
"A donut wall for a great cause."
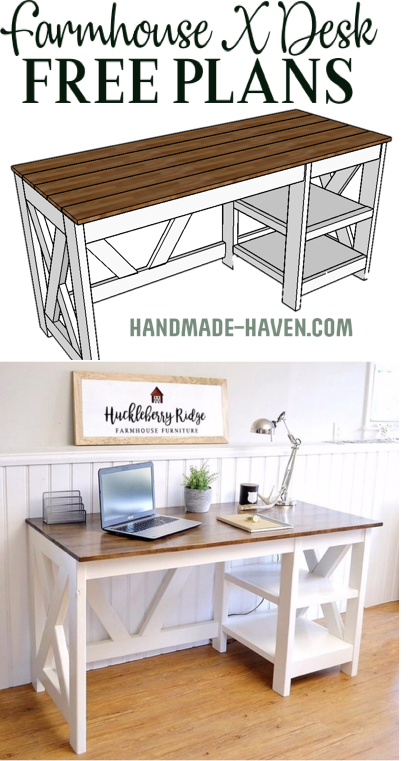
Donut walls seem to be pretty popular these days, so when I got contacted about building one I was very excited to create one. I have seen similar styles for donut walls but I wanted to switch it up and come up with a design that I hadn't seen before for donuts. I decided on a design I thought would look great and I must say, I'm in love.
"This post is sponsored by The Home Depot as part of the Prospective Campaign."
The part that really makes this build special is that I built it for an event in support of The Dragonfly Home, an organization with a vision to serve those impacted by human trafficking, something that's very near and dear to me. When they asked me to build this wall, I was so excited that I could be a part of their efforts against human trafficking.
So let's get to it.
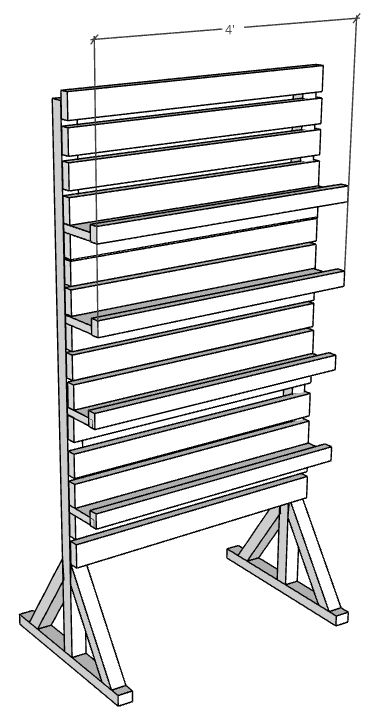
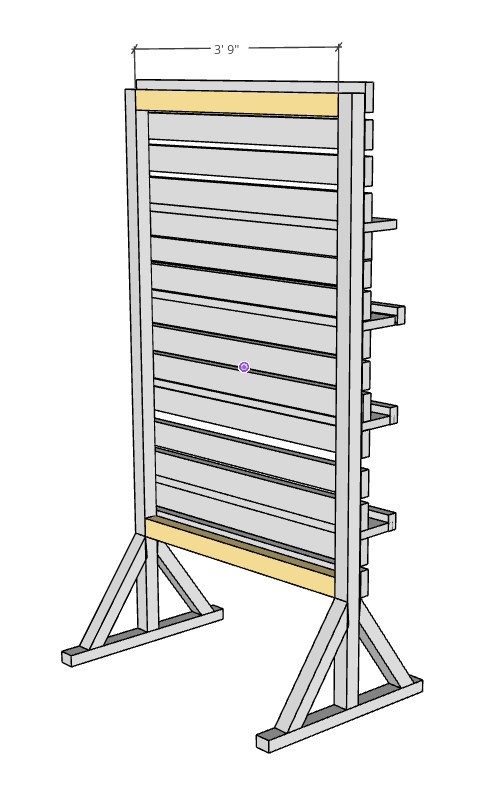
Dimensions
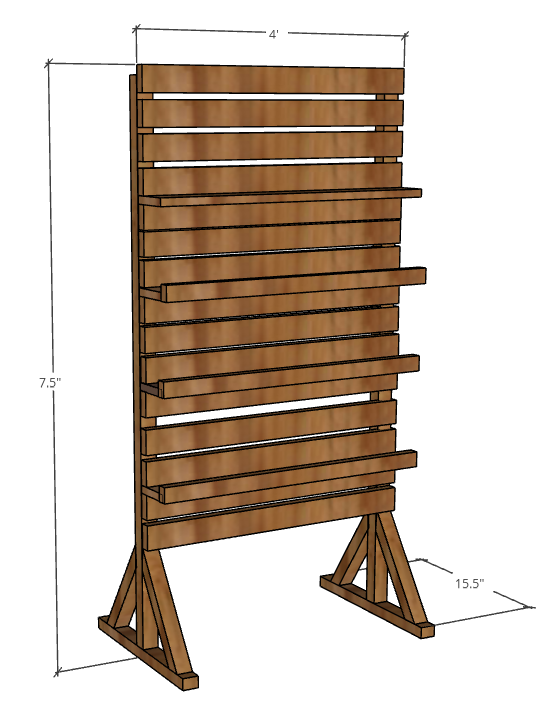
Materials List
6 - 2x2s @ 6ft
2 - 1x6 @ 8ft
8 - 1x4 @ 8ft
2 - 1x2s @ 8ft
Cut List
2 - 2x2s @ 6ft
2- 2x2s @ 15.5"
4 - 2x2s @ appropriate angle
2 - 2x2s @ 3' 9"
4 - 1x6s @ 4ft
15 - 1x4s @4ft
4 - 1x2s @ 4ft
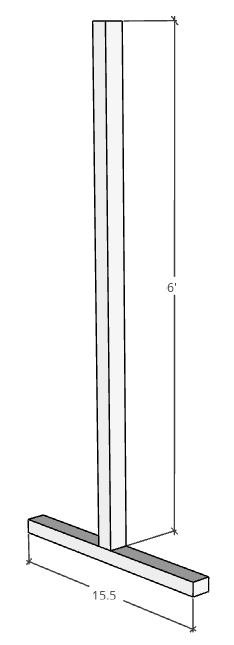
Step 1: Attach the (6') 2x2 to the (15.5") 2x2 using a Kreg Jig on a 1 1/2" setting, with 2 1/2" pocket hole screws to attach along with wood glue. Repeat step for the other side of the DIY Donut wall.
Step 2: Measure 2x2 against the assembled side and cut as needed. Then, attach the angular 2x2 to the assembled sides using a brad nailer and 1" brad nails. Repeat this step for all four side of the assembled legs.
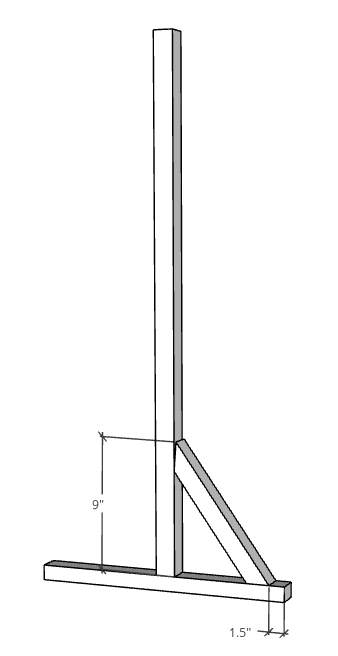 The assembled side legs for the donut wall should look like this:
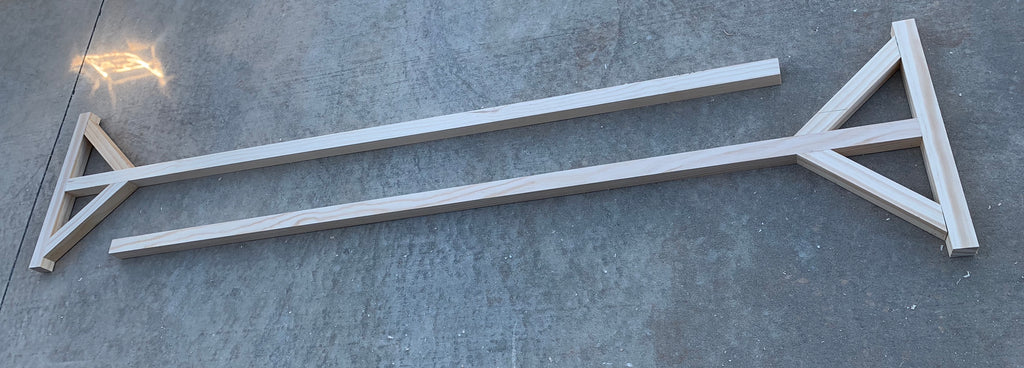
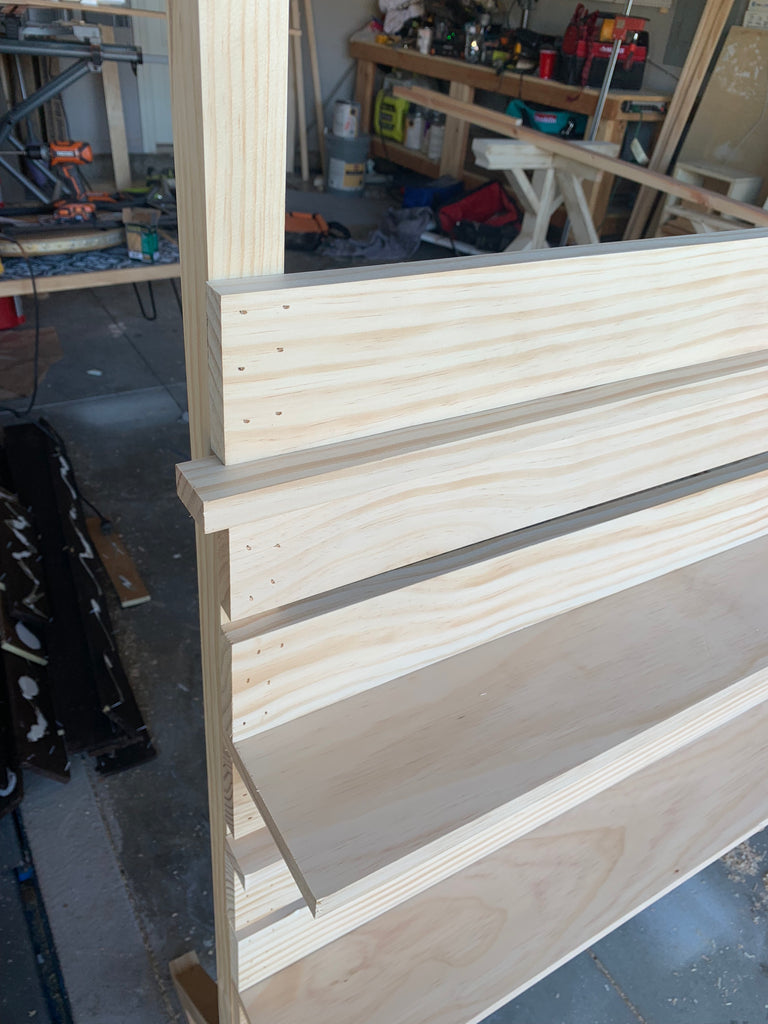
Step 3: Begin attaching the two rows of (4') 1x4s to the assembled legs using a brad nailer, 1" brad nails and wood glue.
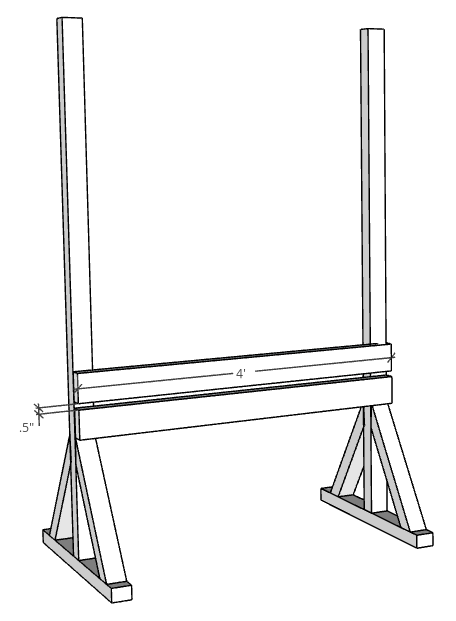
Step 4: Attach the (4') 1x6 to the 1x4 to create a shelf.
Note: These shelves are sturdy enough to hold donuts, if you plan on it holding something heavier, I would suggest a smaller shelf or adding more support.
I used a 1x2 board to help make sure the gap between the boards were even.
To help me build this donut wall I used my Dewalt Deep Pro Organizer, I have a hard time keeping all my screws and nails in one place without it. I really like the removable dividers and the fact that it is stackable, making it easier to store. Once I'm finished building, I can stack it up with my DEWALT Small Parts Organizer.
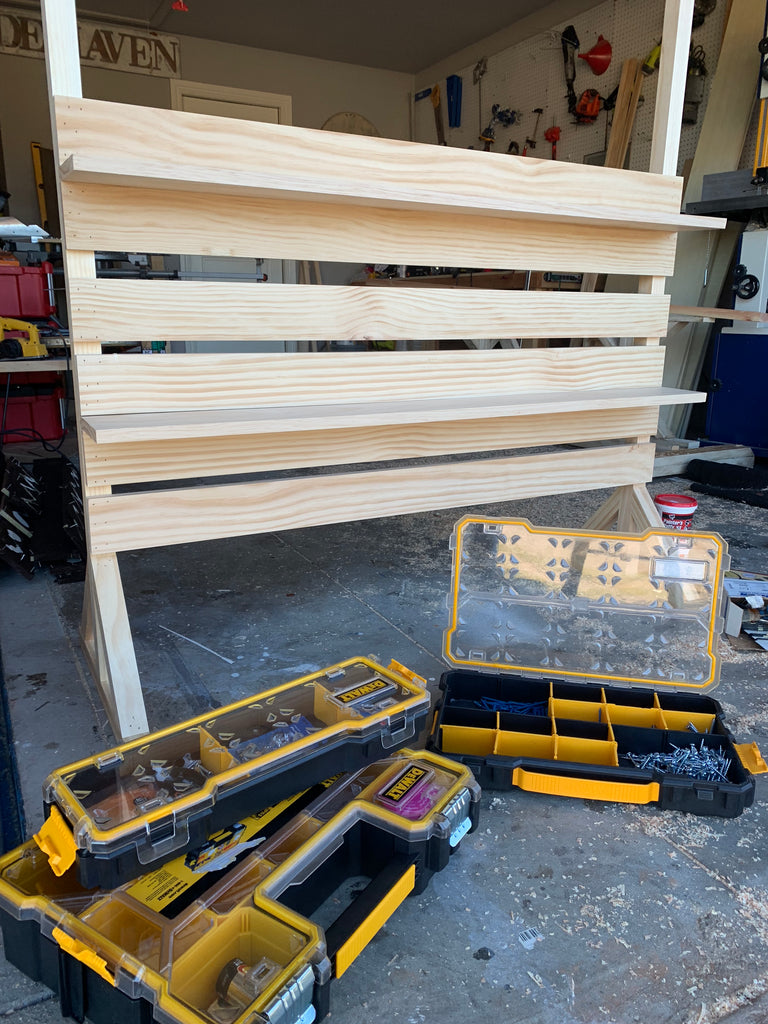
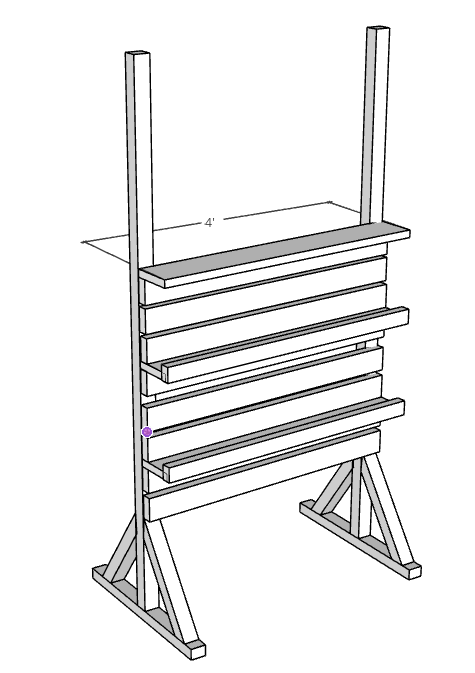
Step 5: Using a brad nailer, add on the (4') 1x2 outer pieces to the 1x6 shelves. The 1x2s should be flush with the bottom of the 1x6.
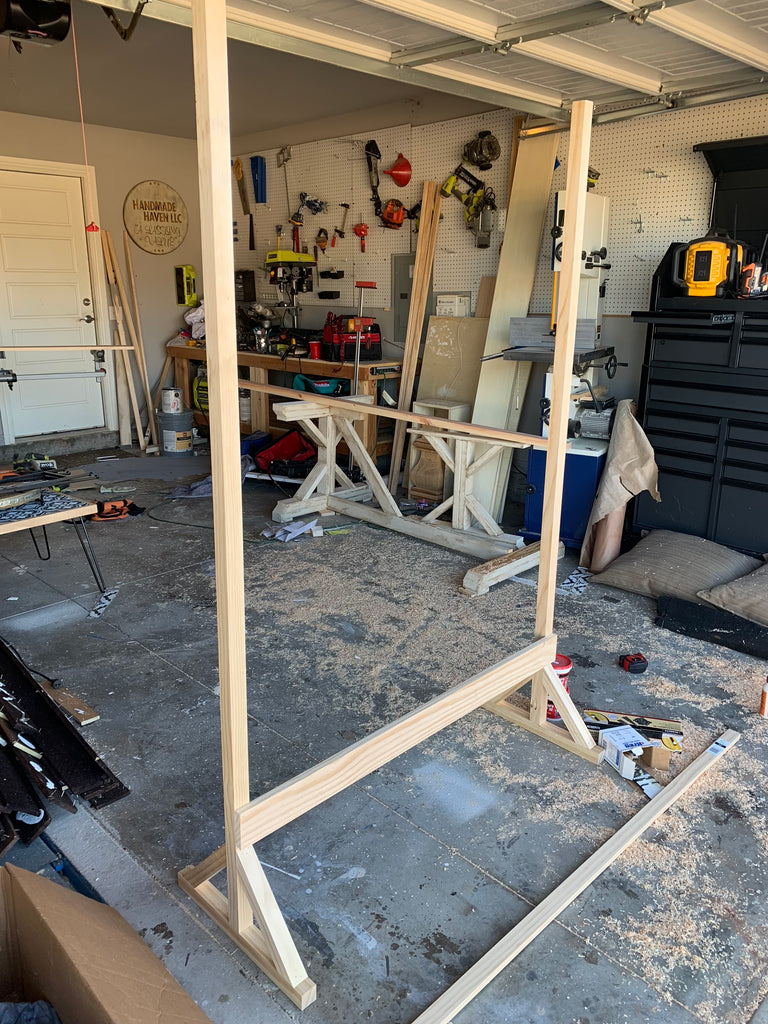
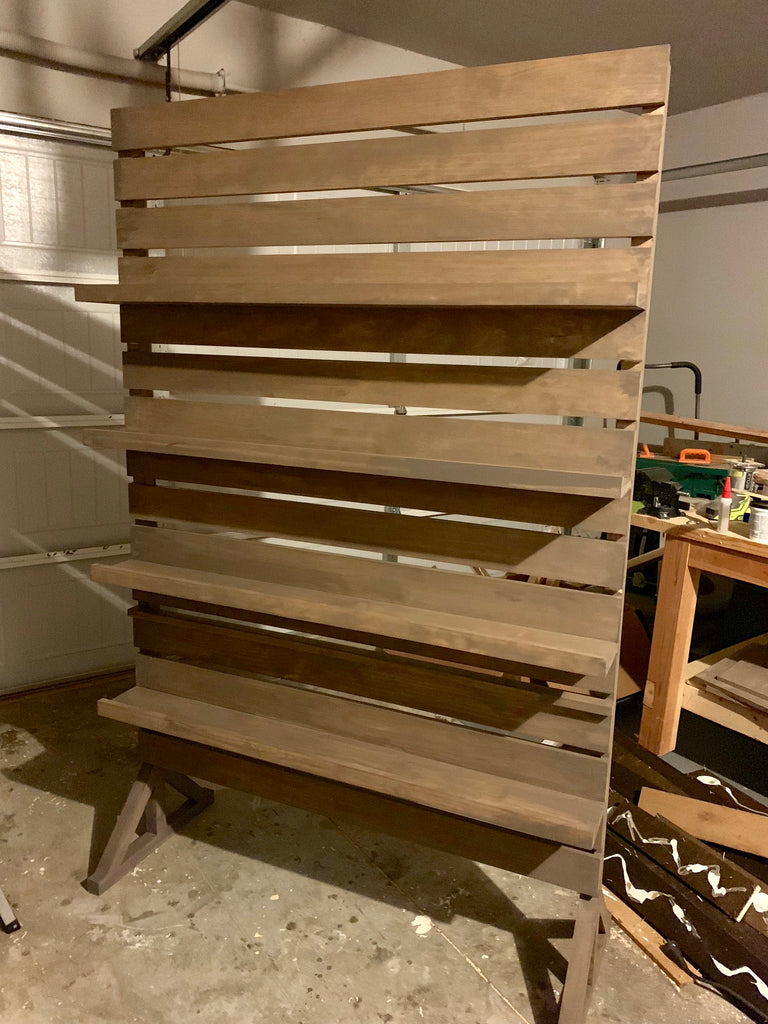
The donut wall really started to take form, and I was starting to get excited. This build could also serve as a display shelf at a craft show.
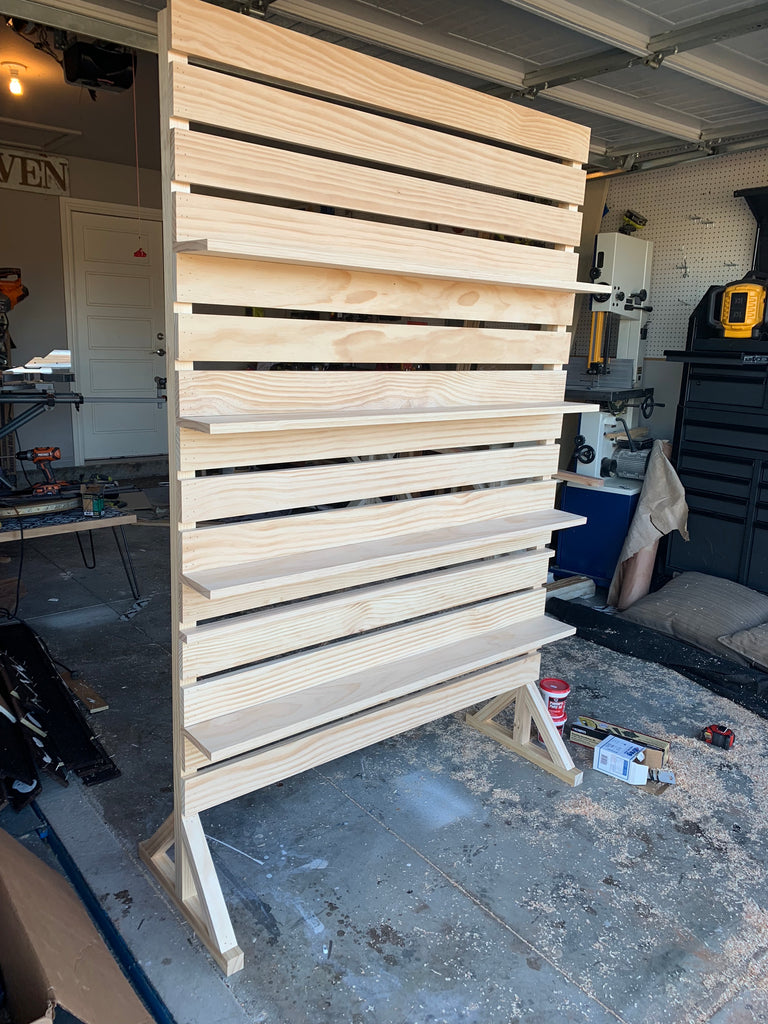
Step 6: Add the 2x2 back supports to the donut wall using a Kreg Jig on a 1 1/2" setting, with 2 1/2" pocket hole screws to attach along with wood glue.
Once the DIY donut wall was complete, I stained it with my favorite stain color Rustoleum Briarsmoke. This is my go to color and it looked sooooo good after I stained it.
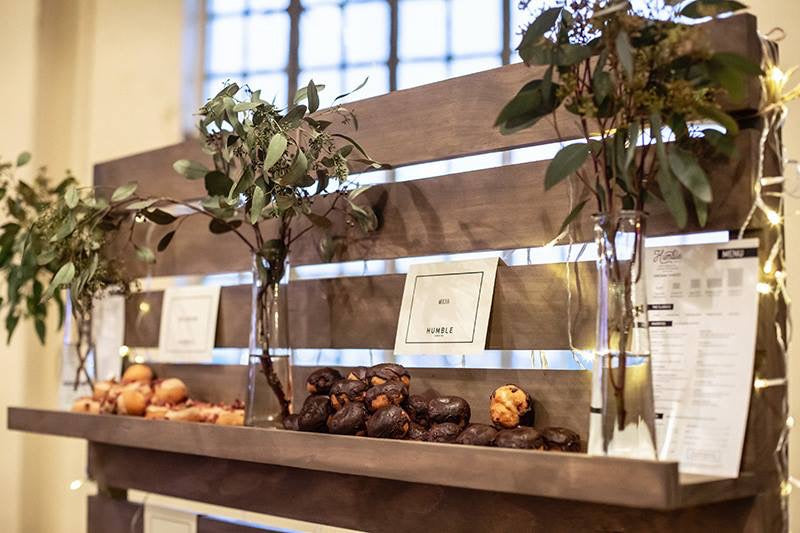
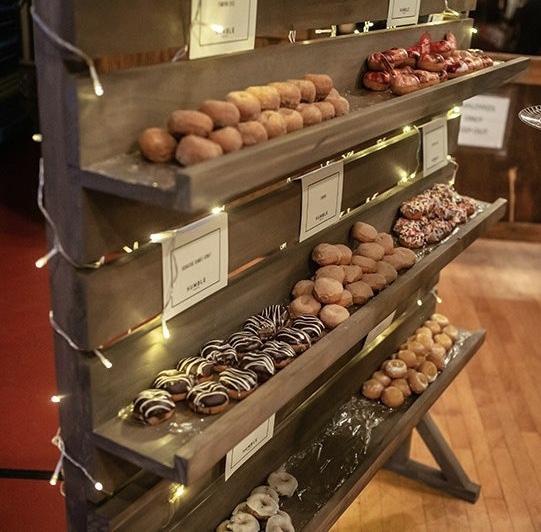
The donut wall was a success at the "Crown of Beauty" Gala. Unfortunately, I couldn't make it but a photographer was able to snag me a couple of photos.
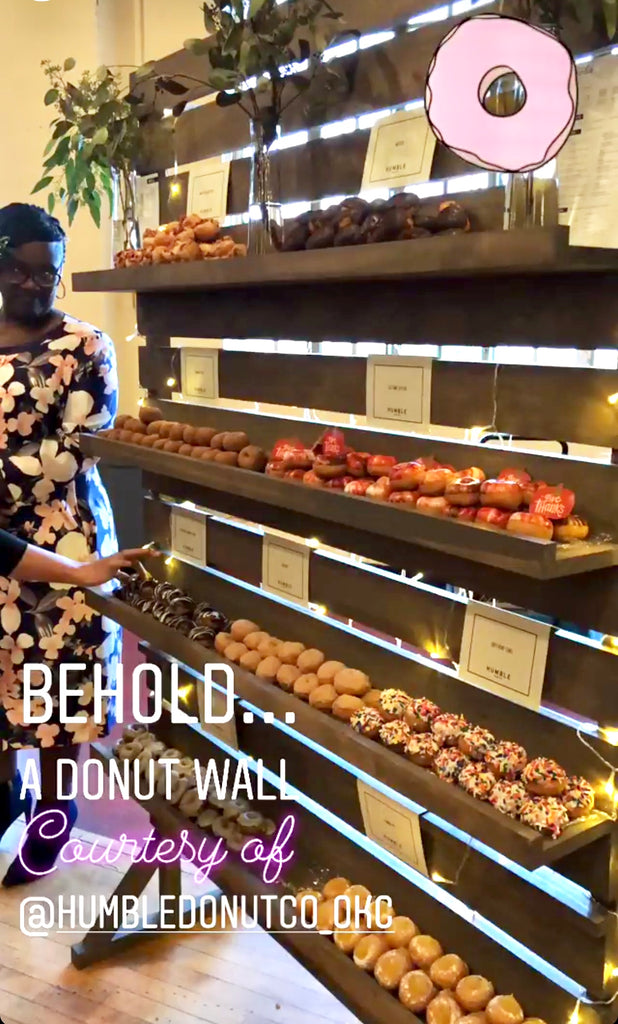
I loved the way it turned out! and who doesn't love donuts?
Thanks for reading guys!
I acknowledge that the Home Depot is partnering with me to participate in the The Home Depot Pro-Spective Campaign. As a part of the program, I am receiving compensation in the form of products and services, for the purposes of promoting The Home Depot. All expressed opinions and experiences are my own. My post complies with the Word of Mouth Marketing Association (WOMMA) Ethics Code and applicable Federal Trade Commission guidelines.


