
Projects

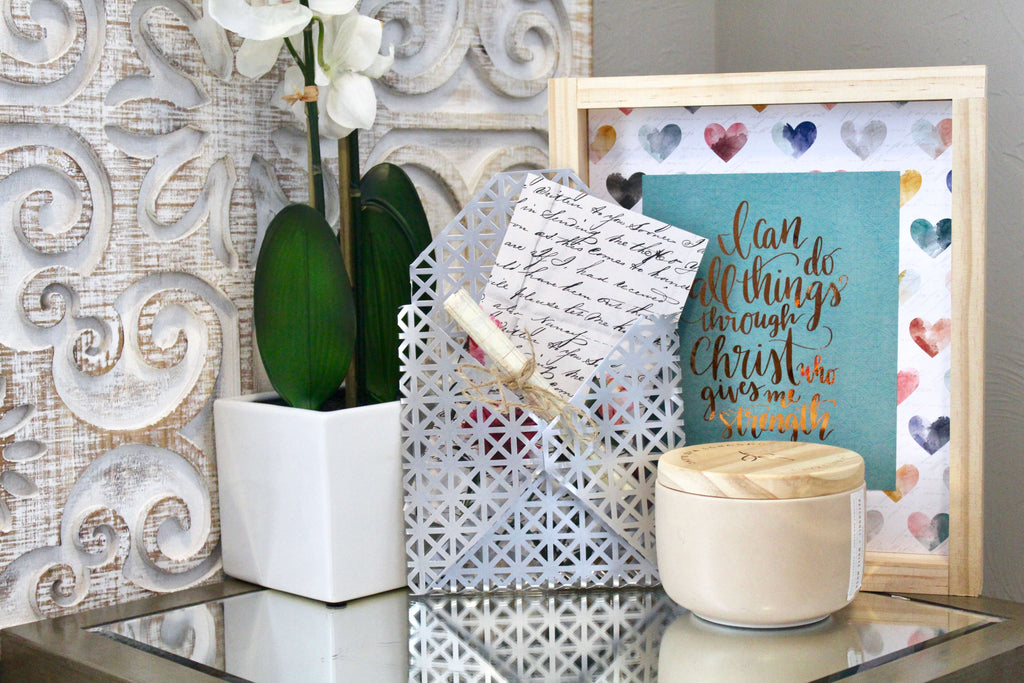
DIY Tin Envelope using Ryobi Shears
"Put your sheet metal to use with the 18-Volt ONE+ Ryobi Shears and create some tin envelope decor"
This review is sponsored by the Home Depot as a part of The Home Depot's Pro-Spective Campaign.
The day I saw the Ryobi One+ 18-Volt 18 Gauge Offset Shears in action was the day I knew I wanted this tool. Lucky for me, I finally got them! (Thanks Home Depot) I already had a list a mile long of what I wanted to do with them, but this project wasn't on the list.
There are some affiliate links in this post, meaning I get a small commission if you purchase through these links, at no cost to you. Click Here to read my full disclosure.
When I first got these babies I tried them out on a piece of leftover sheet metal I had and eventually I came up with this DIY envelope idea.
 I've seen tin envelopes around like this cute one from target and thought this sheet metal tin envelope would make a cool rendition of my own. I look forward to making all different kinds of tin envelopes. Home Depot has all sorts of designs that I'm sure would look just as cool as this one does.
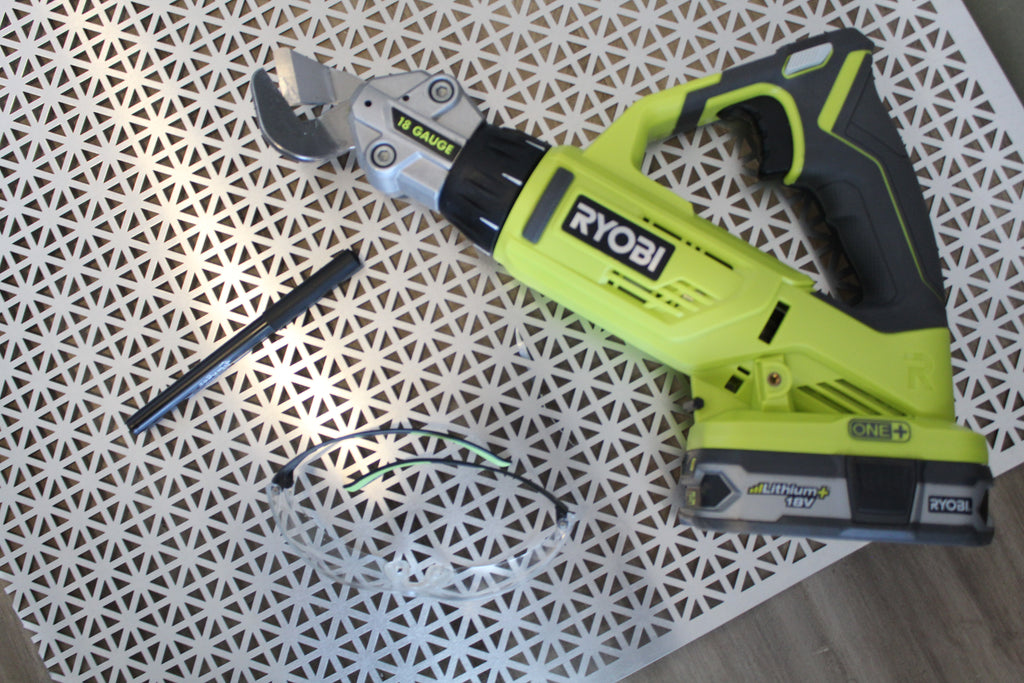
Materials Needed:
- Ryobi Offset Shears
- Aluminum Sheet
- Pen
- Safety Glasses
I love fun projects you can do in less than an hour and this project was no different. If you're more of a visual person luckily for you I video'd my process so check it out.
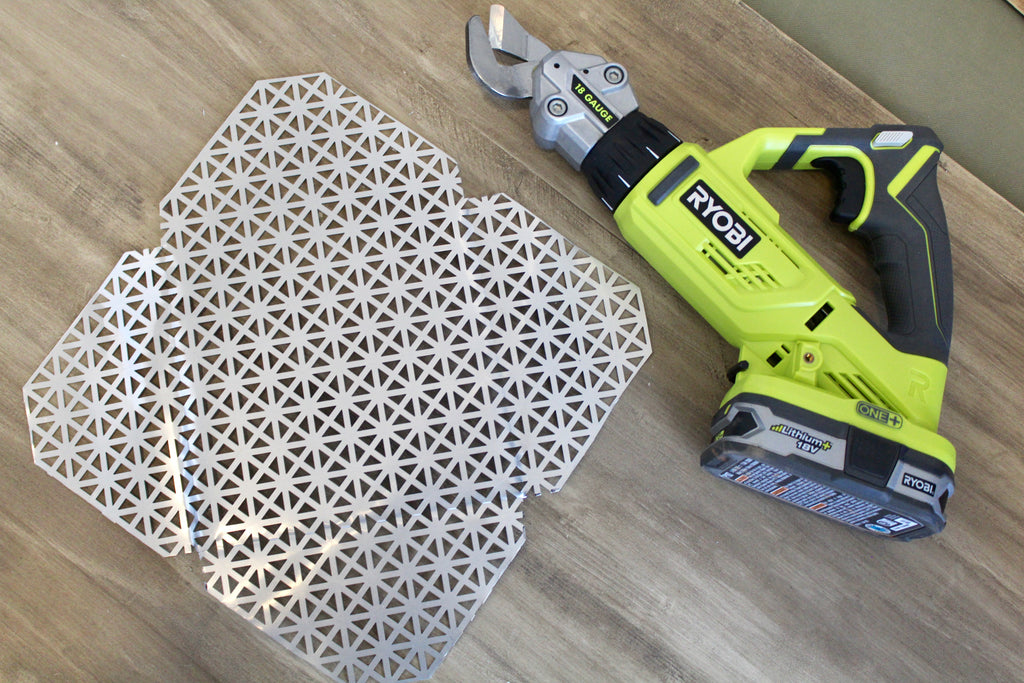
Step 1: The envelope design seems to work best with a square. First, I counted 20 lines on all four sides and then made markings on were to cut, after making markings I cut out the square with the Ryobi Shears.
Step 2: After I cut out the square from the aluminum sheet, I made markings for the four triangles on each side and cut them out.
Step 3: After cutting out the triangles, I cut off the tips on the top and bottom, folded the tin envelope and cut the remaining side tips.
USING THE SHEARS
I was really curious of how well I could handle these Ryobi Shears and to my surprise it was really easy to work with. My favorite feature on the shears is the variable speed trigger, it really helped with this particular project, especially with cutting out the corners.
I also noticed the rotating head for versatile cutting. It is supposed to be capable of cutting over 1,000 ft. of sheet metal and I look forward to putting it to the test and as always its always good that the Ryobi Tools use the same ONE+ batteries.
I have done projects with sheet metal previously and used regular shear scissors and I will defintely take these battery powered Ryobi shears over the regular shear scissors any day!
I acknowledge that the Home Depot is partnering with me to participate in the The Home Depot Pro-Spective Campaign. As a part of the program, I am receiving compensation in the form of products and services, for the purposes of promoting The Home Depot. All expressed opinions and experiences are my own. My post complies with the Word of Mouth Marketing Association (WOMMA) Ethics Code and applicable Federal Trade Commission guidelines.
YOU MAY ALSO LIKE...


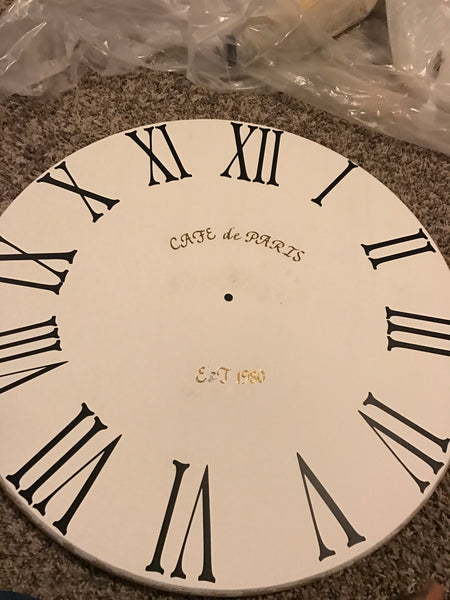
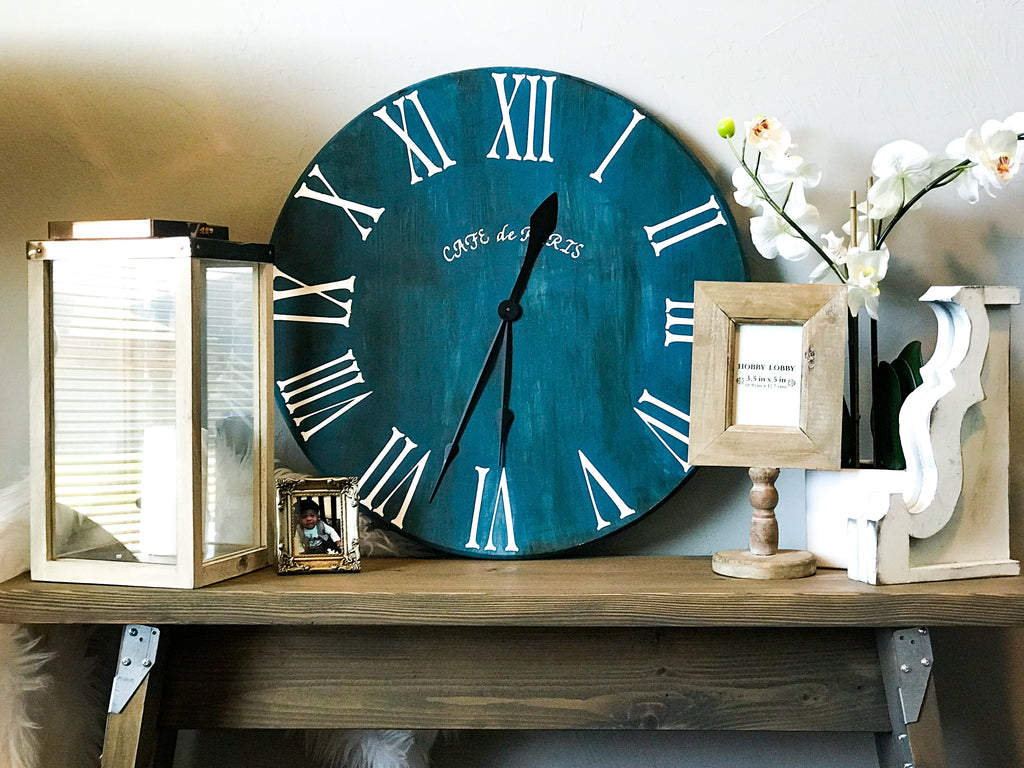
Roman Numeral Clock Tutorial
This Roman numeral clock will make your walls pop!
I just LOVE Roman Numeral clocks, so I wanted to come up with this How-To for anyone to be able create one easily! Here goes..
(There are some affiliate links in this post, meaning I get a small commission if you purchase through these links, at no cost to you. Click Here to read my full disclosure)
Clock Materials Needed
- 24" Wooden Round
- Clock Face Wall Decal
- Rustoleum Linen White
- Annie Sloan Aubbuson Blue
- Credit Card
- Brush
- One small nail
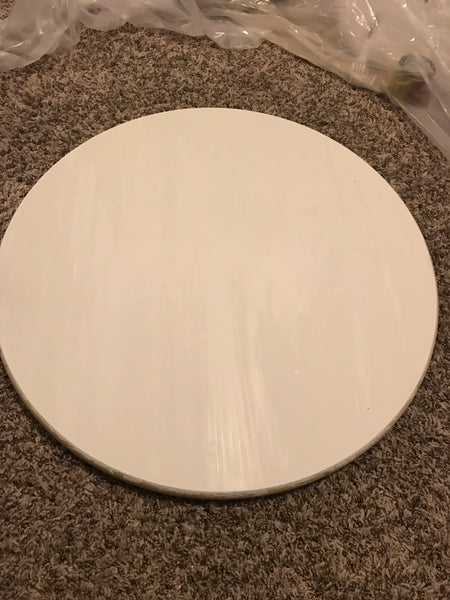
I love how simple and easy this Roman numeral clock was to make! I started off with this 24" round. For all you Non-woodworkers, Home Depot and Lowes has pre-made wooden rounds in all different sizes. "Home Depot's round isn't quit 24" so I'm not sure how it will work with this decal. I purchased mine from Lowes."
After the paint was dry, I applied the Roman Numeral Sticker Decal; my favorite part.
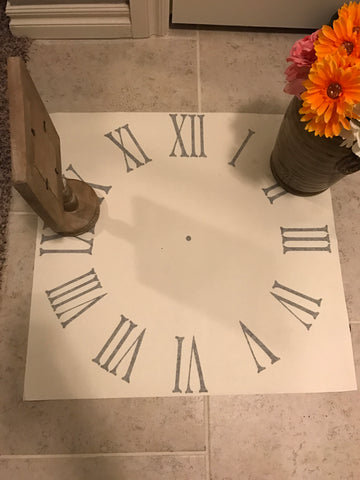
Amazon sells this Roman Numeral Clock Decal in 24" (it comes in other sizes too) that is perfect for a clock stencil. Wallpressions sells it for $9.99. WallSlicks sells it in other sizes but their 24" is higher.
It comes rolled up so I used a picture frame and pot to flatten it out.
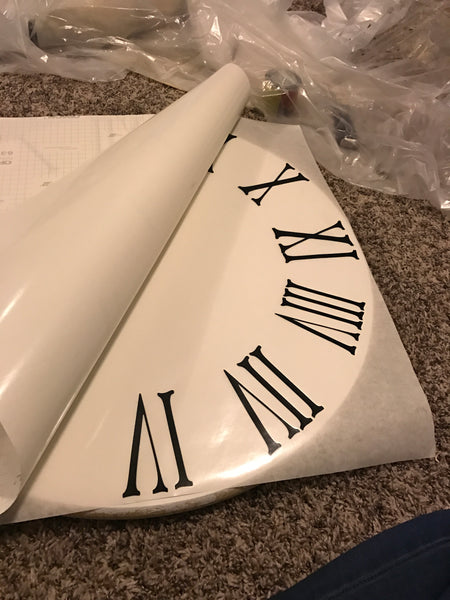
The sticker comes with instructions, but you peel the back side off. Flip it and press the letters into the round. Make sure you place the stickers where you want them before pressing down on the decal.
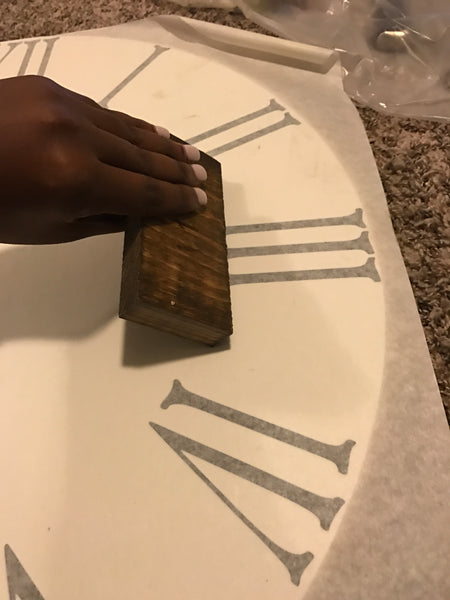
I used a scrap wooden block to make sure the letters would stick to the wood. A credit card would work GREAT for this too.
After pressing the decal down, I removed the top layer of the decal. Make sure to lift slowly to ensure the stickers stay placed on the wood.
I added some small letter stickers to give the clock some extra PIZAZZ!! I pressed those down as well.
Once the Stickers and decal was placed I started painting over it! I used Annie Sloans Chalk Paint in Aubbuson Blue.
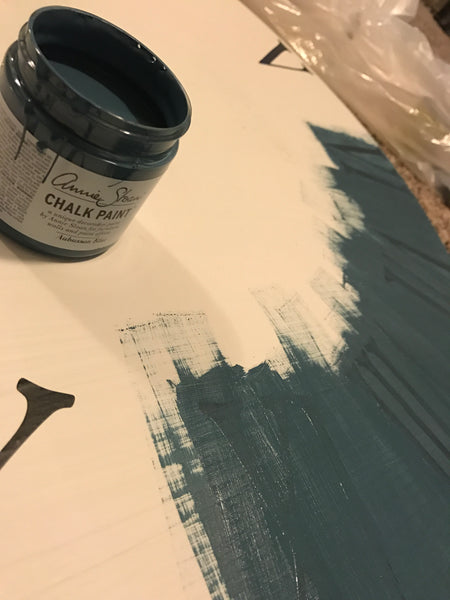
I painted over the whole round and then let it sit to dry!
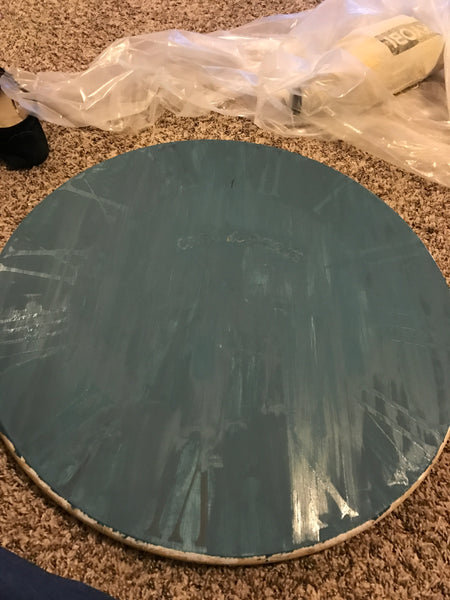
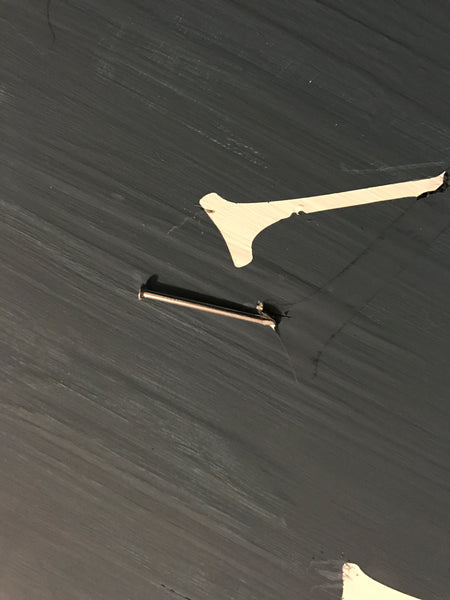
Once it was dry I started peeling the stickers! Another FUN part! I used a small nail to help lift the edges of the sticker, but be careful not to scratch the wood! After peeling I sealed it with Annie Sloan's Clear and Dark Wax.
WAAAAA-LAAAAAAHHHH!!! My Roman Numeral Clock was DONE!!
Feel free to add clock hands or put your own flavor on it! I would love to see your go at this project.

HAPPY CLOCKING!!