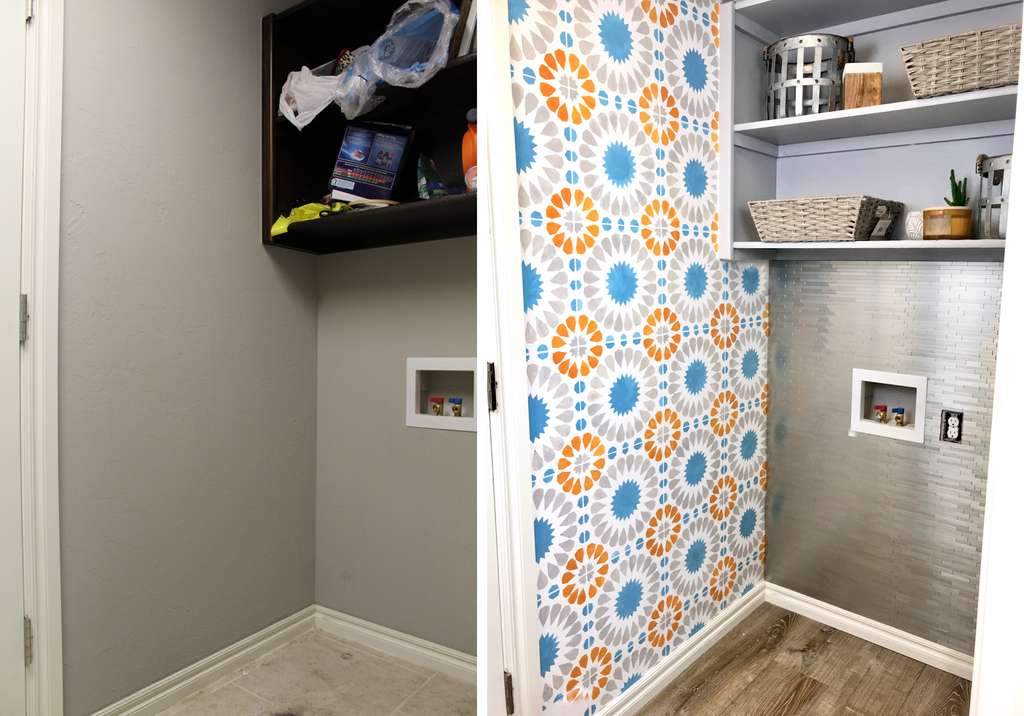
"This Cordelia Tile Wall Stencil is cutting edge."
I knew this wall stencil would be the main feature of my laundry room makeover, so I knew I had to go big or go home. This isn’t my first rodeo with a stencil, so I knew going in that eventually during this project I would hate myself for choosing such a tedious option, but I’m glad I stuck with it, because I love how the wall stencil came out.

Materials
- Cordelia Tile Wall Stencil- CuttingEdgeStencils
- Stencil Brush - Cutting Edge Stencil
- Painters Tape
- Behr Marquee Paint - Flaming Torch
- Behr Marquee Paint - Silver Bullet
- Behr Marquee Paint - Below Zero
- Behr Marquee Paint - Ultra Pure White
I really love how well the wall stencil colors contrast with my new vinyl flooring. I was a little unsure about it in the beginning, but I couldn't be more happier with how it turned out.

Tape off Wall

The first step for my wall stencil project was taping off the wall. I used some painter’s tape I had to go along the edges of the wall and shelving unit. You want to make sure you use a good brand of tape to ensure you have clean lines once it is removed.
Paint Wall
Once the tape was placed on the wall, I began painting the wall I was stenciling in white. This was the color I wanted to show through the stencil colors. I used Behr Marquee Ultra Pure White for this. I applied it using a regular paint roller.
Apply Wall Stencil

Once the paint was dried, it was time to apply the stencil. I started with each individual color and started to fill in the stencil with the colors I wanted. I used Cutting Edge Stencils stencil brushes and I must say, they have been the best brushes that I have tried so far, when it comes to a stencil brush.
When applying paint to a wall stencil, it’s extremely important to make sure you don’t use too much paint. Otherwise, you will get a lot of bleed through. It may take a little longer to stencil but the finished product will be much better in the end.
Clean Stencil
Throughout applying the stencil, I would often clean off the paint, to make sure the stencil didn’t become hard with dry paint. IT was super easy to clean off. I would place the stencil in the tub, let hot water run over it for 1 minute and the paint would wipe right off. I cleaned it for every 12/14 times I painted the stencil on the wall, and then once after I was finished.
Be sure to check out the final reveal here!


