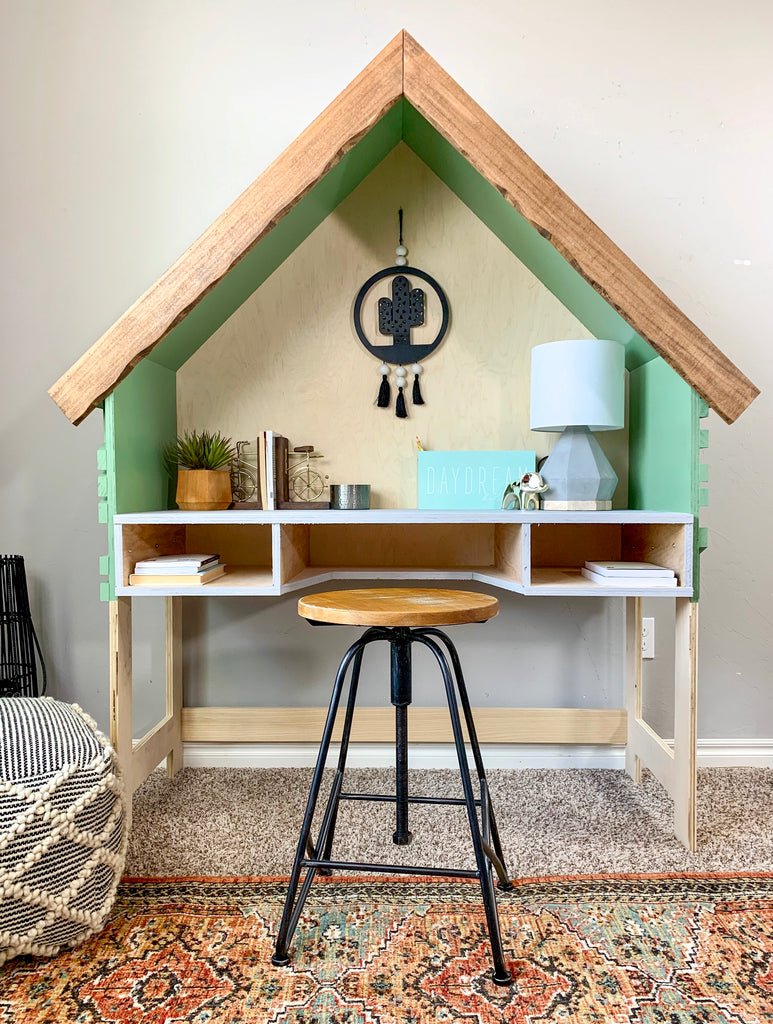
"A modern kid's desk with a house frame all your kids will love."
Normally, I get excited when I get to share a new project with you guys, but I am completely in love with this project. Today, Im giving you guys the 411 on how I built this DIY House Frame Kid's Desk.
With school back in session for the kiddos, I figured I would make something to inspire the kids to want to tackle their homework. I mean if I had this desk when I was a kid, I may have been way more motivated to get some things done.
I must say, after this build, I surely wish I was a kid again. I was looking on Pinterest one day and came across a similar desk and instantly knew I had to recreate it.
"There are some affiliate links in this post, meaning I get a small commission if you purchase through these links, at no cost to you. Click Here to read my full disclosure."
Now let's get to it!
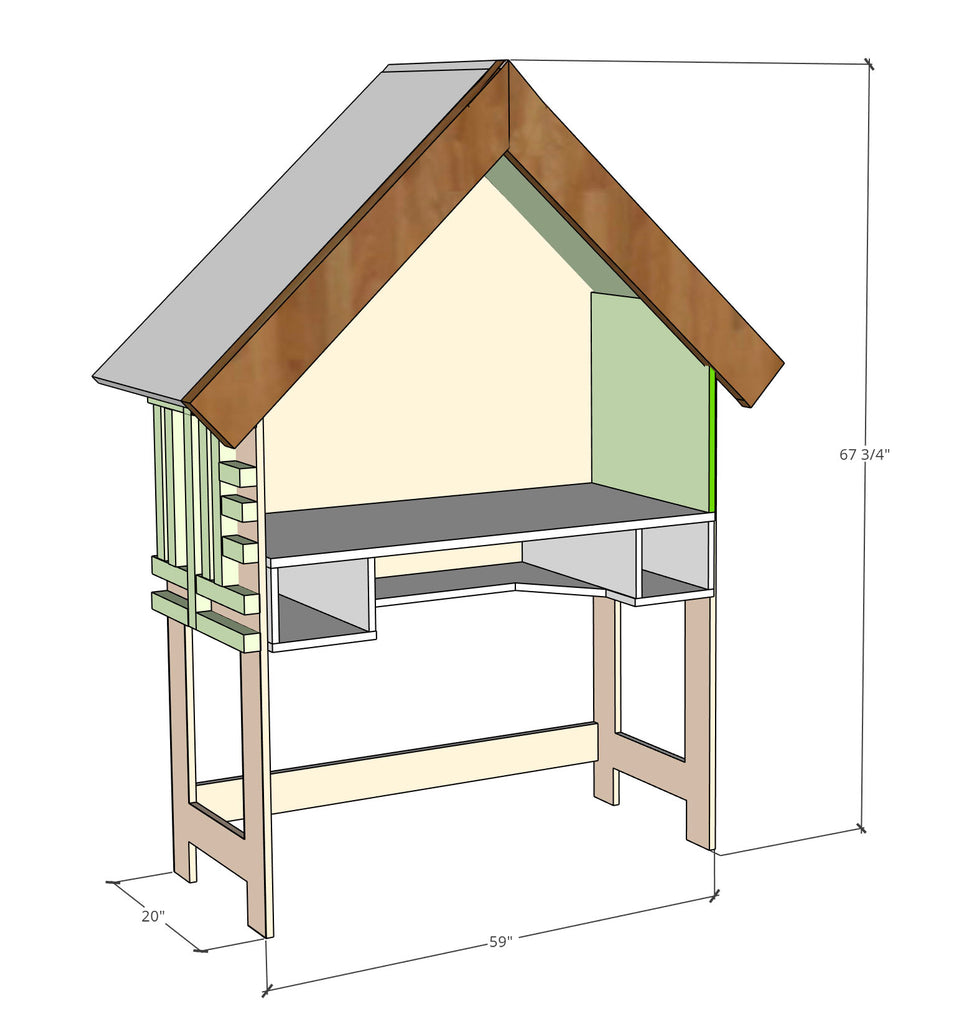
Dimensions
| Materiels |
| 2 - 3/4" sheet of plywood |
| 2 - 1x4x8 board (poplar) |
| 7 - 1x2x6 board (select pine) |
| Behr Ultra- Laurel Tre |
| Chalk Paint - Parisian Grey |
| Frog Tape |
| Wood Glue |
| Wood Filler |
| 1 1/4" Pocket Hole Screws |
| 1 1/4" screws |
| Brad Nails |
| Varathane Stain - Special Walnut |
*See Detailed Printable Plans for Cut List and Measurements*
| Tools Used |
| Paint Sprayer |
| Drill/Driverl |
| Circular saw |
| Miter Saw |
| Kreg Right Angle Clamp |
| Kreg Clamp |
| Kreg Jig K4 |
| Kreg Jig R3 |
| Kreg 90 Degree Corner Clamp |
| Jigsaw |
| Sander |
| Brad Nailer |
I know that some people are more visual learners, so luckily, I got my process of building this House Frame Kid's Desk on camera.
Check out the video above before reading through the step by step tutorial.

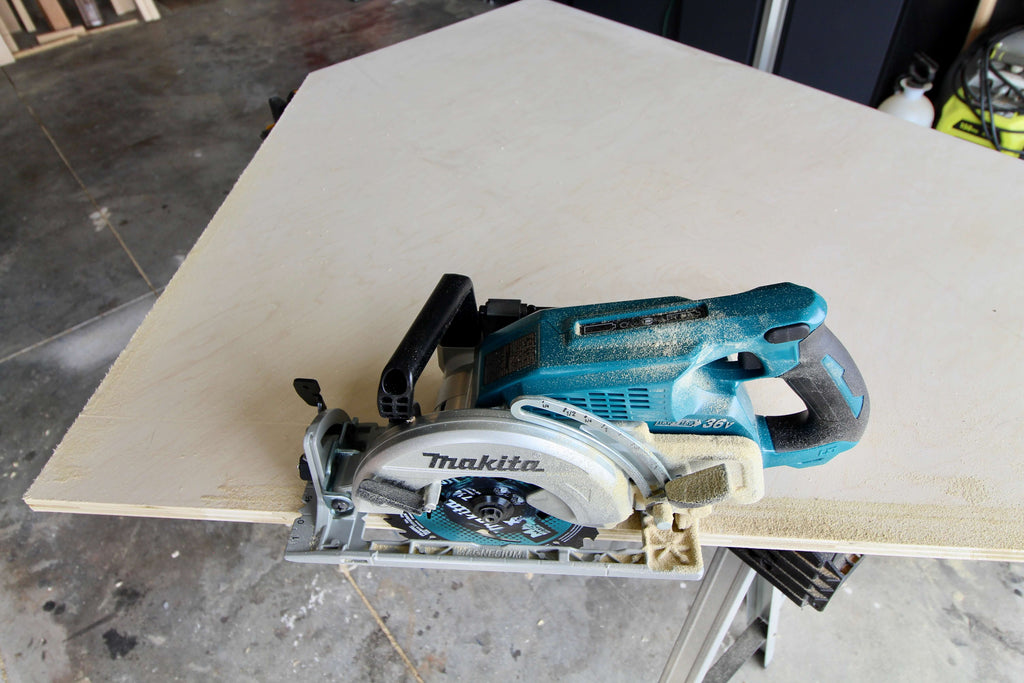
Step 1: Cut out House Frame Backing
The first thing I did for the House Frame Kid's Desk was cutting out the house shaped backing. I cut a piece of 3/4" plywood into a house shape using my rear handle circular saw.
Want to no more? Check out my full tool review for this saw here.
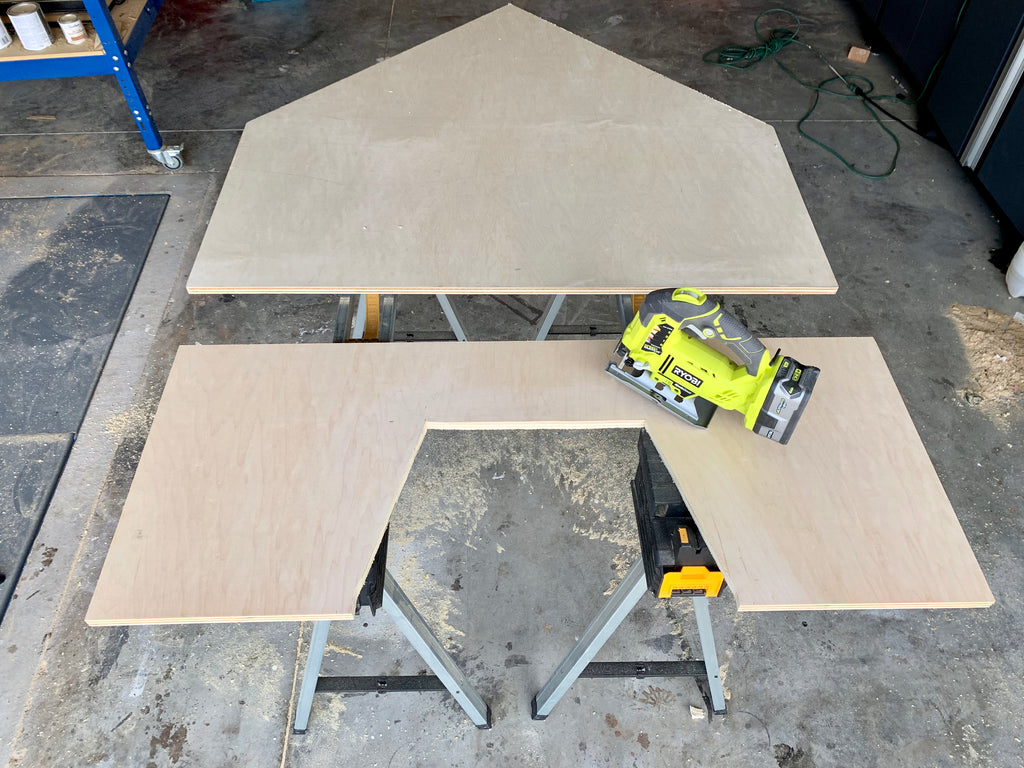
This step was fairly simple because I had the back piece of the house shape kids desk pre-cut when I purchased my plywood.
Step 2: Assemble Desk
With the House shape backing cut out, I began to build the desk off of the it. First, I took the bottom plywood sheet for the desk and begin cutting out the U shape with my jigsaw.
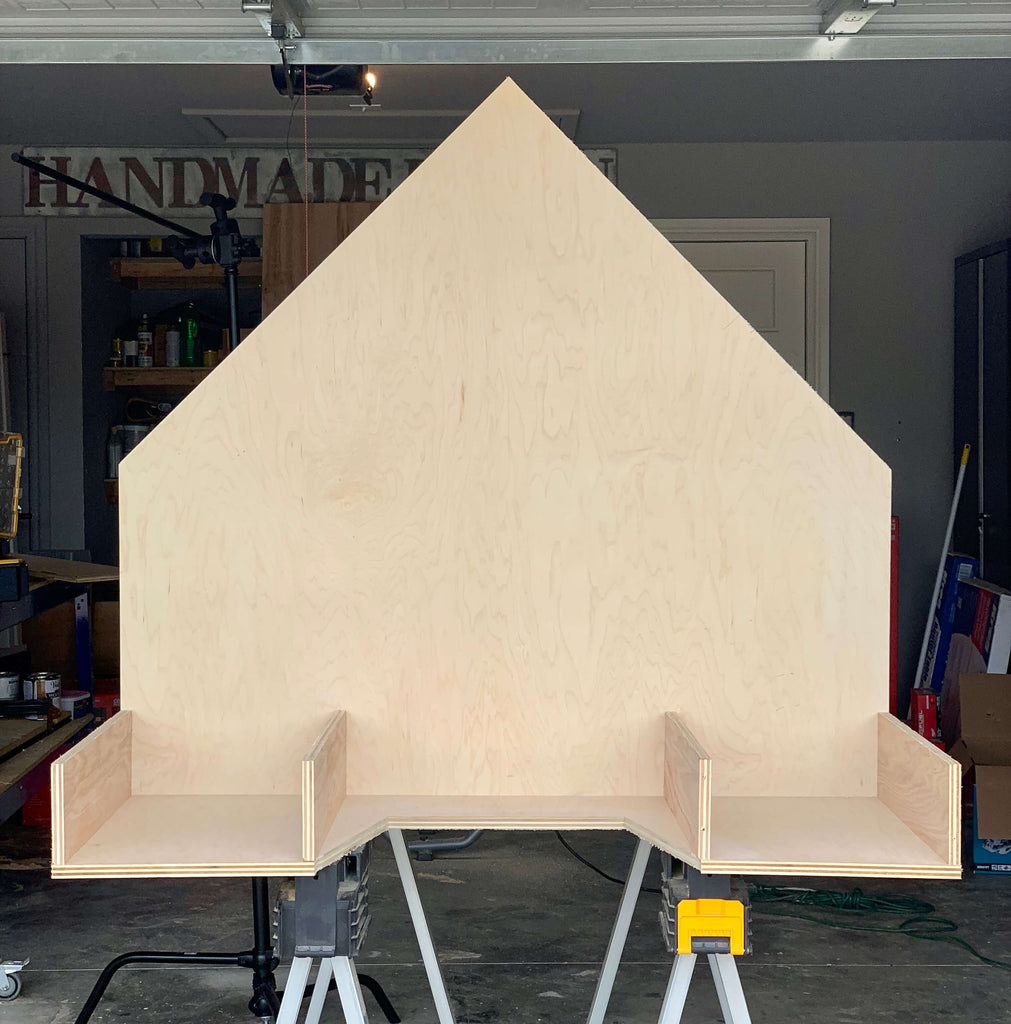
Once I cut out the U shape, I used my Kreg Jig on a 3/4” setting to drill pocket holes into the bottom of the desk shelf and attached it to the house shape piece using 1 1/4" Pocket Hole Screws.
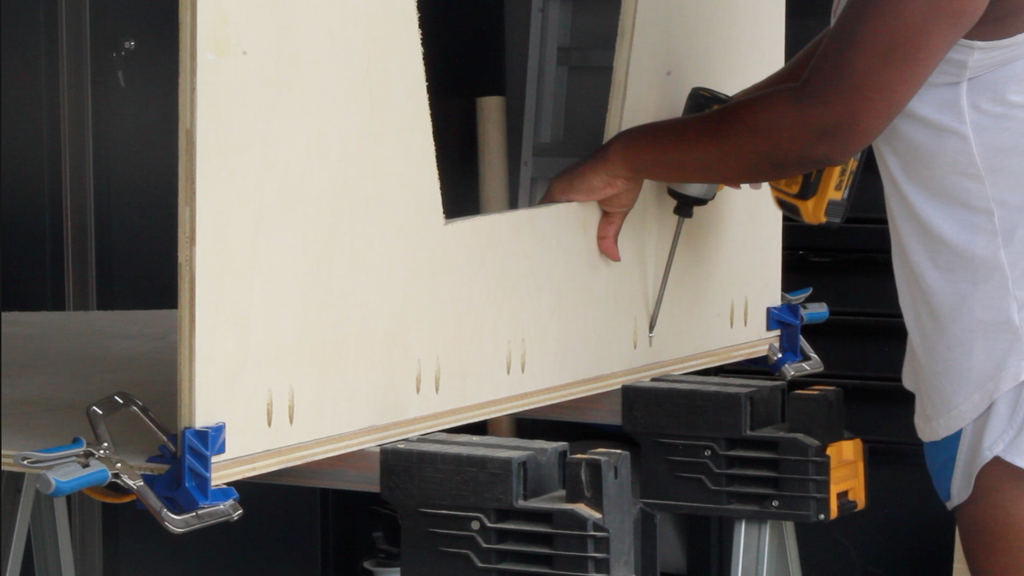
I used my Kreg 90 Degree Corner Clamp to hold the board into place while I screws the board down. These clamps really come in handy when you're building by yourself.
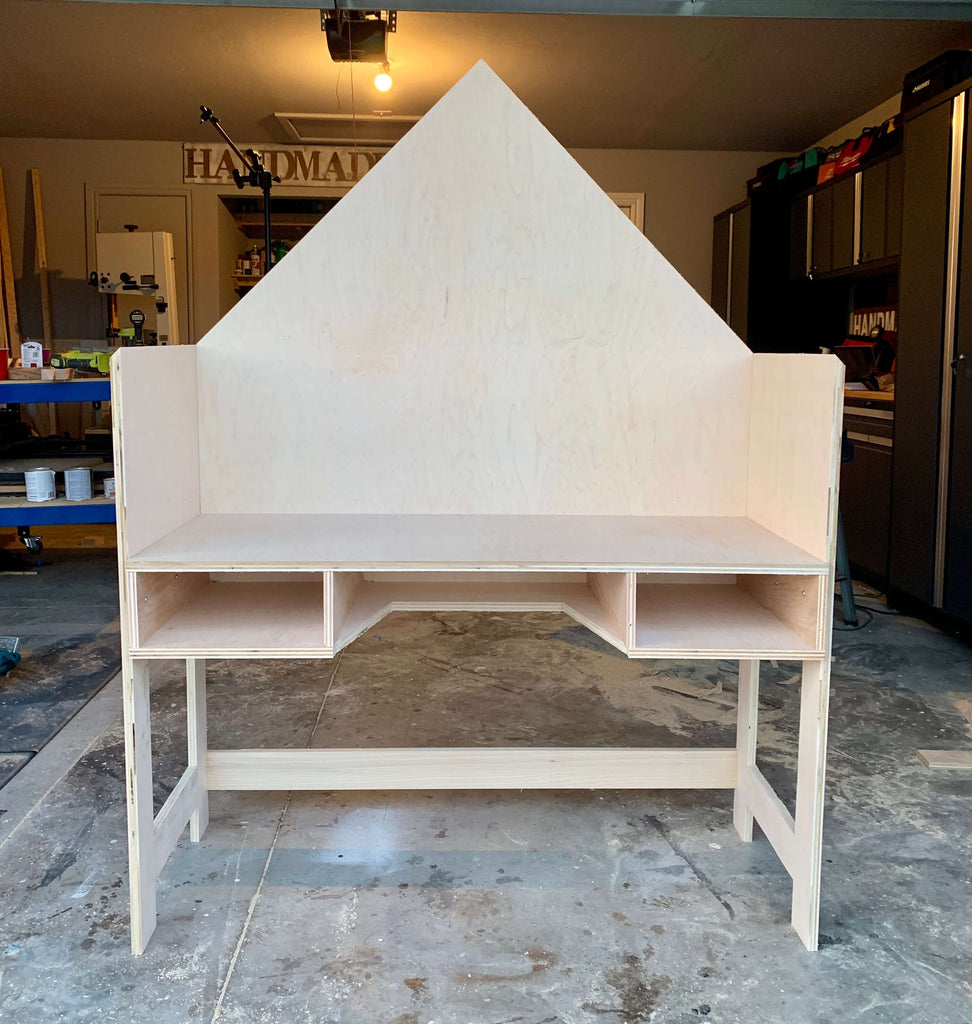
Now your house frame should look a little something like this:

Next, I begin attaching the inner pieces to make the desk openings. I used my Kreg 90 Degree Corner Clamps to secure the front and my Kreg Right Angle Clamp to secure the pieces to the back of the House Frame.
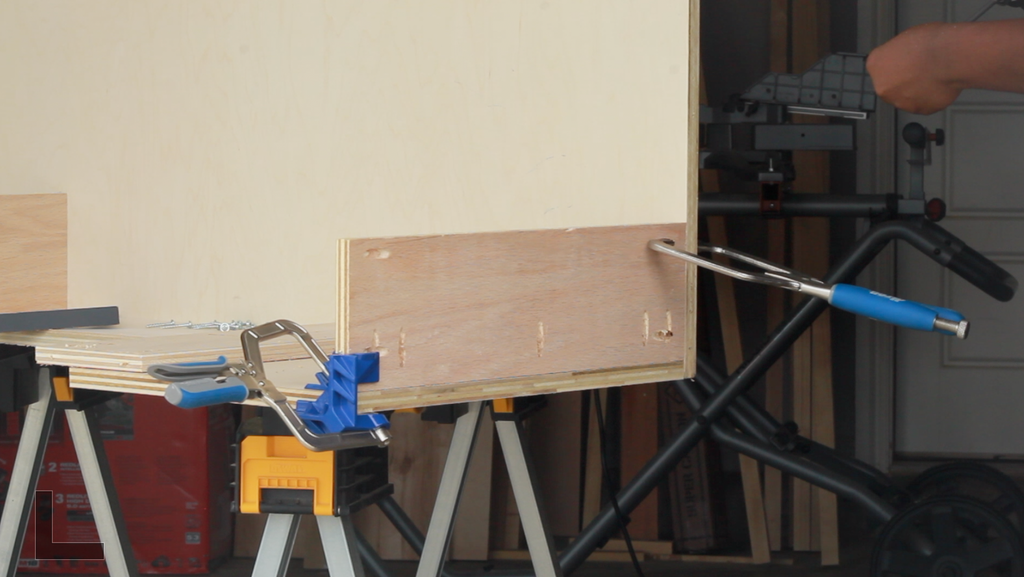
I used my Kreg Jig on a 3/4” setting using 1 1/4" Pocket Hole Screws to secure the pieces down. Now my house frame is starting to take shape.
Now the last step to finish the desk portion of this build is adding the top of the desk. I pre-drilled pocket holes under the bottom of the top piece to be able to secure it to the house shaped backing and I secured the sides down using pocket holes on the two sides.
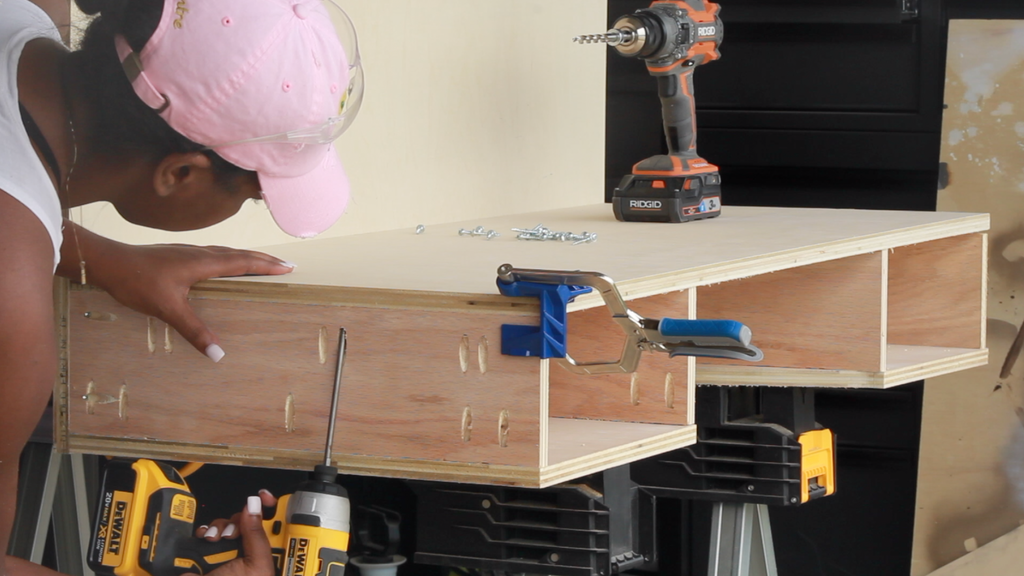 Again, I am using my Kreg Jig
 on a 3/4” setting using 1 1/4" Pocket Hole Screws. Now the desk portion of the DIY House Frame Kid's Desk is complete.
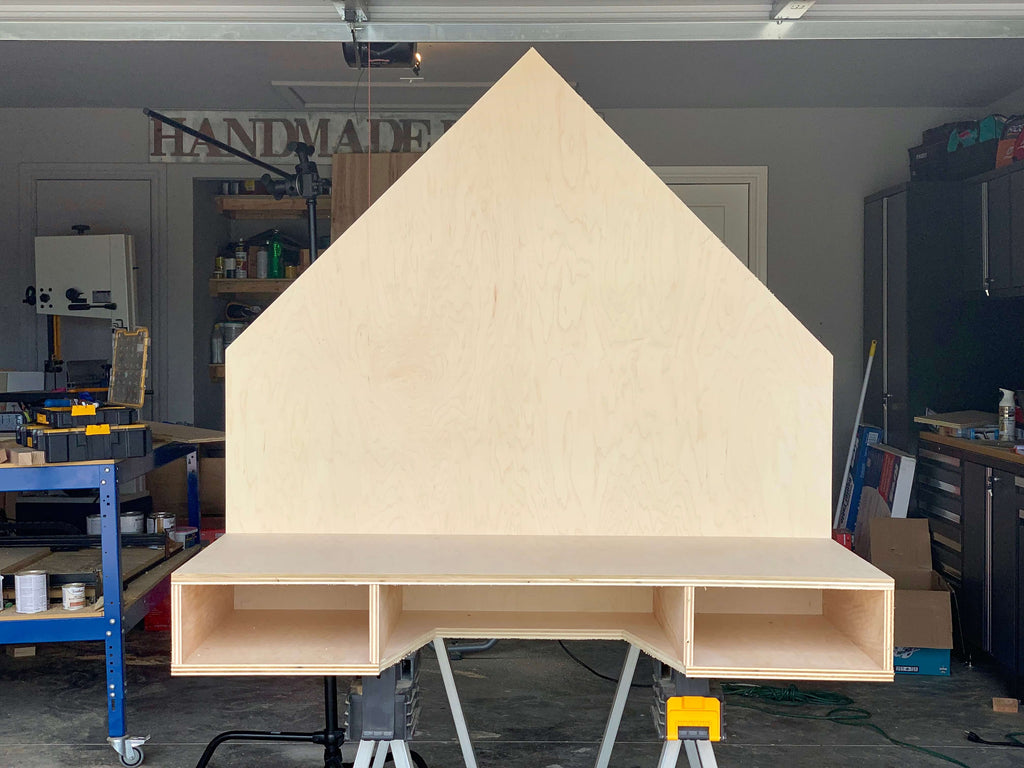
Man this is starting to look so good. Is it just me or does the back of this project look like home base? No? Just me? Ok...moving on!
Step 3: Assembling the Sides and Base
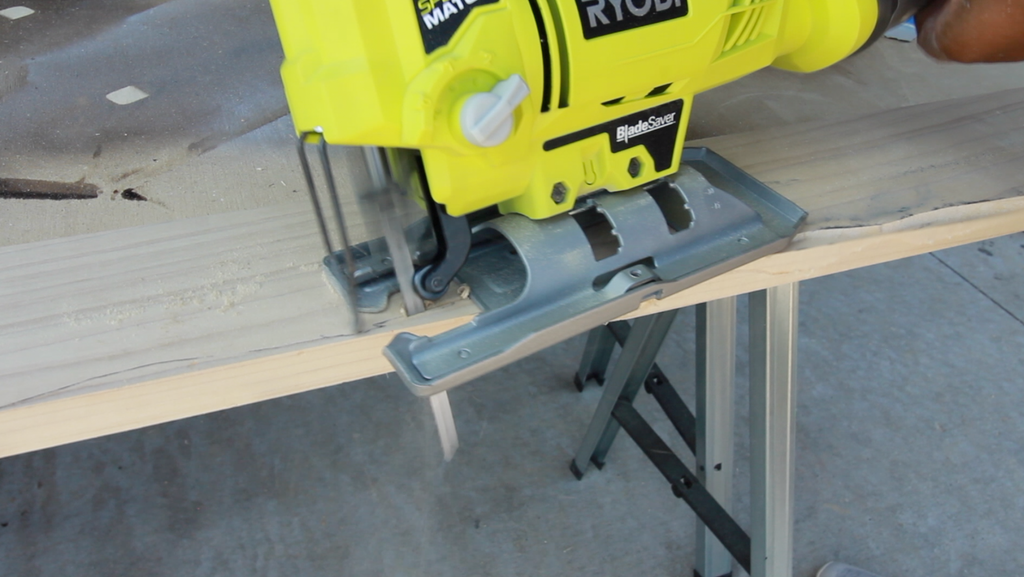
I first started making the cutouts on the sides of the kid's desk using my jigsaw. First I cutout the bottom part of the desk sides and then the inside rectangle.

To cut the inside of the side pieces, I first used a drill to drill holes in the center of the square I was cutting out and then used my jigsaw to make the cutout.
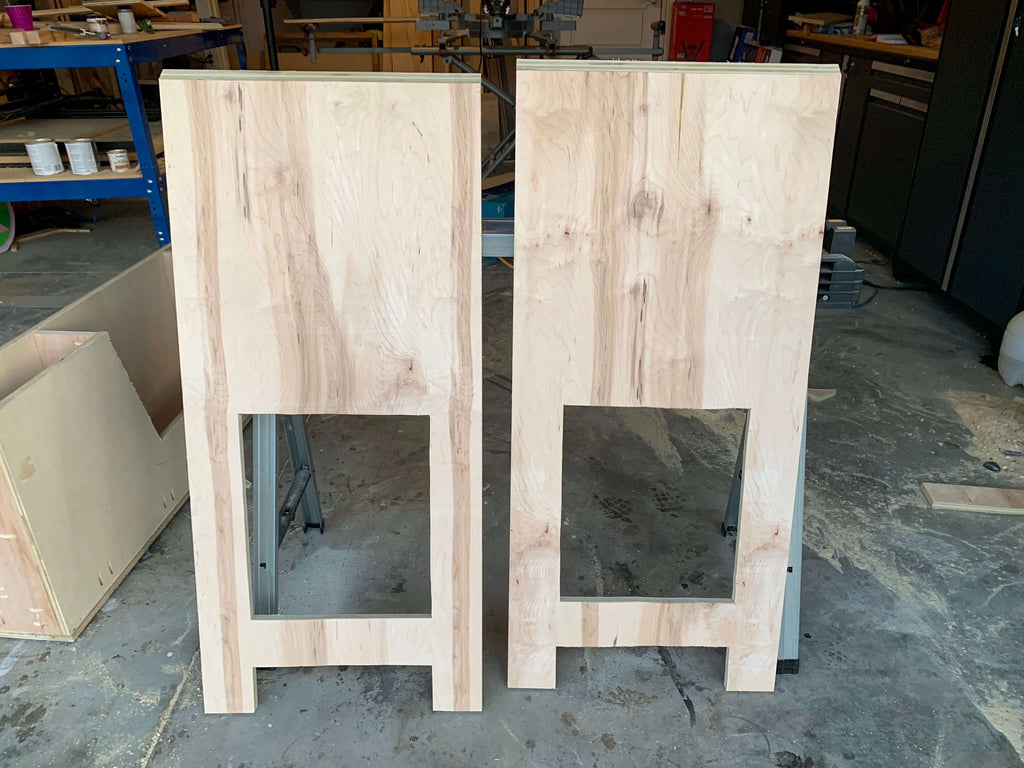
You should have two side pieces with the same exact cutouts. I then used my circular saw to cut the top of the side pieces at 45 degrees. This is an important step, to ensure that the top of the house frame desk will sit evenly.
Next, you're going to attach the sides to the assembled house frame desk using pre-drilled pocket holes.
 I used my drill to secure the sides down into place and then drilled in screws through the desk opening to attach the front side of the side piece to the house frame. I did this for both sides and then added a stretcher piece at the bottom for support.
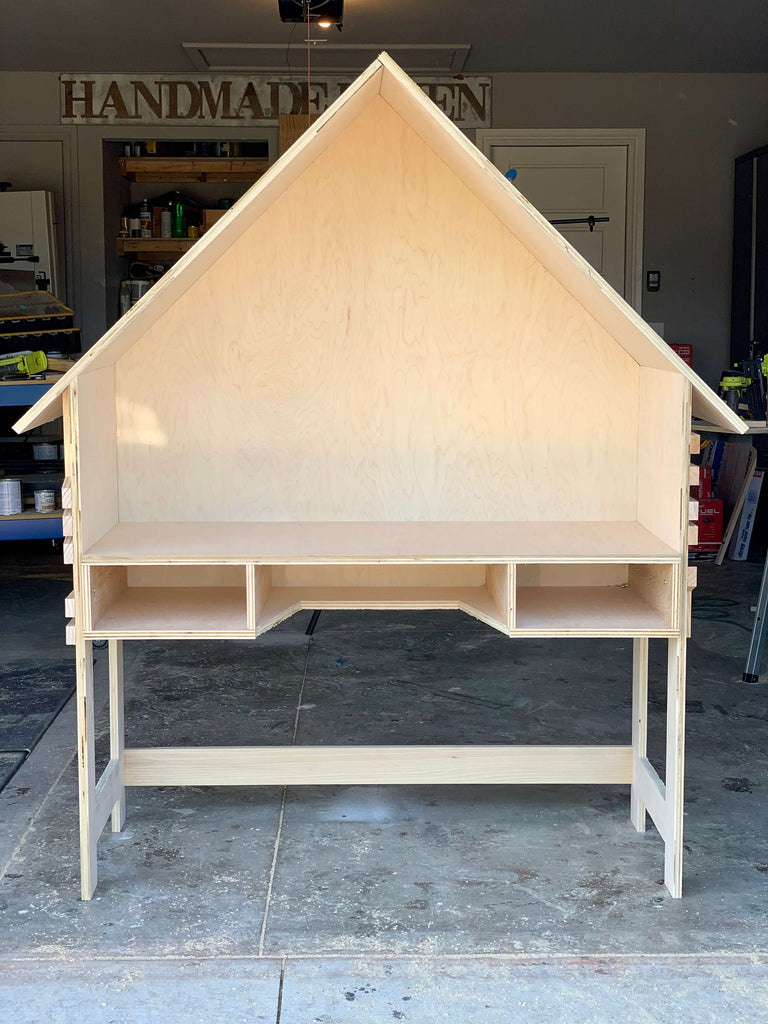
Step 4: Add Decorative Trim
I was loving how the desk was starting to look but I wanted to add something a little extra, so I decided to add some decorative trim to the sides and I'm so glad I did.
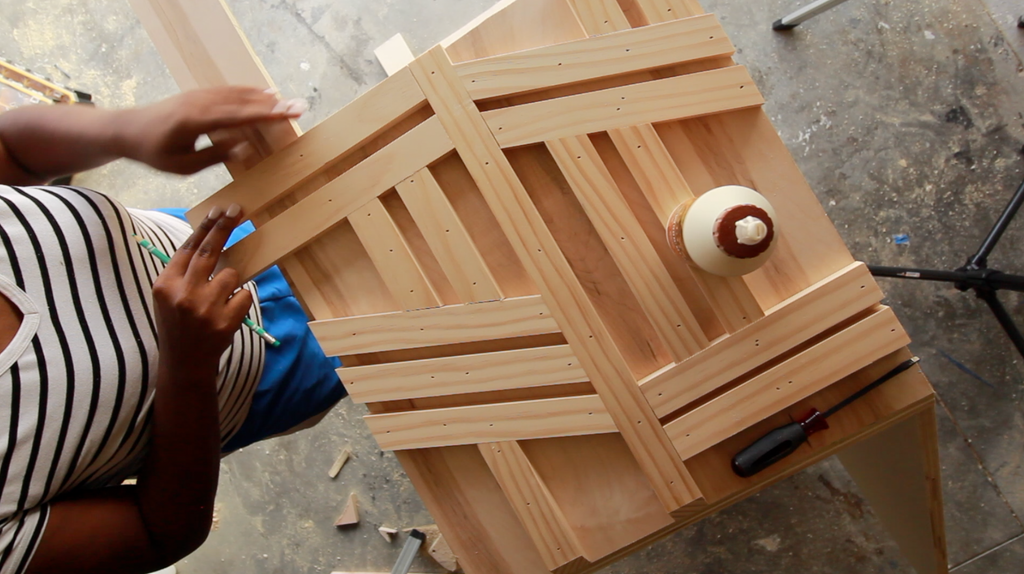
I didn't really have a particular style, I just kind of designed it by what looked good. All of my angles were cut at 22.5 degrees. I measured each trim piece against the desk and cut. I secured the trim down with wood Glue and nailed it down into place with my brad Nailer and 1 1/4" brad nails.
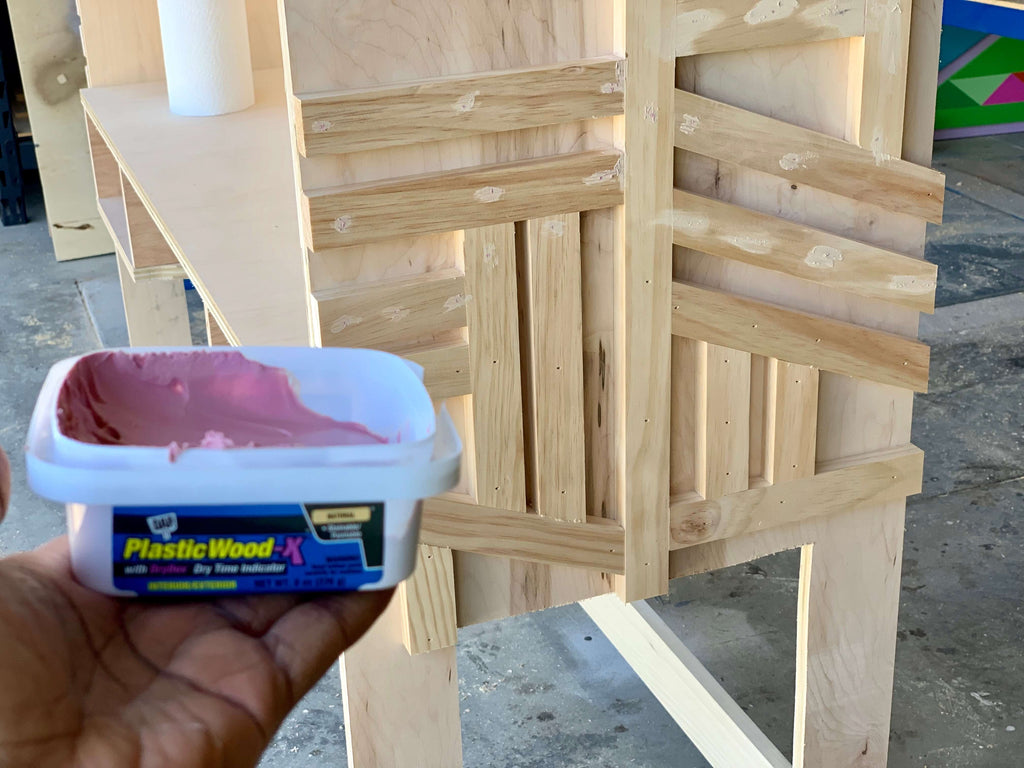 Once the trim was in place, I used my wood filler to fill in the nail holes to have it prepped for painting.
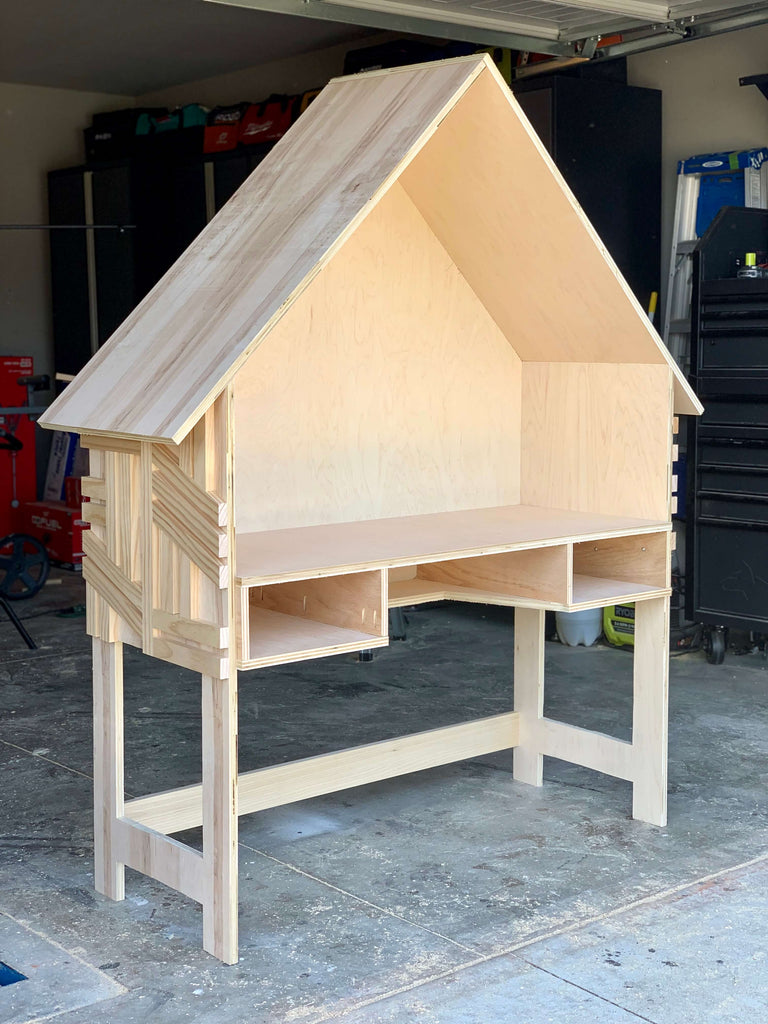
Although the desk looks so good in the natural, I couldn't let it stay like this. But here's one more photo before we get to painting!
Step 5: Painting the House Frame Desk
Before assembling the rest of the desk, I decided to go ahead and paint the desk to make it a lot easier. First I taped off the desk using frog tape and some plastic. I decided to use Behr Ultra - Laurel Tree for the outer part of the house frame desk and Chalk Paint - Parisian Grey for the desk portion.
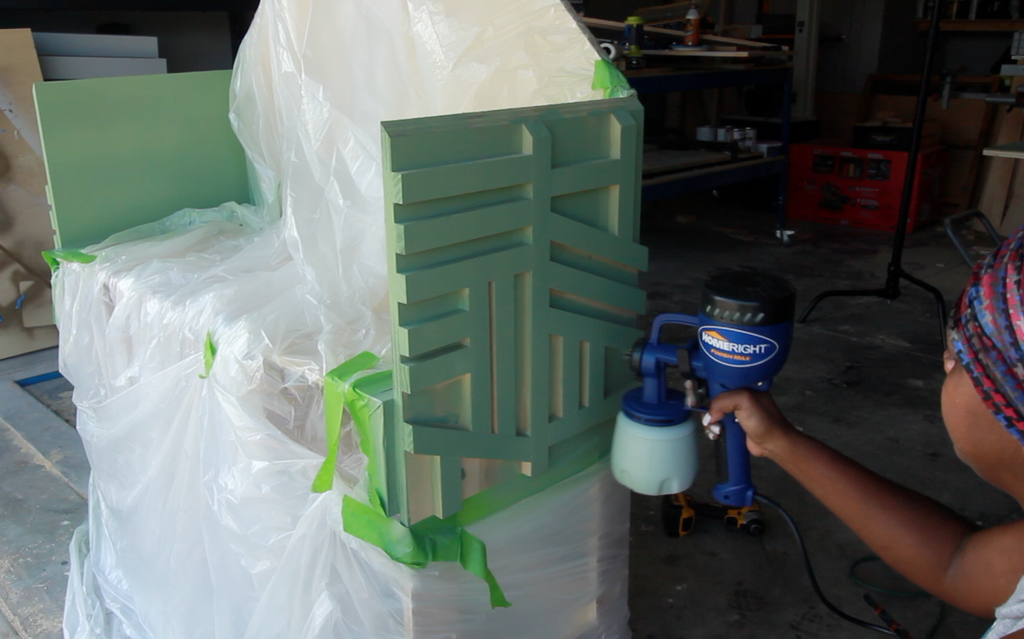
I decided to use my paint sprayer for the outer portion of the house frame because I knew it would be difficult to get in between the decorative trim spaces, and I'm so glad I did.
After the green was done drying I painted the desk using a paint brush.
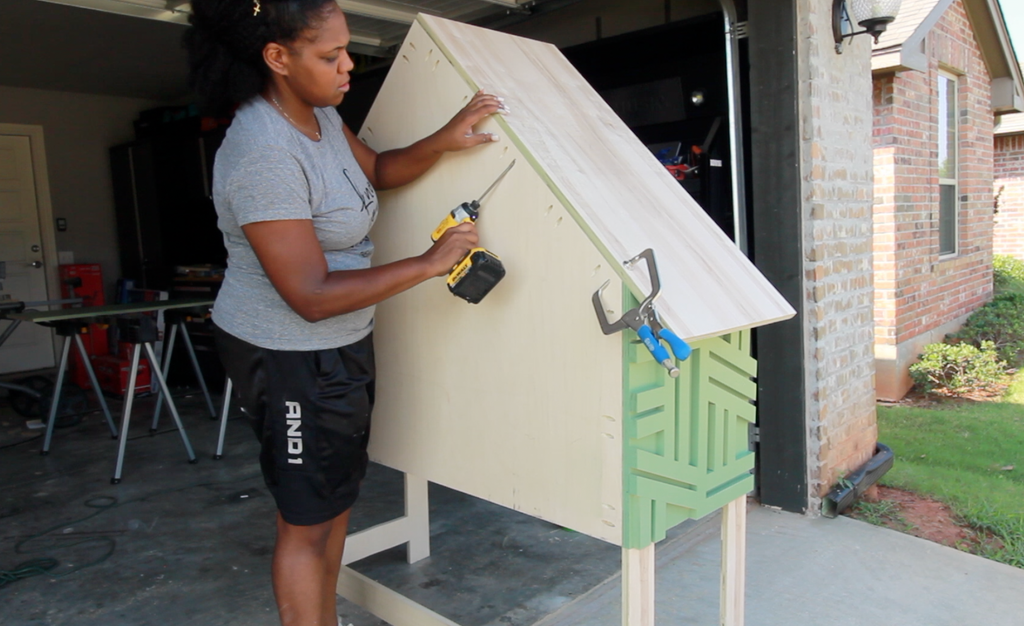
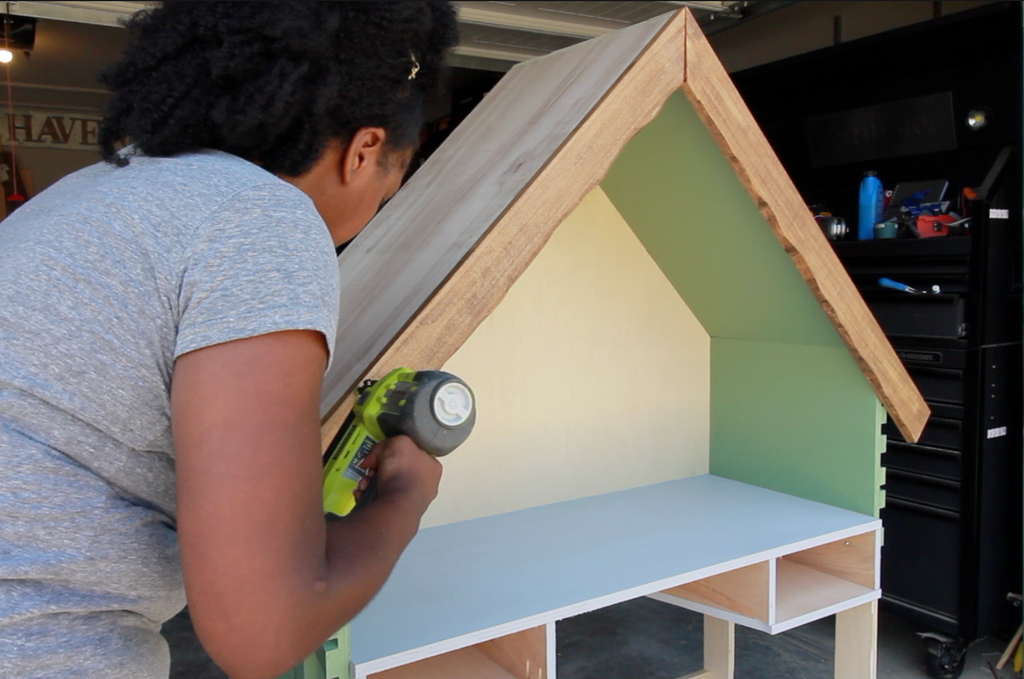
Step 6: Adding the House Frame Top and Trim
With the house frame desk all painted, it was time to add the top pieces. Using pre-drilled pocket holes, I attached the top boards to the the house frame. I secured it down to the back and then used my brad nailer to nail down through the desk sides.
Once both sides were secure, it was time for the last piece of the project; the front trim.
I wanted to make the front a little decorative so I decided to create my own faux live edge board. Live edge can be expensive so I decided to create my own.

First, I began by marking a pattern that I could cut out. I just made a loose wave pattern. It doesn't have to be anything fancy. Then I but my Jigsaw on a 30 degree bevel and began cutting on the line.
I think this tenchique is so cool, and it really gives the board that live edge look. Once the boards were all cut out, I stained them with special walnut and then attached them to the house frame using my brad nailer and brad nails.
 and that's a wrap folks! I was able to knock this build out in two days and I know the kids are gonna love it!
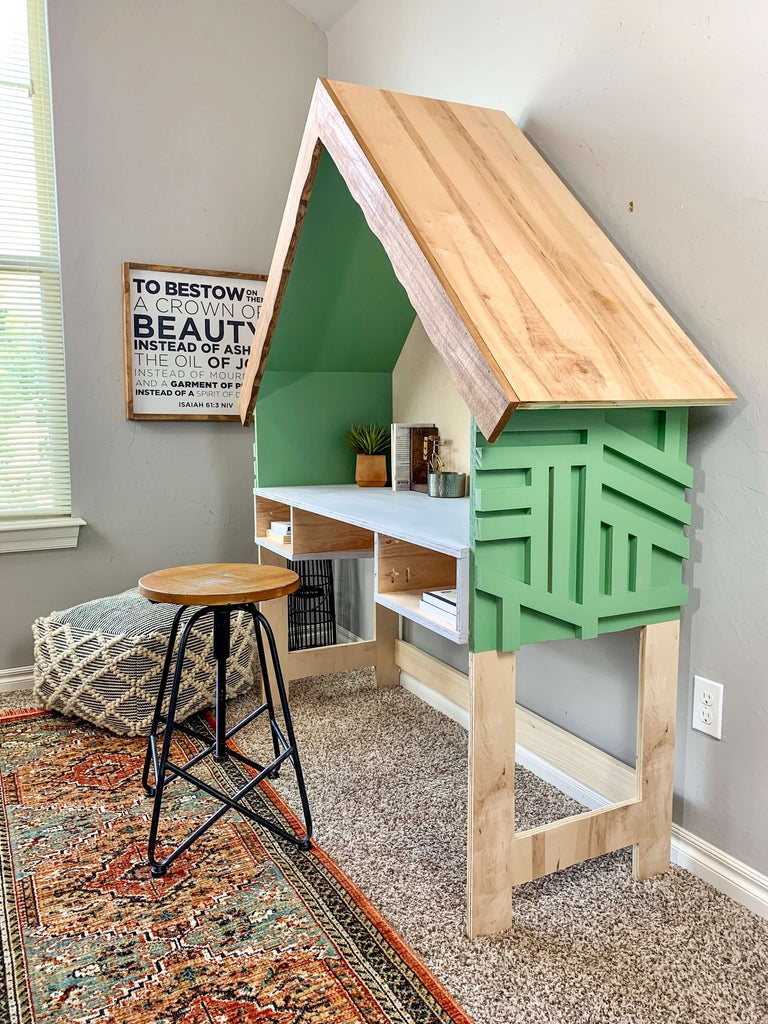
Now let's take another look at this DIY House Frame Kid's Desk.
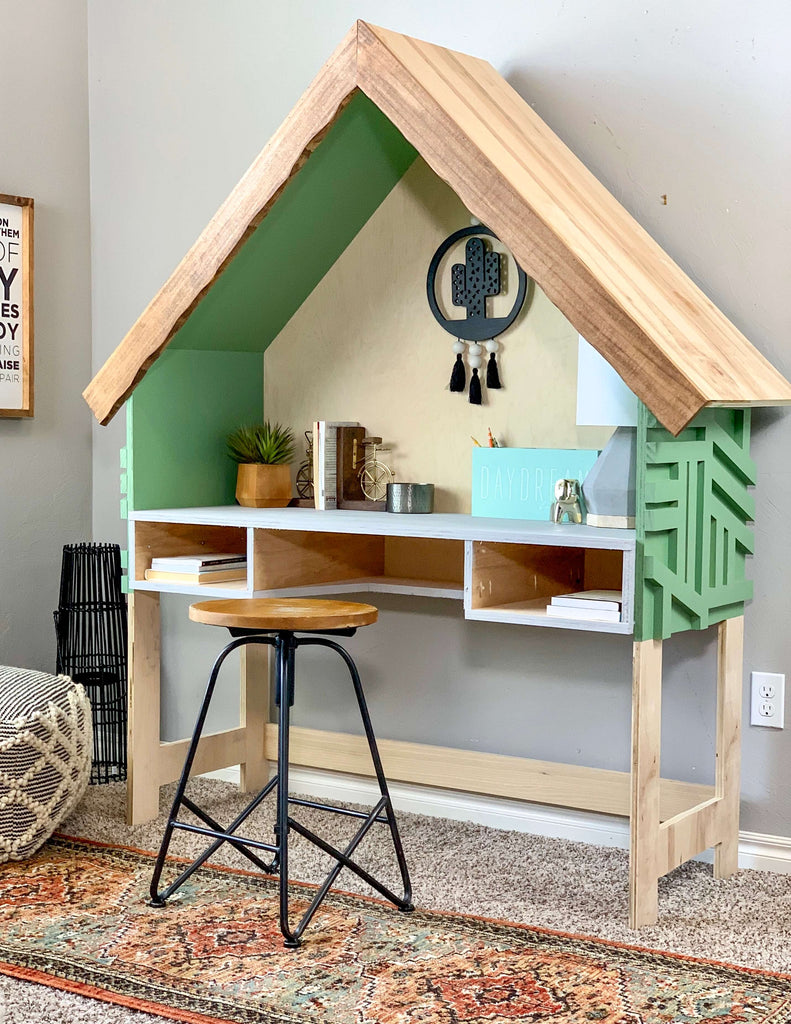
I couldn't be more satisfied with how this kids desk came out and I can't wait to see you guys try it for yourselves.
 This project is the perfect mix of work and play. Get your kids motivated about their school work with this cool House Frame Kid's Desk.

Thanks for reading guys, XOXO Ashley