"This DIY Shoe Cabinet will solve all of your organization problems."
I don't think I've ever been more excited about a project than I am today. I am very happy to be sharing theses DIY shoe cabinet plans with you. I was originally sent a picture of a shoe cabinet and I instantly fell in love.
 I knew it would be a little bit of a challenge without having dimensions to reference, but I was up for the challenge.
Luckily, I went through all of the bumps and bruises to figure it all out so you wouldn't have to. Man was it worth it, this shoe cabinet is every girls dream.
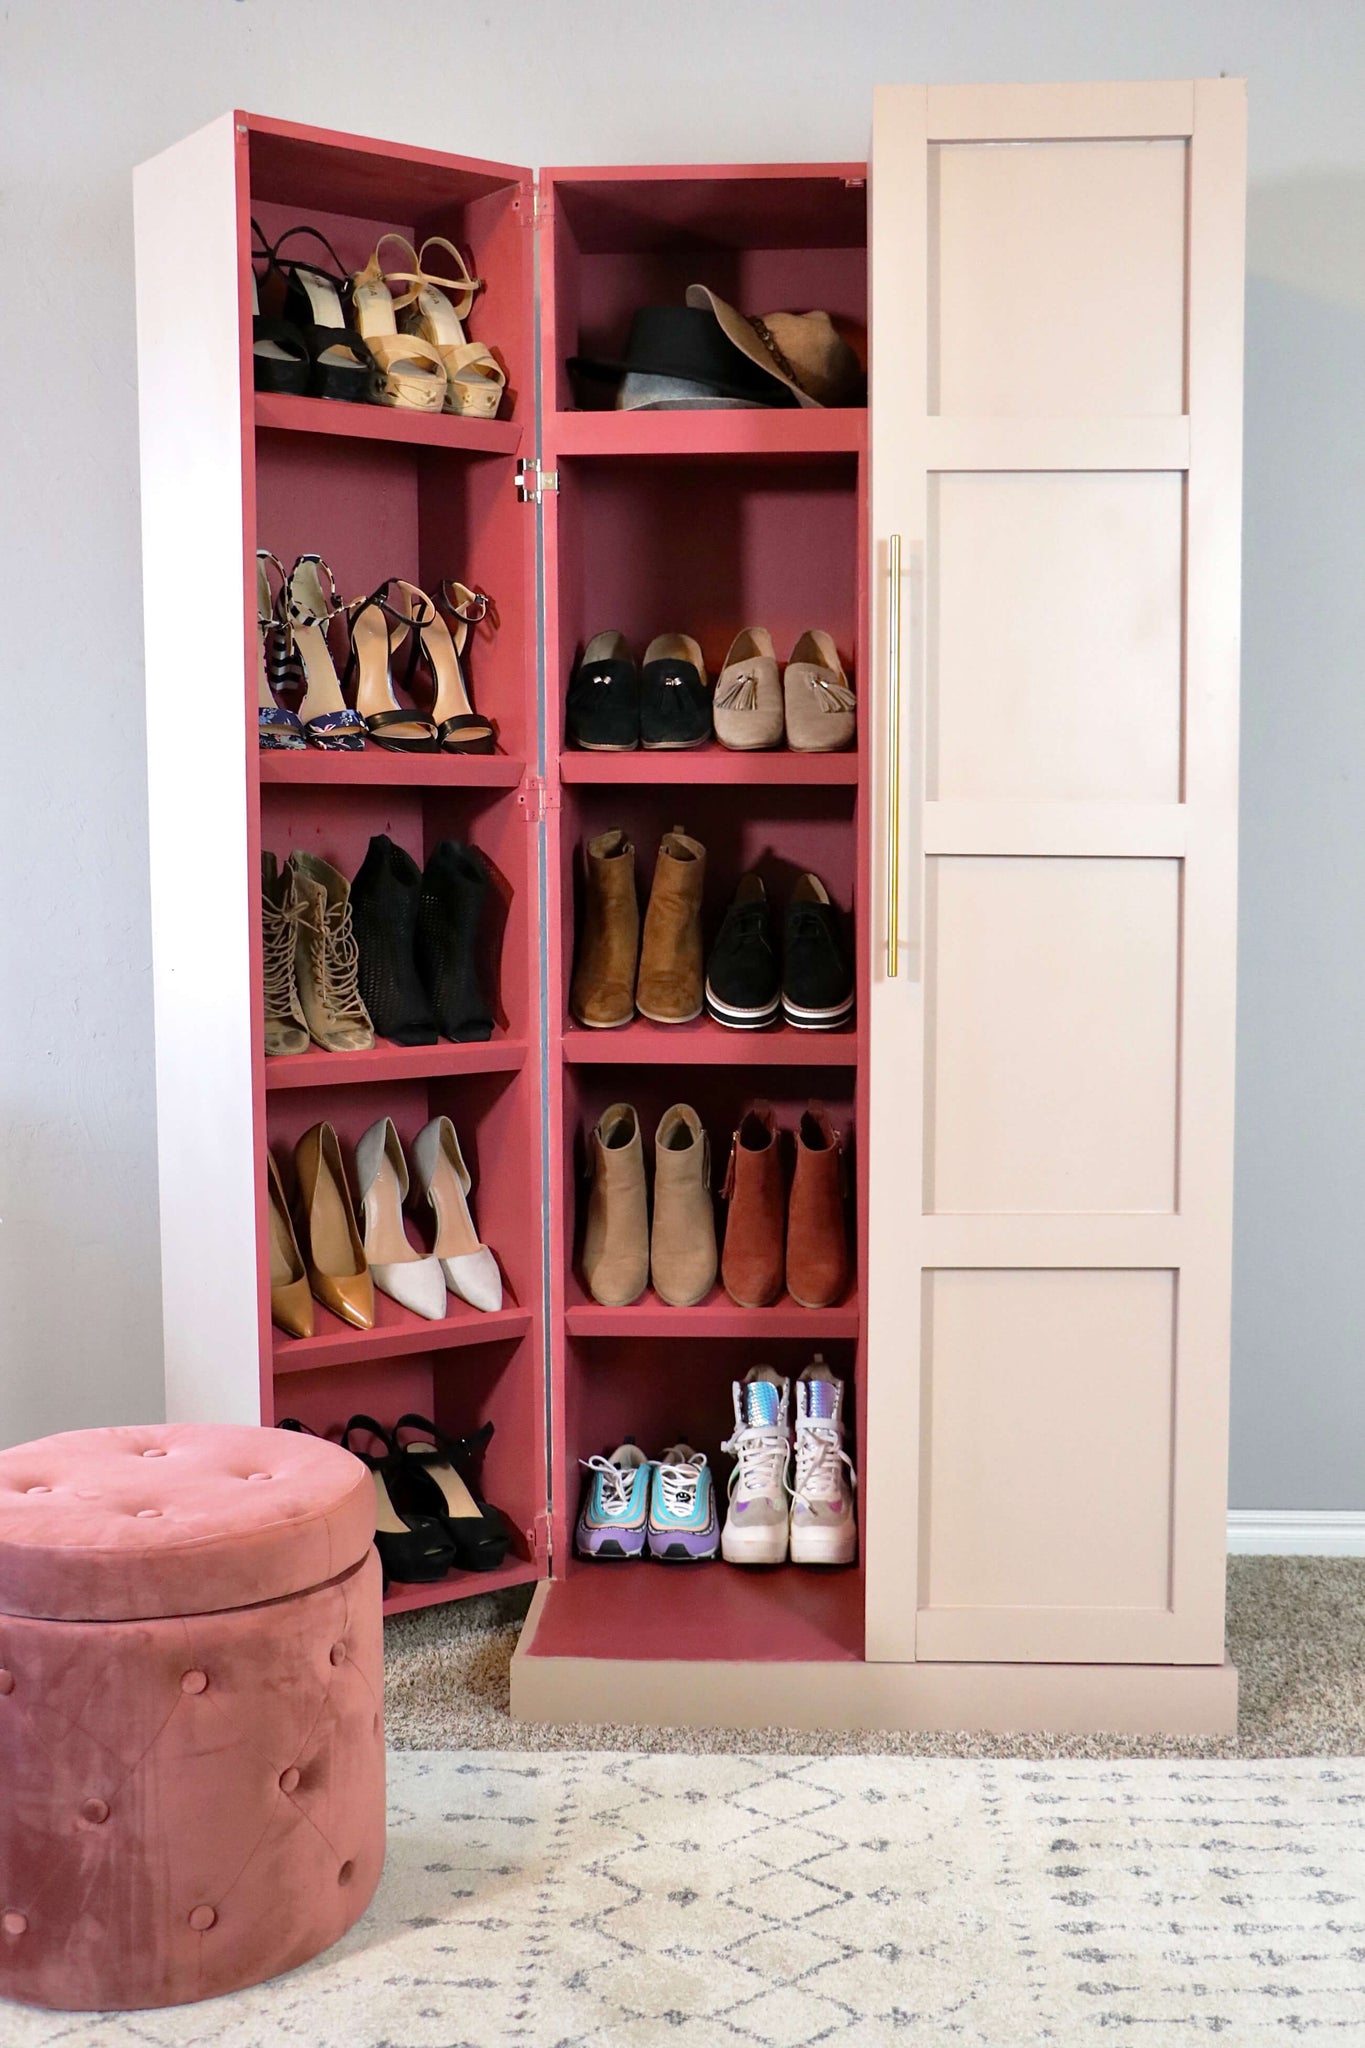
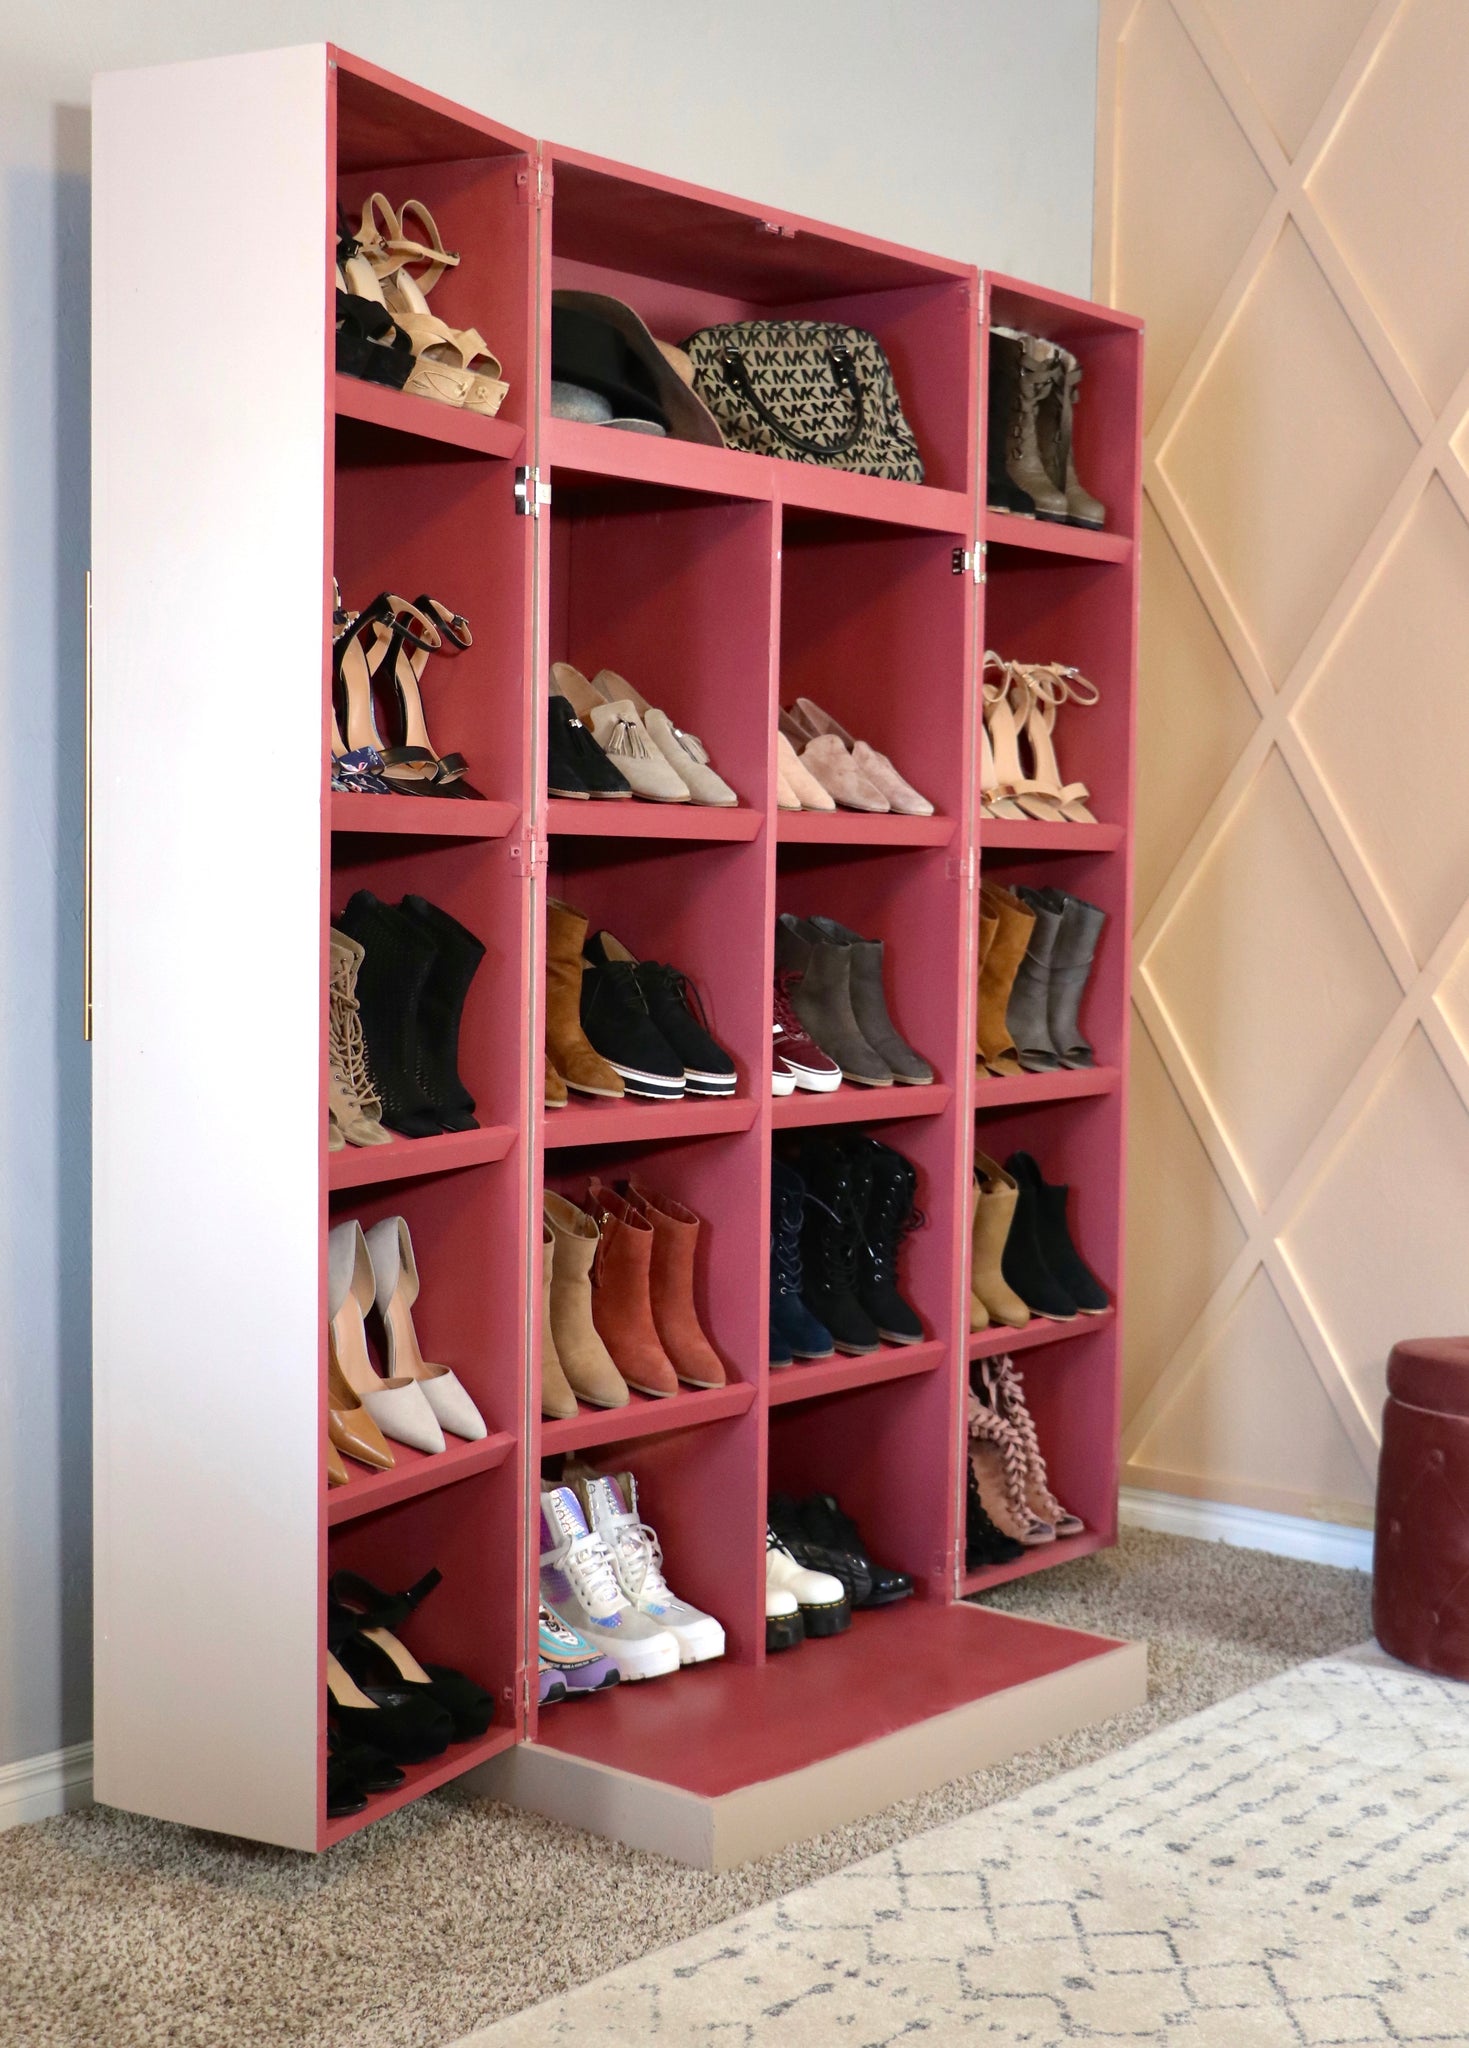
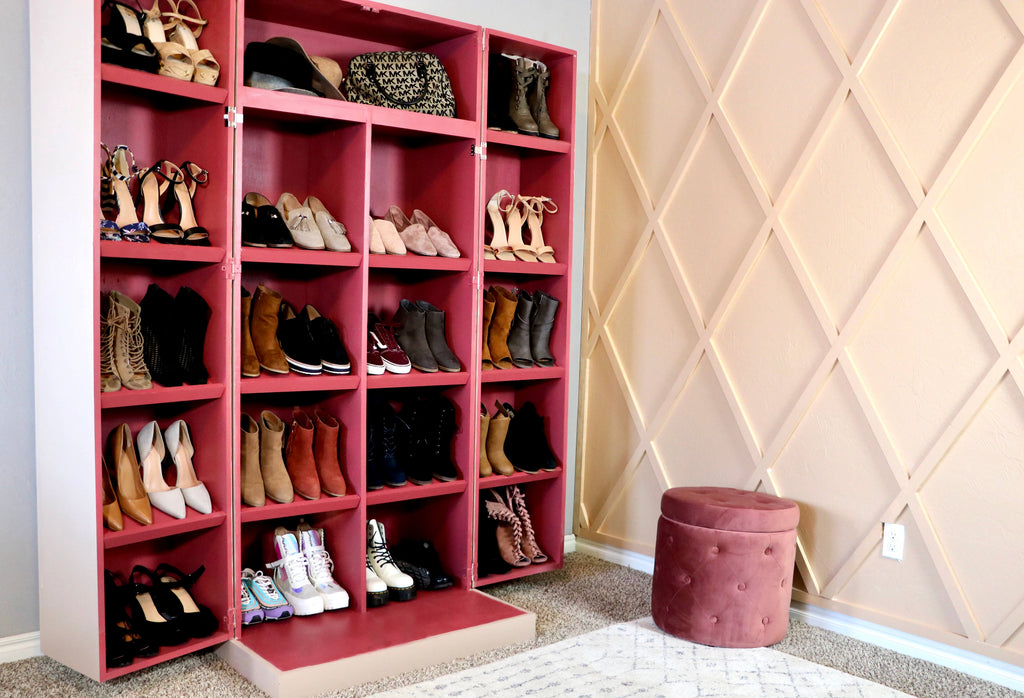
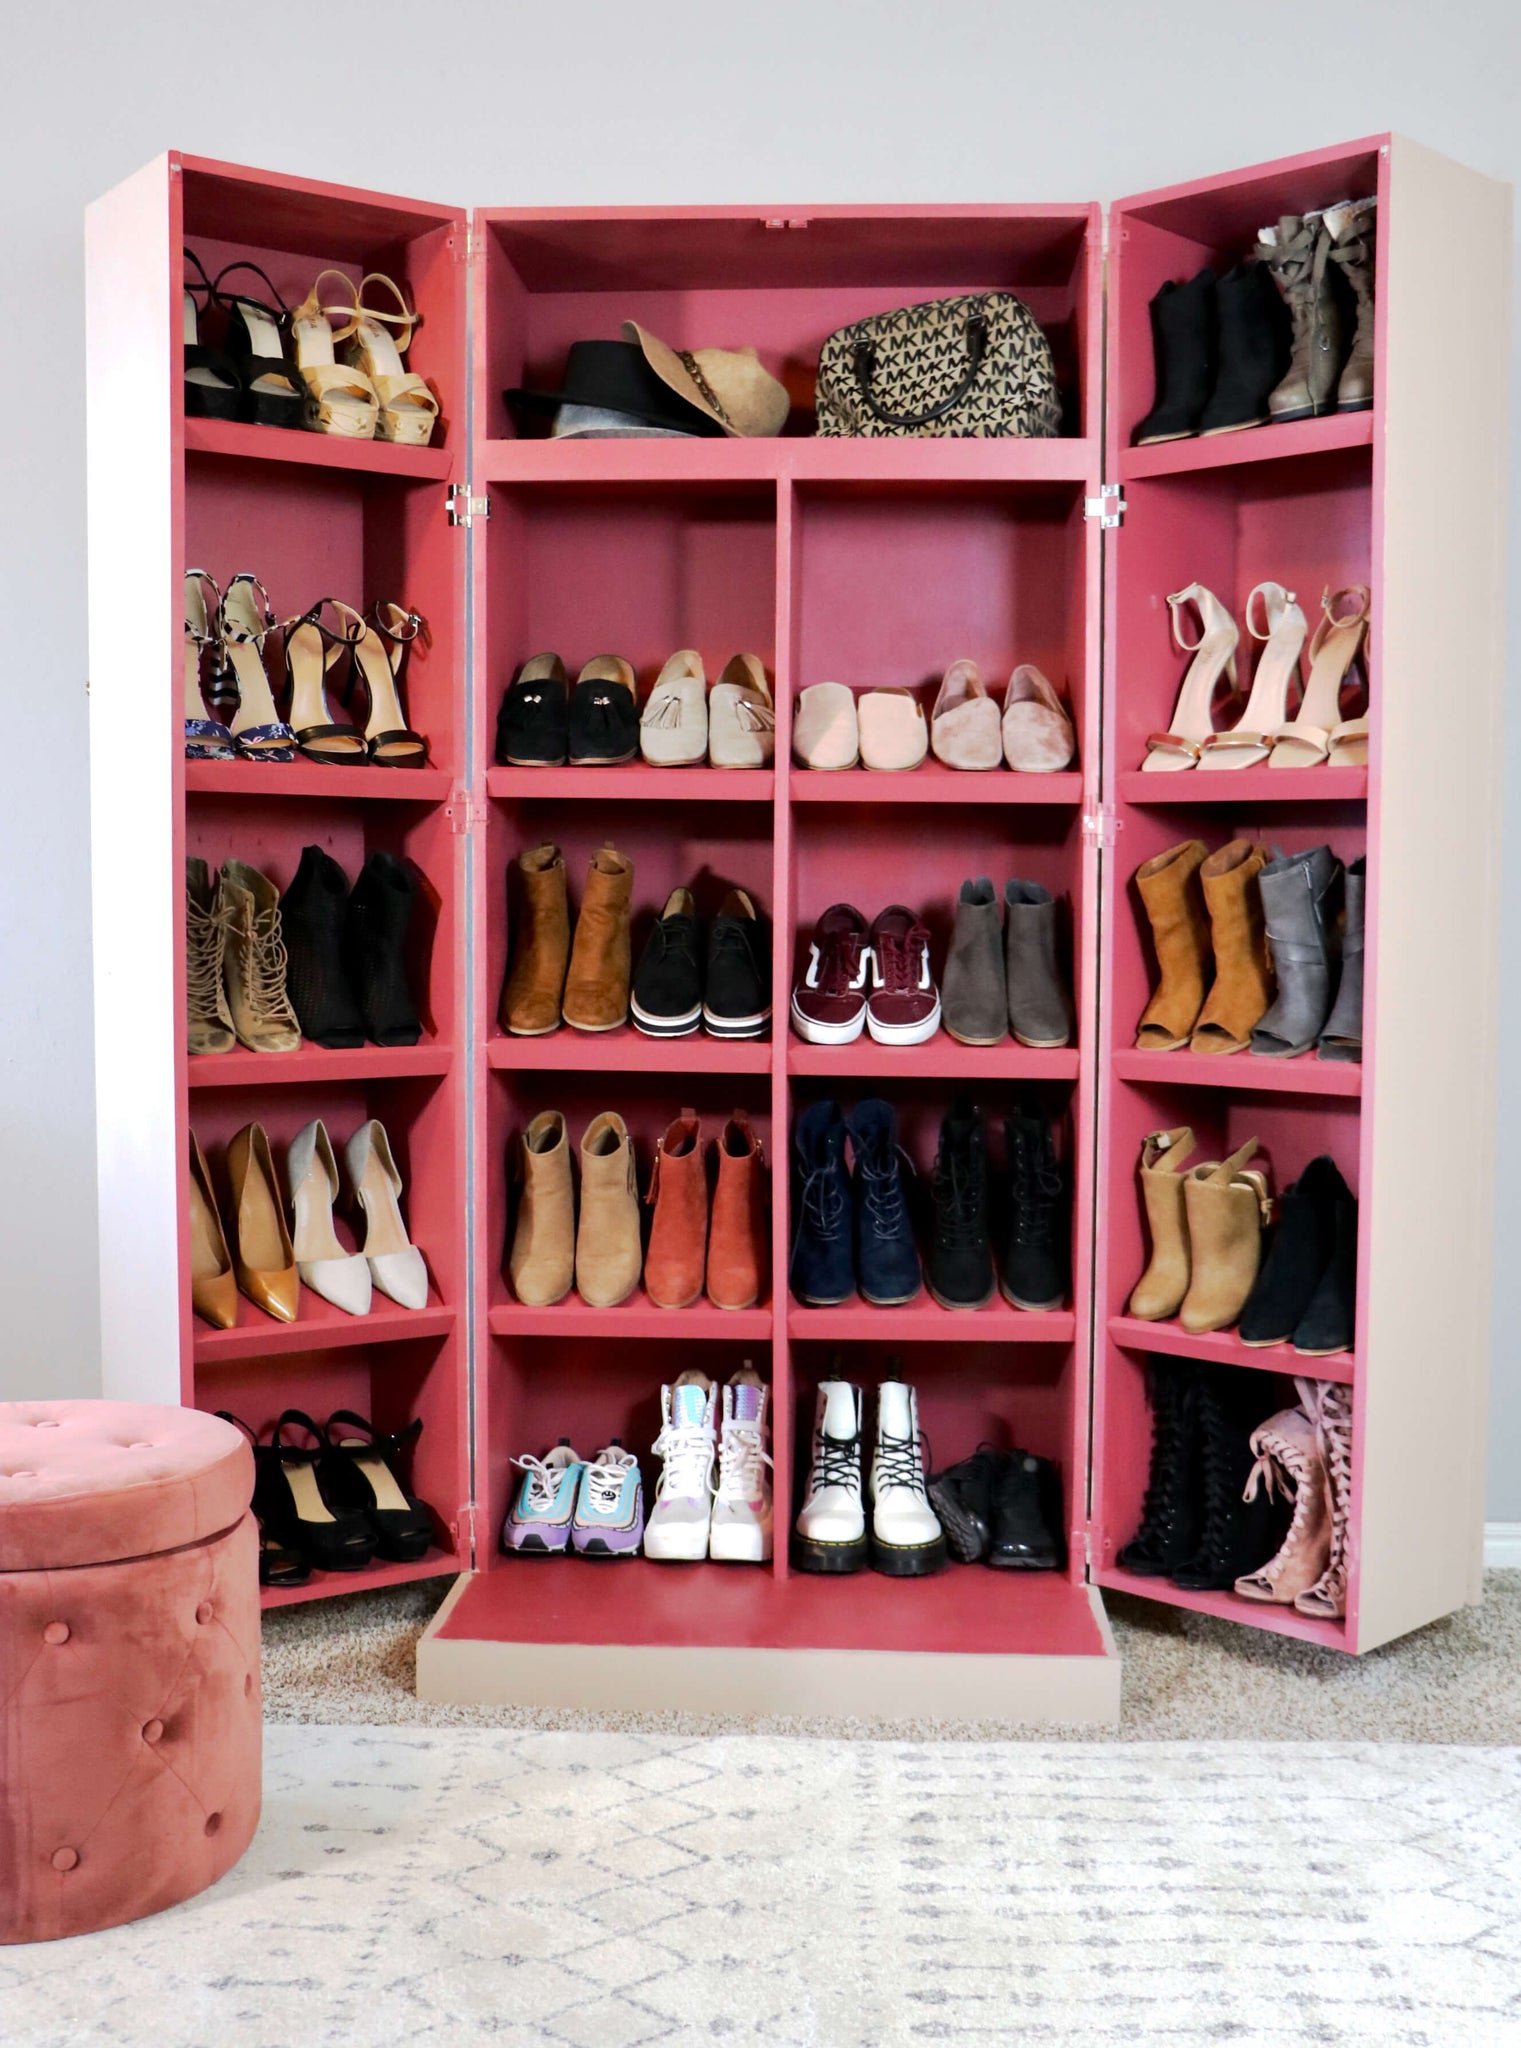
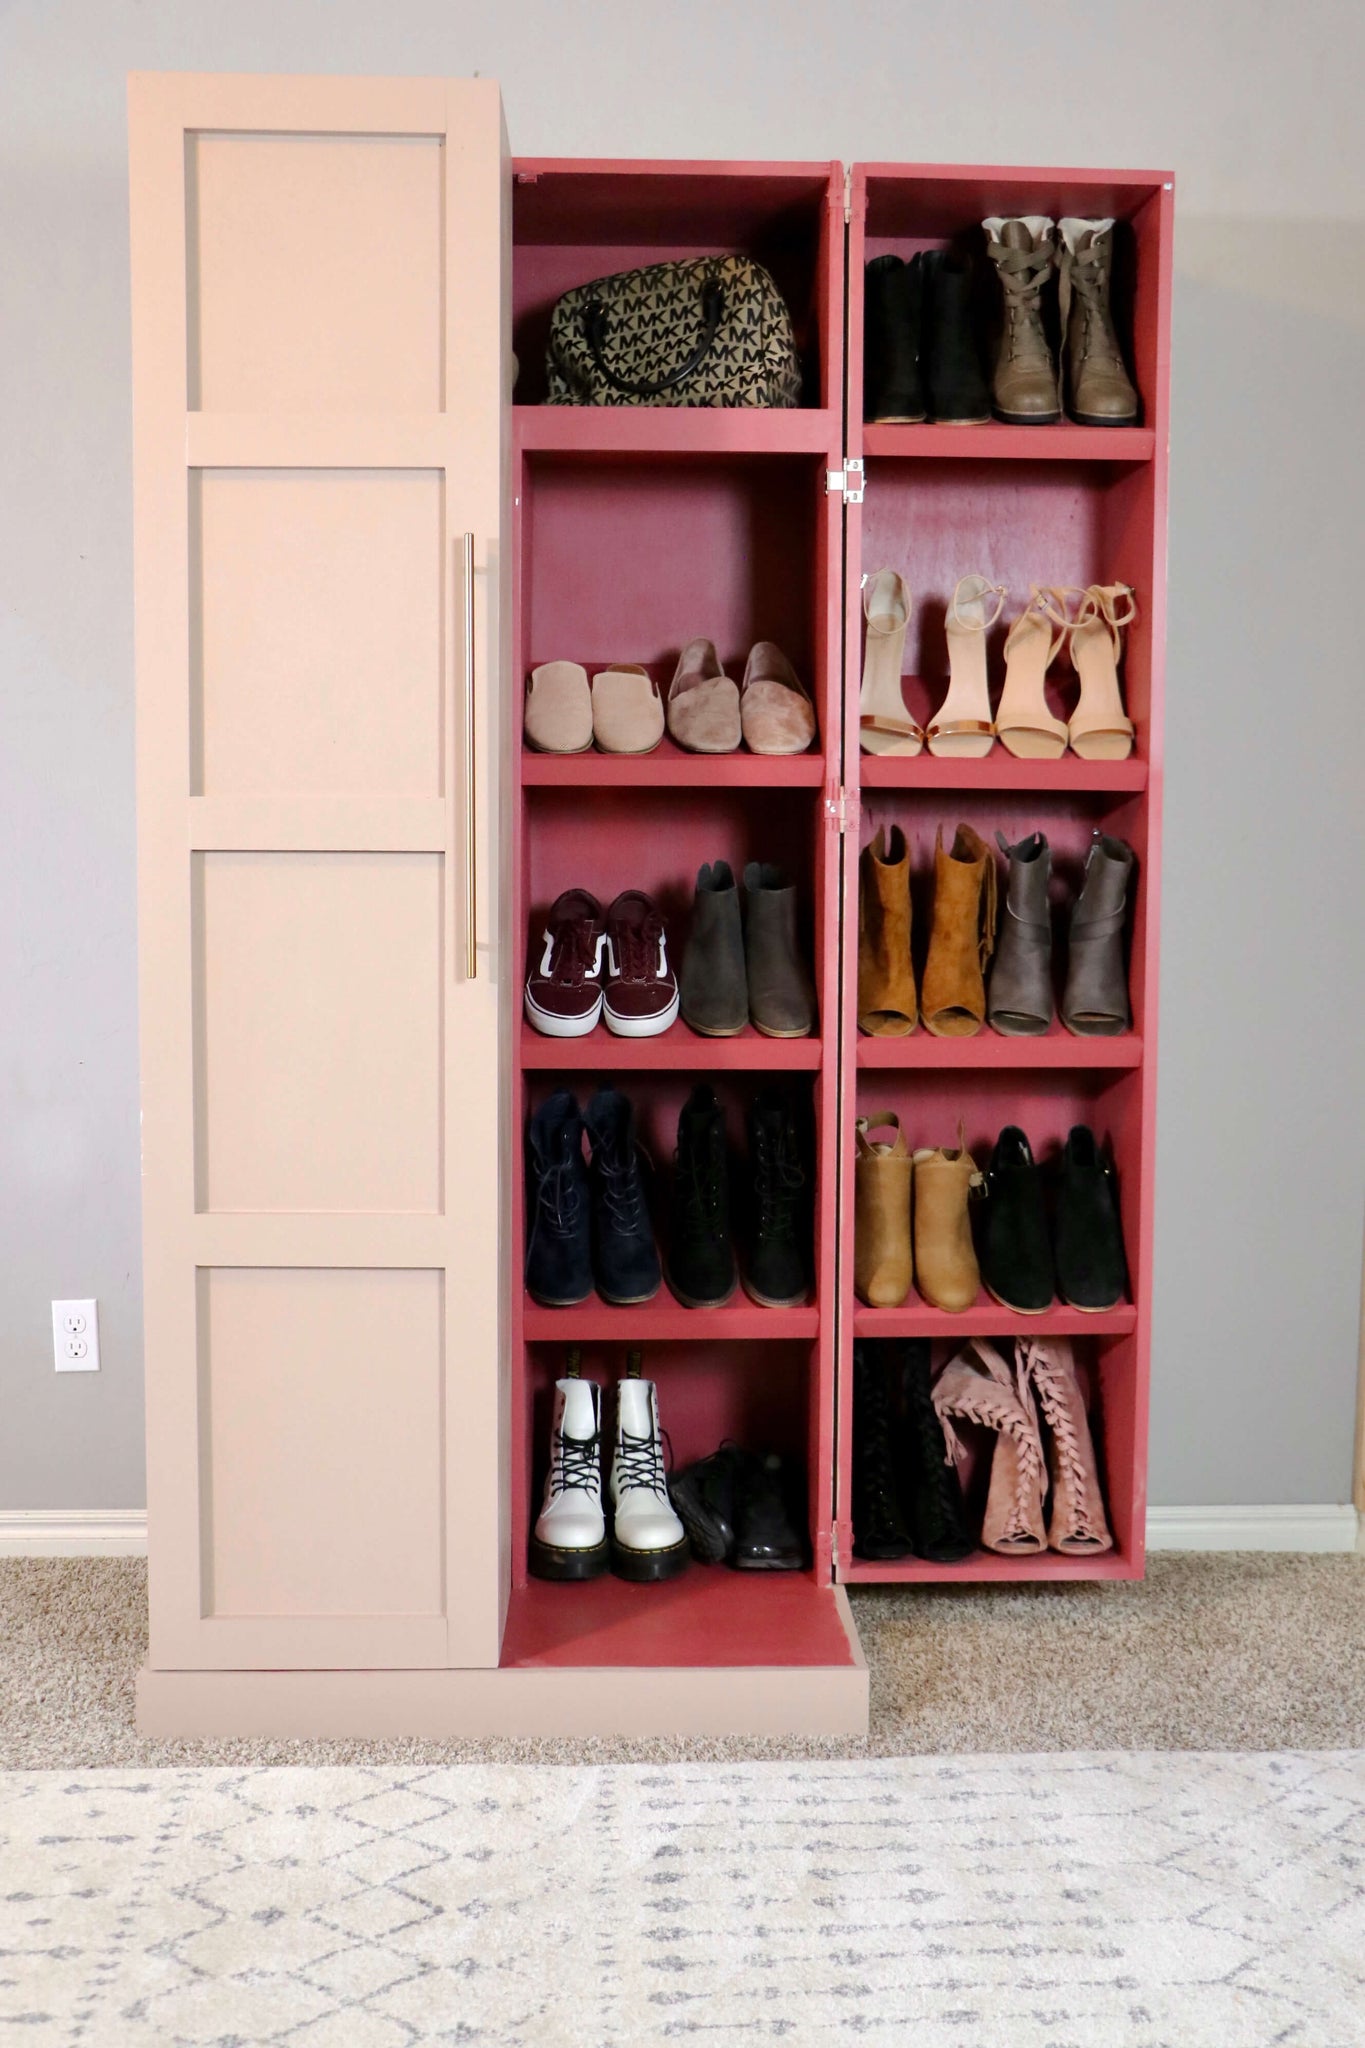
I hope you enjoy this shoe storage just as much as I do. I built a smaller hidden storage shoe cabinet but I outgrew it fast. It held 16 pairs of shoes, but this baby can hold 36 pair of shoes. Now that is what I call an upgrade. Now let's get into the details.

"There are some affiliate links in this post, meaning I get a small commission if you purchase through these links, at no cost to you. Click Here to read my full disclosure."
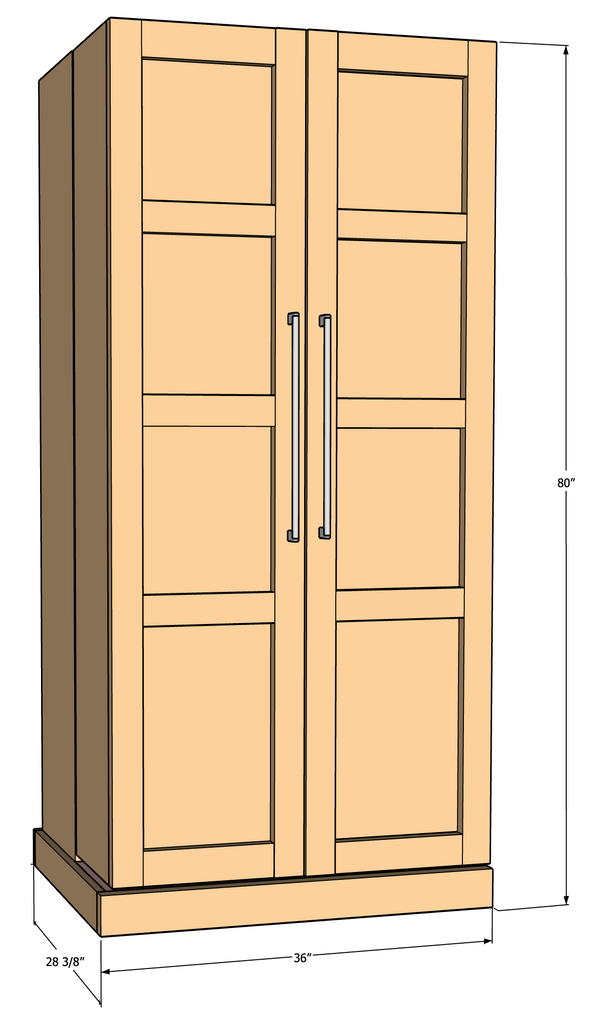
Dimensions
Wood Materials
- 2 - 3/4" piece of plywood (4'x'8)
- 2 - 1/4" piece of plywood (4'x8')
- 4 - 1x12x8 (Select Pine)
- 2 - 1x12x6 (Select Pine)
- 4 - 1x2x6 (Select Pine)
- 4 - 1x3x8 (Select Pine)
- 1 - 1x3x6 (Select Pine)
- 1 - 1x4x8 (Select Pine)
Cut List
See Detailed Plans for Cut List
Materials
- 1 1/4" Pocket Hole Screws
- Hinges
- Gold Cabinet Pulls
- Spackling
- Wood Filler
- Wood Glue
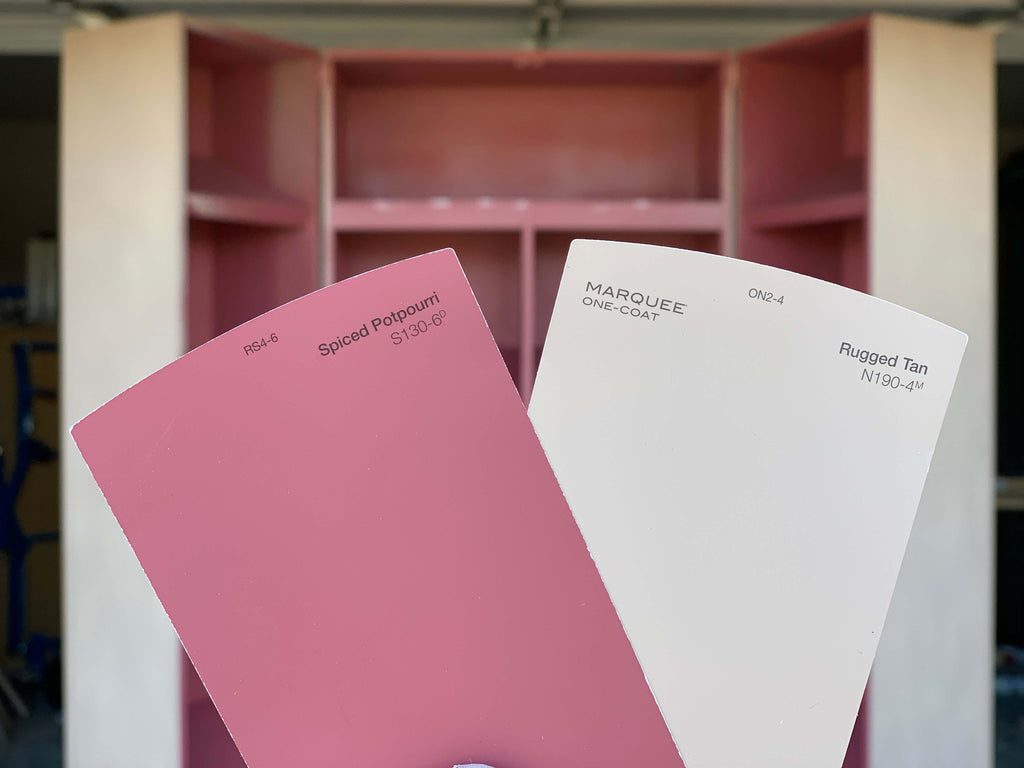
- Behr Paint - Spiced Potpourri
- Behr Paint - Rugged Tan
Tools Used
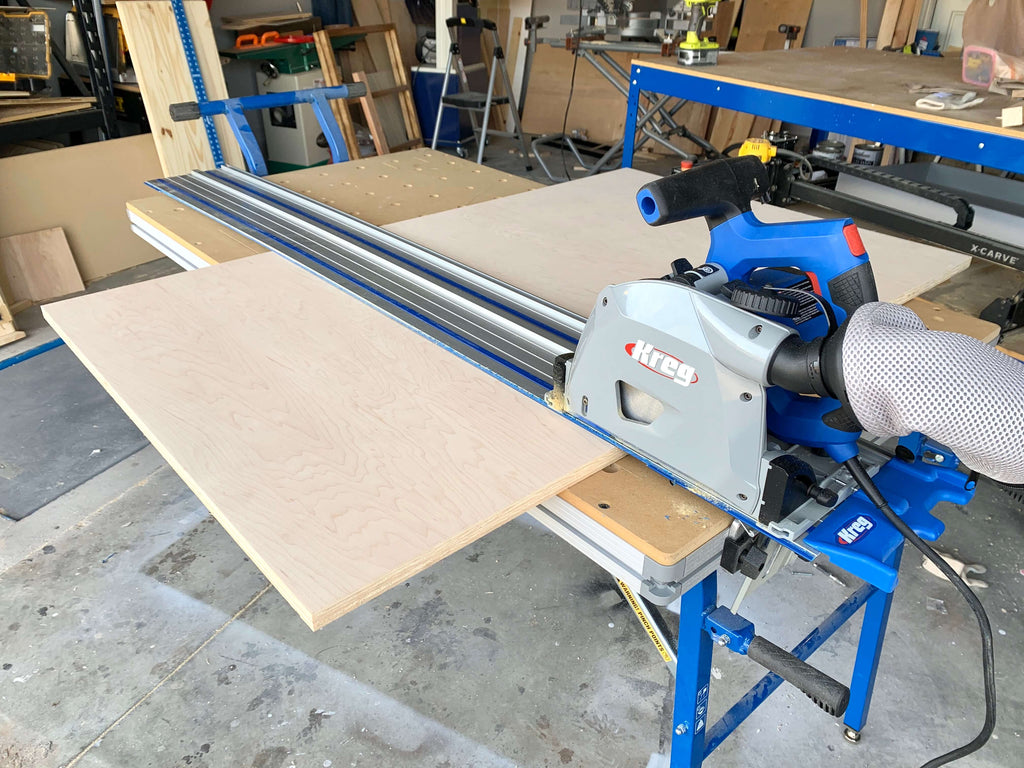
- Kreg Adaptive Cutting System
- Kreg Jig
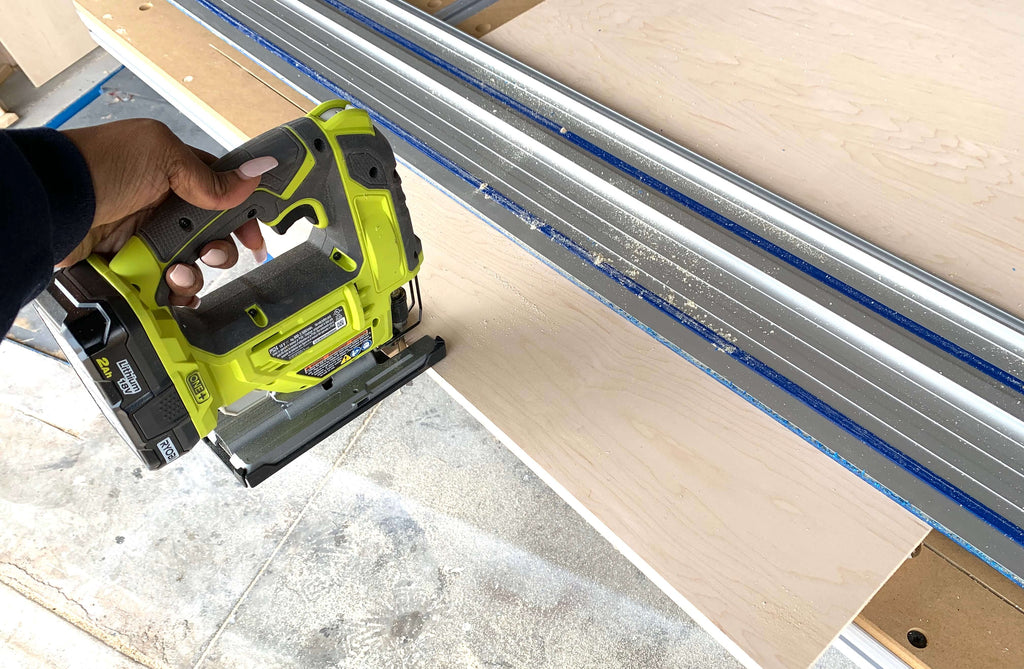
- Jigsaw
- Kreg Right Angle Clamp
- Home Right Paint Sprayer
- Drill
- Kreg Foreman
- Staple Gun
- Brad Nailer
- Sander

Step 1: Cut Wood to Size
I first started off by cutting the wood I needed to build the main frame of the shoe cabinet down to size. When I purchased my plywood, I got my plywood cut down so that I can manage it better and don't worry I'm sharing all of the measurement details in the printable plans.
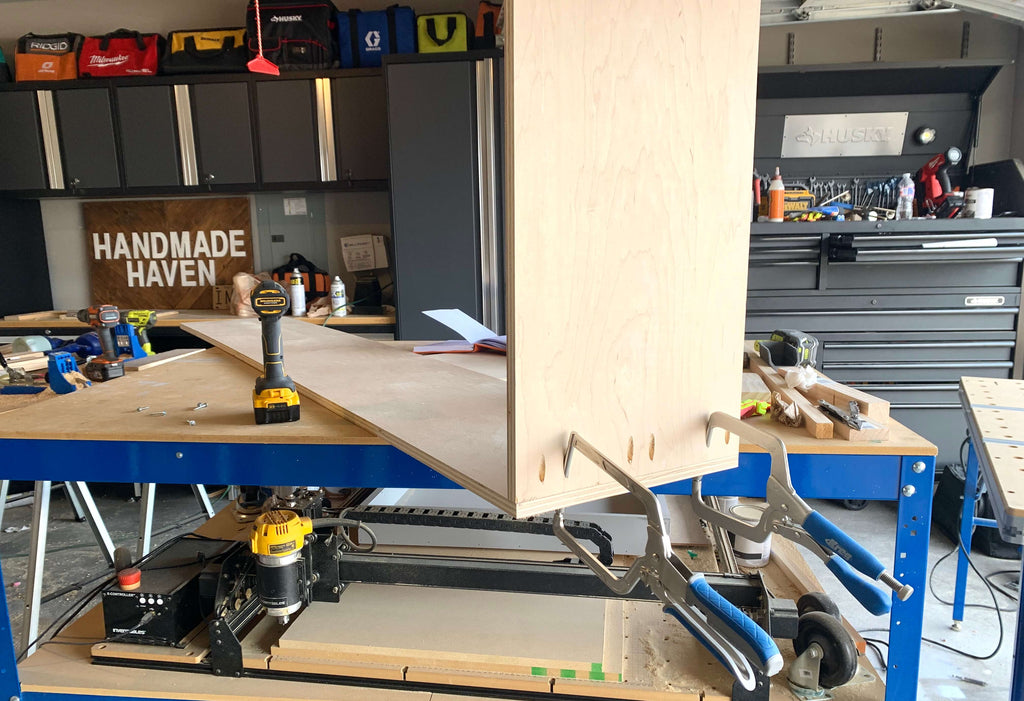
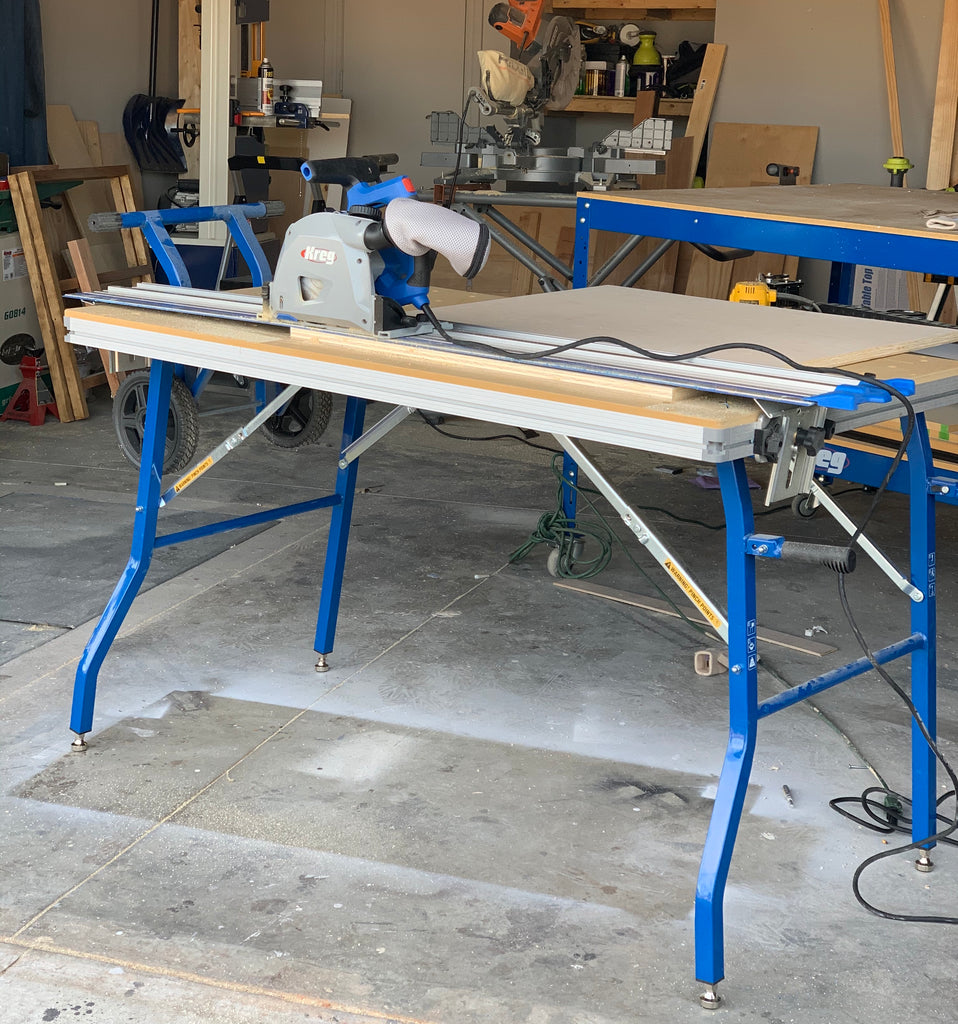 Once I got the plywood home, I started cutting the plywood down to the sizes I needed to create the center shoe cabinet frame. I used my Kreg Adaptive Cutting System to cut everything down. If you're not a big fan of the table saw, this is a great alternative tool. It's a track saw, but on a guided track; allowing for ease and precision.
Step 2: Building the Shoe Cabinet Middle Frame
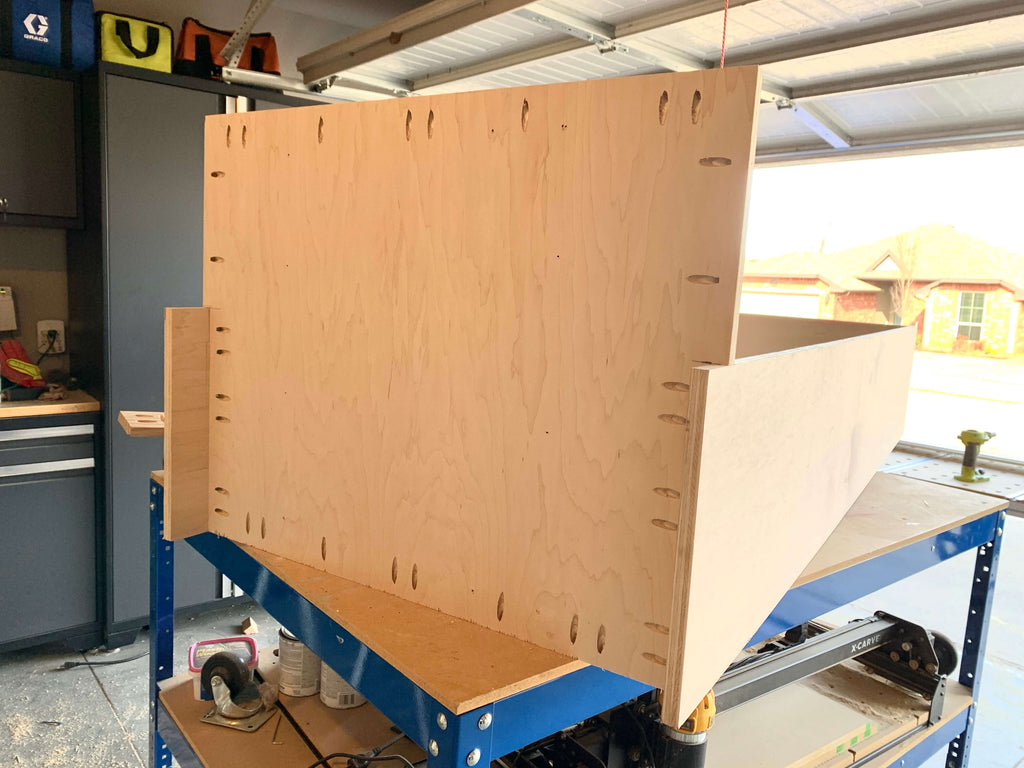
Once all of the plywood was cut down to size, I started building the frame. The first piece I needed to build with was the bottom plywood board. In order to make the board fit, I needed to cut out notches on the sides.
This will make more sense once you go through the shoe cabinet plans. I cut out the notches first by using my Kreg Adaptive Cutting System and then cutting off the end with my jigsaw.
 After I cut the notches out of the bottom piece, I created pocket holes all around the board with my Kreg Jig to be able to attach it to the shoe cabinet sides. It should look like the photo below once you're done.
I didn't have any type of dimensions to reference while building this shoe cabinet but I was lucky to find this pantry build that had a similar bottom design tat I wanted, so I was able to use that to get me started.
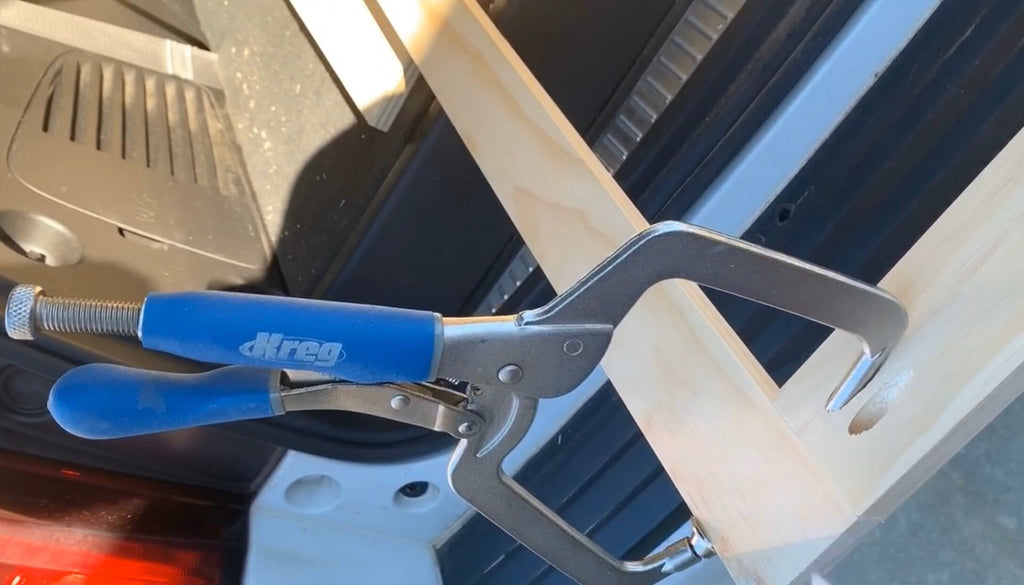
 Now it's time to get the top main frame assembled. I used my Kreg right angle clamps to help me build the main frame and used pocket hole screws to assemble the frame together.
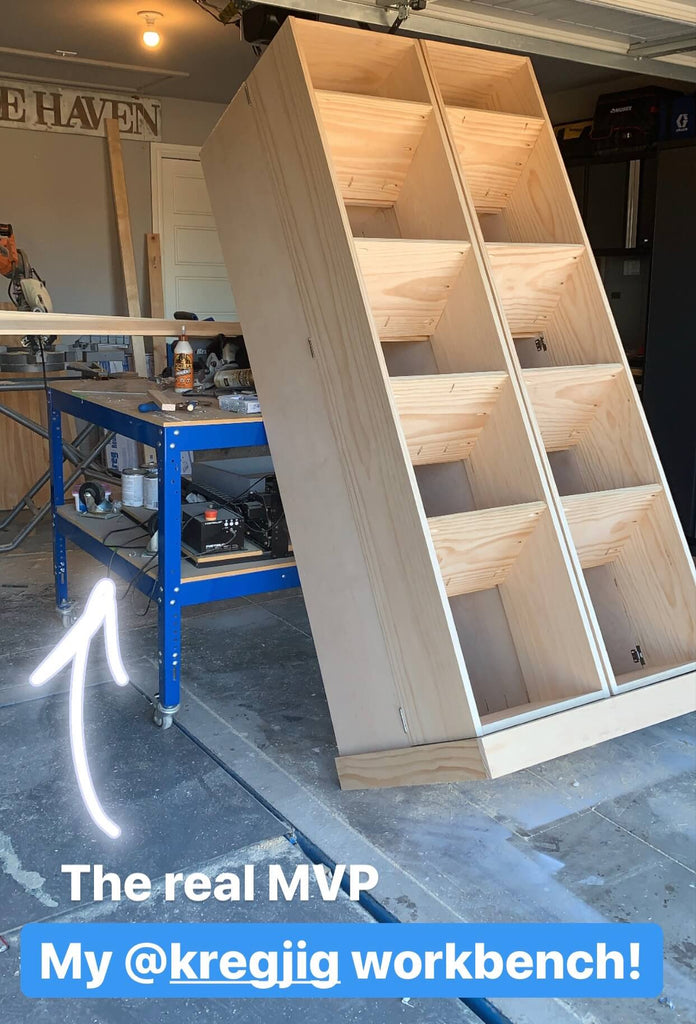
 Once the top part of the center frame was assembled, I started attaching it to the bottom piece. I used my Kreg workbench to help me build this frame; it made it a lot easier to maneuver and this workbench can hold a lot of weight.
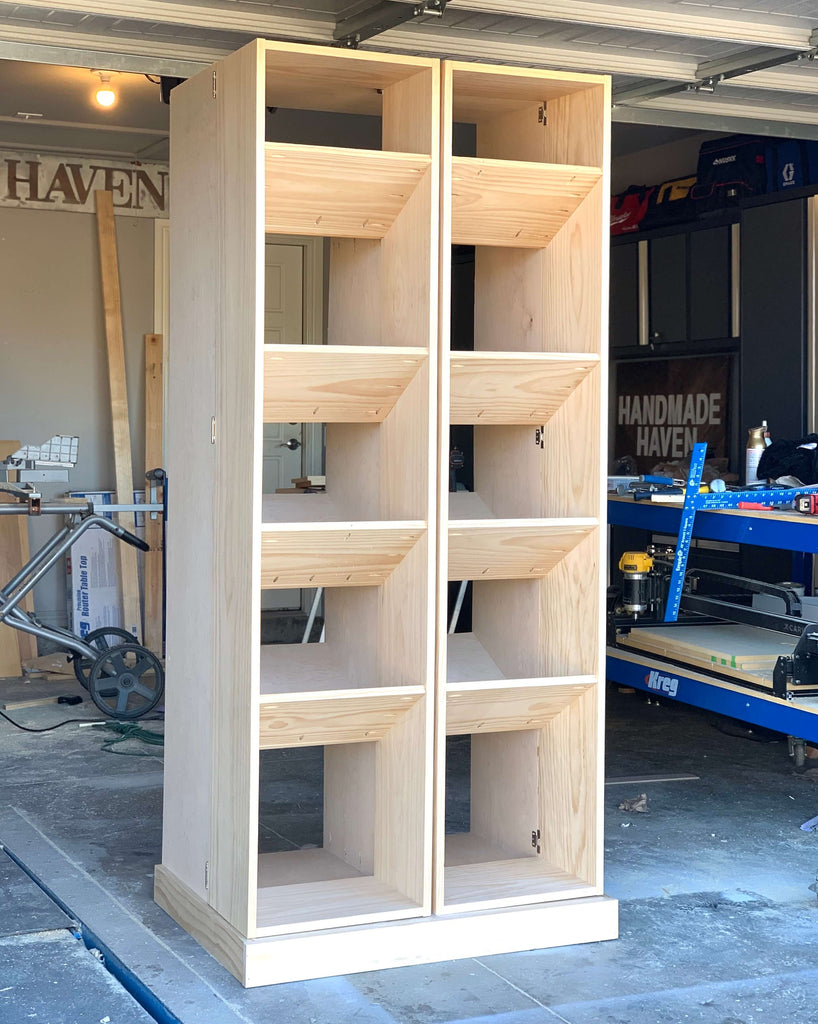
 After the outer frame was all put together, I added in the top shelf and the center divider using pocket holes and pocket hole screws.
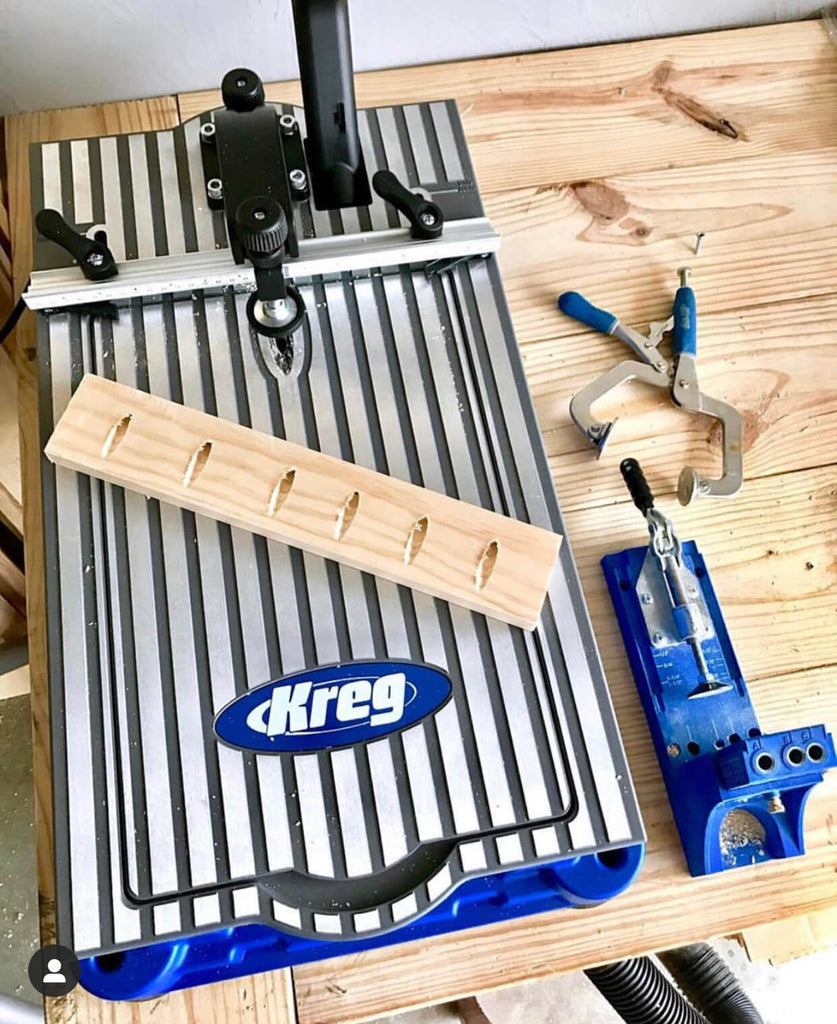
If you're not used to using a Kreg Jig, this project will surely get you acquainted. Theres enough pocket holing to go around. I usually use my Kreg Foreman for projects that require a ton of pocket holes, but a regular Kreg Jig will work just as good, I use my Kreg Jig Master system a ton.

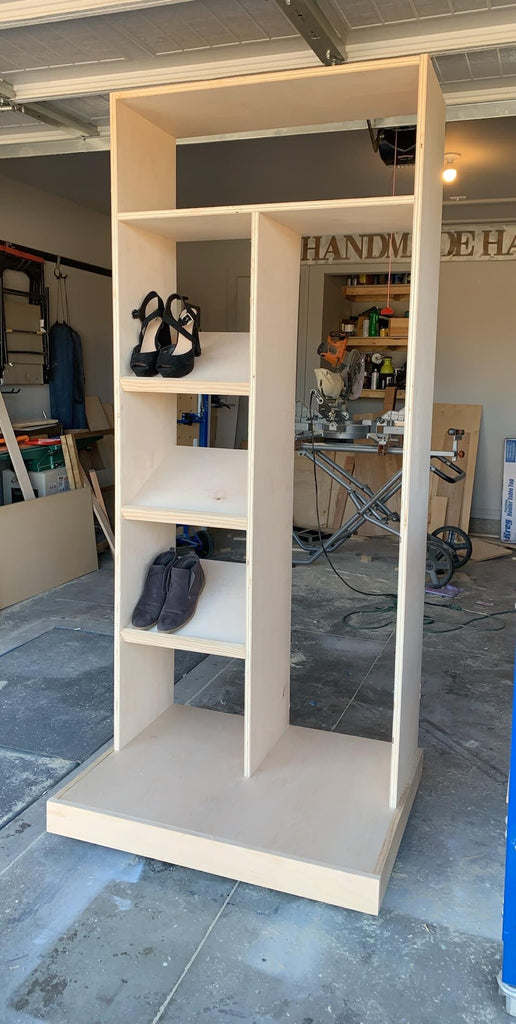
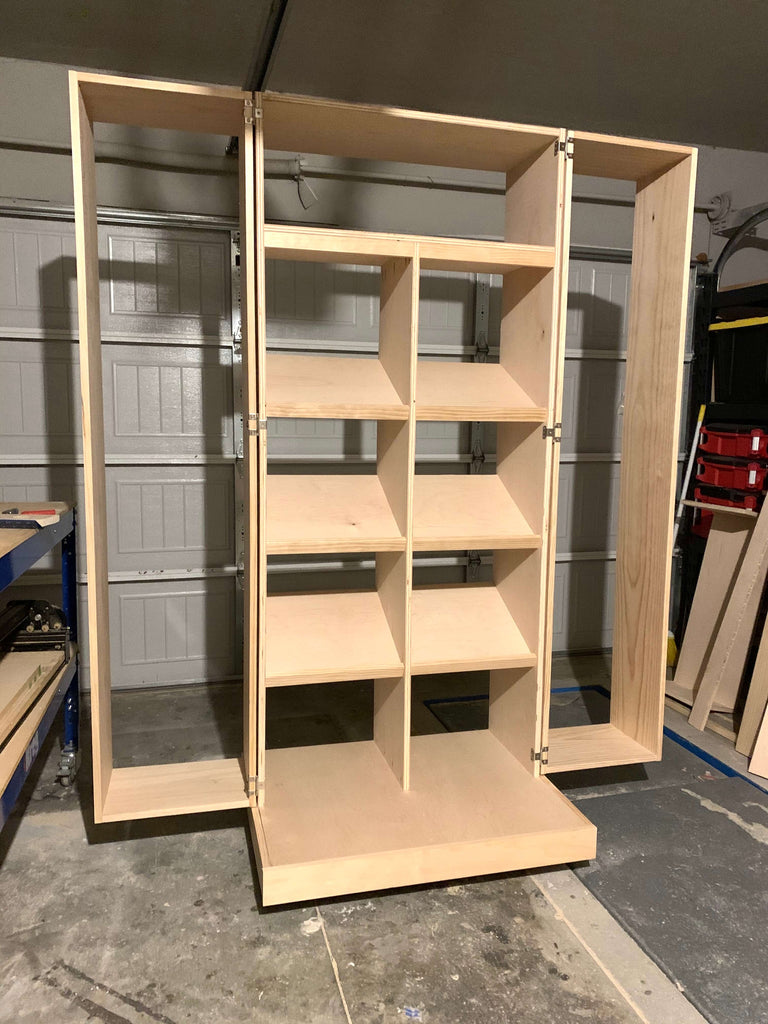
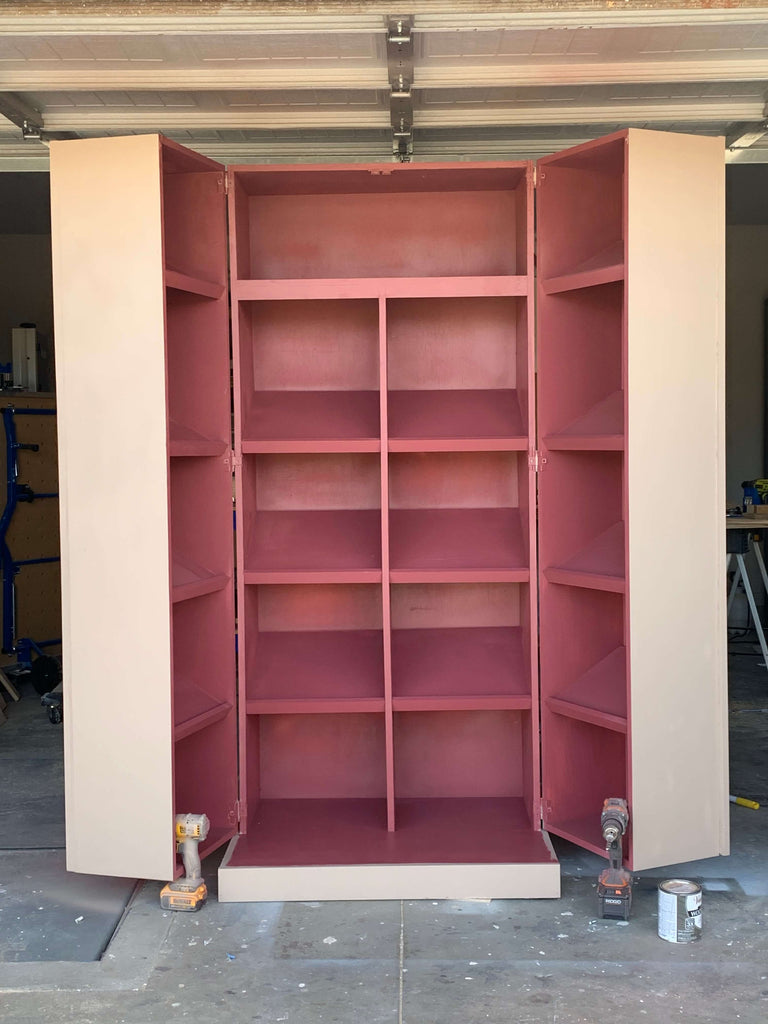
The center frame of your shoe cabinet should look something like the above when you are complete.
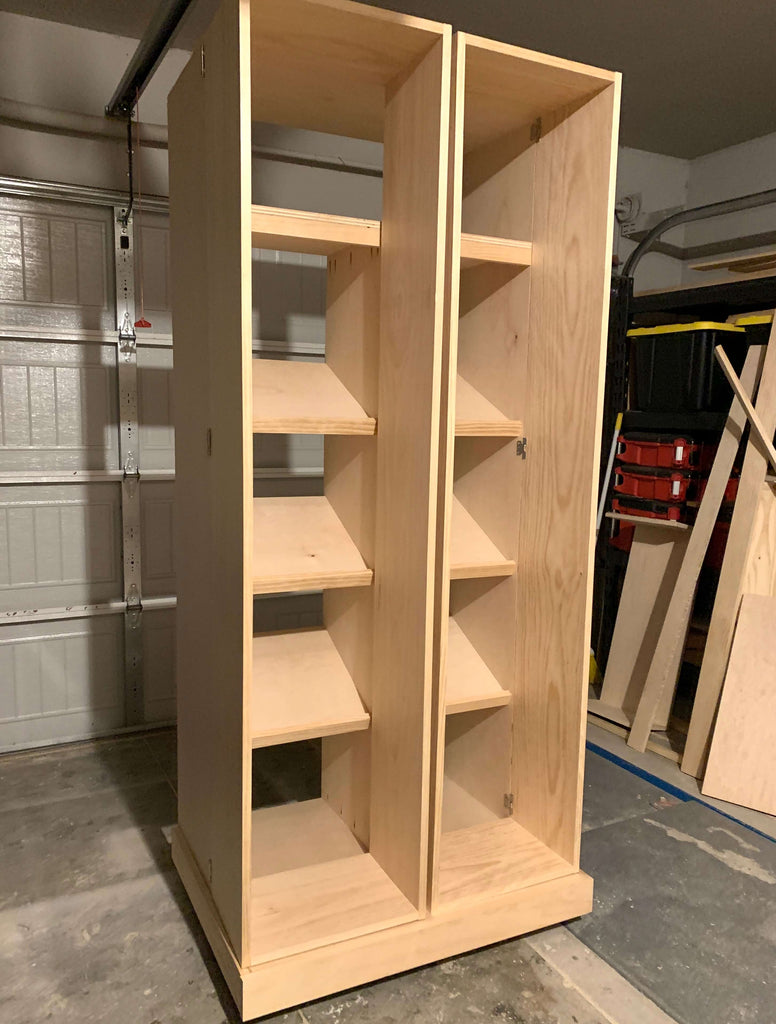
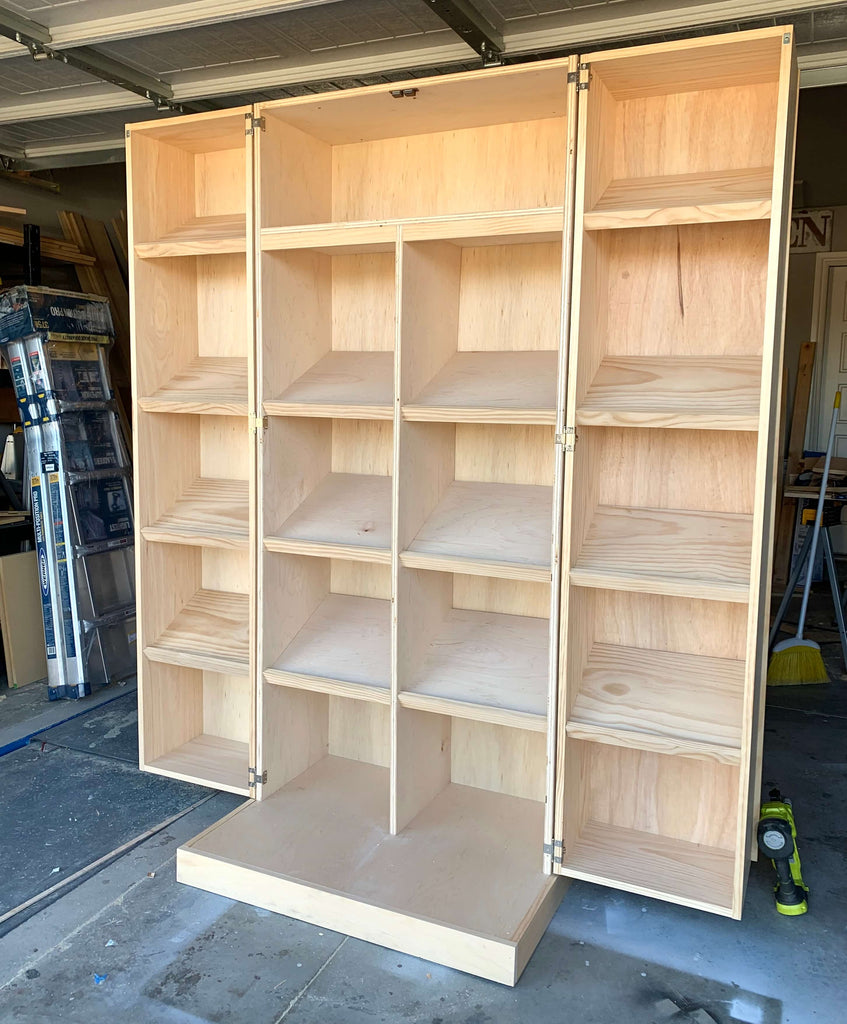
Step 3: Adding in the Shoe Shelving
With the center frame fully assembled, I began building the shoe shelving. The shoe shelves are made up of 3/4" plywood and 1x2 trim. I used pocket holes to secure the trim to the front of the 3/4" backing and used pocket holes on the bottom of the plywood sides to attach it to the shoe cabinet frame.

I decided to slant my shelves to give the shoe cabinet some character but feel free to make your shelves however you like.
I wear a size twelve, so I tested out how my shoe would look with this particular slant and it worked perfect for my size, but you may want a smaller slant or you may want your shelves to be straight. This part is totally up to you, just make sure you adjust your measurements as needed.
One thing to note about these shoe cabinet plans is that these slanted shelves weren't made to fully touch the shoe cabinet backing so there will be a small space behind the shelves once you're done.
If you don't want this space in the back, you will need to cut the back of the shelf at an angle so that it's completely flush with the backside. Again, this is the step where you can customize things how you want it.
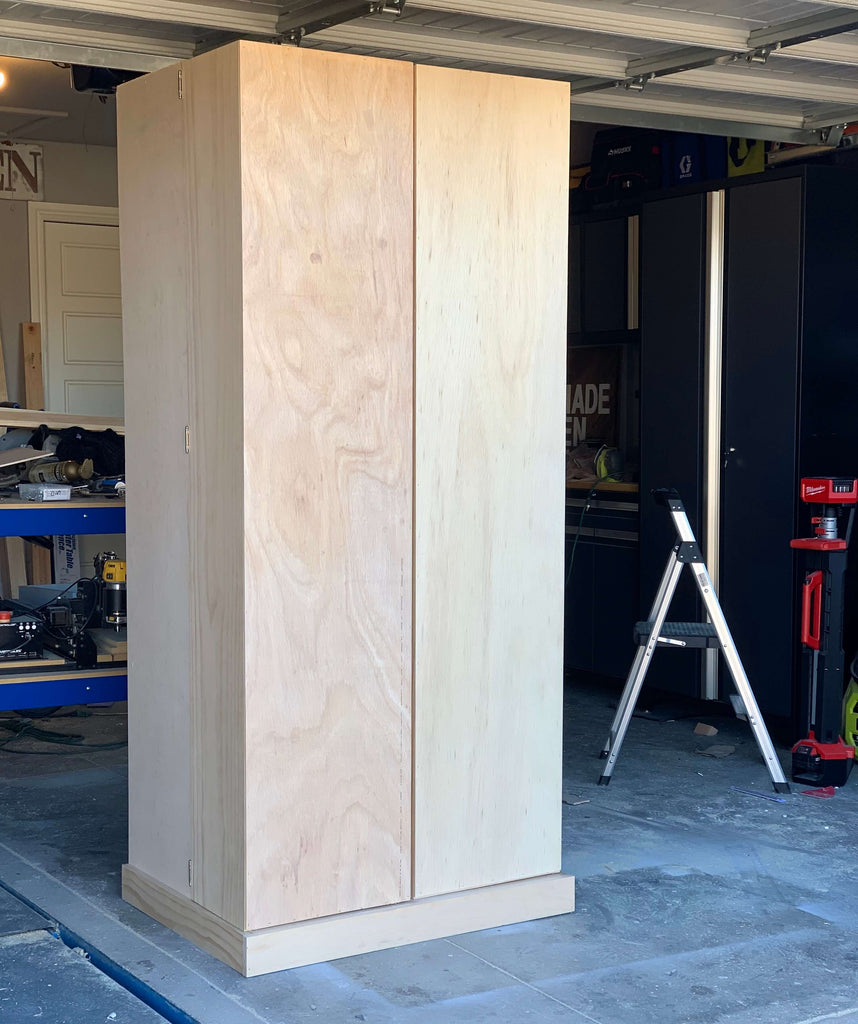
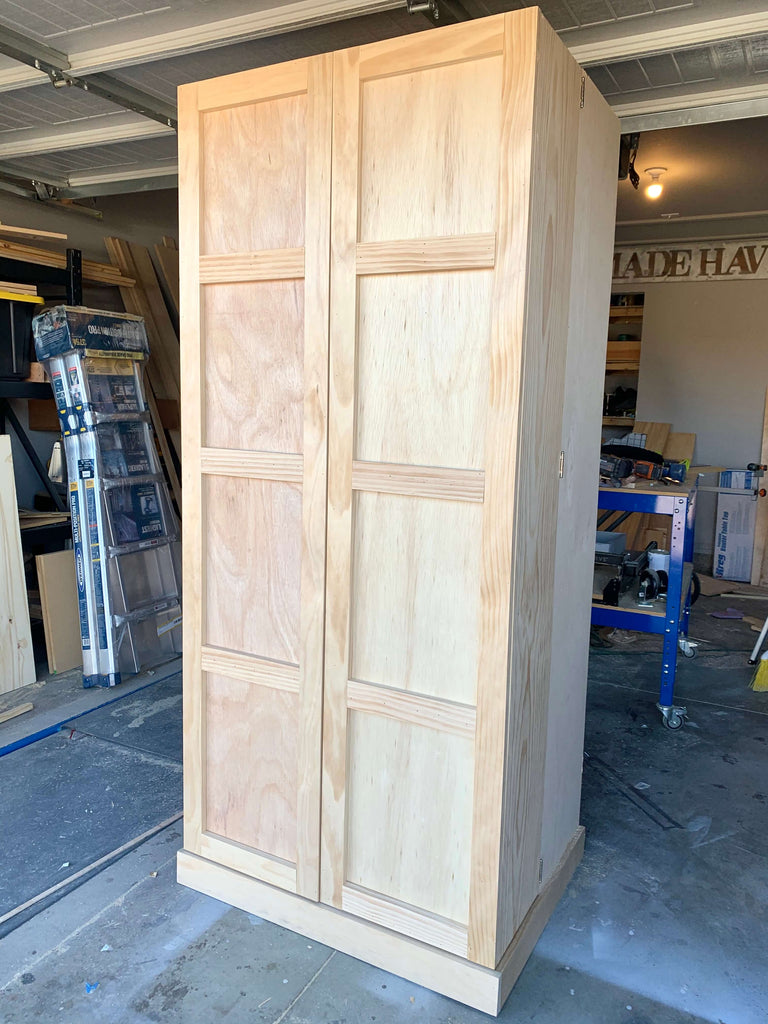
Step 4: Adding the Shoe Cabinet Doors
Now on to the fun part. Even though I built this shoe storage on my own, it will be incredibly helpful if you can find help with this part.
I first assembled the outer frame of the doors using pocket holes and pocket hole screws and then attached them using these hinges. You want to make sure you get hinges that allow the door to fully wrap around. I used 1x12 select pine boards to build the doors, but feel free to use plywood here to make your shoe cabinet cheaper.
I started off attaching the doors with three hinges, but I will be adding two more hinges later for extra support for 5 in total on each doors, just waiting on the delivery man for the last two.
One thing to note here is that it's very important to leave enough space between the bottom of the doors and the shoe cabinet center frame so that there is enough room for the doors to freely swing open.
I ran into a little snag with this because I didn't have enough space underneath, but no worries, I will be making the correct changes in the plans so you don't run into the same issue.
These particular hinges should allow your doors to swing fully open and closed with no issues. So be sure to test your doors out after you attach them. The doors may not want to stay completely closed, but we will be attaching a magnetic catch later to help them stay closed.
Step 5: Adding Shoe Shelving to Doors
Once the doors are attached and you feel like they are functioning properly, you can start adding in the shelving. I added in these shelves the same way I adding the shelves to the center frame. I tried to match up the shelving as much as I could to the center frame shelving so that everything looked even.
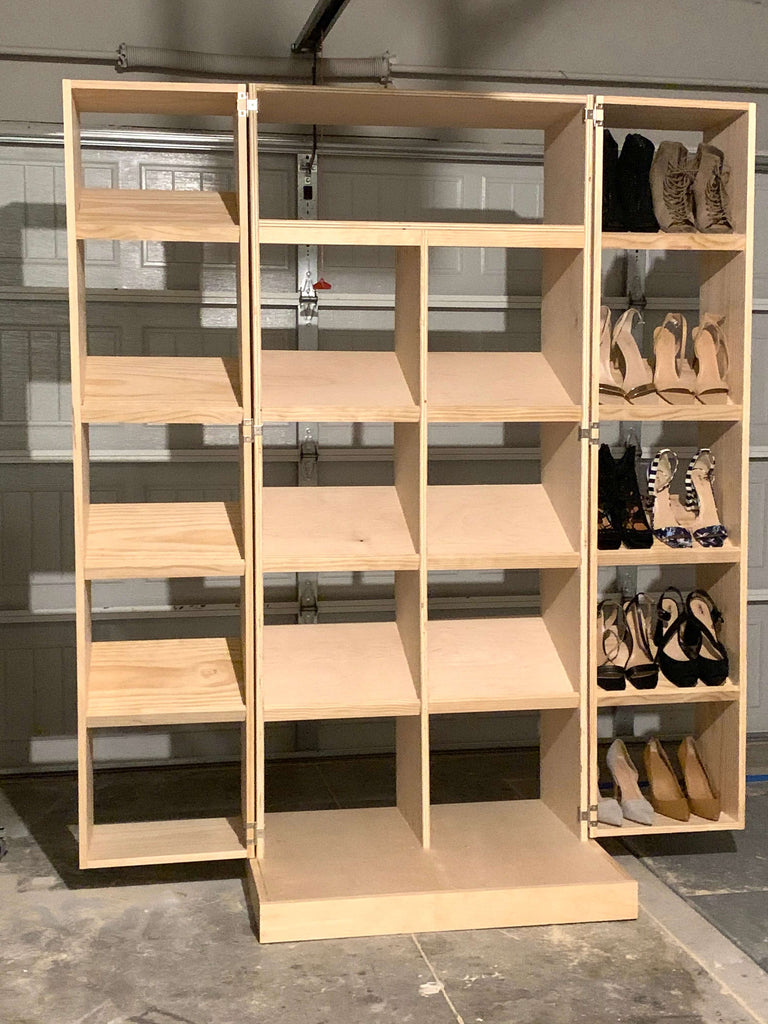
Once I started adding in the shelving, I noticed that the door dropped slightly, so it may not be a bad idea to add the shelving before you attach the door, but adding the shelves after helped me make sure all of the shelving lined up, so I will leave that up to you.
I added some of my shoes just to see if the weight would affect the door and it didn't seem to affect it much, but adding in the shelves definitely did. If you want to make any changes to the doors, this is where you want to make those changes.
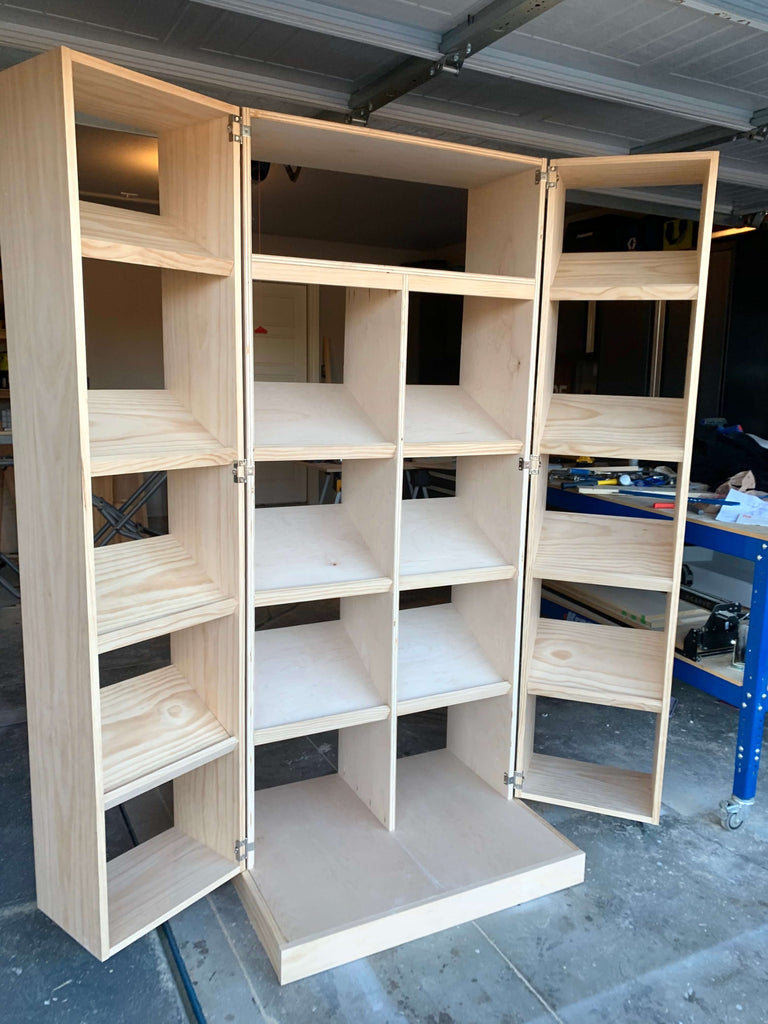
Your shoe cabinet should look a little something like the above and below picture when you are done adding in all of the shelving. This was a really fun build to make and it was exciting to see it take form.
Step 6: Adding Shoe Cabinet Door Fronts
This is the part where we can have a little more fun because we can customize the door fronts to look however we want. I first started off by attaching 1/4" sheets of plywood to the front of the doors using my staple gun. I also had these sheets cut down to size at The Home Depot and then made further cuts later using my Kreg Adaptive Cutting System.
In order to help keep the doors closed while attaching the door fronts, I added in the magnetic latch at the top of the center frame.
I leaned the shoe cabinet on my Kreg workbench to make it easier to apply the 1/4" backing. That workbench is a beast and I have loved using it ever since Kreg sent it to me.
You want to make sure that the 1/4" backing is the exact size of the door and that there is the same amount of space underneath the backing so that it doesn't snag underneath.
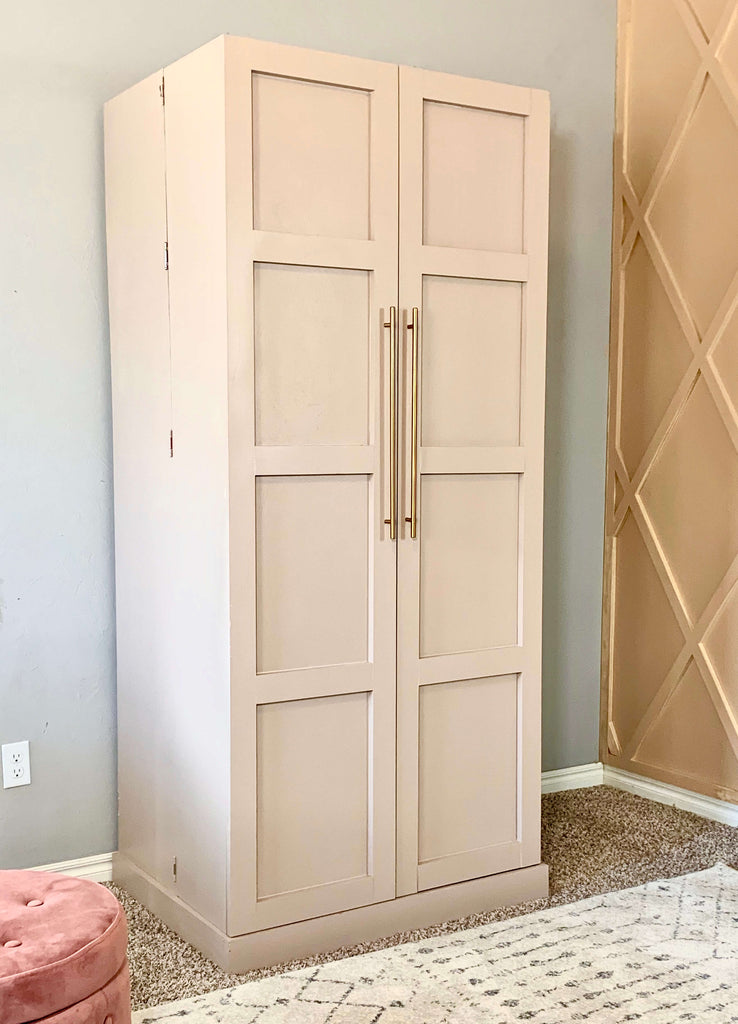
This shoe cabinet is giving me all the feels. After adding the 1/4" backing, I added on the outer trim. After going back and forth on designs, as you guys saw on my Instagram stories, I decided to go for a sleek door design.
I first assembled the outer square of the trim with help from my right angle clamp and then I attached it to the cabinet with wood glue and brad nails, making sure I nailed into the outer parts of the shoe cabinet into the 3/4" boards.
 Once the square trim was attached, I went back through and added the horizontal 1x3 trim pieces, also using wood glue and brad nails to attach.
I used 1x3 trim to create this design and attached the trim to the shoe cabinet with my brad nailer
Step 7: Add the Center Frame Backing
Once the door fronts were attached, I added the 1/4" backing to the shoe cabinet center frame using my staple gun and I was finally finished with the building process of the cabinet.
I am so excited with how well this build came out; this was probably one of the more satisfying builds that I've made to date. Now it's time to prep for paint!
Step 8: Prep for Paint
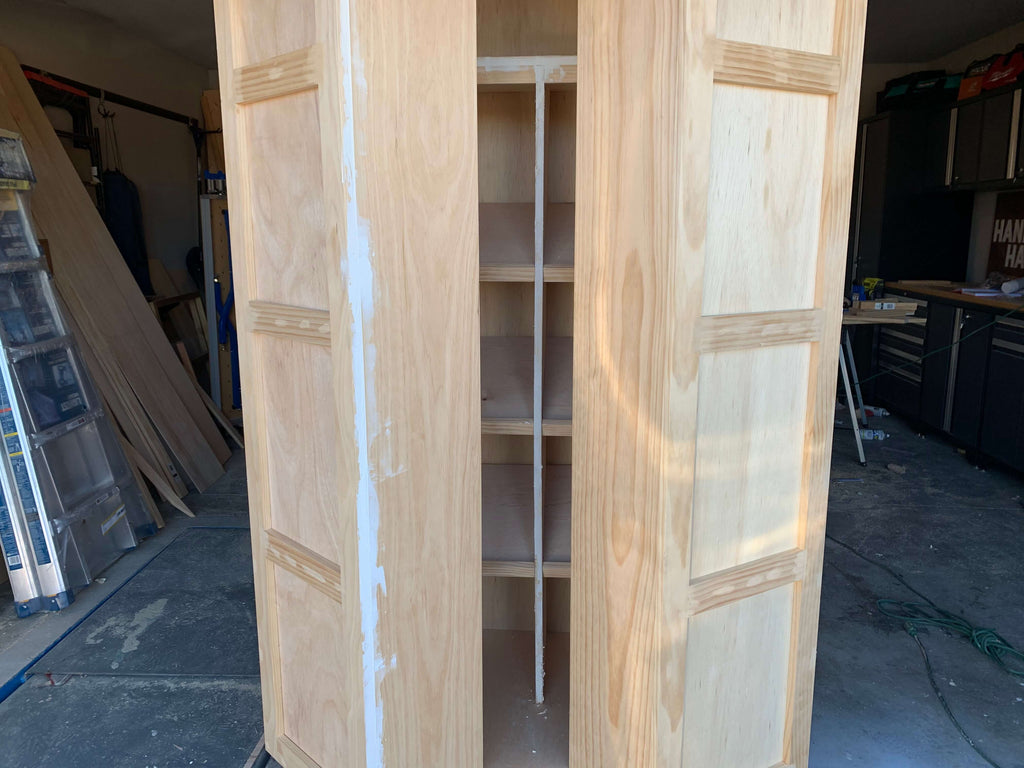
I first started off with filling all of the nail holes with wood filler I also, went around and spackled all of the 3/4" plywood edges and holes I created in the process on the cabinet and caulked the inside edges of the cabinet.
This was one of the main reasons I decided to use common boards instead of plywood on the doors, I knew it would give me a cleaner finish and require less prep work for paint.
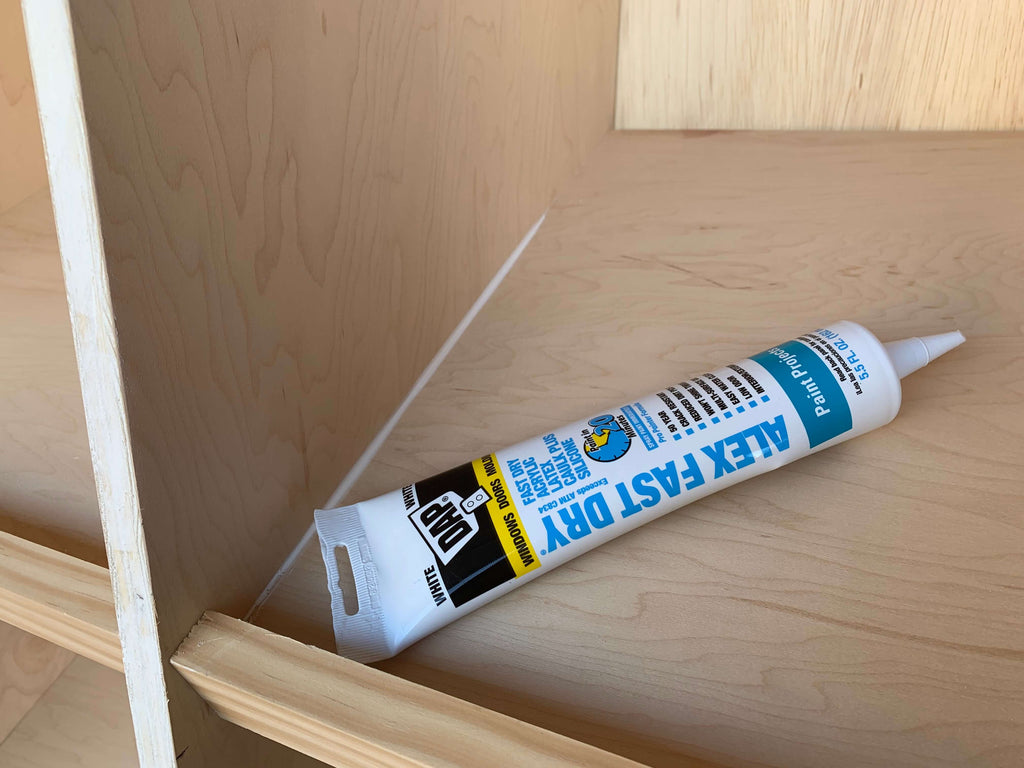
Once, the caulk and wood filler was all dry, I sanded the shoe cabinet down really well and then went back through and caulked all of the edges of the cabinet so that I would have really clean lines after painting. I made sure to do the caulking after the sanding because I didn't want dust particles to stick to the caulk.
Step 9: Paint the Shoe Cabinet
After sanding, I started to use my Home Right Paint Sprayer to paint the shoe cabinet. I have used several sprayers over time and I really love this one. Mainly because it's so easy to set up and clean up.
The cleanup process is my least favorite thing, but this sprayer makes it easy. It's also not as expensive as other competitive models.

I decided to share one of my other little tips today. As you can see, I use sandwich bags in the paint container to hold my paint. This allows the cleanup process to go a lot quicker when switching between colors.
They actually make paint liners like this but they are a lot more expensive then sandwich bags and you get about 10 for $5. Sandwich bags come at 150 for a $1, so I guess I'm being a cheap-o. Either way, it works just as great for me.

Originally, I thought maybe I could paint the whole cabinet pink bu tI quickly realized, that wouldn't be so great. So I decided to go for a two-tone look and I couldn't be more happier with how it turned out.
I usually like my furniture to be sleek and neat but I also have a very bold personality, so this cabinet was the perfect combination of sleek but fun.
I used about 3/4 of a gallon of paint for both colors. I did have to go back and use a roller for touch ups after spraying both colors. Unless you tape the cabinet, it's hard to not get paint on the other color when spraying so closely.
I did about three thin coats of each color and you're going to want to let the paint sit a little bit of time between coats to let it sink in, so you can see which spots need touch ups.
Step 10: Add Cabinet Pulls
The last step in the cabinet process was adding the cabinet pulls. I originally ordered some smaller pulls, but they were way too small for the cabinet, so I ordered some 17" gold cabinet pulls.
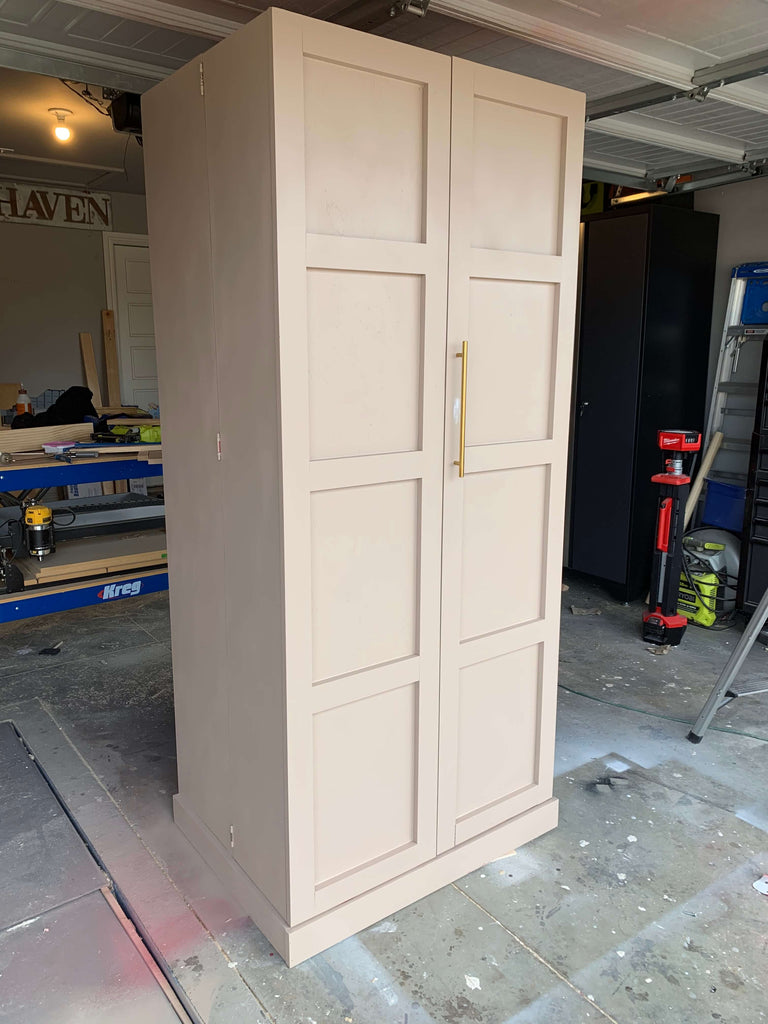
Originally, I was going to pace the pulls in the center of the cabinet, but it was really difficult to attach the pulls with the shoe shelves in place, so I had to make sure I placed the pulls in spots where it would be easy to screw in the screw from the back.
Shoe Cabinet Cost Breakdown
I'm sure everyone is wondering how much this baby cost. I spent roughly $550 on this project, which I know isn't super inexpensive but it was surely worth it.
I did utilize select pine for the shoe cabinet doors, which drove up the price quit a bit, so if you're looking for a way to cut costs, be sure to use plywood and regular pine for the cabinet doors and you can save a little over $150.
Welp, that about wraps it up for the shoe cabinet, I hope these shoe cabinet plans help you create your own cool shoe oasis, but before we go let's take another look at how great the cabinet came out!.
 Be sure to check out my Instagram stories under my highlight "shoe cabinet" to see my process of putting this shoe cabinet together and some helpful tips.
I couldn't be happier with the end result, I hope you guys enjoyed it too.
As always, thanks for reading guys.