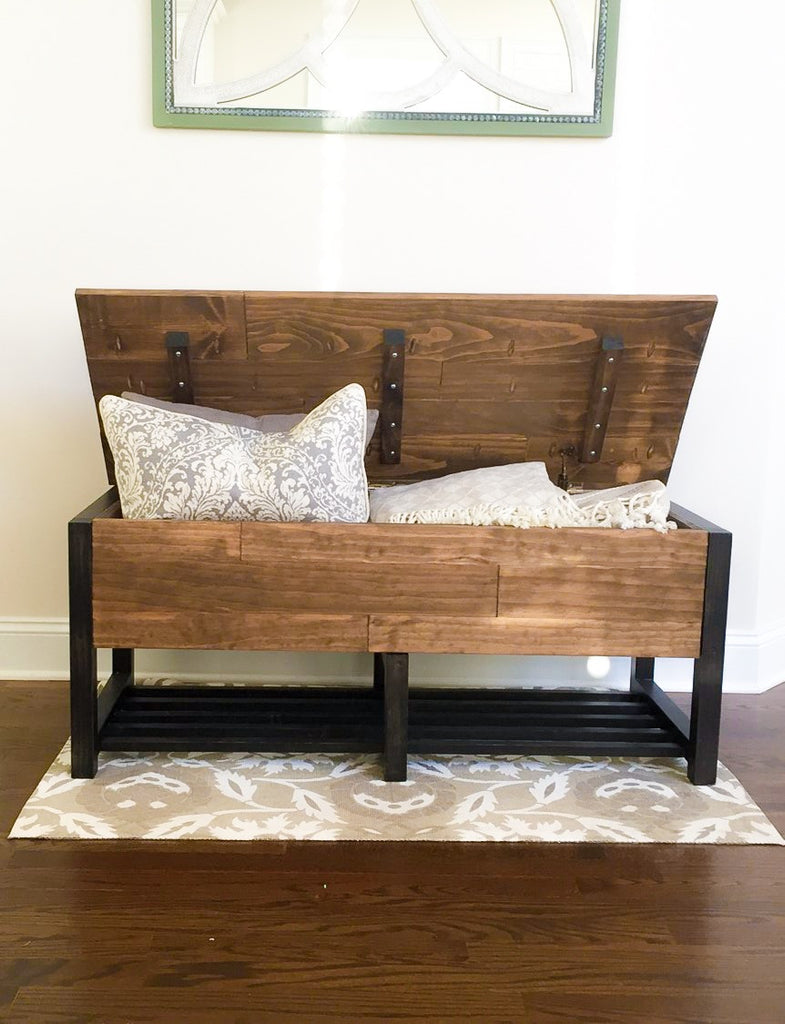
An entryway storage chest you can't help but to love.
This DIY entryway storage chest is the perfect project for your home entryway. The hidden storage gives it the perfect balance of functionality and decorative. Giving entryway storage a whole new name.
 I love partnering with fellow builders and today I'm presenting a build by Mandi of HoneySuckle & Sawdust!. She built this cool entryway storage chest and I'm happy to present the 3D plans for her awesome entryway storage chest! Be sure to check her out on Instagram and Facebook!
(There are some affiliate links in this post, meaning I get a small commission if you purchase through these links, at no cost to you. Click Here to read my full disclosure)
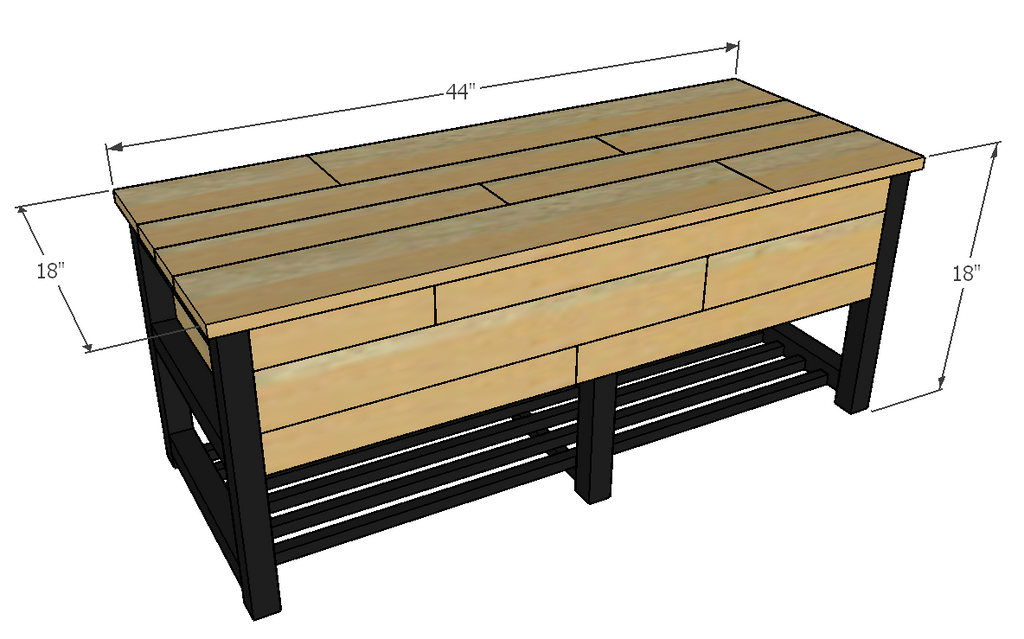
Dimensions
Materials List
3 - 1x1 @ 8 ft
2 - 1x3 @ 8ft
2 - 1x4 @ 8ft
1 - 1x6 @ 8ft
3 - 2x2s @8ft
1- 3/4" sheet of plywood
2 - 1x2 @ 8ft (optional replacement for 1x1s_ see note below)
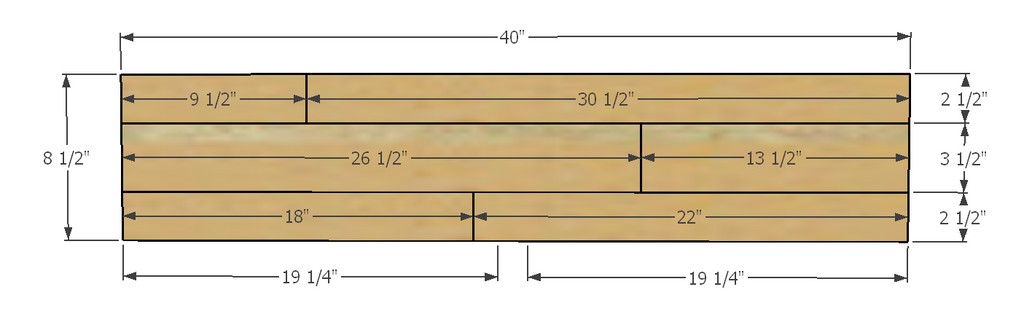
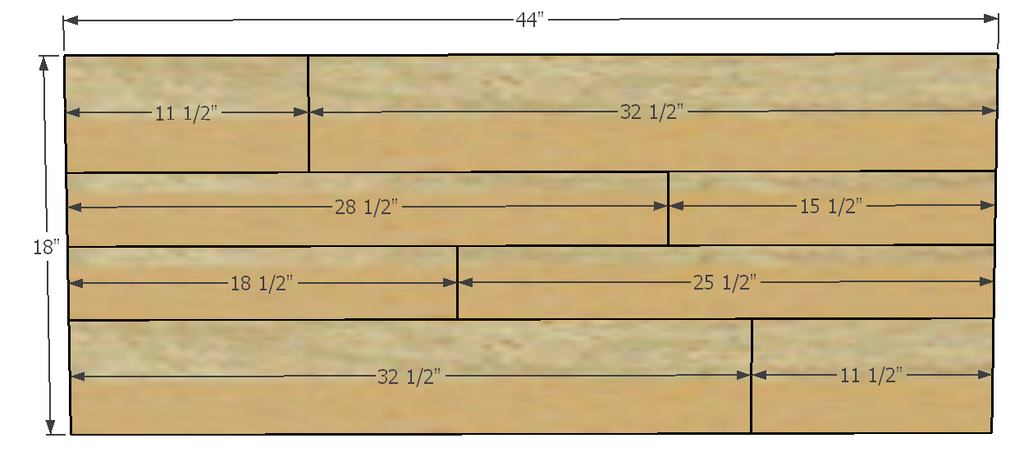
Cut List
See Detailed Printable Plans for Cut List
Step 1: Attach the side chest pieces together using a Kreg Jig K4 Pocket Hole System on a 3/4" setting, with 1 1/4" Pocket Hole Screws to attach along with wood glue. Make two of these for both sides of the entryway storage chest.
Note: Use biscuit joinery or add 1/4" plywood to inside to hide pocket holes.
Step 2: Attach the end plywood sheets to the side pieces using a Kreg Jig K4 Pocket Hole System on a 3/4" setting, with 1 1/4" Pocket Hole Screws to attach along with wood glue. Add 4 2x2s (7 3/4) to four corners for support. Pocket holes should be made on the inside of both sides of the plywood sheet.
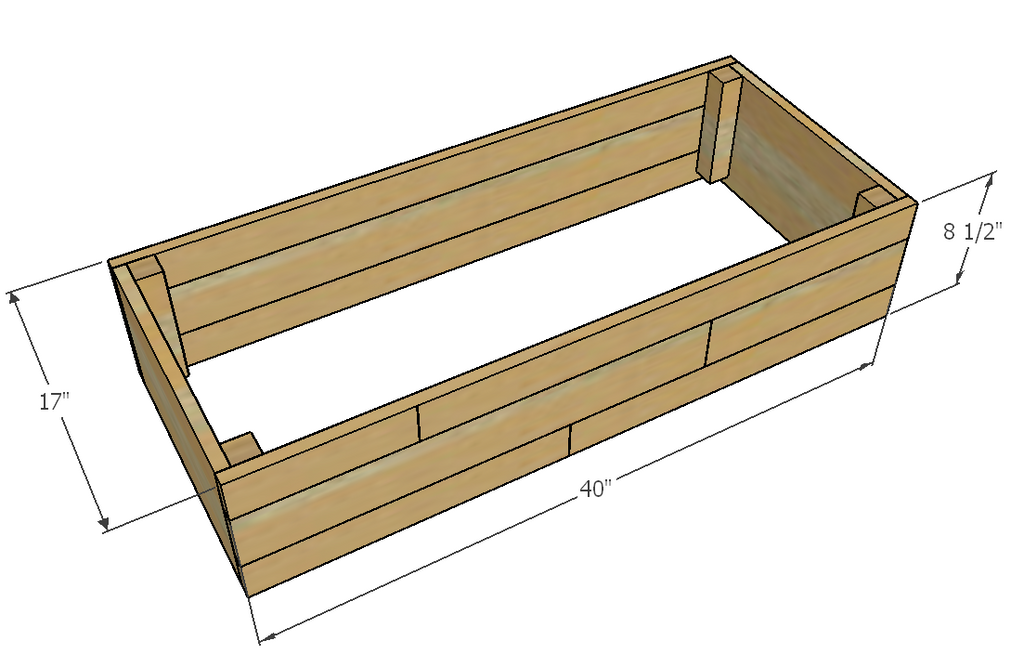
Step 3: Attach the bottom plywood sheet to the assembled chest using a Kreg Jig K4 Pocket Hole System on a 3/4" setting, with 1 1/4" Pocket Hole Screws to attach along with wood glue. Pocket holes should be made on the bottom of the plywood sheet.

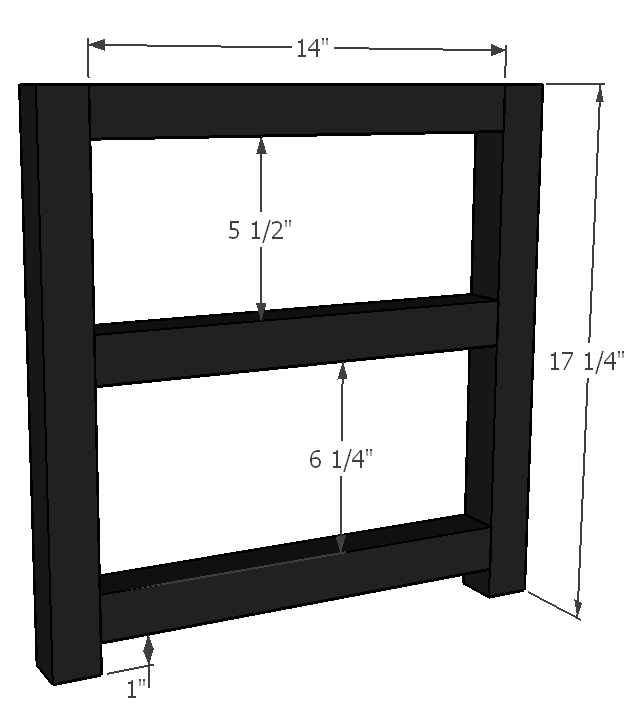
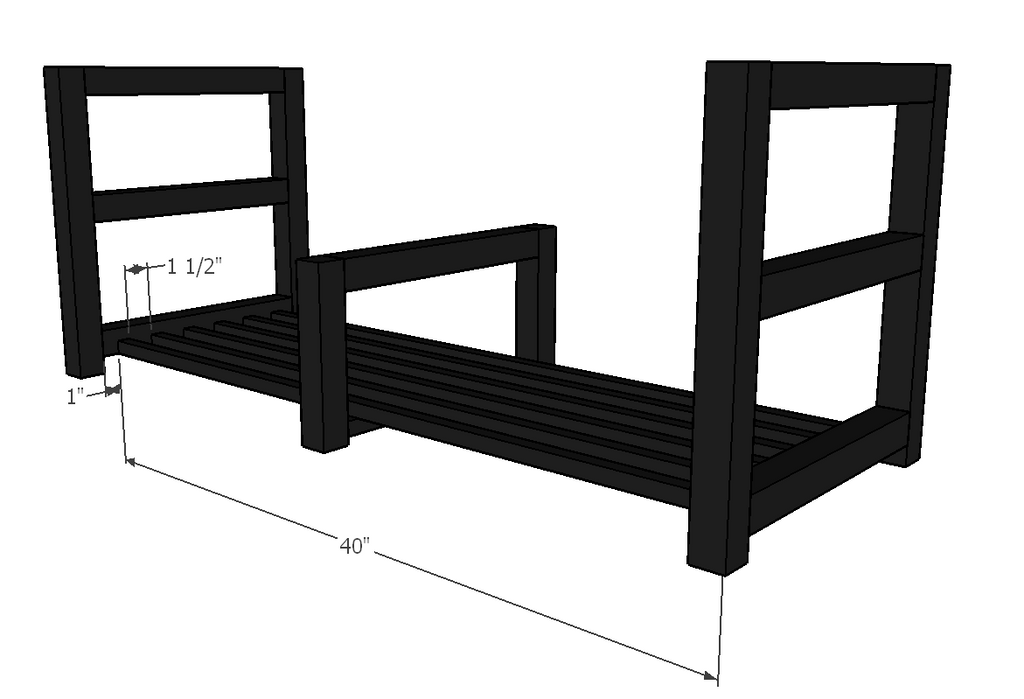
Step 4: Assemble the two end pieces by attaching the 2x2 side leg braces to the middle leg braces using a Kreg Jig K4 Pocket Hole System. On the 2x2 uses a 1 1/2" setting with 2 1/2" Pocket Hole Screws on the 1x1 use a 3/4" setting, with 1 1/4" Pocket Hole Screws to attach along with wood glue.
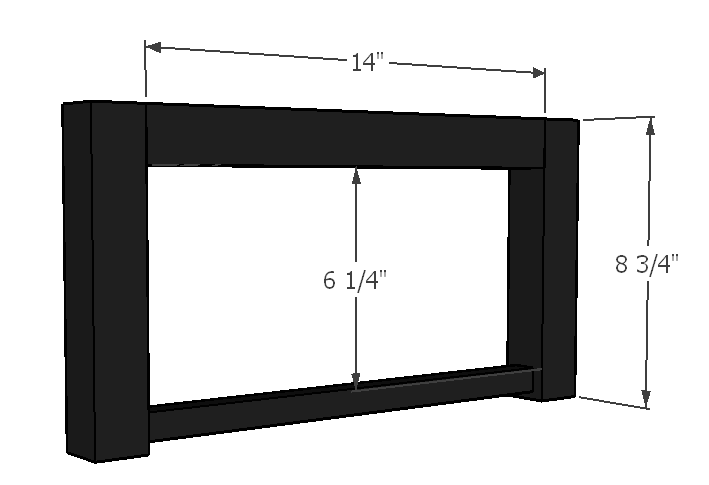
Step 5: Assemble the middle piece by attaching the 2x2 side leg braces to the 1x1 middle leg braces using a Kreg Jig K4 Pocket Hole System. On the 2x2 uses a 1 1/2" setting with 2 1/2" Pocket Hole Screws on the 1x1 use a 3/4" setting, with 1 1/4" Pocket Hole Screws to attach along with wood glue.
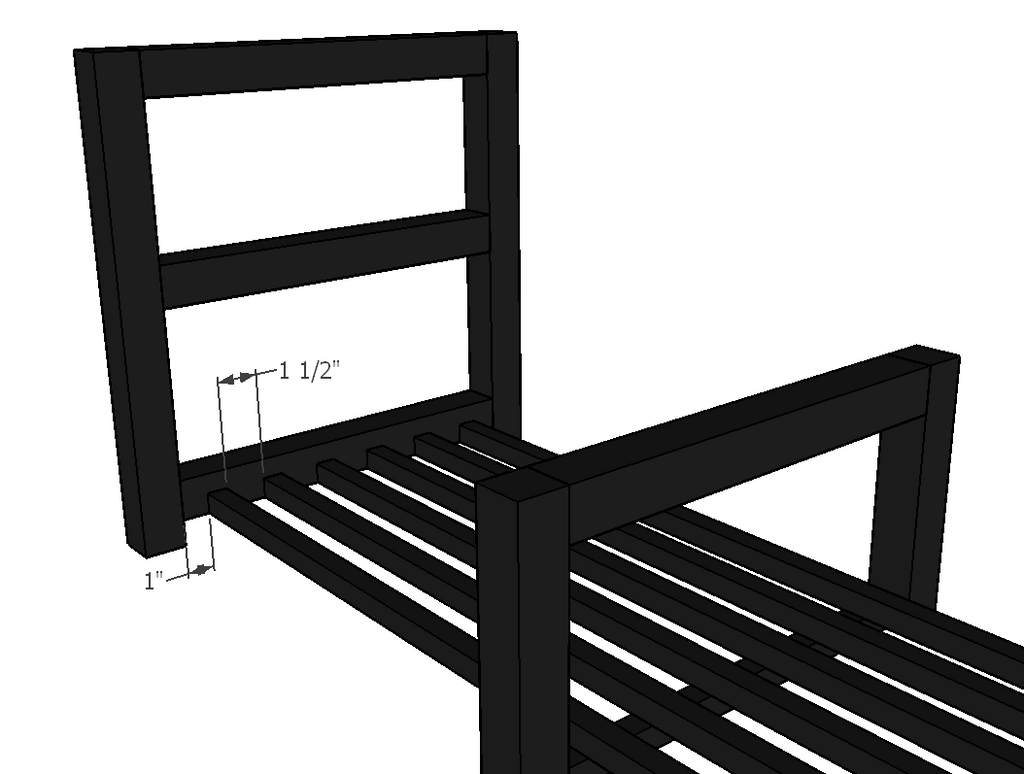
Step 6: Connect the 3 pieces together by attaching the 1x1 (40") support pieces to the two end pieces using a Kreg Jig K4 Pocket Hole System on a 3/4" setting, with 1 1/4" Pocket Hole Screws to attach along with wood glue.. Then screw in (40") support pieces into the middle support leg.
Step 7: Attach the bottom half of the chest to the assembled box with 2" wood screws.
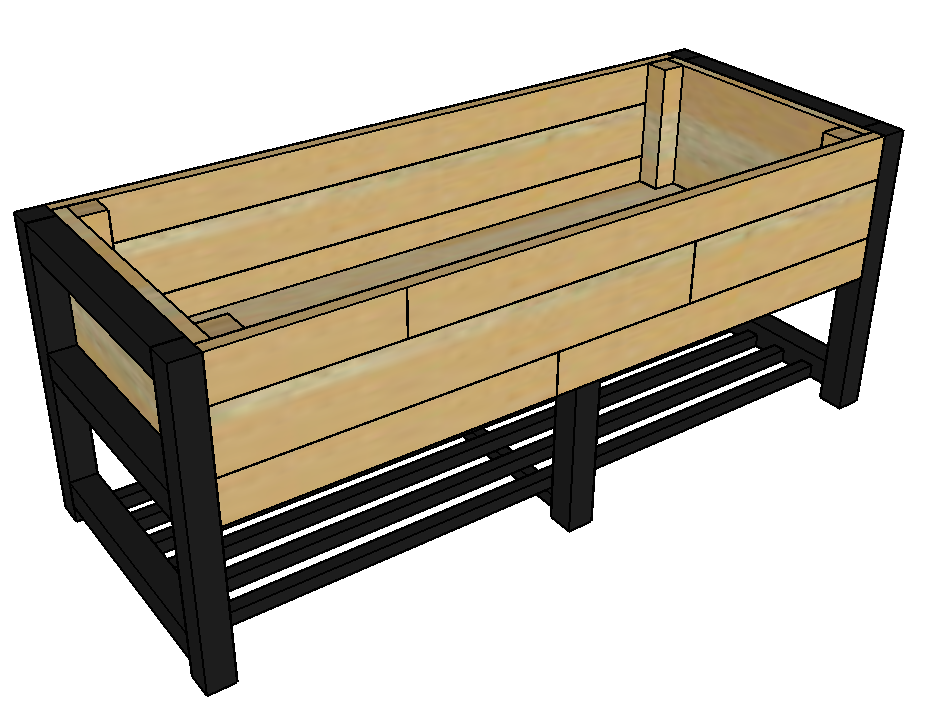
Step 8: Assemble the storage chest top using a Kreg Jig K4 Pocket Hole System on a 3/4" setting, with 1 1/4" Pocket Hole Screws to attach along with wood glue, add lid support hinges underneath and then attach to the storage chest by attaching piano hinges to the back.

Let's take another look at Mandi's awesome build!