
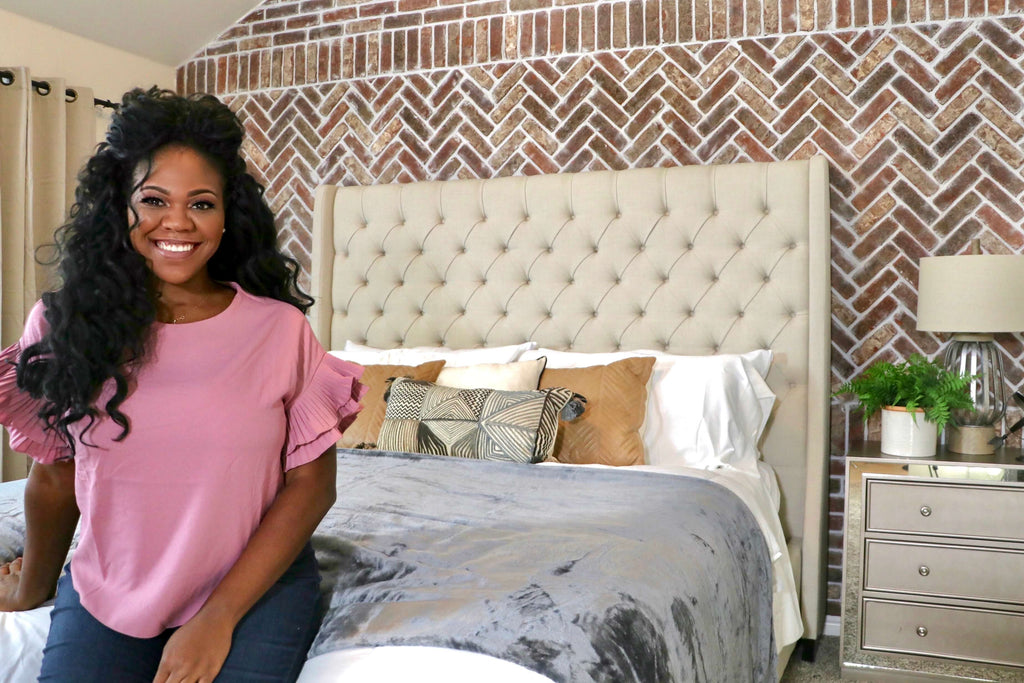
"Who knew a thin brick wall could look so good."
This thin brick wall project has been quite the popular project and I am so glad to finally be sharing all of the details with you. I am so happy to be partnering up with my friends from Old Mill Brick to bring you this tutorial.
Today I will be sharing all of the fun details on how I completed this thin brick wall project; and I promise you won't be disappointed.
 The crazy thing about this project is that I have never worked with brick before! Can you believe it? If you are wondering if you can tackle a project like this, you absolutely can, and I am sharing all of the details to get you started. I originally saw this idea on Remington Avenue's Instagram and knew I had to have it, so let's get into it!
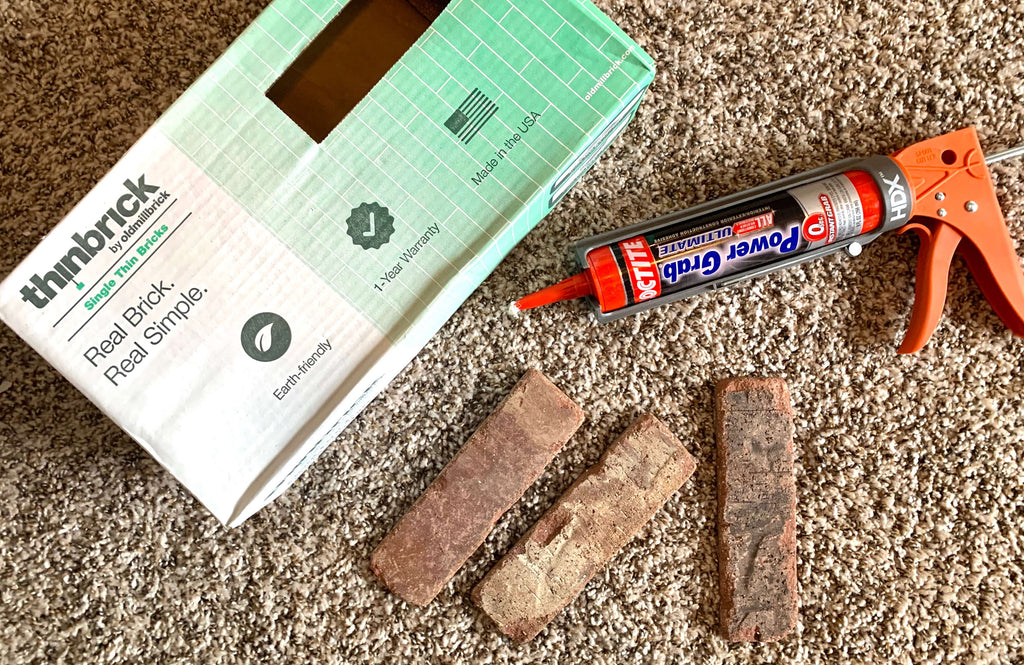
Materiels
- Old Mill Brick - Thin Brick Singles (Castle Gate)
- 3/8" dowel
- Loctite Adhesive
- Sanded Grout - Bright White
- Sanded Grout - Platinum
- 3/8" Trowel
- Bristle Brush
- Grout Bag
Tools Used
If you are more of a visual person, check out this how-to video on my installation process.
Phase 1: Applying the Thin Brick Wall
Step 1: Taking Wall Measurements
Before getting started, I first had to take wall measurements to figure out how many materials I would need to tackle this brick wall project. My wall was 13' high and 10' wide, which is pretty big.
 I used this sq. ft calculator to calculate my total square footage. You enter in the width and length of your wall and it will tell you exactly how many square footage of materiel you will need. I ended up getting 19 boxes of the thin brick singles, just to have a little extra for mistakes, but only used 18 of the boxes.
Once I figured out the sq ft. , I also calculated I would need around 12 packs of Loctite Adhesive for this wall project and my math was perfect; I used all 12 tubes. Normally, you would see people using mortar for brick, but I am always one who likes to work harder and not smarter, so I decided to use this adhesive for an alternative. It's a lot less messier, cures faster, and holds the brick to the wall very well.
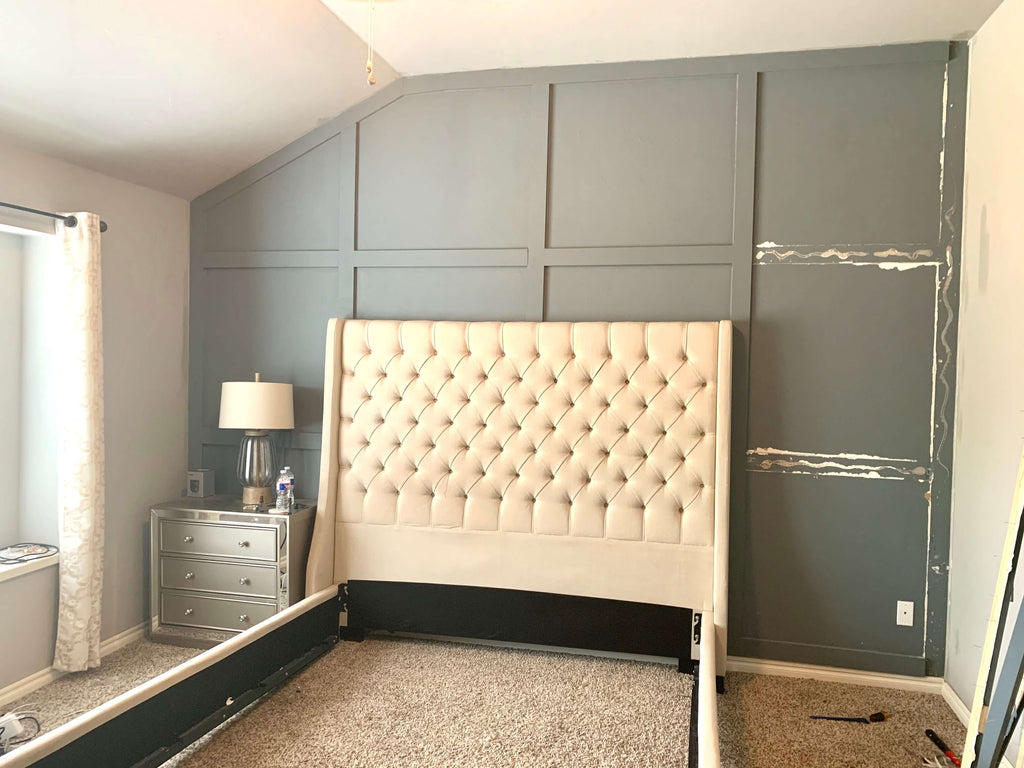
Step 2: Prepping the Wall for the Thin Brick
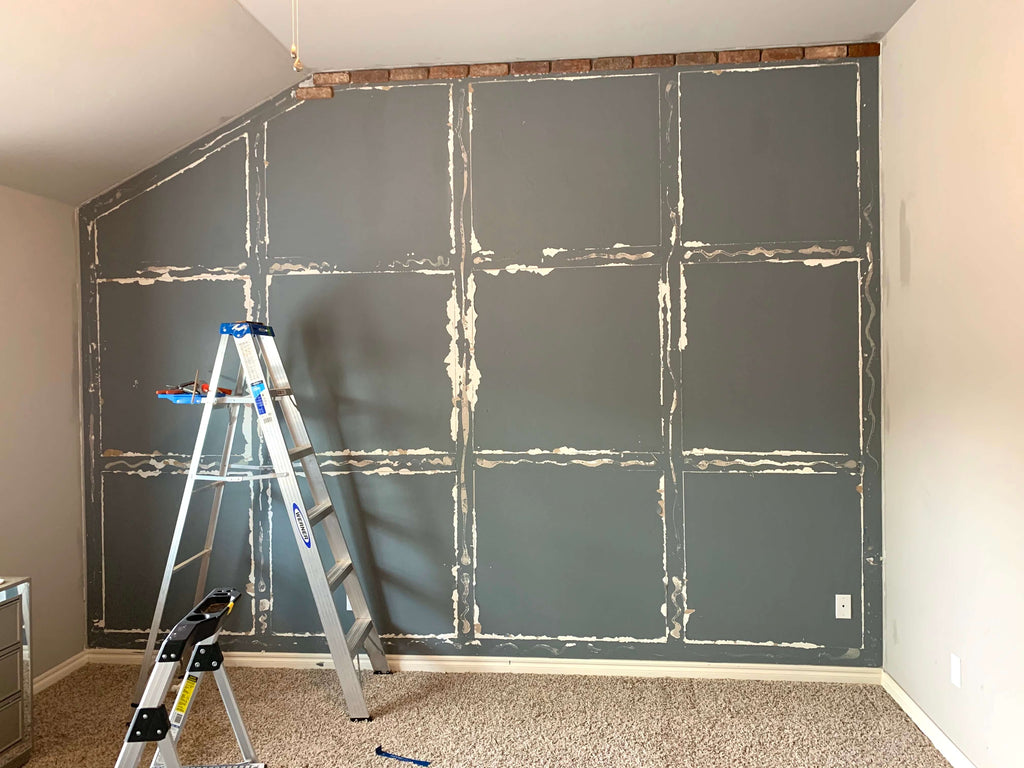
I had to do a little more wall prepping than normal because I had wall paneling on my bedroom wall. I added this paneling to my bedroom wall but I decided to go for something with a little more pizzaz. Let's take a look at the before.

A few people were bummed about me taking down my wall paneling, but I think after they saw the brick, they were just fine with me taking it down. Once I took the wall paneling down, I wiped the whole wall down with a damp rag and then went back and wiped off all of the dust with a dry cloth to make sure the wall was completely free of debris.
Once the wall was all dry, it was time to start applying the bricks; the fun part of the project.
Step 3: Applying Brick to the Wall
I begin applying the thin bricks on the wall and started at the top of the wall and worked my way down. It really doesn't matter where you start with these thin bricks because they aren't building on top of each other. I personally wanted to start at the top so if there were any imperfections or unevenness, it would fall at the bottom.
I decided to start applying the full singles first and then go back afterwards to cut the angles on the bricks. I decided to go with various designs for the wall, so I started laying the bricks straight across first. The first line is probably the most important because it needs to be 100% straight. My bedroom wall isn't all the way square so it was important to make sure the first line was completely level. 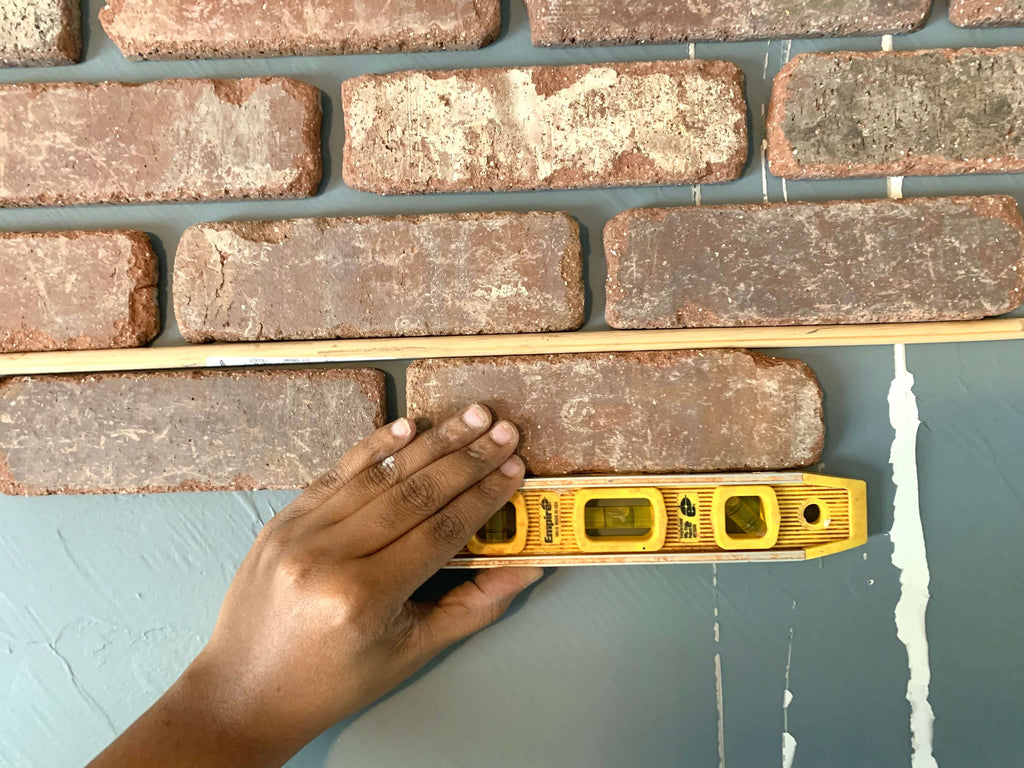
I placed nine rows of bricks on the top of the wall to get me started and used a 3/8" dowel to make sure my spacing was correct. The dowel will definitely be your friend, so have a couple handy. I also used a level to make sure each brick was level. This can seem a little meticulous but I wanted to make sure my bricks looked as flawless as possible. If your first line is straight, the lines below should go on level, but some bricks were still off, so I checked each brick; I know , Im crazy.

I applied a decent amount of adhesive to each brick to make sure it sticks well. I was so impressed with this stuff, it is super strong. As soon as you place the brick on the wall it sticks. You do get around 10 minutes to move it freely before it starts to cure. Make sure you play close attention to your bricks once you place them; I found that after about 30 minutes, there's no budging them. I also found that it was better to apply adhesive to a bunch of bricks and then apply them to the wall rather than doing them one by one.
Even though this was a one man job, if you can find help, use it. Don't be like me, I would have appreciated a helping hand with this portion.
Now take it from me, if you are doing this project alone or if you have help, you will want to get this battery powered caulk gun. I used a regular caulk gun for the first nine rows and man were my arms on fire! The battery powered gun made it go a lot faster and put less strain on my arm.
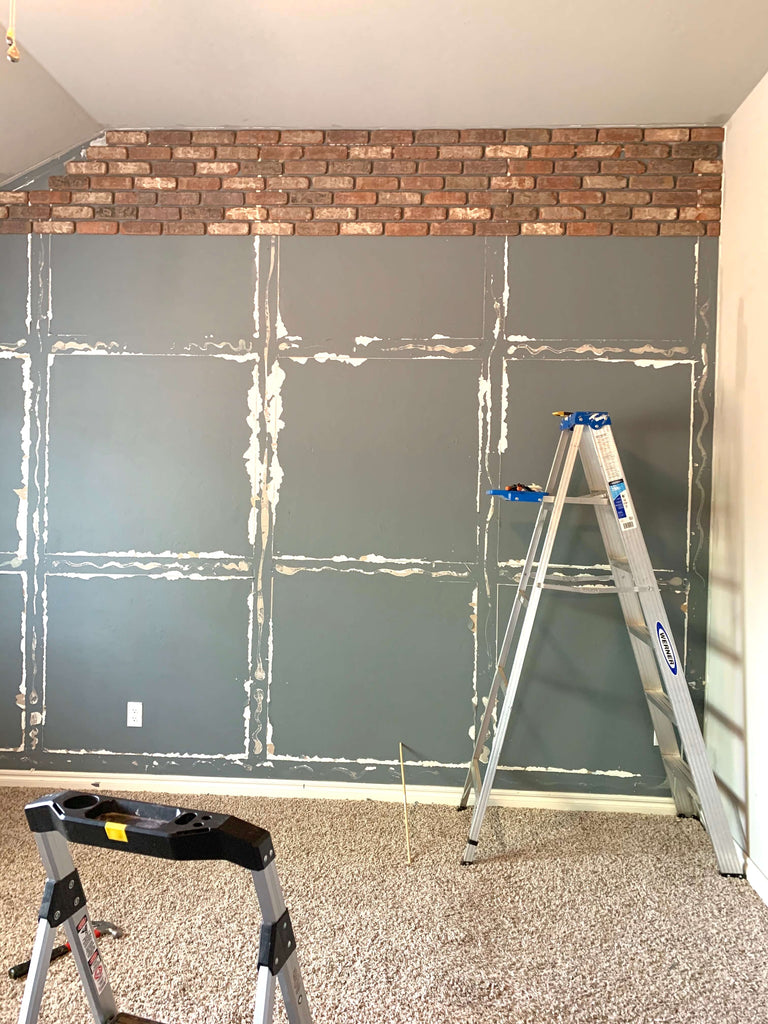
After I laid out the nine rows of singles, I switched over to the vertical pattern. This was probably the easiest part of the design. I laid these out pretty quickly and then on to the herringbone.
In order to make sure the herringbone pattern was straight, I used a laser level to make sure the bricks were laid down evenly and on square. This helped the middle portion go a lot faster.
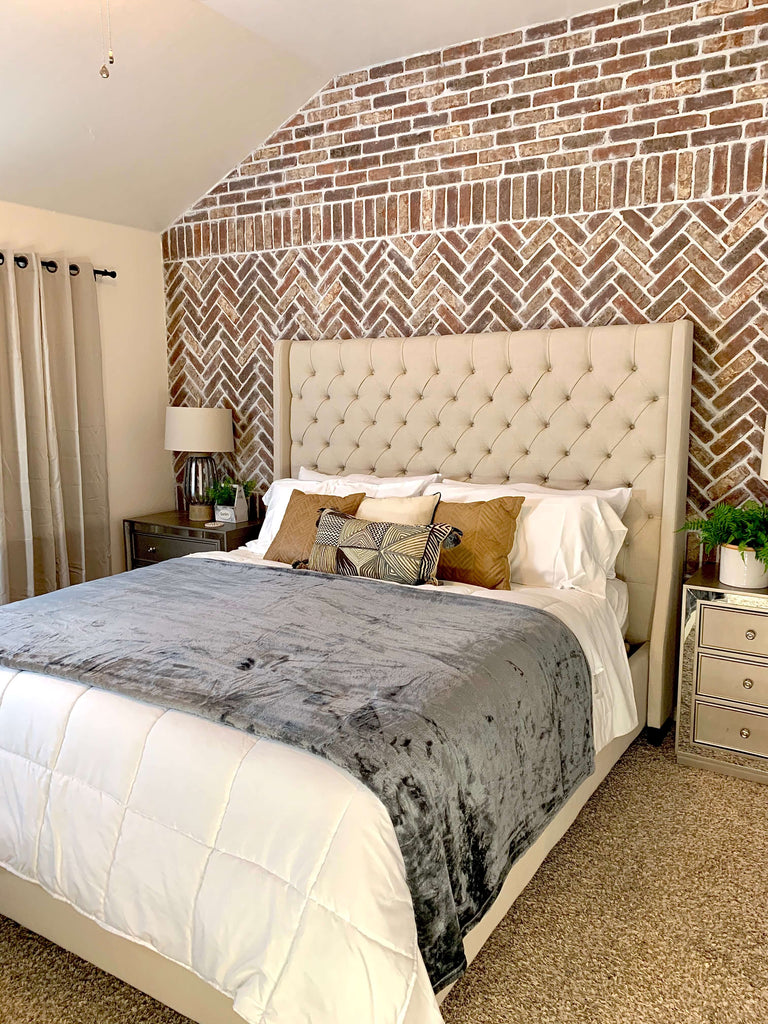
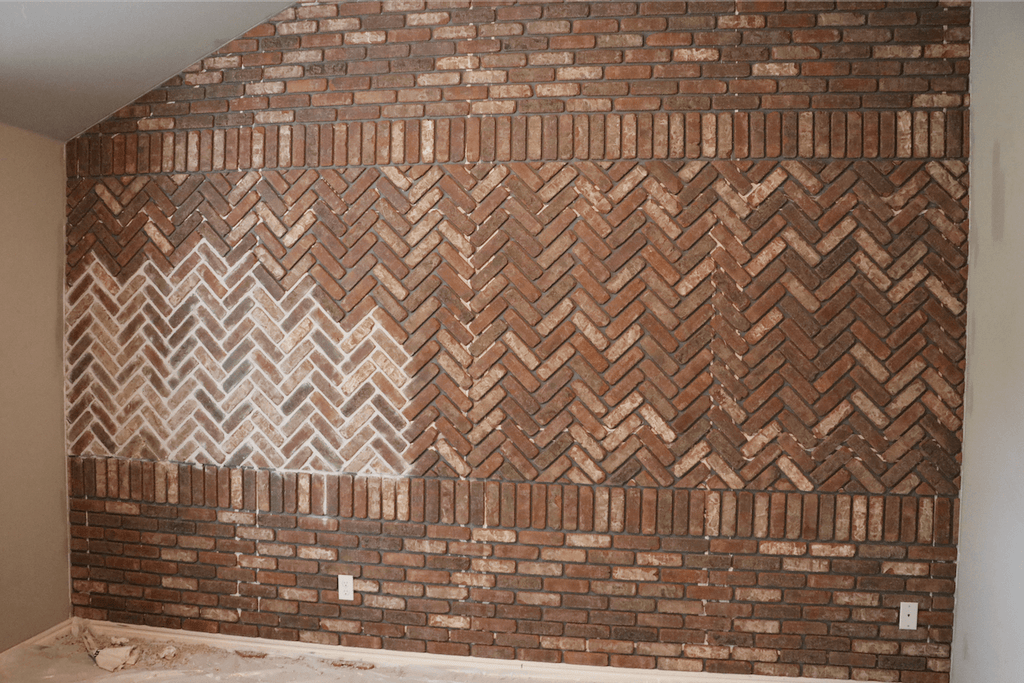
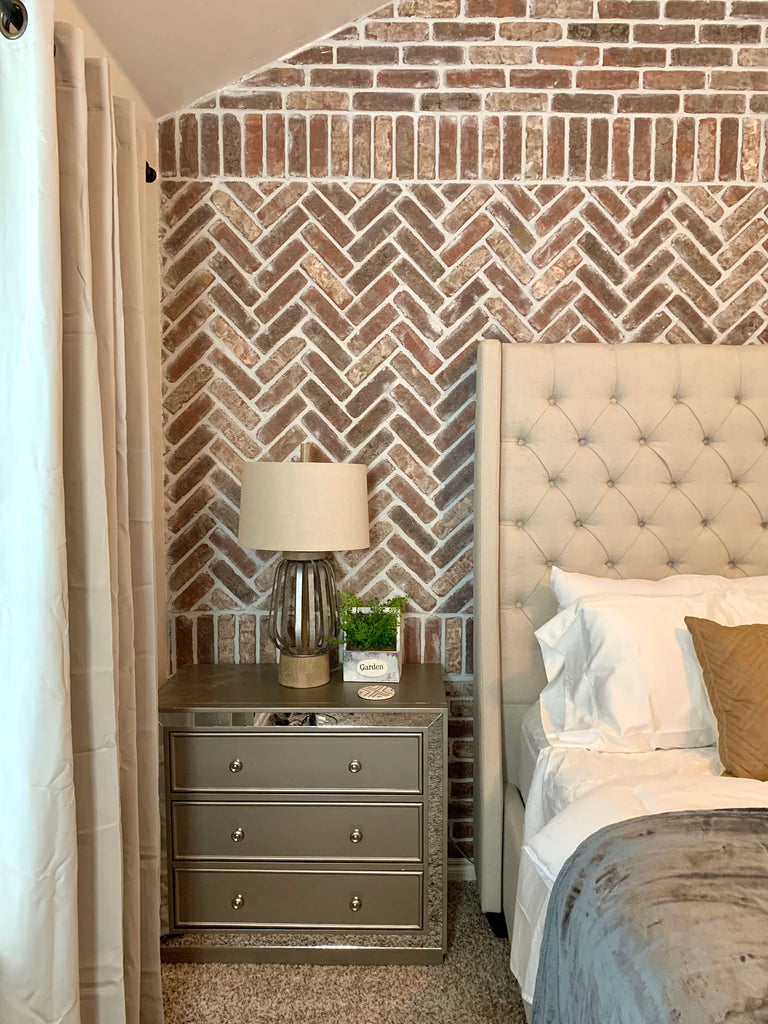
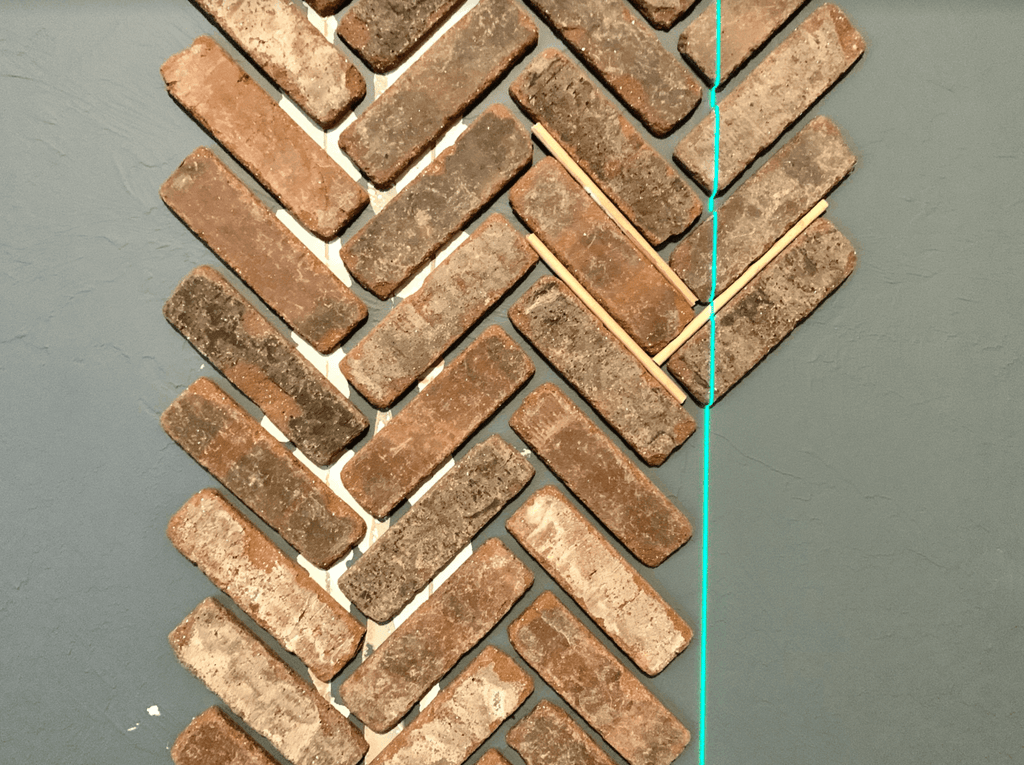 It was interesting to see the pattern once the bricks were all done. I was amazed at how good it looked.
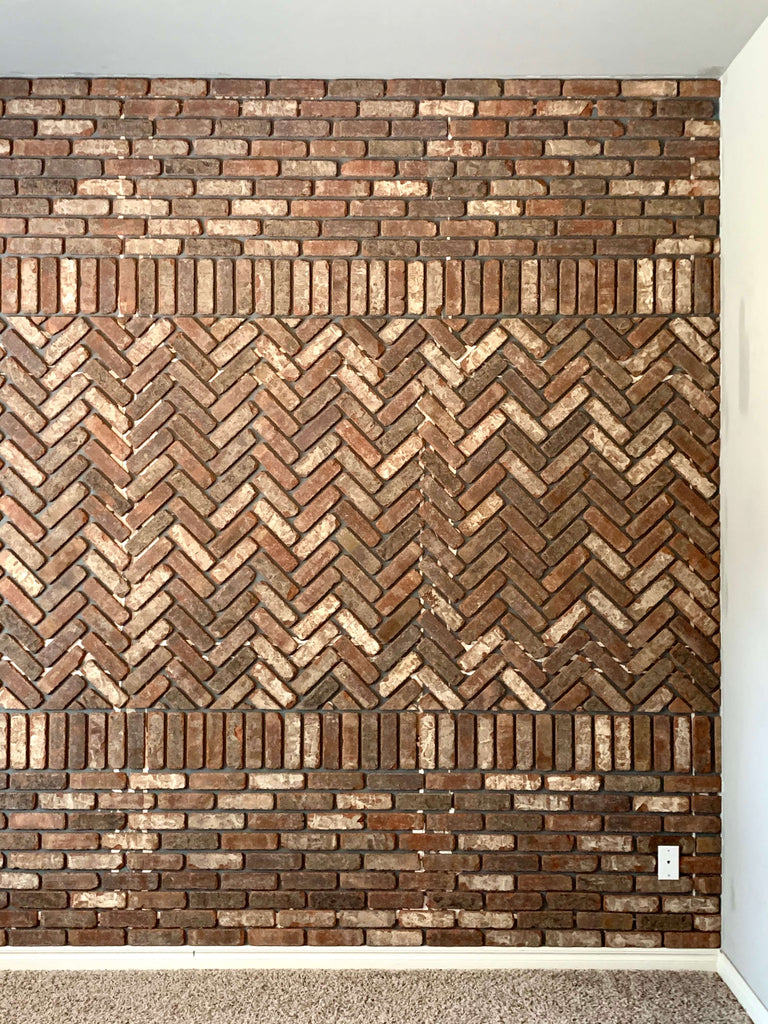
Let's check out the wall pattern once its done.
Phase 2: Grouting the Thin Brick
Now on to the fun part; the grout. This was my first time grouting, so I was both excited and anxious to see how it would turn out, but I wasn't pleasantly surprised how easy it was. so if you are wondering how to grout thin brick, you're in luck.
Originally, I tried the Antique White, but discovered very quickly that the antique white wasn't the color I was looking for. I decided to try to try two other colors and they both weren't right. After trying those two, I decided to just mix them together and BOOM, I had found the right color for my wall. I did a 50/50 mix of the sanded grout in Bright White and Platinum.
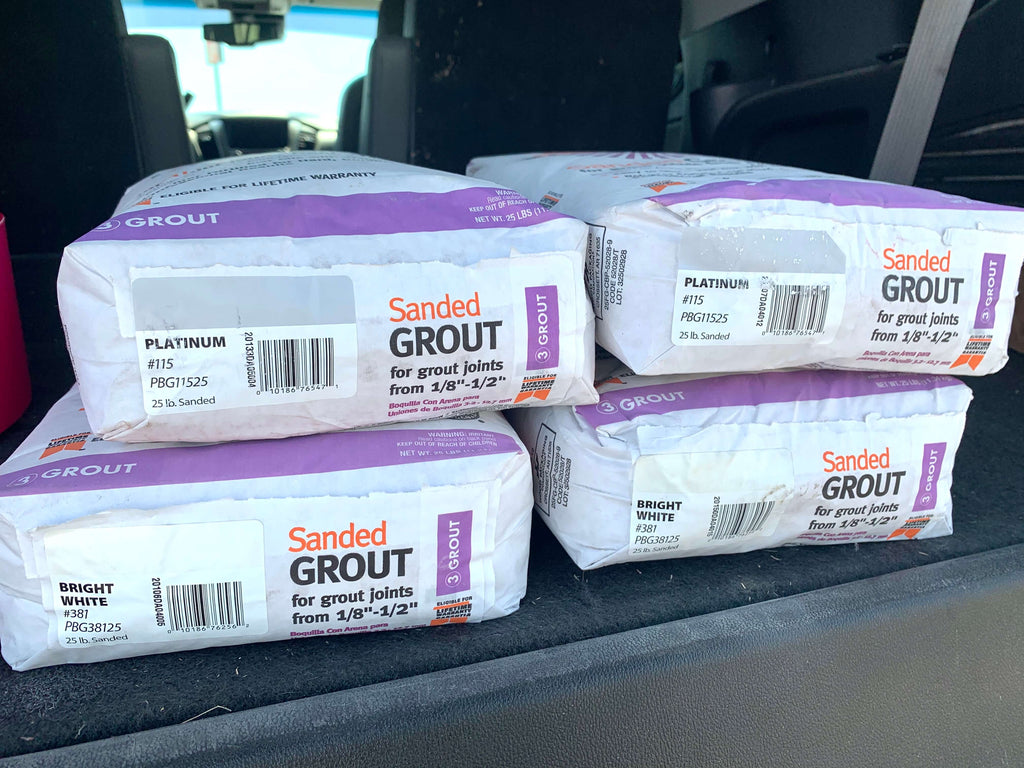
I ended up using four bags for my project; it was just enough, like scrapping the bag enough. I used around six cups of grout each mix to make sure I didn't waste any grout.
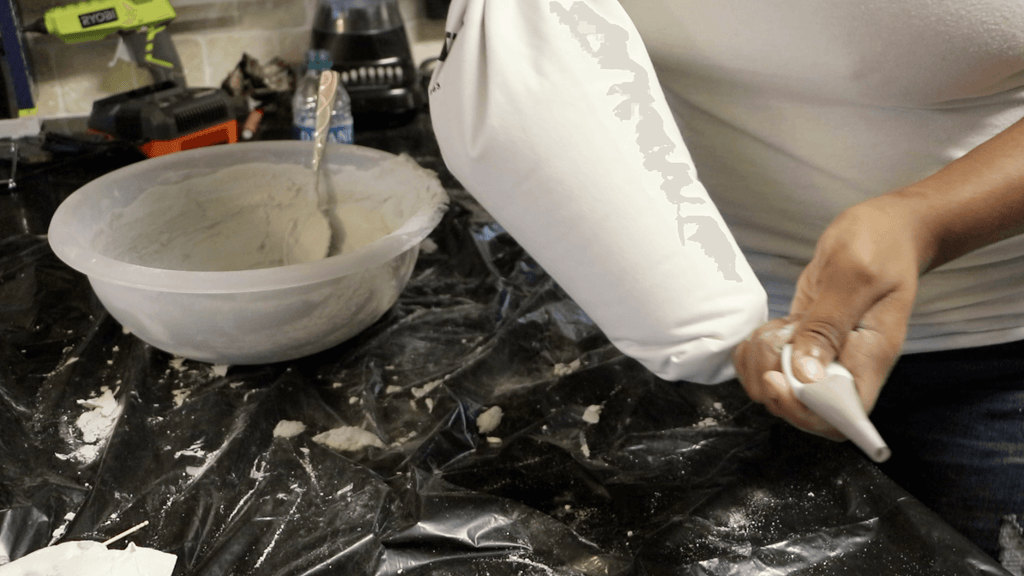
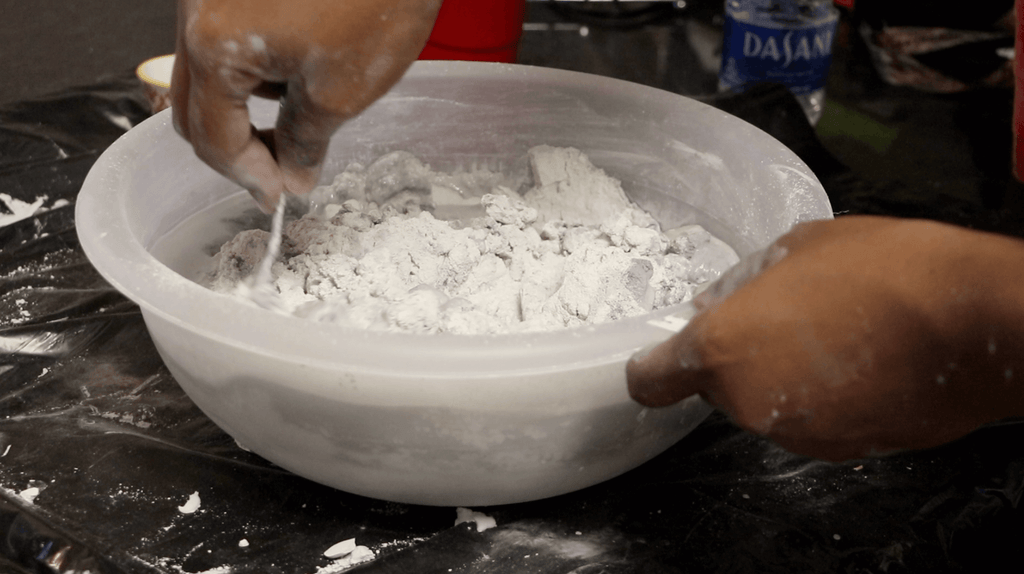 I used a small bowl and spoon to mix the grout to the consistency that I wanted and then poured it and then let it sit for 10 minutes. After the ten minutes, I poured it into the grout bag and started to grout the brick. I really loved this grout bag because it was re-usable. I washed it out after every use and it was the perfect size to get my sections knocked out.
 Grouting the brick was fairly easy, but time consuming. If you have extra hands available, you will definitely want to use them. One thing you want to make sure you do before grouting is laying down plastic. It will get super messy, so you don't want to mess up your floors.
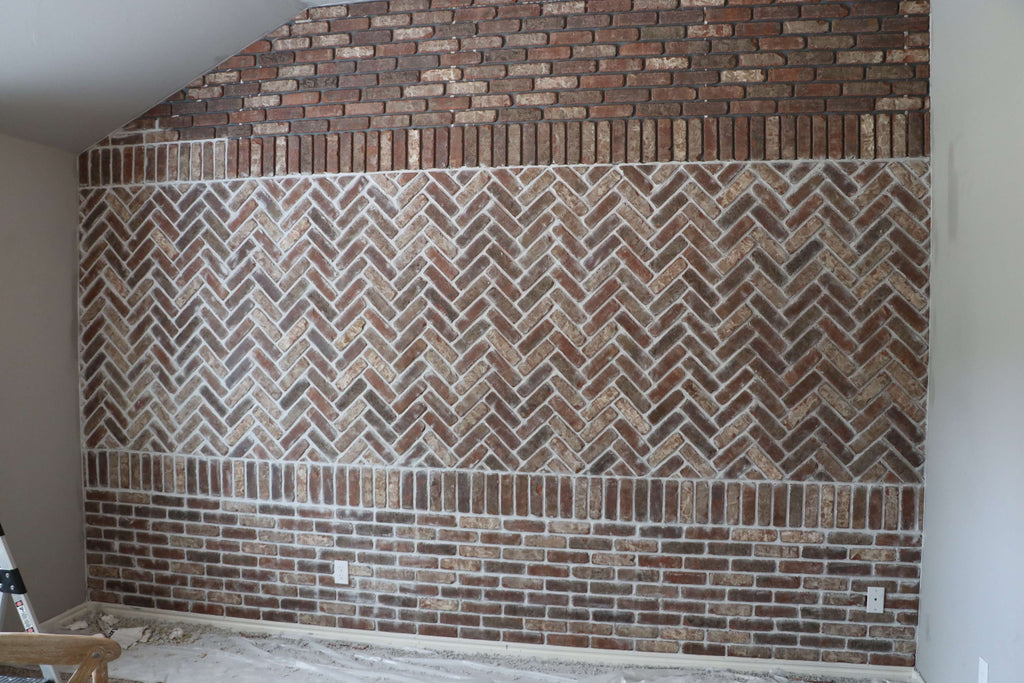
 Once I applied the grout, I used a trowel and a bristle brush to flatten and set the grout into place. It's amazing how the grout really brought out the brick.
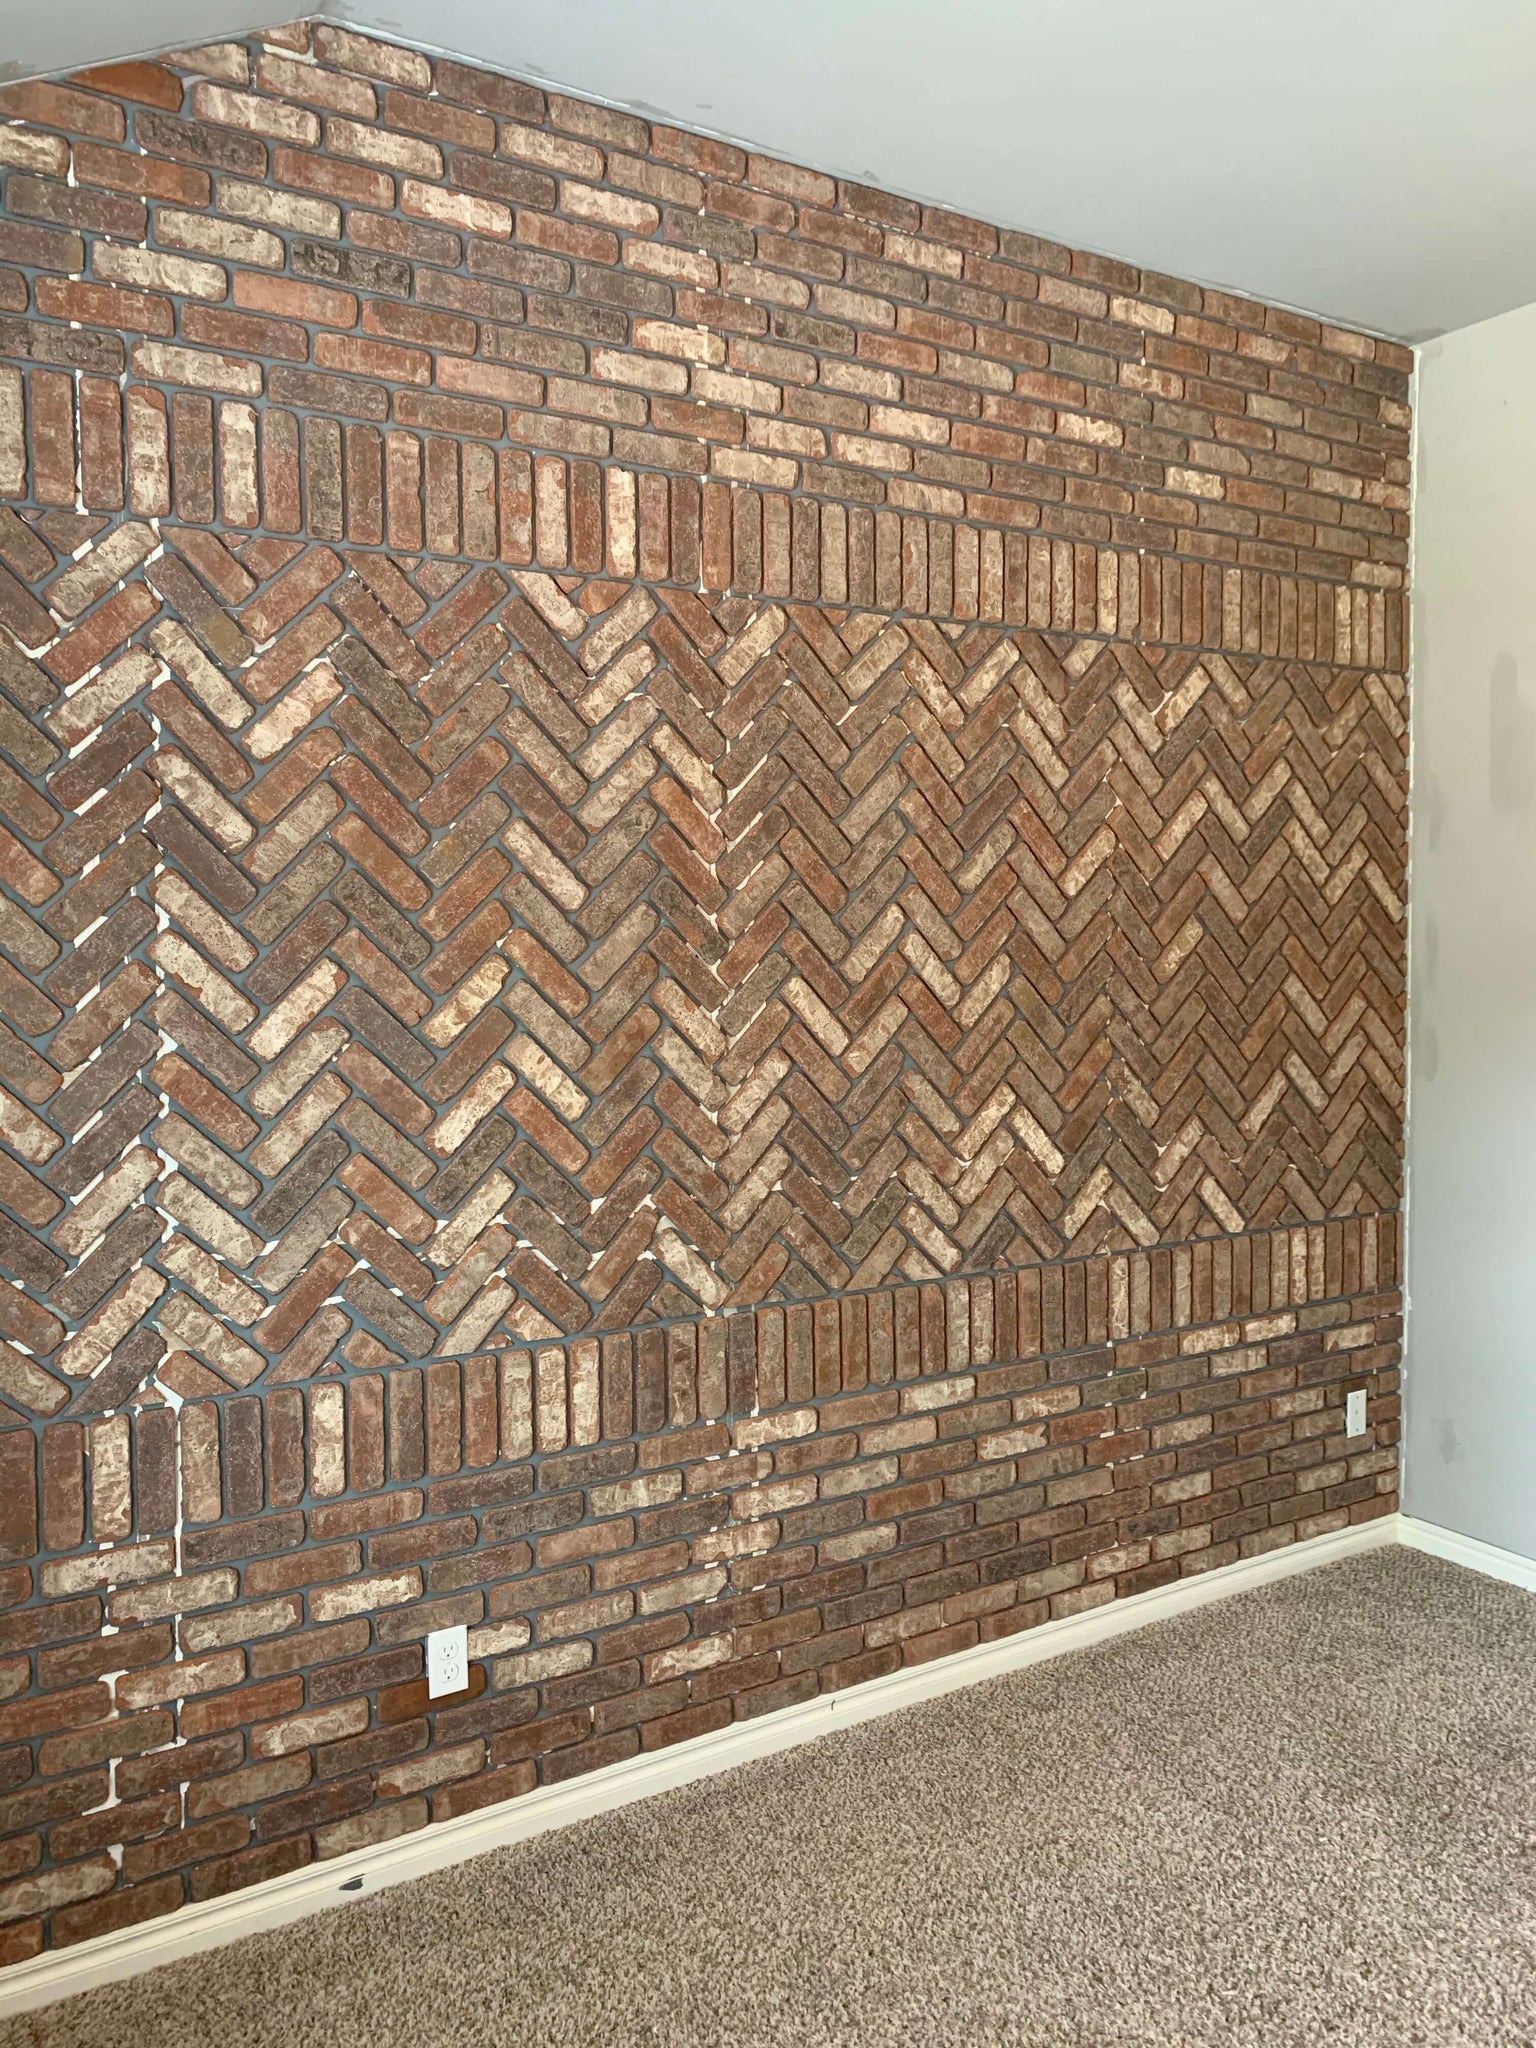
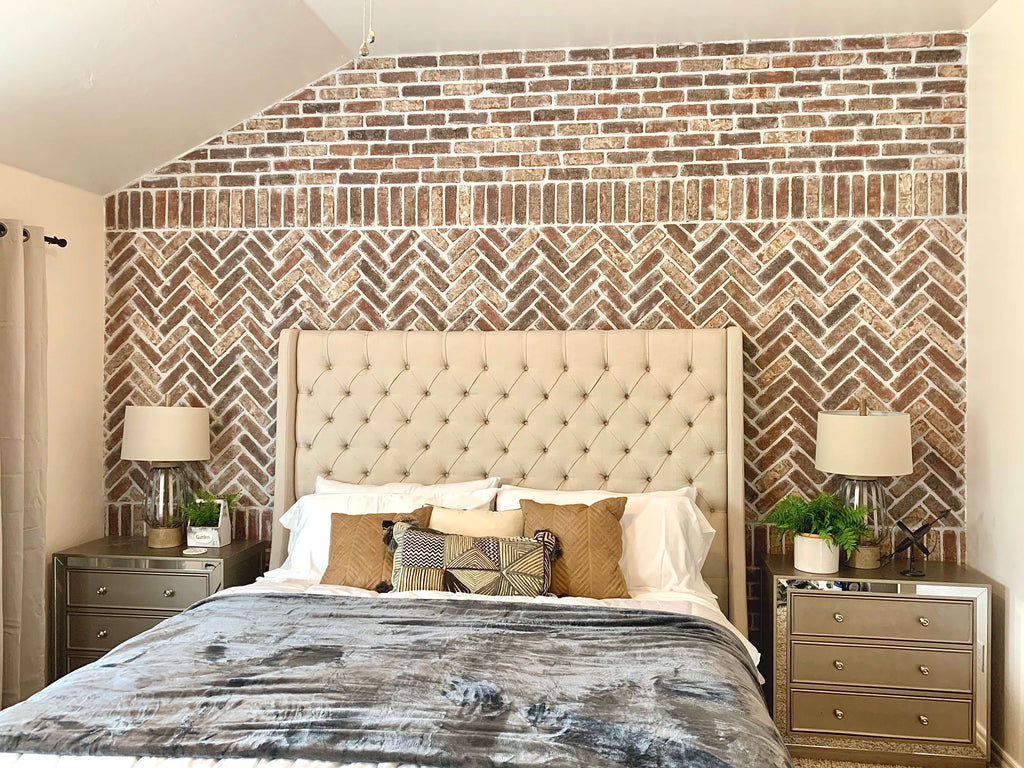
 I knew this project was going to bring my bedroom to life and there's nothing like a good before and after.
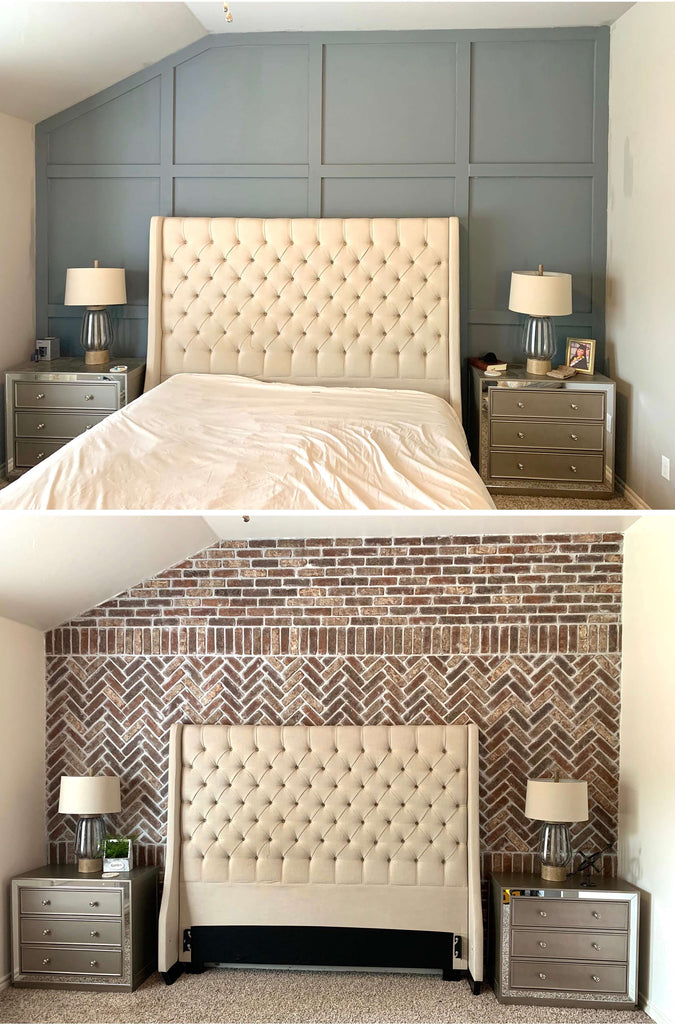 Now let's take one more last look at the wall. Let me know what you think in the comments below. I am absolutely in love!

 Welp that wraps up the brick project! I hope you guys are inspired to tackle your own brick projects; I can't wait to see.
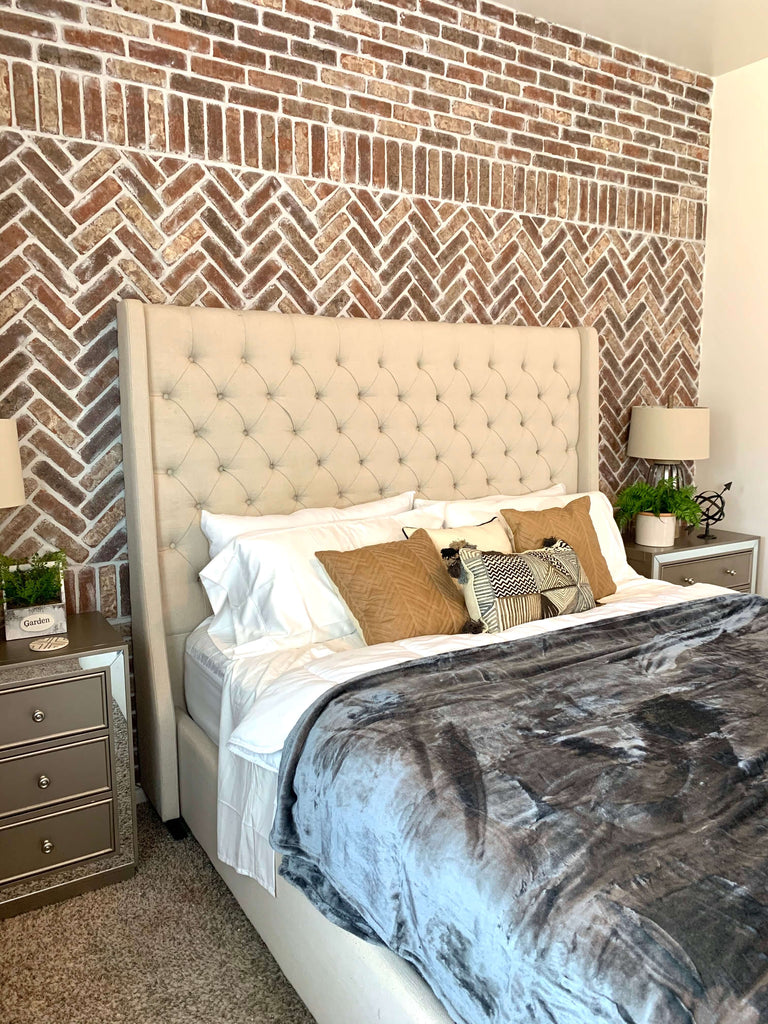
As always, thanks for reading guys, XOXO Ashley.


