
"A Kitchen Renovation for someone deserving."
If there was ever a project I was excited for, this is it! I am so excited to finally be sharing the Kitchen Renovation Reveal. If you missed the news, I have been working on a Kitchen Renovation for M'Kaylah Woods, a nurse here in OKC.
"This post is sponsored by The Home Depot."
With all the craziness going on in the world right now, I figured why not give back to someone who gives themselves to people daily, so here we are and it was all made possible by The Home Depot.
The Why?
I was super excited to announce that I would be doing this Kitchen Renovation. I met M'Kaylah through one of my really good friends and they were in need of a new kitchen; so I thought it would be a great idea to give them a brand new kitchen space they would love. Let's take a look at the before.
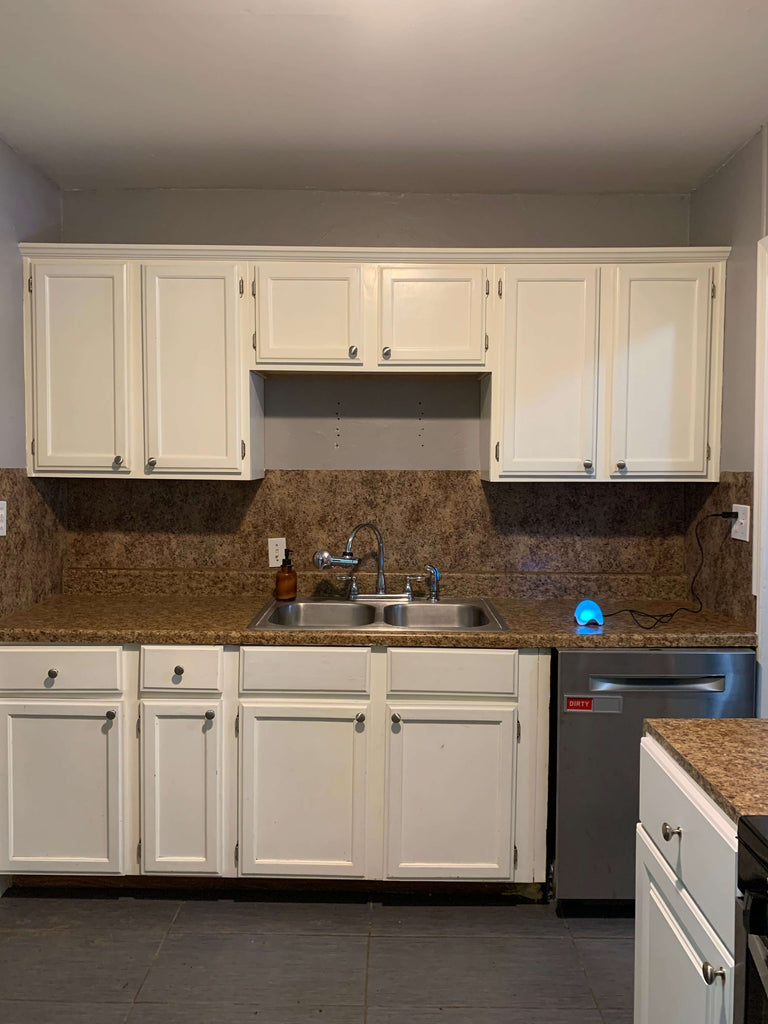
Even with a small budget to work with, I knew I could totally transform this space with a few familiar products from The Home Depot. Luckily, M'Kaylah's kitchen was on the smaller side, so I knew the money could go a little longer. But I was able to totally transform the space with $3200! Crazy right!? If you're wondering how I pulled it off, keep reading on to see just how I tackled M'Kaylahs kitchen.

The Demo
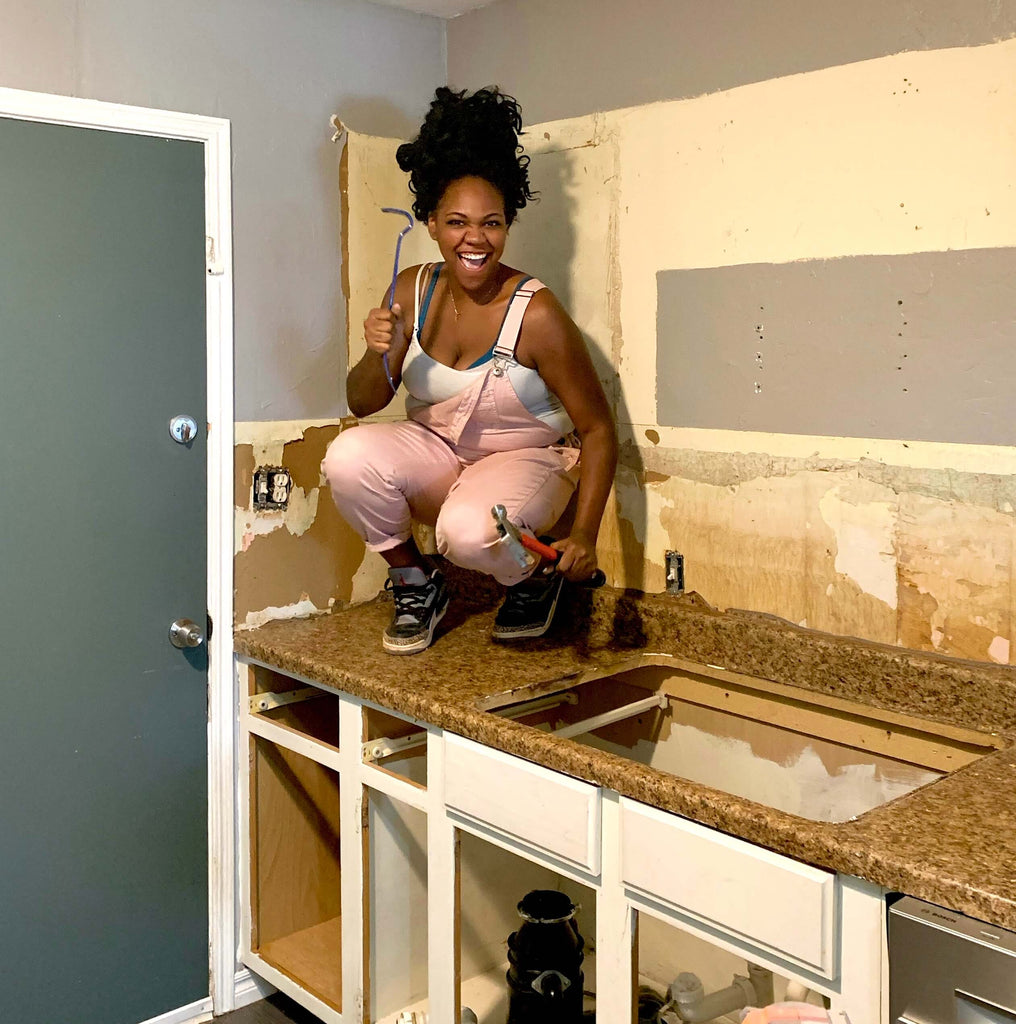
Being that this was my first Kitchen Reno, I was super excited about the Demolition. I always see home renovation shows and think "How cool would it be to tear down a kitchen." Well my demo dreams have come to life, because I now have my first Kitchen Demo under my belt and it was just as fun as it imagined.
Here is the order in which I tackled the Demo:
- Taking Down Cabinetry - The cabinets were really simple to take down. All of the cabinets were secured to the wall with four screws. I simply took out the screws with my drill, tugged on the cabinets and they came right down.
- Removing Backsplash - I removed the backsplash with a hammer and crowbar. Luckily, the backsplash was a thin laminate materiel. It was barely stuck to the wall and came right off.
- Removing the Sink - In order to remove the sink, I first had to disconnect all of the drainage and appliances. First, I had to turn off the water valves, and then I disconnected the drainage tubes for the garbage disposal and dish washer. This was a lot easier than I had originally anticipated. Once the drainage was unhooked, I removed the undermount screws underneath the sink (screws holding the sink in place). Once the screws were off, I took a crowbar and a knife to break the sealant around the sink and tugged on it a bit and it came right out.
- Removing Counter Tops - To remove the countertops, I un-screwed the screws underneath that were holding the countertop to the bottom cabinets and then used my strong girl arms to break it into half. Now that I've demo'd a kitchen I feel like I can do anything. HA!
- Removing Cabinet Doors - After all that hard work, my friend Kim removed the cabinet doors to complete the demolition.
After I completed the demo, the Kitchen looked an absolute mess, but I was excited to continue on and turn a drab space into a fabulous one. Now with the demolition out of the way, it was time to get started with the makeover.
For all of you visual folks, luckily I was able to video the process and cram it into a 15-min video. Check it out and then read on for all of the juicy details.
Refinishing the Cabinets
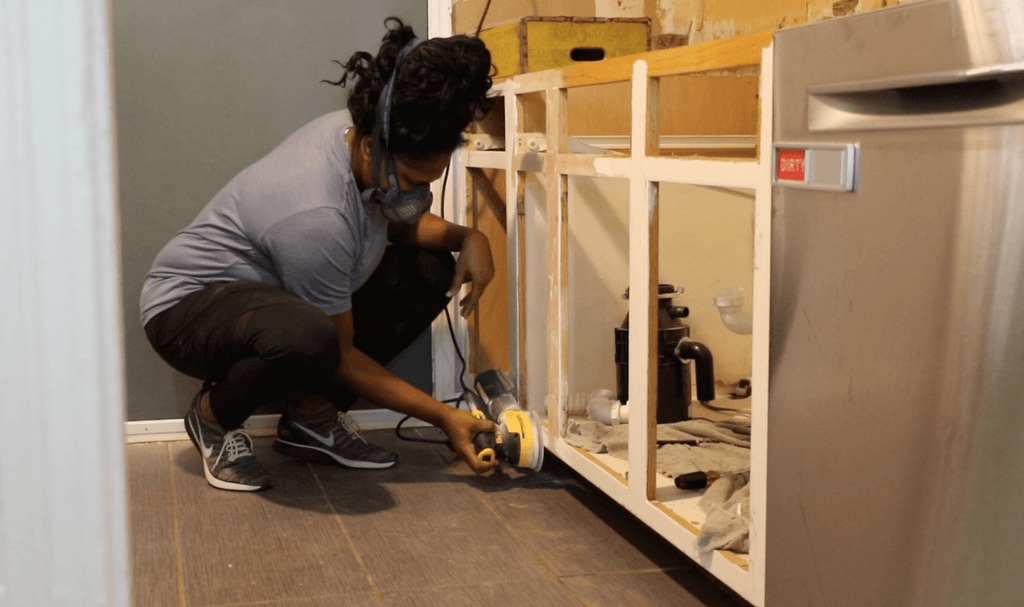
I decided to tackle the bottom cabinets first and work my way up. Being that I was on a budget, I decided to purchase new upper cabinets and just refinish the old existing cabinets. I knew with a little love and elbow grease, I could get the bottom cabinets looking new again. This is how I tackled the cabinet refinish:
- Sanding - First, I sanded the cabinets down with my orbital sander and used 80-grit sandpaper to remove the existing cabinetry paint. Once the paint was removed, I went back around and sanded it with 120-grit sandpaper to smooth it out.
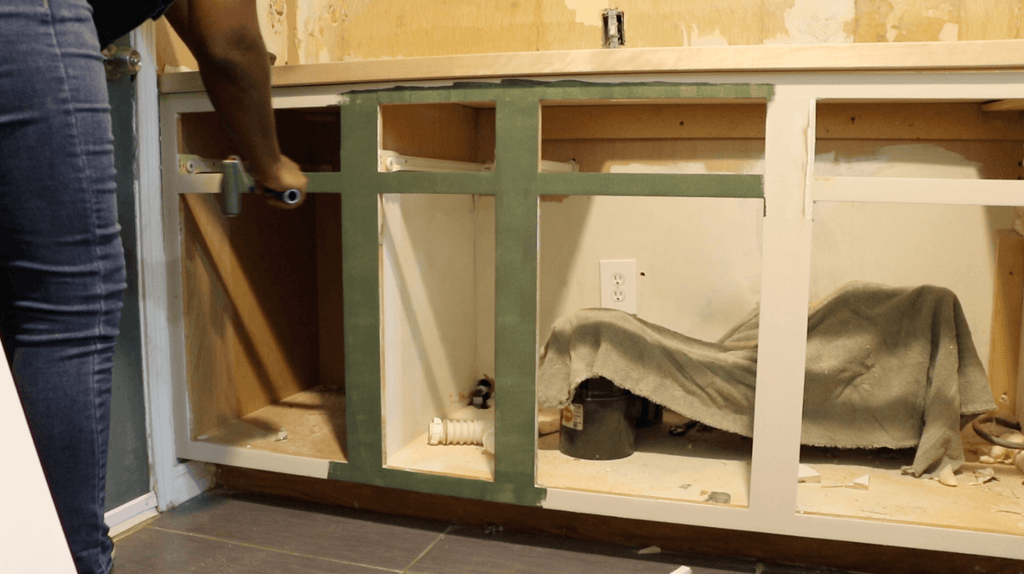
- Prep for Paint - Once the cabinetry was sanded down, I filled all of the holes and imperfections with patch and paint, let that dry and then sanded down the cabinets again to get it nice and smooth.
- Prime the Cabinetry - Once the cabinets were ready for paint, I painted them with a primer, to ensure good coverage. I used a regular paint roller to roll it on. I did around two coats.
- Painted the Cabinets - After the primer was dry, I went back and painted the bottom cabinets with this amazing Behr Marquee Paint. This time with three coats. I painted the upper cabinets with Behr “Sandy Clay”
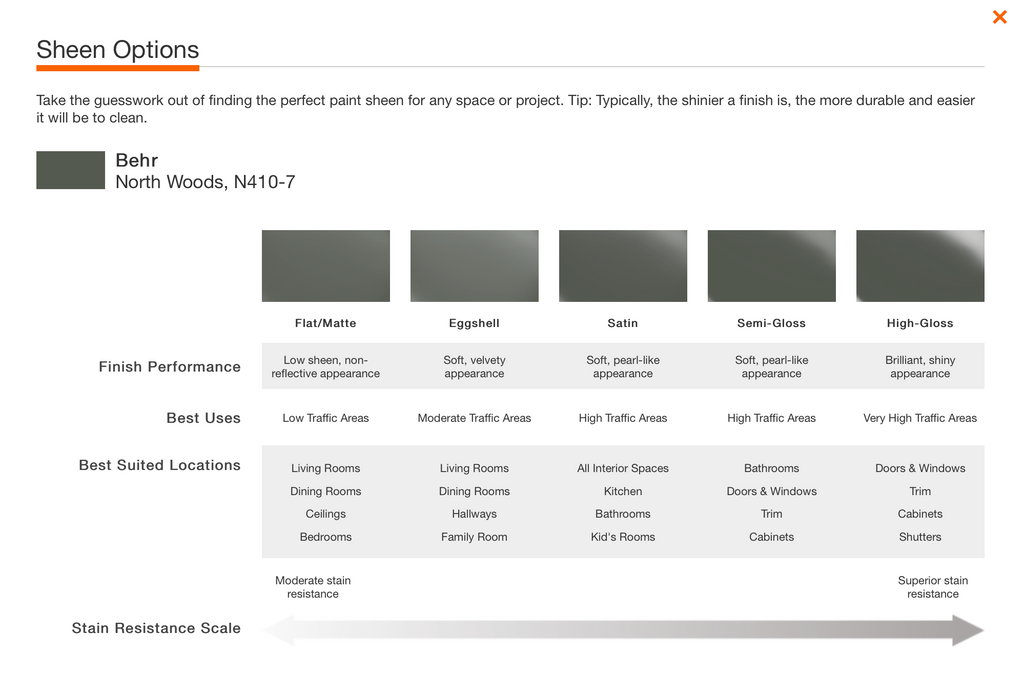
It was really easy to pick out the type of paint and sheen. When you go to The Home Depot website and choose a color, they make it easy for you to find the right type and sheen of paint. This really made picking out paint a breeze.
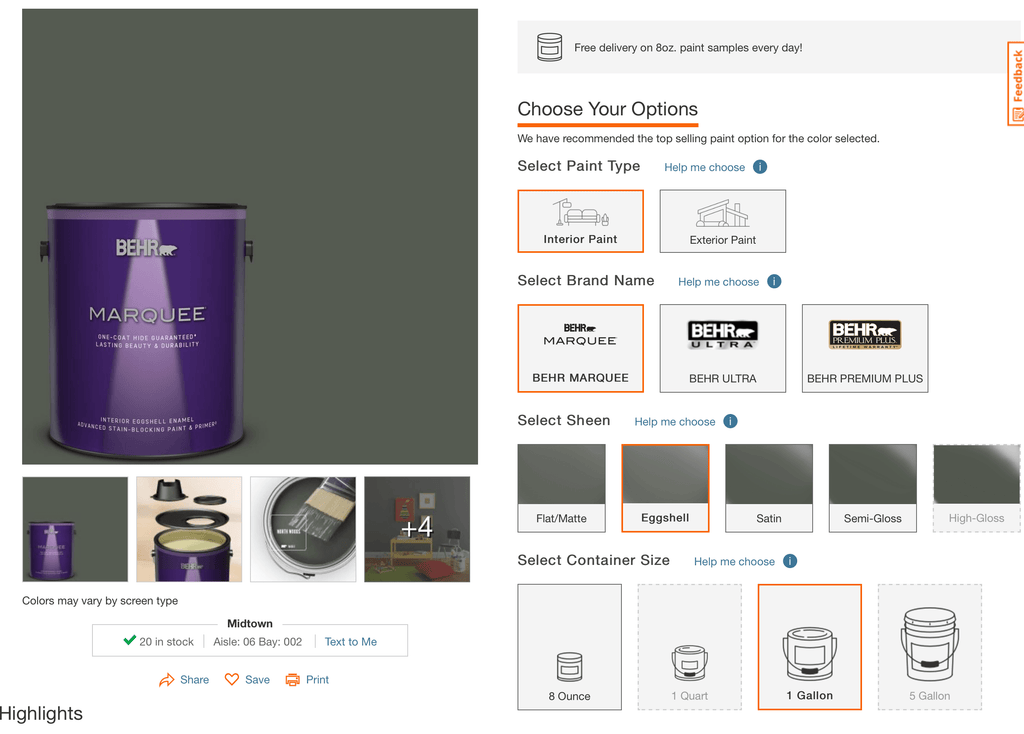
I really love that The Home Depot breaks down each option and what's best for your project on their site. If you are having trouble picking out which paint to use and what sheen you want, The Home Depot has got you covered.
Installing the Butcher Block Countertop
Now with the bottom cabinetry out of the way, it was time to move on to the countertops. I was most excited about this part of the project because I have always loved the butcher block look and have been wanting to try it out.
I was so surprised to find this butcher block just hanging out in The Home Depot aisles, normally you would think this is the type of materiel you can only get online but I was happy to find it right at my local Home Depot. Now let's get into how I tackled the countertop.

- Cut to Size - The first thing I did was cut the end off of my butcher block to make sure it would fit in the kitchen spaces. To cut the butcher block down I used my track saw and man was I never happier to have gotten that tool. This was the perfect tool for this counter job. The saw cut through it like butter and the track helped make sure everything was nice and even.
- Secure in Place- Once the butcher block was cut to size, we placed it in it's appropriate space and secured it down by drilling 2 1/2" wood screws from underneath the cabinet up into the butcher block to secure it down into place. I decided to use screws with a star head because they are a lot harder to strip and its easy to strip screws on a step like this. If you don't hold the drill evenly, it can be harder to try and drill those screws in.
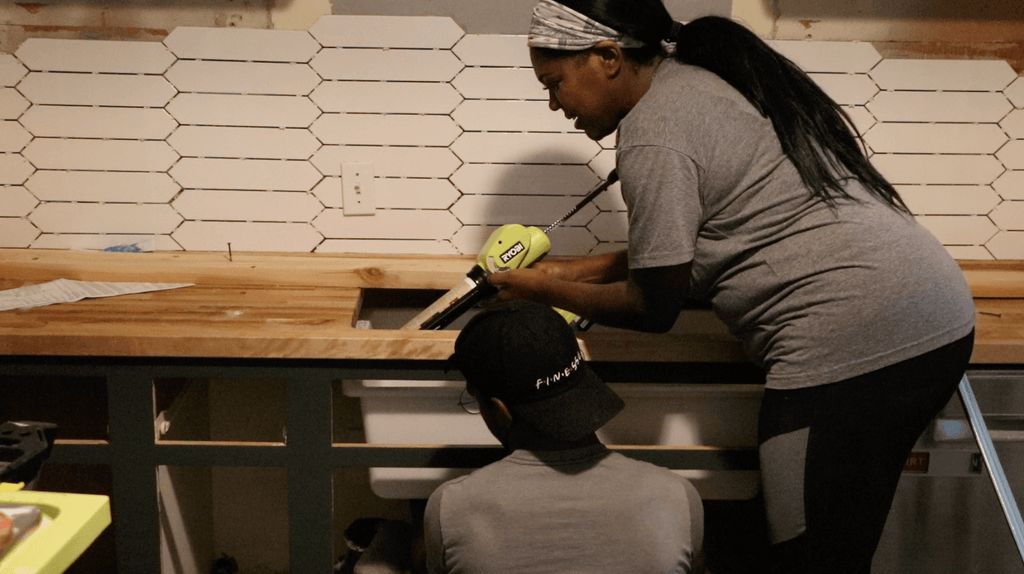
- Cutting the Sink Hole - This step probably gave me the most anxiety because I knew if we messed this up, the whole piece would basically be ruined. So to eliminate the guess work, I first made a sink hole template to make sure I cut the hole exactly where it needed to be.
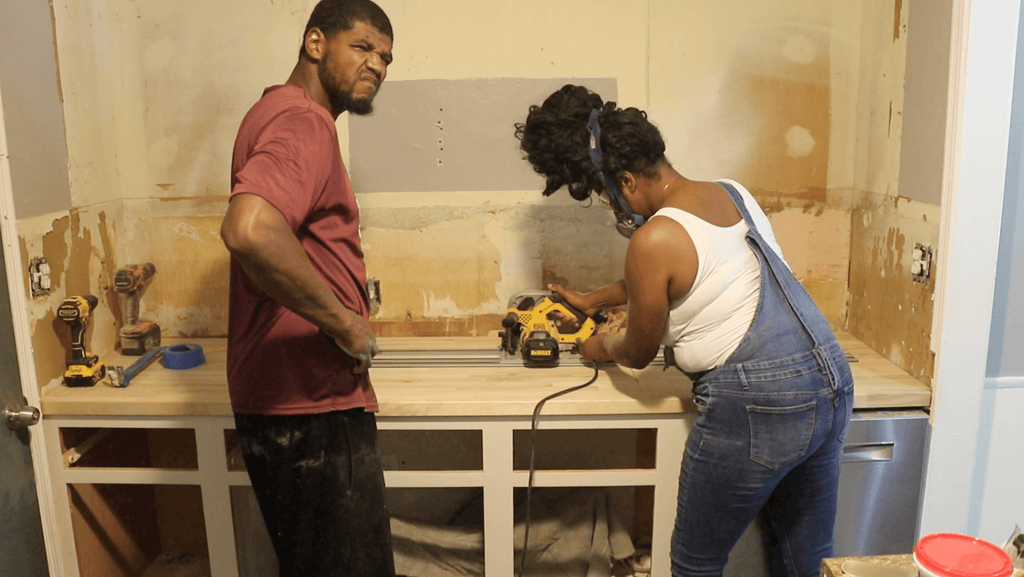 After creating the template, I traced the hole line on the countertop and then begin making four plunge cuts in the counter top with my track saw. I did not go all the way around the corners with my track saw, I left just enough space to go back around with my jigsaw to curve the corners. P.S Someone get my brother a mask!
4. Sealing the Countertops - This was one of the most popular questions on my Instagram. How are you sealing the counter tops. First, I went and filled the little small holes in the butcher block with epoxy. This was my first time trying this particular epoxy and it worked fairly well, but I may try another product next time just to see the differences.
After that dried, I sanded the butcher block down. First with 120-grit and then 220-grit sandpaper to get it nice and smooth.
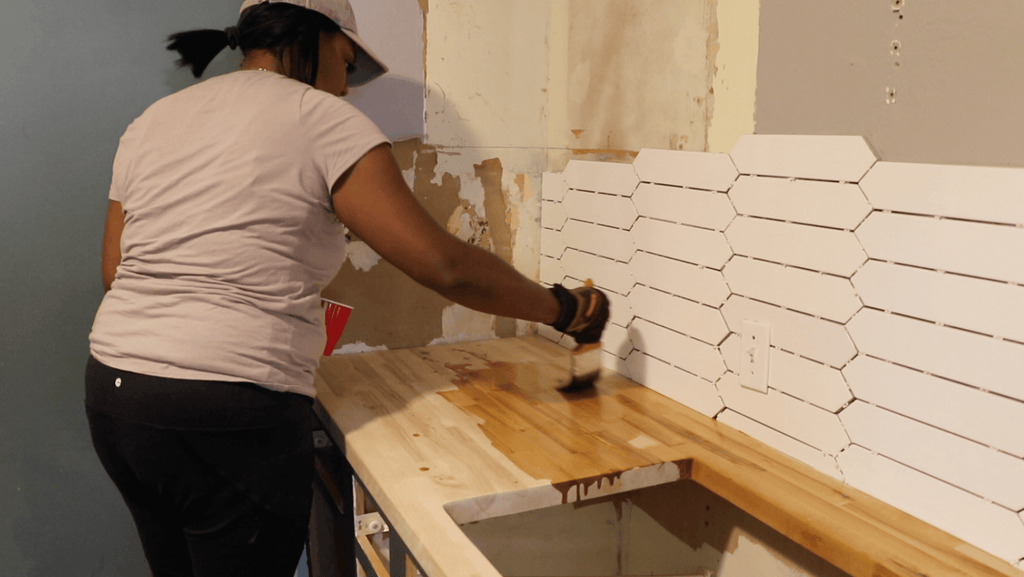 Then to seal it, I applied tung oil to the surface using a bristle brush. I put on three coats to make sure the butcher block was fully saturated, with a light sanding in between each coat. I just love how the tung oil makes the butcher block stand out. With butcher block, there is some follow on maintenance, being that its wood, but a fresh coat of tung oil is always an easy step to tackle when needed.
Upper Kitchen Cabinets
Even though I had a pretty tight budget, I knew I wanted to splurge on some new cabinets for the upper cabinets because the older cabinets weren't salvageable. So I ordered two sets of frameless unfinished cabinets through The Home Depot Delivery Service. Luckily, they were amongst the many items eligible for free delivery and were delivered right to my door step. I was able to un-package them and get right to work. Now let's get into the details.
- Painting the Upper Cabinets - I painted the upper cabinets with a cream color and painted the cabinets using my paint sprayer. If you are debating whether to refinish your kitchen cabinets, I would highly suggest using a paint sprayer. It makes the paint go on evenly and saves a bunch of time. I used my Home Right Sprayer and I absolutely love this sprayer, its the best one I've tried for the price. These cabinets really took the paint well and were super easy to work with.
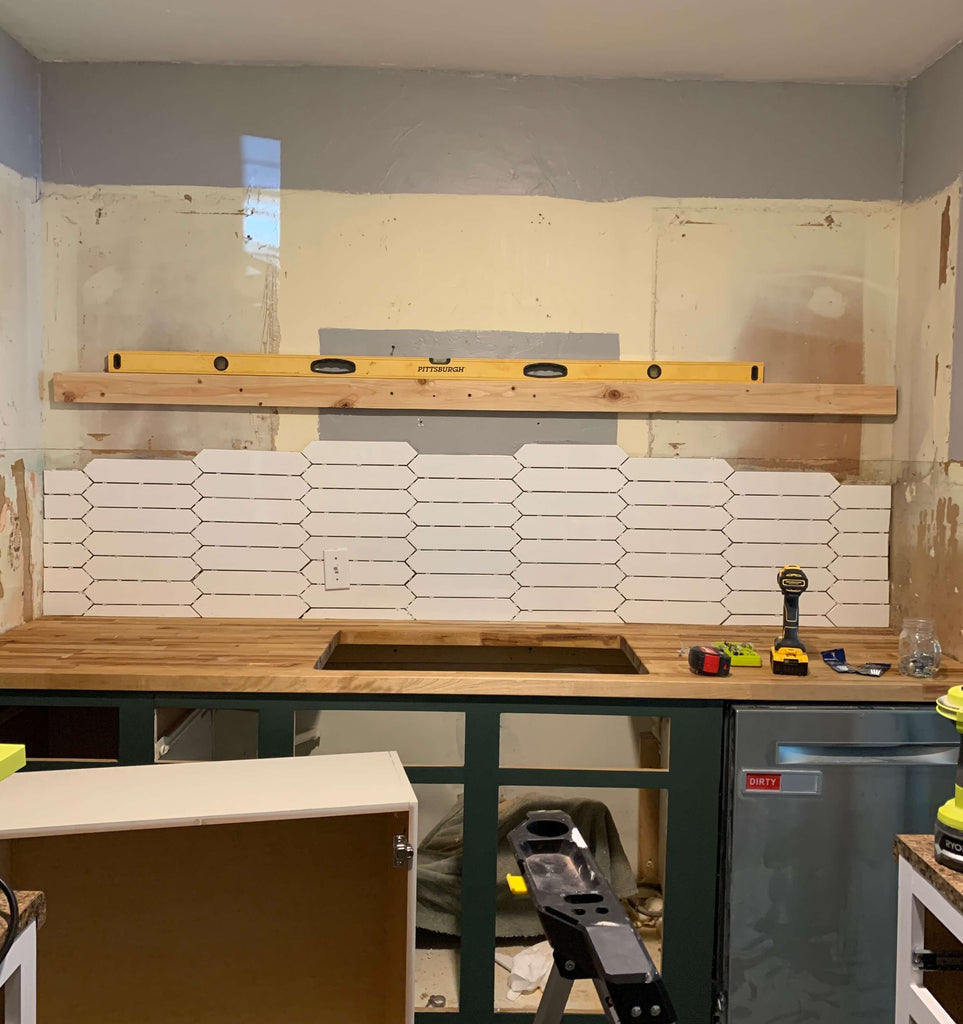
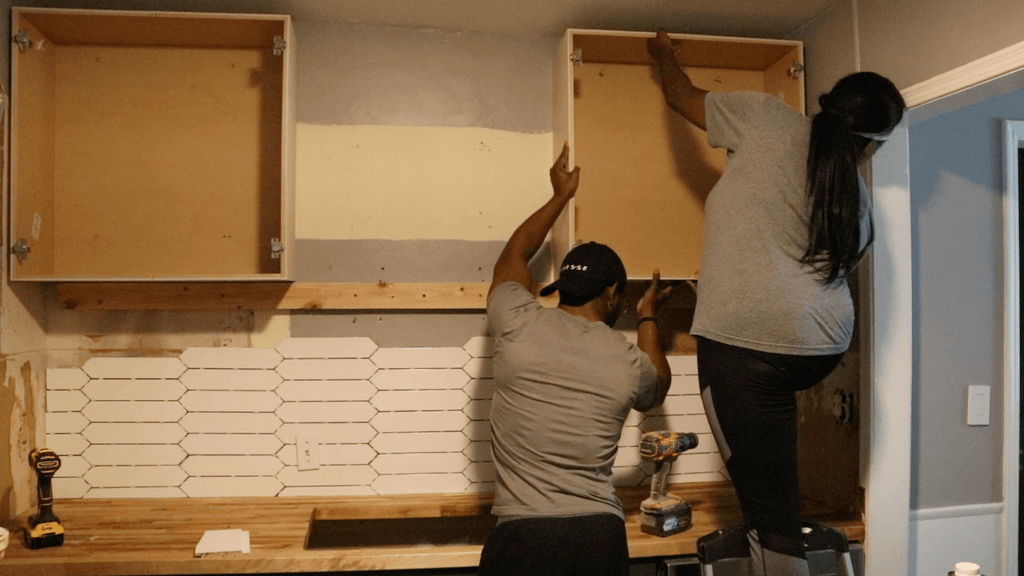
- Hanging the 2x4 - Now if you are someone who has been wondering if you can hang kitchen cabinets, this is a step you definitely down want to miss. So the first thing I did was find all of the studs with a stud finder to hang the cabinets. Once I found the studs, I screwed in a 2x4 into the wall and used my level to make sure the 2x4 was level. You don't want to skip this step because this 2x4 is what helps hold the cabinets into place and keeps it level while screwing the cabinets to the wall.
 Once the 2x4 was secure, I placed the cabinet on top and screwed the cabinets into the wall using wood screws, these were the suggested screws that came listed with the cabinets instructions. The cabinets looked so good on the wall and I knew early on that I wanted to lift the cabinets up to make the room feel larger. What I didn't anticipate was how it would look raised.
 When I saw the raised cabinets, I loved the height of them, but I knew that it didn't look proportionate, so I had to do some quick on the job troubleshooting. I quickly decided to add some little fun open storage cubbies and I am so glad I did. They look like they are a part of the existing cabinets and it created more storage for the Woods. Yay for thinking on your feet.
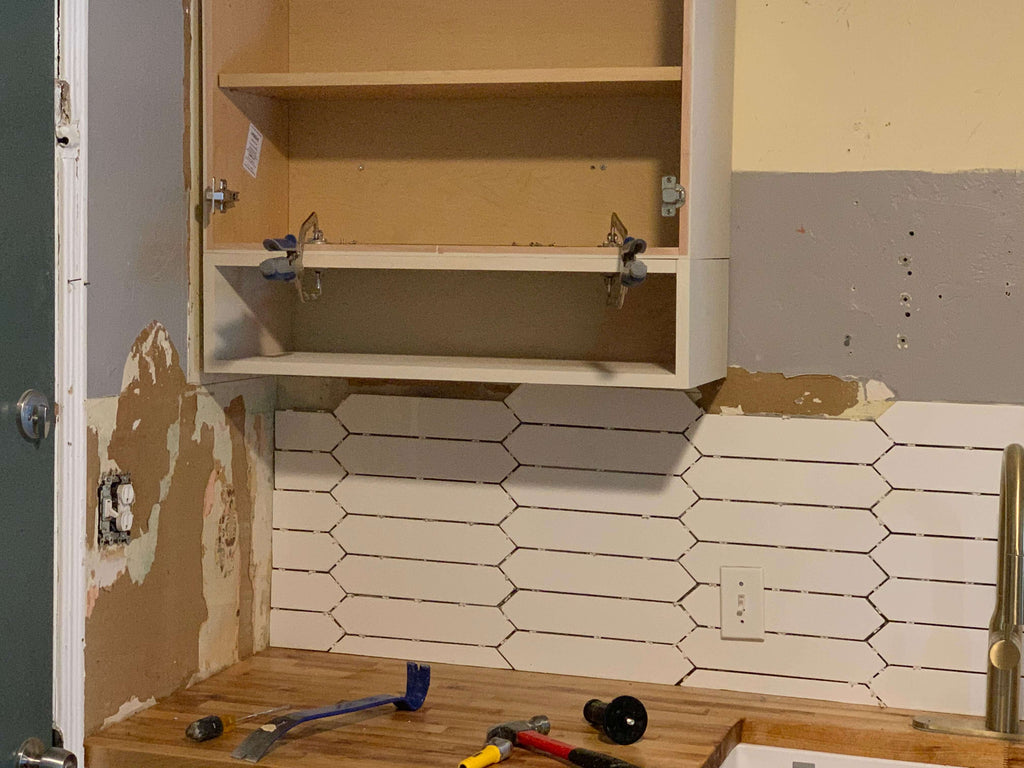 I built them using select pine wood, which is a better grade than regular pine, because I wanted them to look really sleek.
I added the little cubbies by using my right angle attachment to screw them directly into the upper cabinets while clamped into place.
Installing the Sink/ Faucet
Originally the Woods had a regular double stainless steel sink but I decided to splurge on this huge Blanco Sink. I was able to get it delivered right to my door step and a fun service I learned that The Home Depot has is the "free delivery & haul away on appliance purchases $396 or more", where they will haul away your old appliances for you. Technically a sink doesn't count but if you have a kitchen renovation in mind and you're worried about where those old appliances will go, The Home Depot has got you covered.
This sink really changed the whole look of the kitchen and I absolutely love how it coupled with the butcher block counter tops. Unfortunately, because of the way the counter was shaped, we had a little bit of a hard time getting the sink in, only because it was an uncomfortable position to put it in there, but with the help of my friend Michael, we were able to get it into place.
- Set up Clamp - The first thing I did was get my clamp ready to go. I set a long 2x4 on top of the sink so I could clamp the sink into place. You want to have this ready to go, so when it's time to clamp it into place, you can do so quickly.
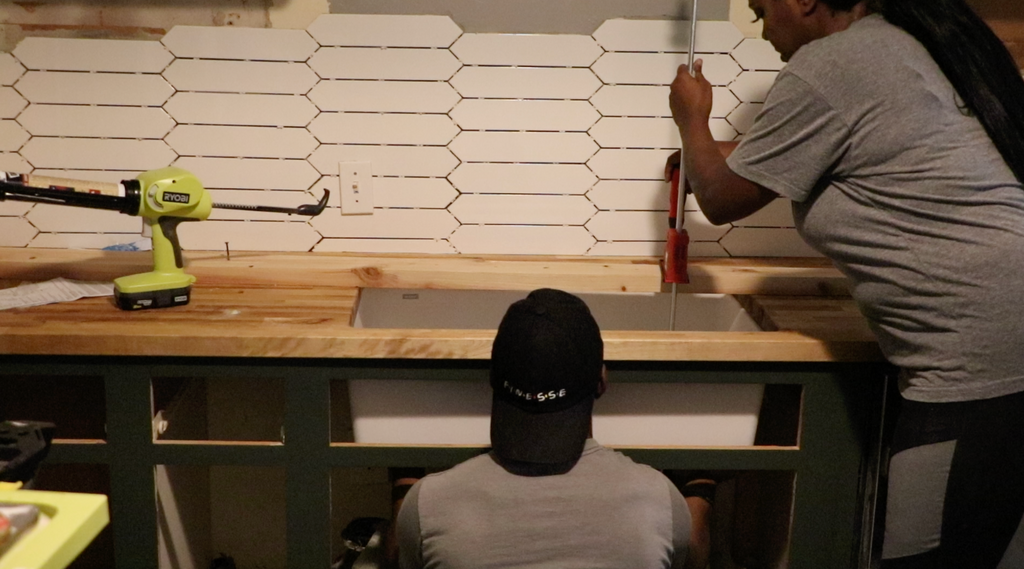
- Add Sealant to Sink - In order to hold the sink into place you want to make sure to add a silicon sealant to the top first. While my friend held the sink down, I used my battery powered caulk gun to apply the sealant to the top of the sink. Once the sealant was added, we lined up the sink with the sink hole and pushed it onto the countertop and I clamped it into place. I let the clamp sit for 24 hours so the sealant could fully cure.
- Add Undercount Sink Clips - Once the sealant had dried, I went back around and added undermount sink clips underneath the sink to make sure the sink was securely in place.
- Add Quick Lock Mount - This step was one of those figure it out during the process steps. Because I removed the old sink I hadn't realized that the lock mount for the garbage disposal was attached to the old sink. So I got a new quick lock mount for the garbage disposal and installed it into the new sink and placed some plumbers putty around it to make sure it was sealed and secure.
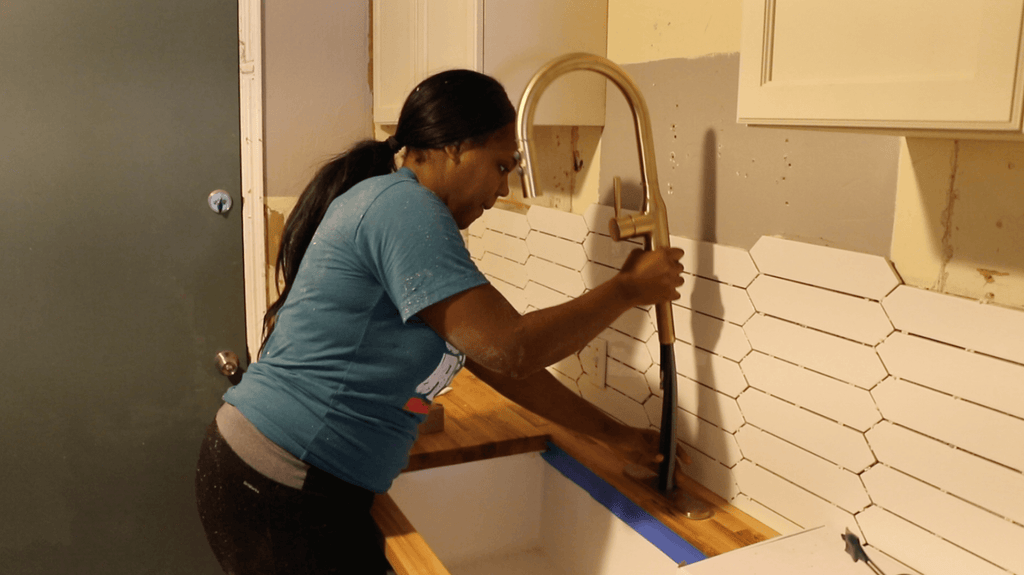
 Once the sink was in place, I begin to add the faucet. Like the sink, I decided to splurge on a nice gold faucet to match the new Blanco sink and I definitely don't regret my decision.
Installing the Faucet
This kitchen faucet was the perfect combo for this kitchen and the pictures definitely don't do it justice. First, I had to drill three holes for the kitchen faucet. The directions for the faucet were pretty straight forward and I just followed them to install the faucet.
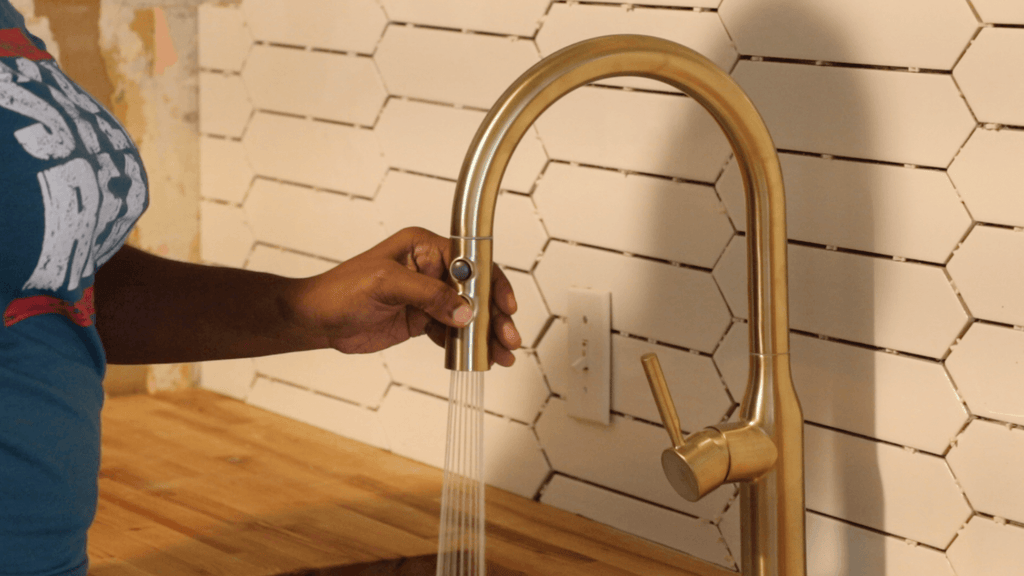
 Once the faucet was installed, I hooked up the sink and garbage disposal and all of the drainage pipes underneath and turned on the water to test out the new faucet. Turning on the sink was one of those moment were you realize "wow! I really just installed a sink." There were a lot of firsts in this project and I was super proud of myself all throughout this reno.
Installing and Grouting Tile
Now on to the tile and grouting. I was super anxious to try this portion of the project out because I've never actually tiled before. My brick wall is the closest I've come to it, so I was super excited to learn and be able to experience actually doing it for the first time. Now I must rave about this amazing tile.
I really like that it has that subway feel but with a modern twist. I used one and a half cases for this particular project but if you need some help figuring out just how much tile you need, Home Depot has you covered with their tile project calculator.
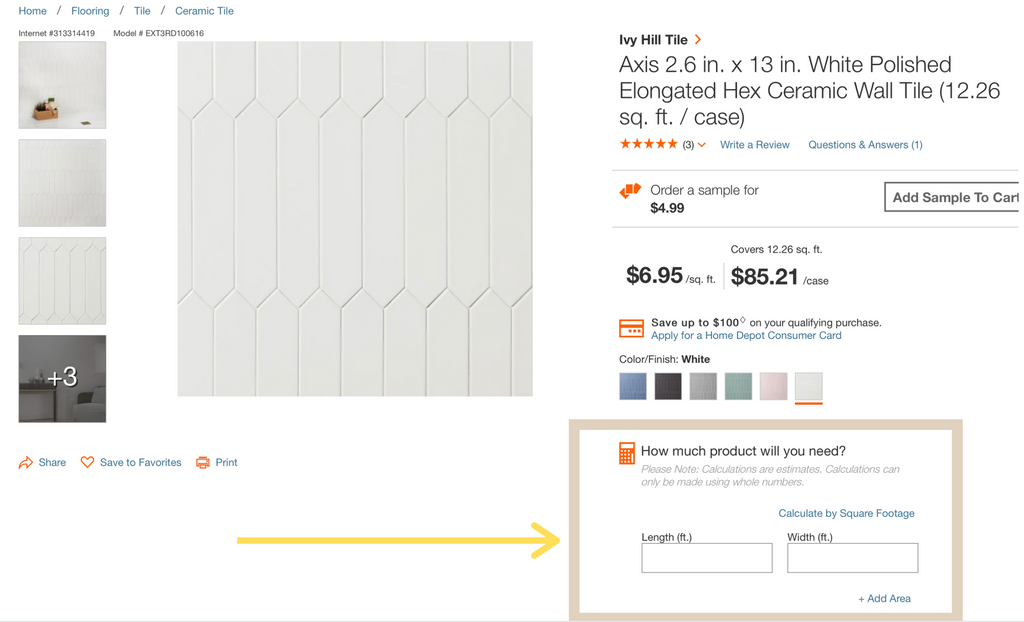
Luckily, once I had chosen the tile I wanted. The tile calculator was embedded right there in the product page. If you are worried about how much tile you will need, The Home Depot's tile calculator will eliminate all of the guesswork.
Tilling
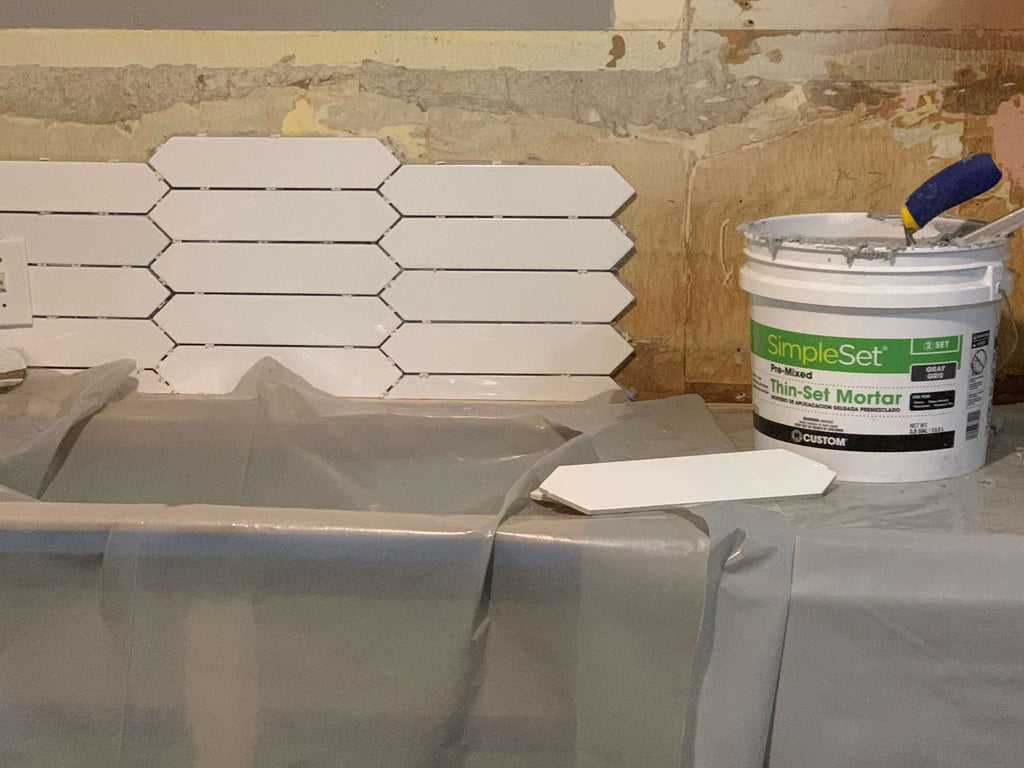
Instead of spreading the mortar on the wall first like you'd normally see, I decided to just back butter the tile one by one with my trowel. My reasons for this was because it was my first time and I felt it would be easier to manage the tile that way and also, I knew that I would be splitting the tiling into two sessions because I was waiting on the cabinets to arrive. This way worked out for me but I'm excited to try it the other way next time.
I opted not to replace the existing drywall because the laminate backsplash didn't mess it up too much and we were on a tight budget, I think each reno is different and you just have to kind of play it by ear, but for this particular project I just decided to go ahead and put the new tile on the existing drywall and it worked out fine.
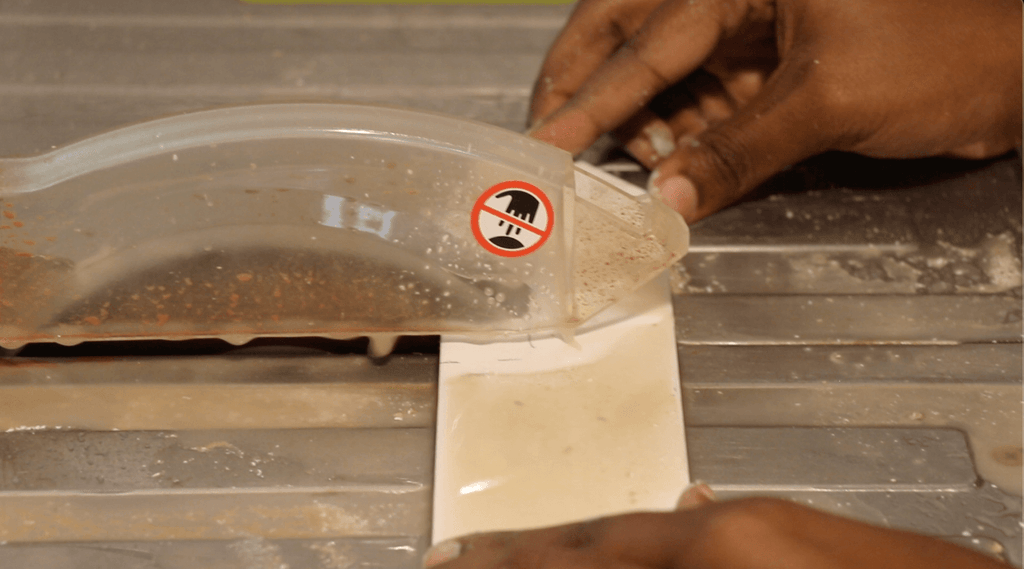 I used spacers in between the tiles to ensure I had the correct spacing all the way around and utilized my tile saw to cut the tiles on the ends and top. After I laid the tile, I let it sit for 48 hours and then removed the spacers to prep for grouting.
Grouting
For the grouting portion, I decided to go with a pre-mixed grout to make the process easier. I went with a grey color to bring out those white tiles and it matched perfectly.
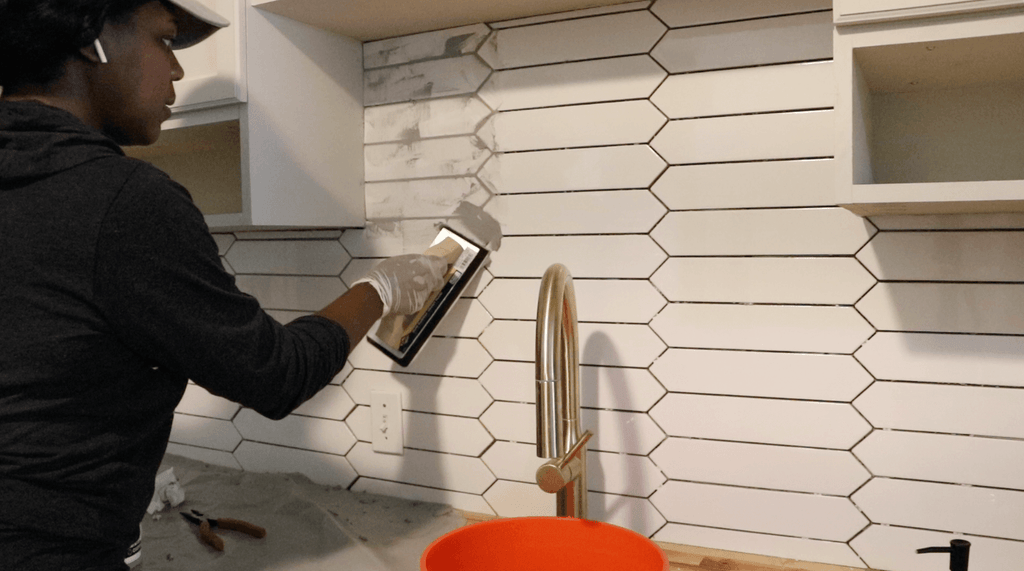 I first started by using my float to push grout into the tile in small sections. You want to make sure you do small sections because the grout will dry fast and its hard to get the grout off the tile once its dry. After doing a small section, I would take my sponge and clean off the excess grout and then use a damp rag to wipe it completely clean and continue the same steps all along the wall.
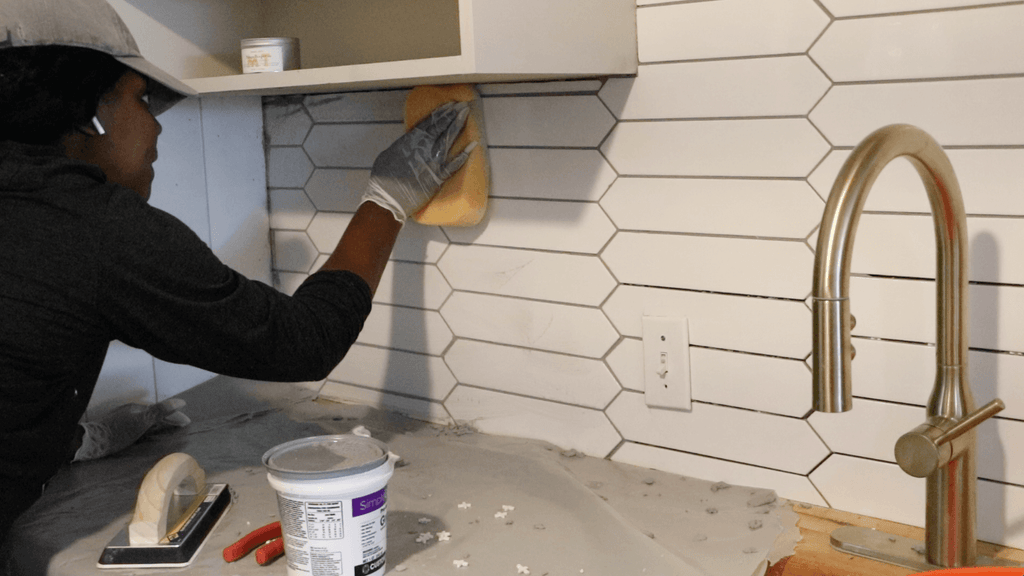 This process was fairly easy, just a little time consuming with the cleanup. Two people would definitely come in handy here. To my surprise, this only took one quart of grout to complete.
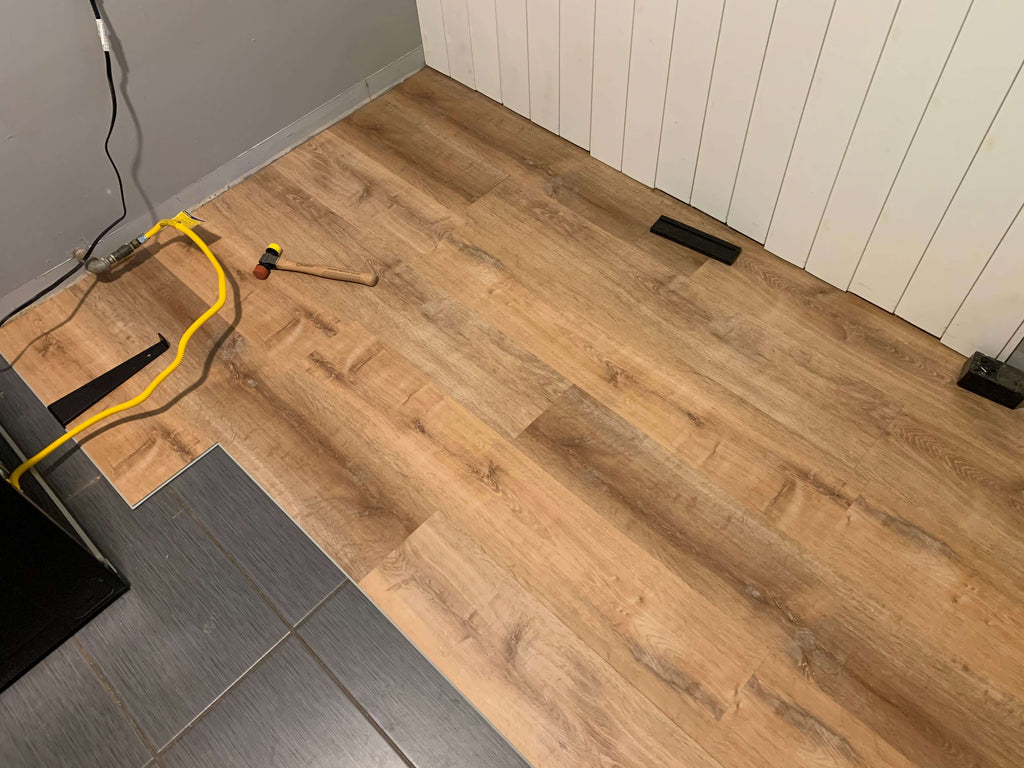
Installing the Flooring
Now on to the flooring. The old kitchen had a darker tile but I wanted to add some flooring that would brighten up the space a little bit. Knowing the budget, I knew that this Lifeproof flooring would be the perfect addition to the new kitchen.
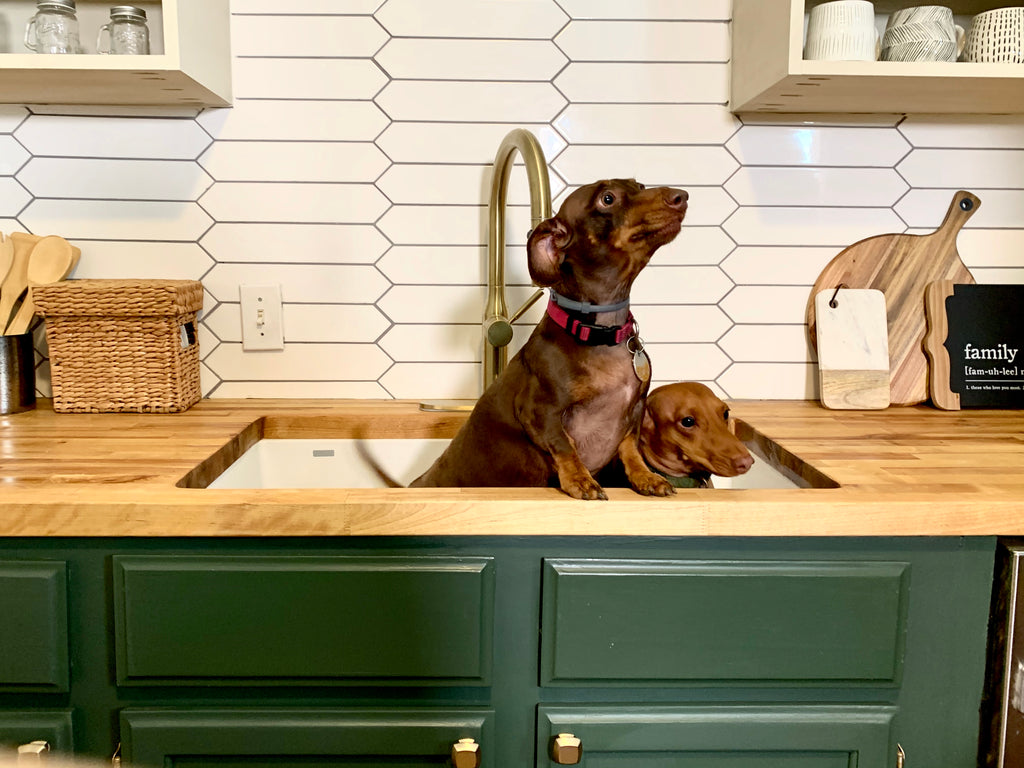
 I put this flooring in my laundry room a few years back and absolutely love it. Its also supposed to be pet friendly, which was perfect for this project being that the Woods have two little dogs.
The thing I love the most about this flooring is that it can go right over your existing tile and doesn't take long to install. With the help of this flooring kit, I was able to install this floor in less than an hour. Crazy right!? I cut the flooring down with my miter saw and just placed it right over the existing floor and man does it look good. Just don't forget to wear those knee pads!
Installing the Shiplap
Being that the Woods house was older, the walls really weren't as appealing as I would like, so I decided to add shiplap all across the walls. I knew this would be a little pricey, but worth it in the end.
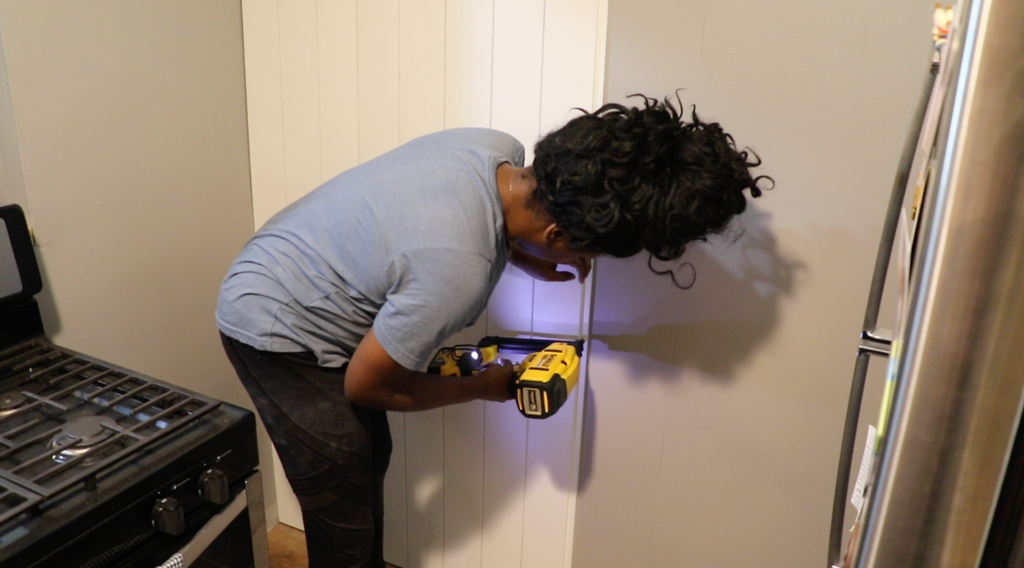 I opted to go with a ready made shiplap to speed up the process and it was really great to work with. I ended up using nine boxes for the whole kitchen. I secured the boards to the wall using my brad nailer and went back and filled the holes with wood filler. This shiplap also made the kitchen feel much bigger.
Once all the holes were filled, I went back and painted the shiplap with a muted white.
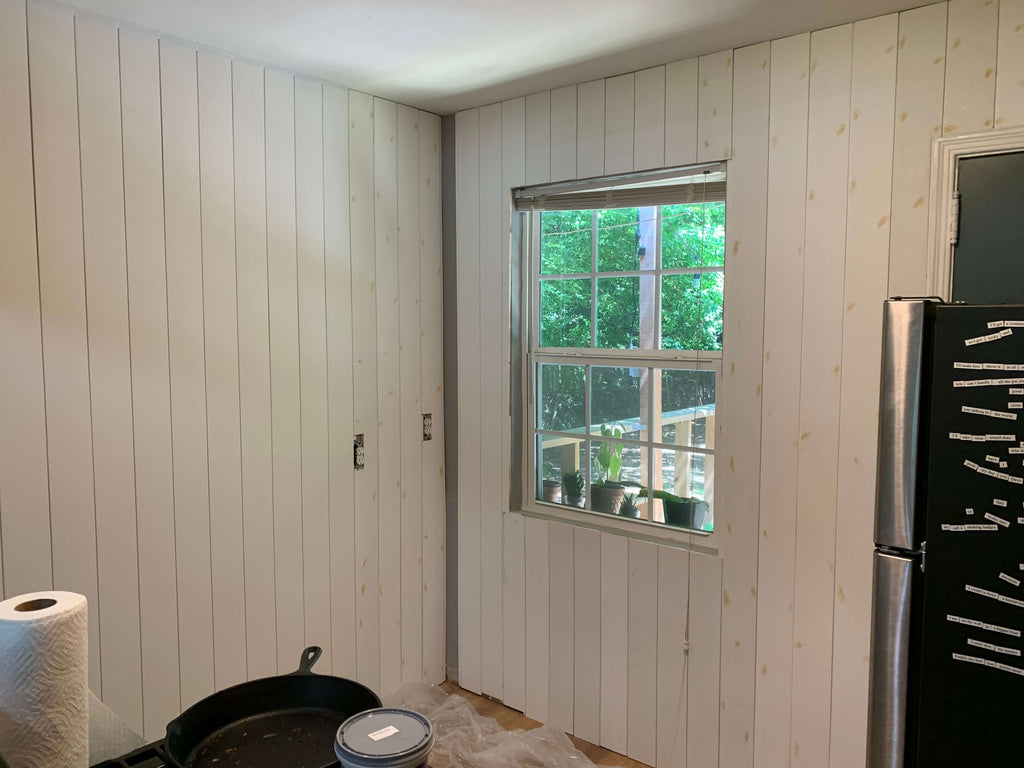
Finishing Touches
Once everything was all in place, I went back around and adding gold knobs to all of the door handles.
Budget Breakdown
| Backsplash Tile | $200 |
| Frameless Cabinets | $250 |
| Shiplap | $600 |
| Kitchen Faucet/ Sink Drain | $200 |
| Blanco Sink | $343 |
| Paint | $150 |
| Sink Undermount Clamps | $21 |
| Butcher Block Counter Tops | $330 |
| Hardware | $70 |
| Cabinet Cubbies/Middle Cabinet/ Trim | $258 |
| Lifeproof Flooring/Tools | $350 |
| Tiling Tools/Grout/Mortar | $120 |
| Miscellaneous (Paint Tools, Varnish, Caulk, Filler, Sandpaper, screws, plastic, adhesive, etc.) | $300 |
| Total | $3200 |
The Final Reveal
Now let's get to the moment you all have been waiting for, The FINAL Reveal. I think I surprised myself with this project, because I couldn't have imagined this project turning out any better.
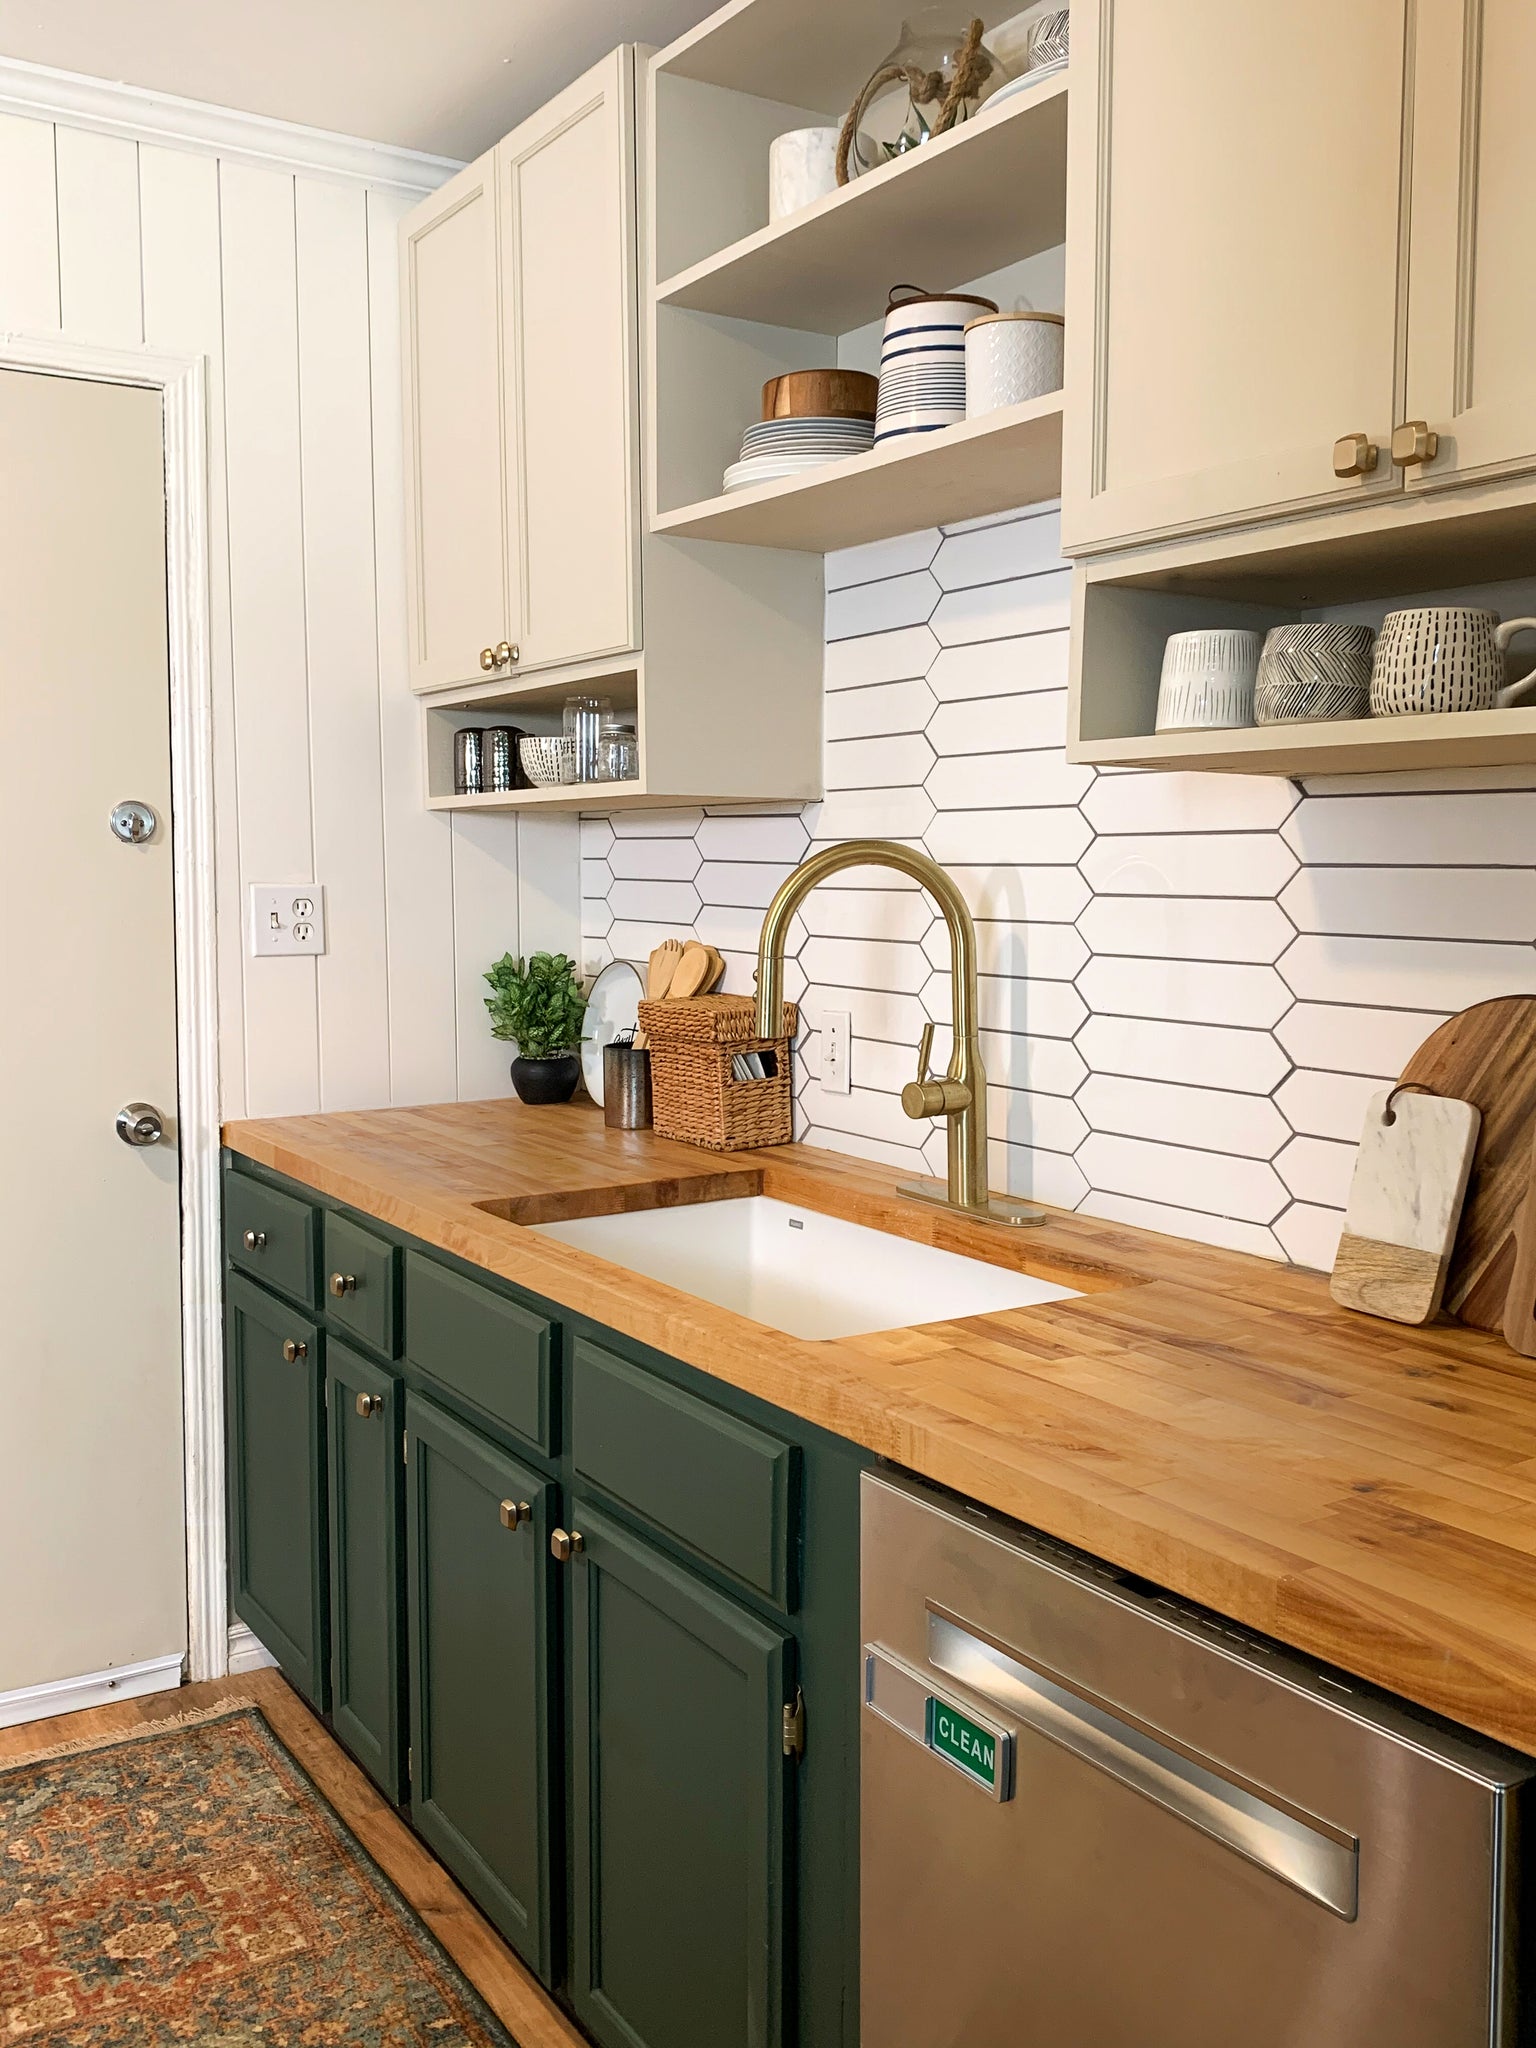 I'm simply amazed with how I was able to completely transform this kitchen with $3200, and I hope you guys love it just as much as I do.
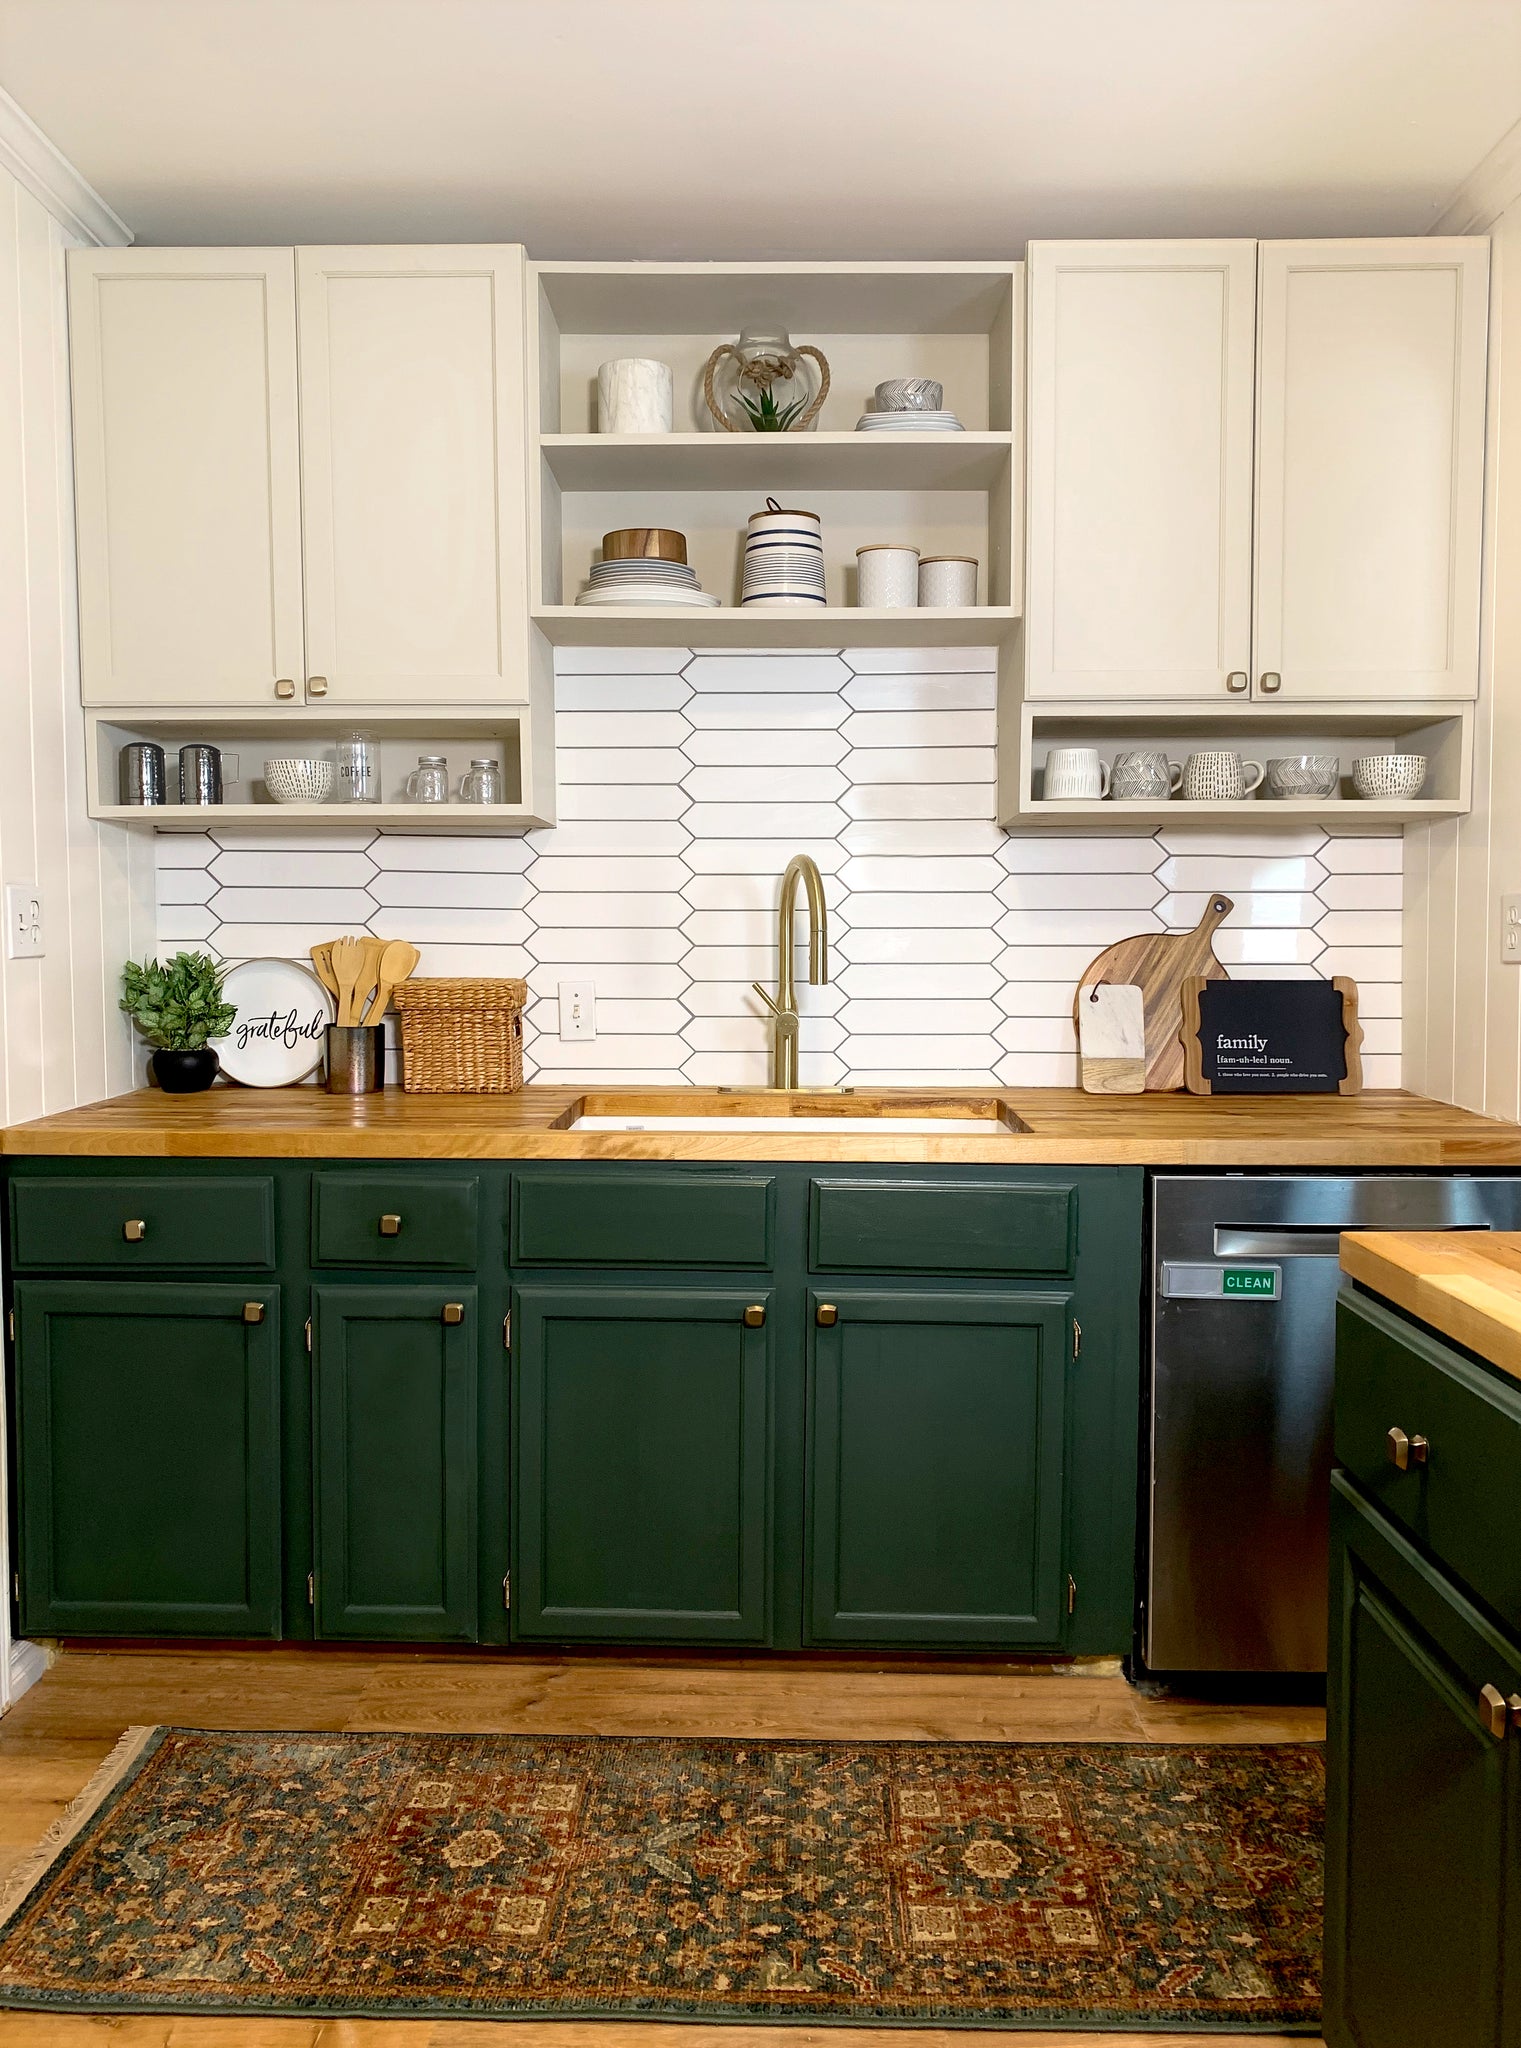 All of the materials tied in so nicely and it really made it look like a brand new space. I'm so glad with the design choices I made.
 I was super happy to get the approval from Chewy and Major, they absolutely love their new sink. If they are happy then I think my job here is complete.
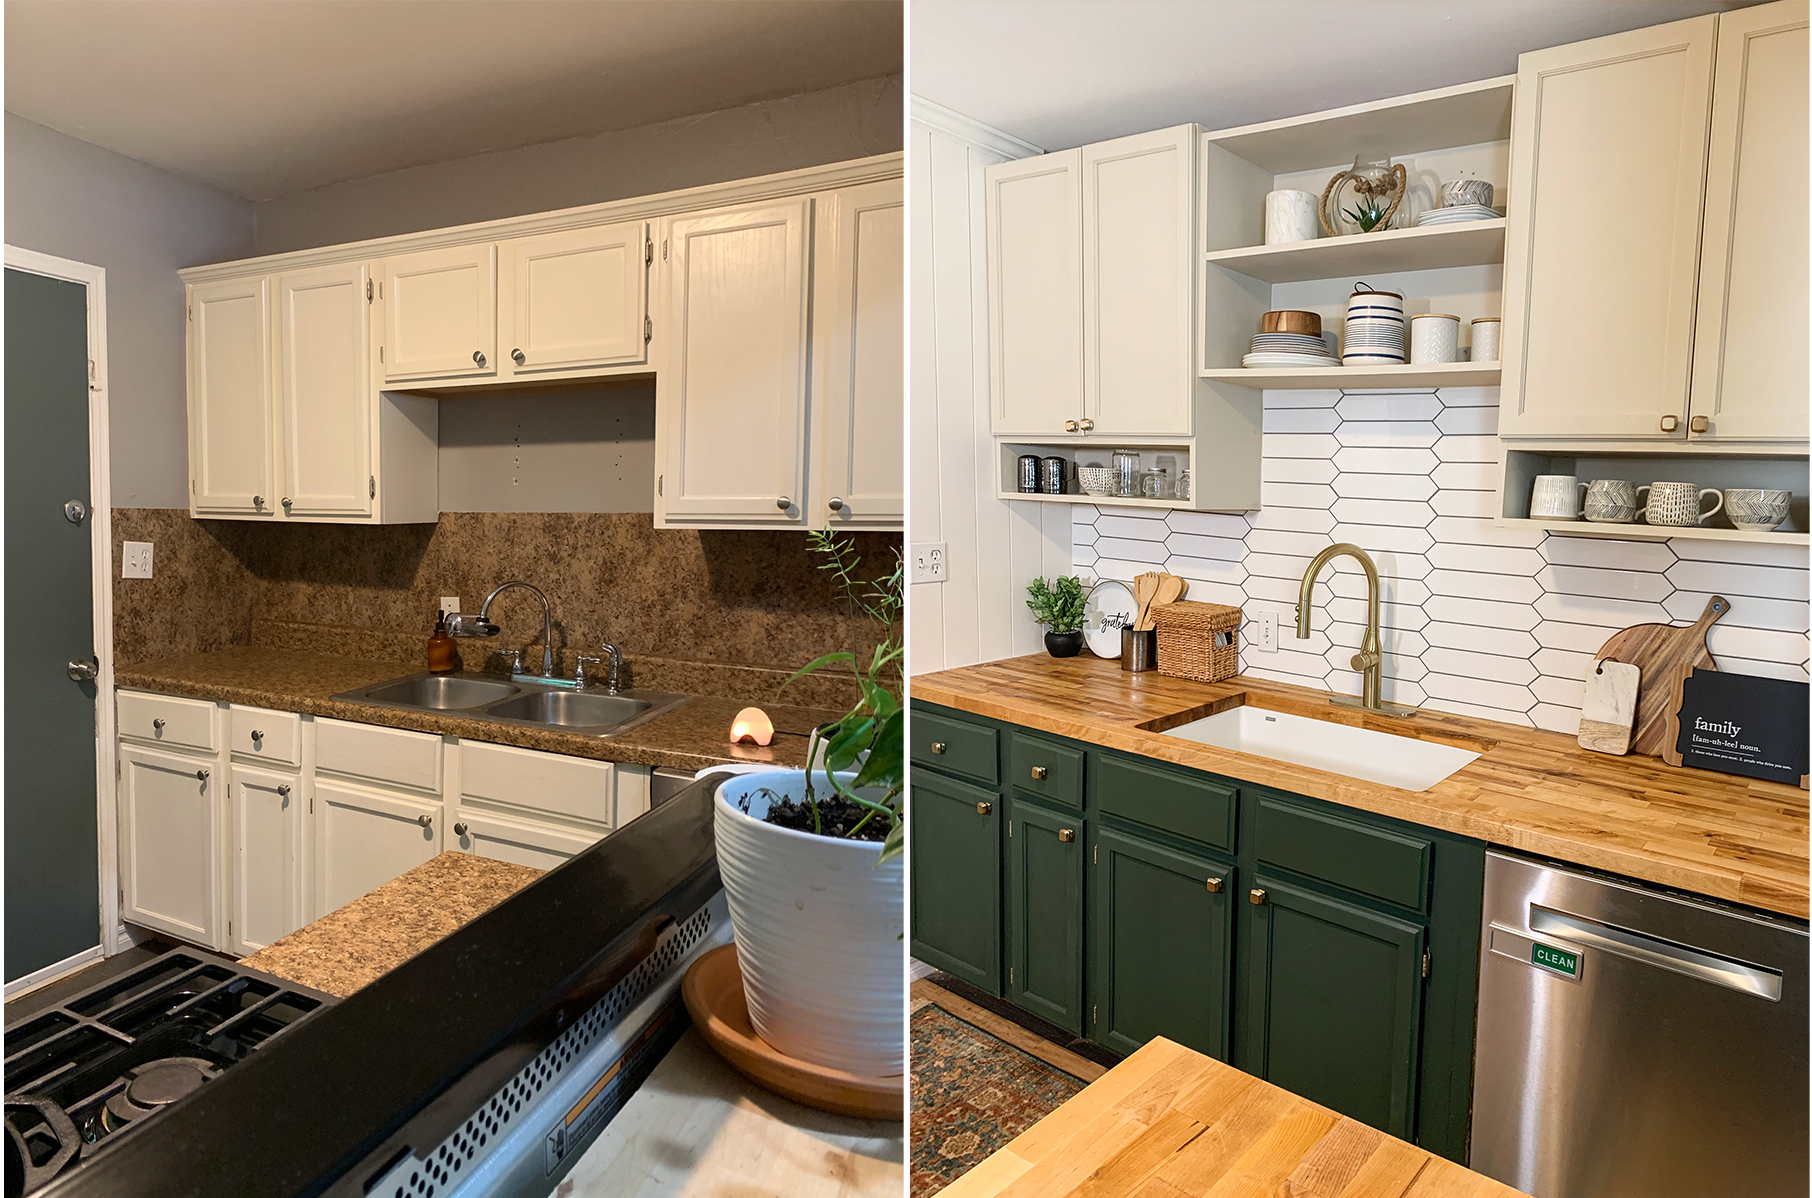
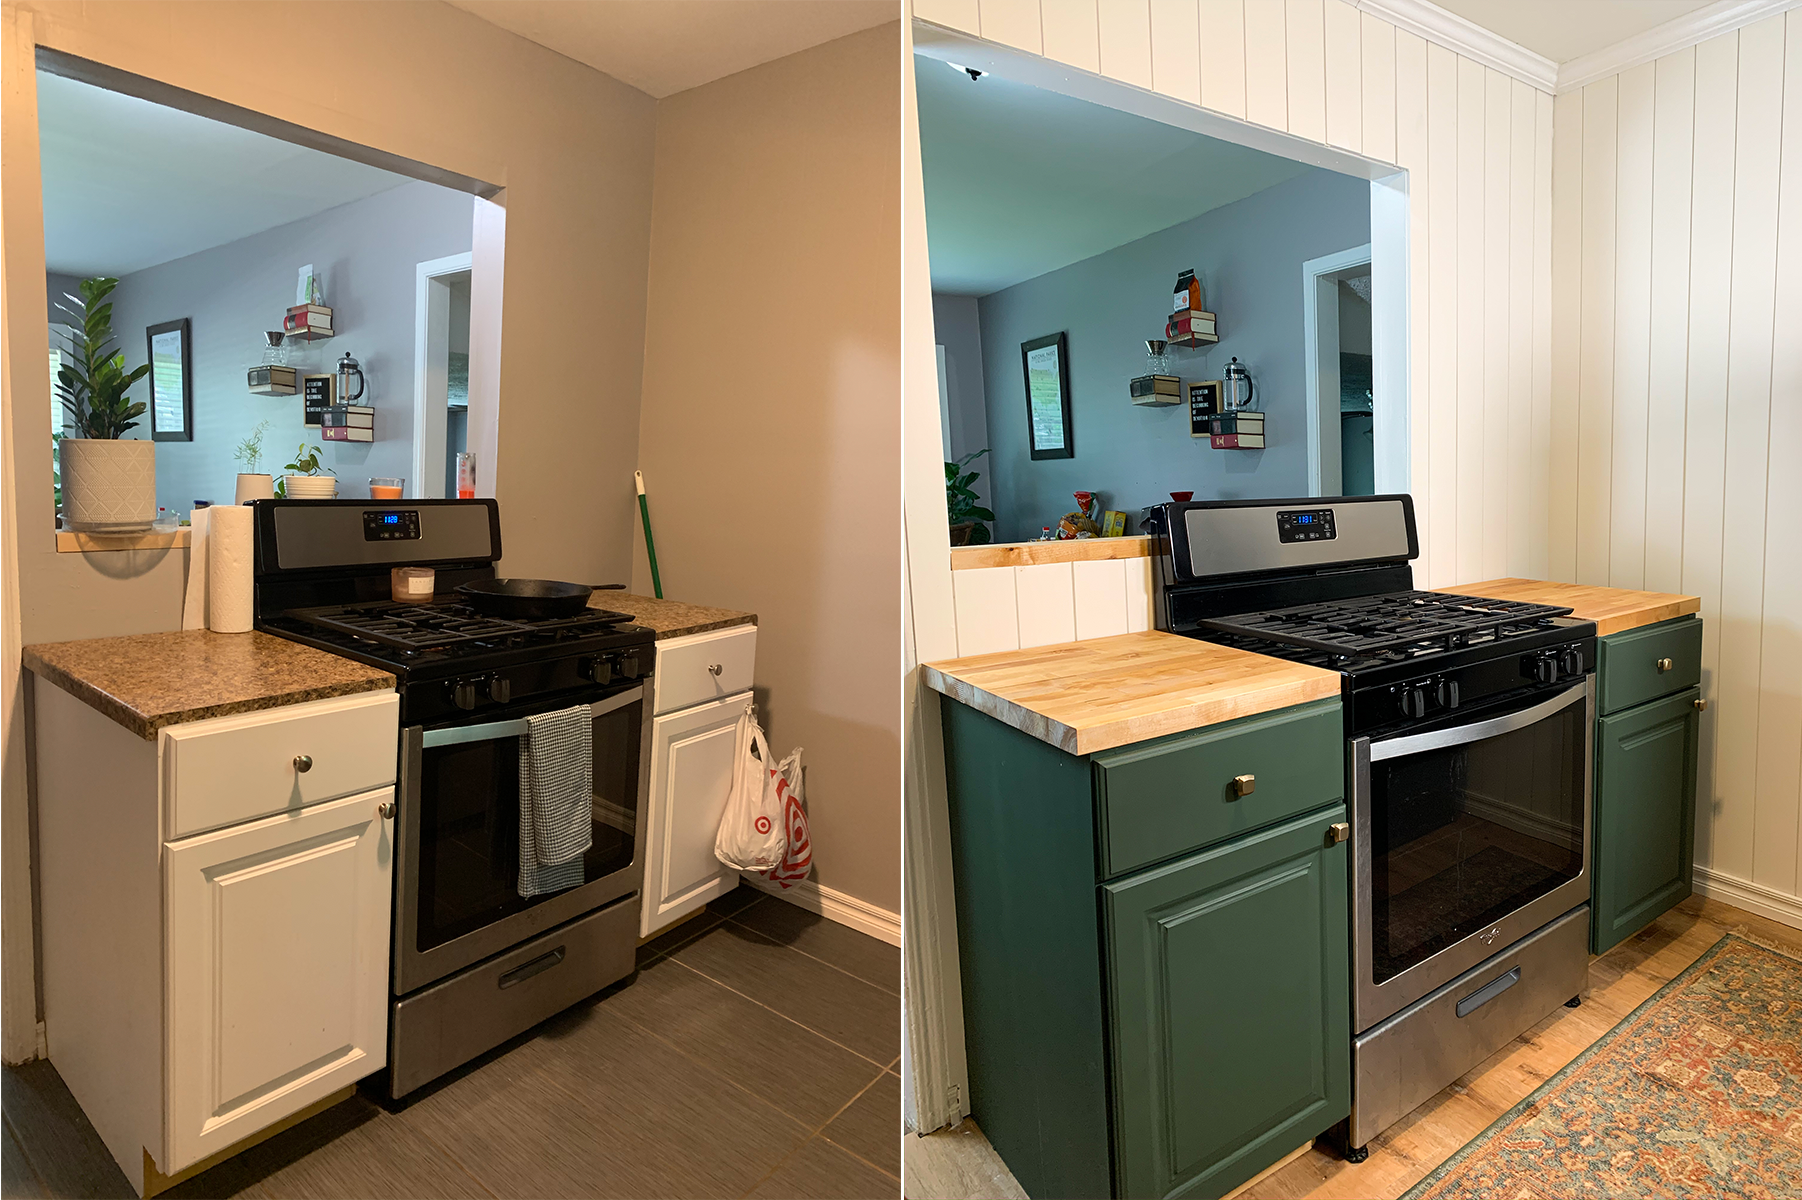
and who doesn't love a few good before and after photos?
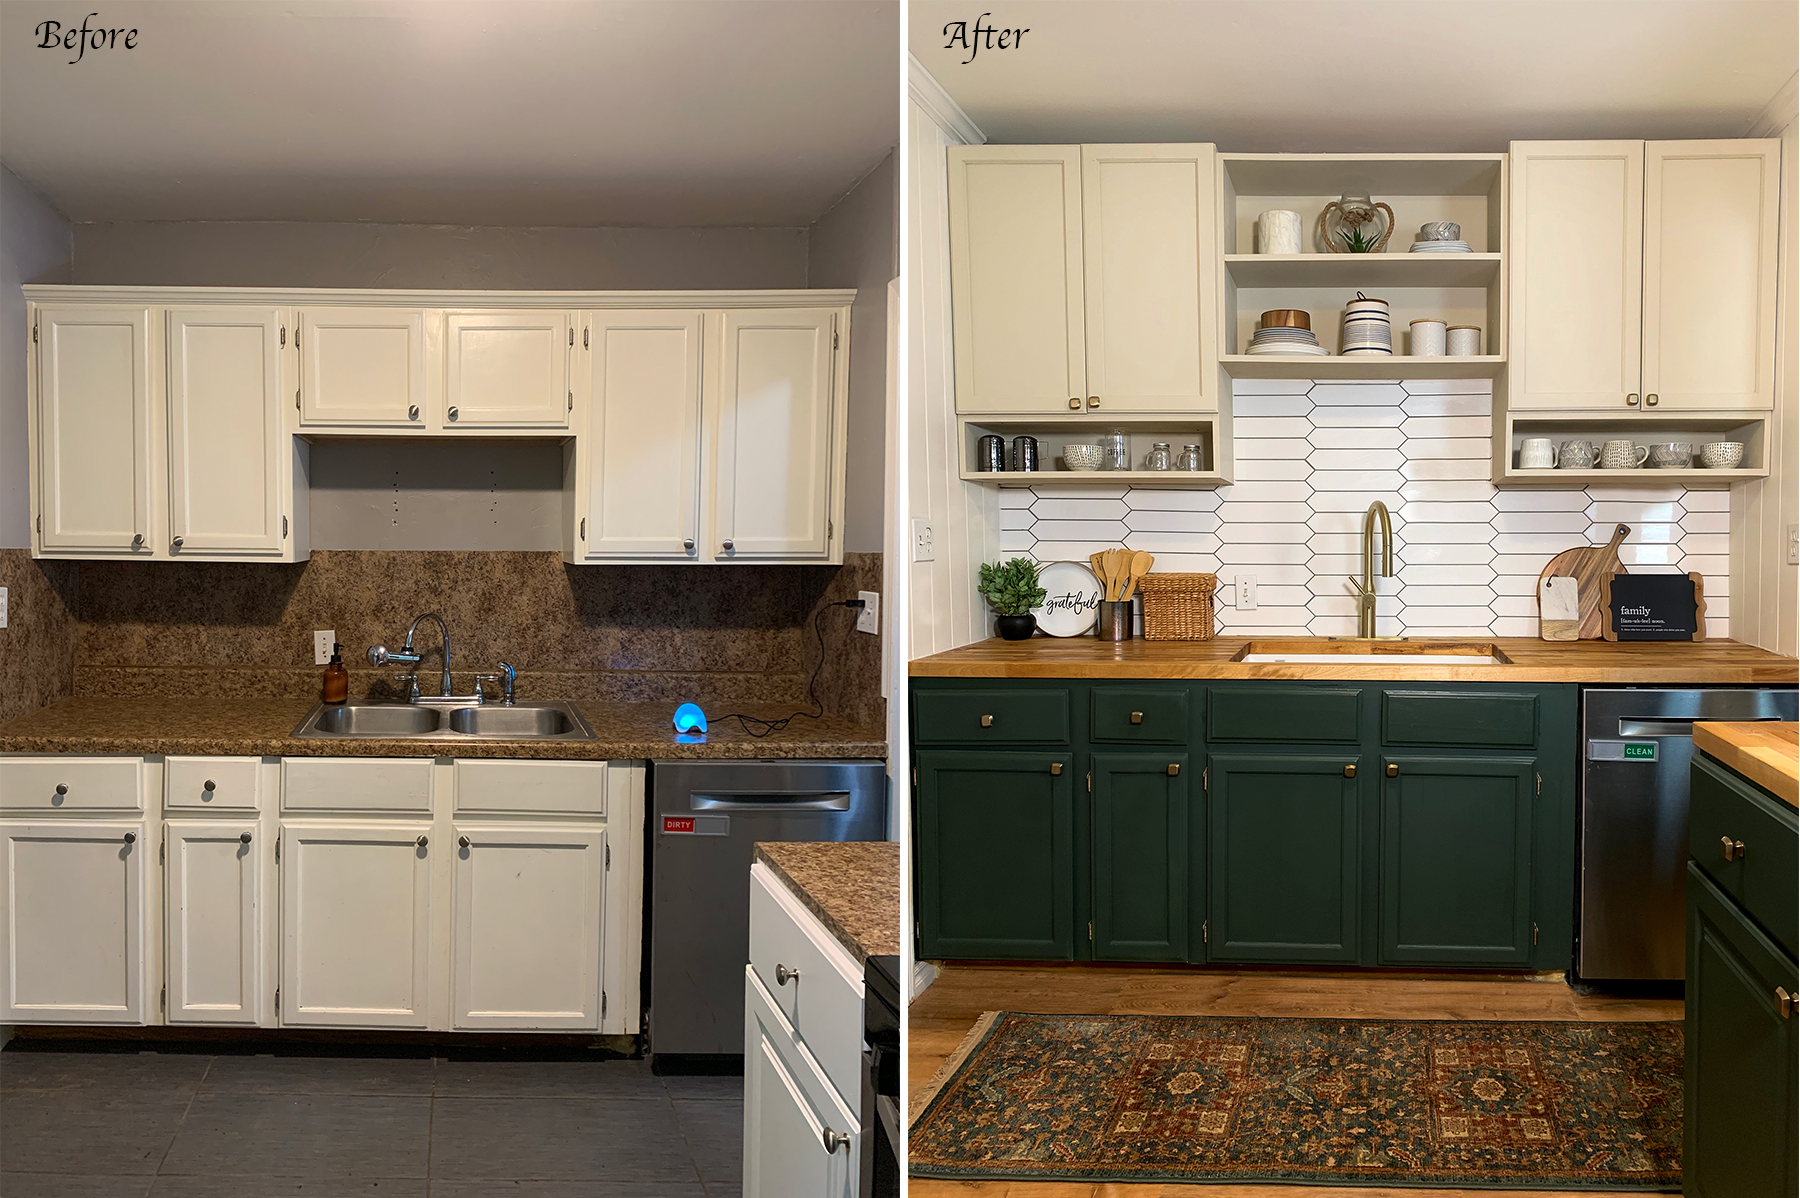 Seeing the two pictures side by side really makes you realize just how much the kitchen changed with the small changes.
If you are a little scared to tackle your kitchen Reno, this is proof that it can be done. This was my first kitchen renovation project and I think I knocked it out of the park.
 Welp, that wraps up the Kitchen Renovation, I hope you guys enjoyed this project just as much as I did and as always, thanks for stopping by guys, XOXO Ashley.


