"A barn door tv console that will keep you glued to the TV"
I am here to present another build made by an awesome fellow builder. Charlee over at Build and Create Home. She has created this amazing barn door tv console that puts all other tv stands to rest. YES! Im bragging on her :) Lucky for you, we have partnered up so you too can build this baby. Enjoy! Be sure to check her out on Instagram to keep up with her latest projects!
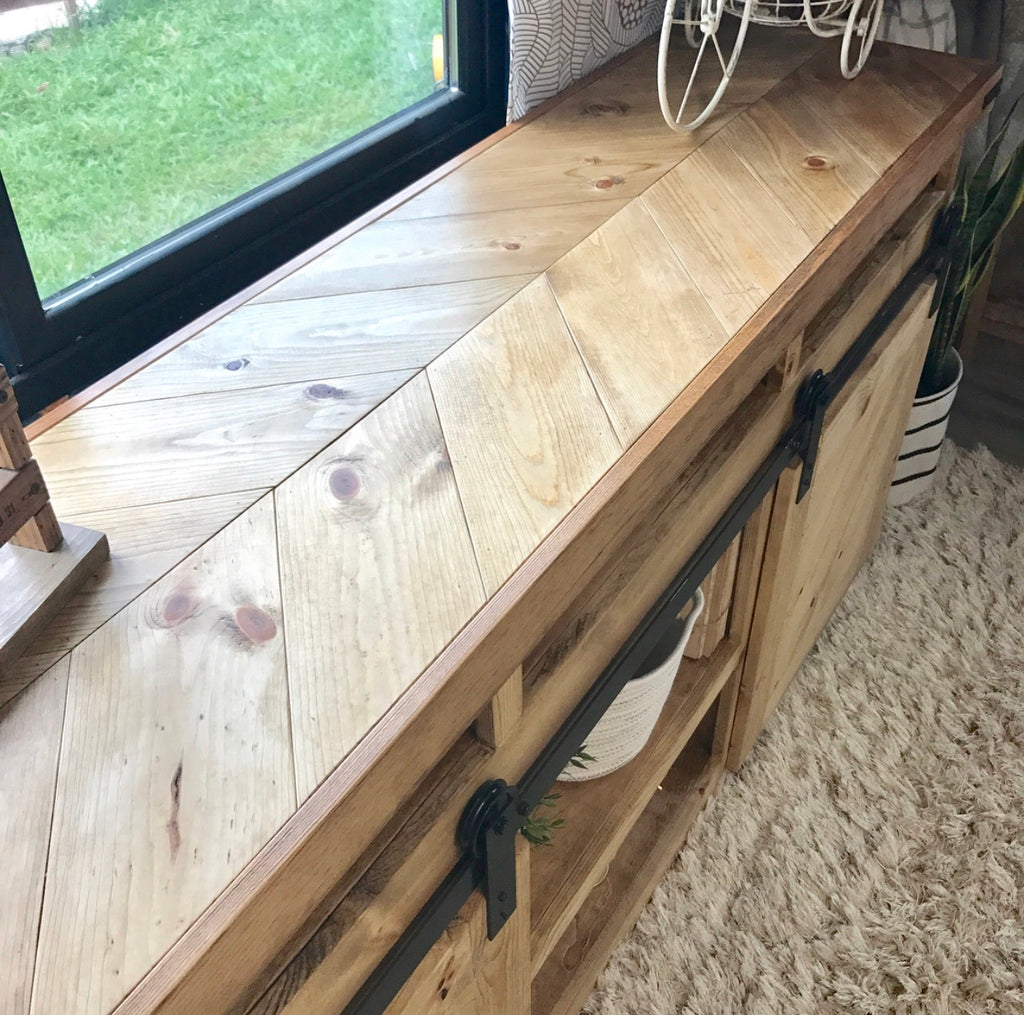
Be sure to check out Charlee's post here for all the details on finish and hardware.
There are some affiliate links in this post, meaning I get a small commission if you purchase through these links, at no cost to you. Click Here to read my full disclosure.
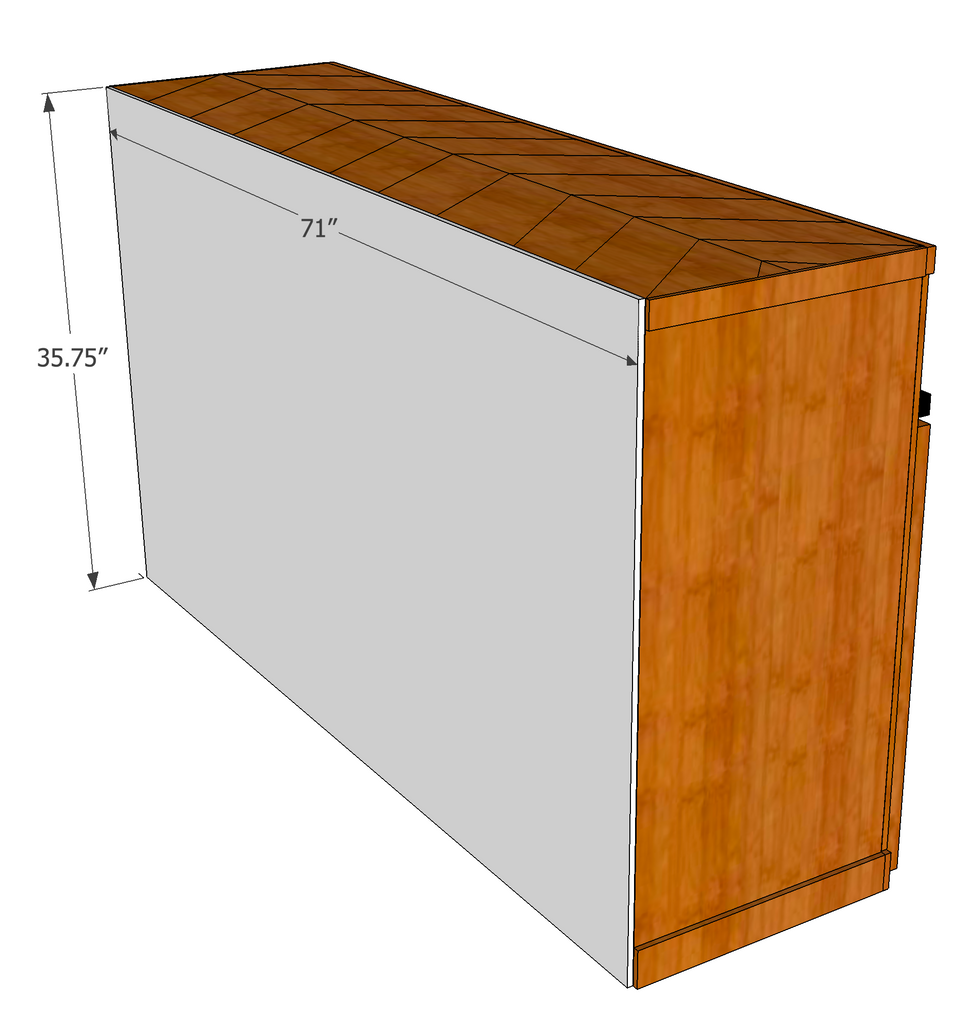
Dimensions:
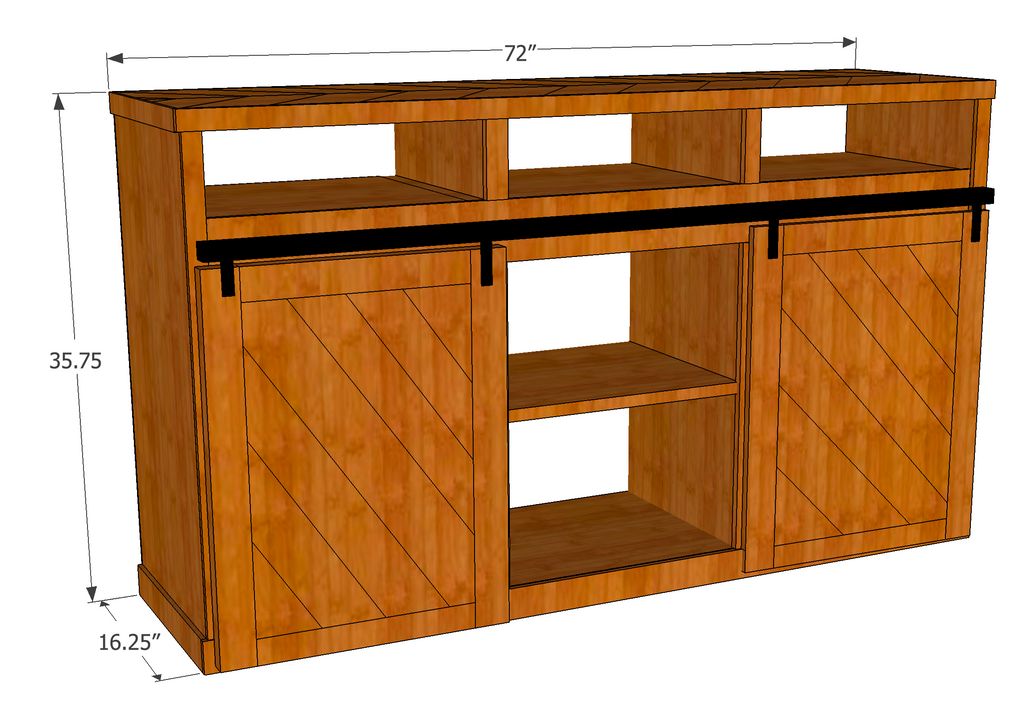
Materials List:
- 7 - 1x4 @ 8ft
- 3 - 1x2 @ 8ft
- 1- 1x3 @ 8ft
- 1 - 1x3 @ 6ft
- 3 - 1x6 @ 8ft
- 2 - 3/4" sheet of plywood @ 4'x8'
- 1 - 1/4" sheet of plywood @ 4'x8'
Cut List:
- 2 - 3/4" plywood @ 15 x 35"
- 1 - 3/4" plywood @ 15 x 71"
- 1 - 3/4" plywood @ 15 x 69.5"
- 2 - 3/4" plywood @ 15 x 31.5"
- 4 - 3/4" plywood @ 15 x 23"
- 2 - 3/4" plywood @ 15 x 22"
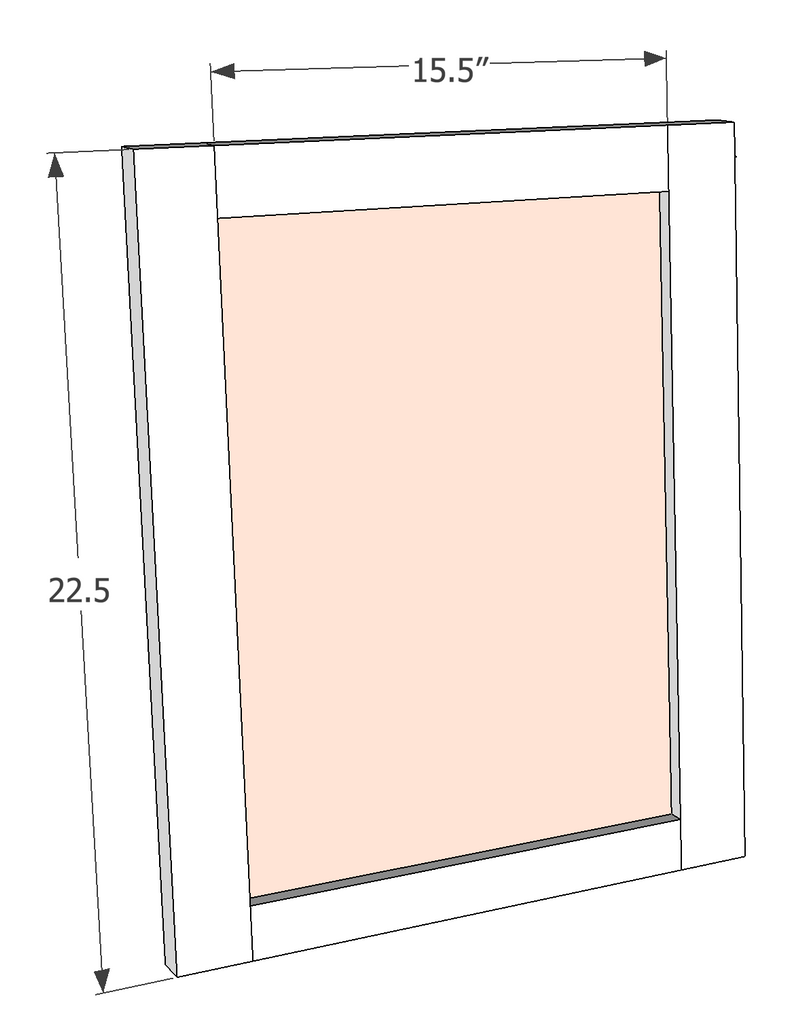
- 2 - 3/4” plywood @ 22.5” x 22.5”
- 2 - 1x4 @ 15"
- 1 - 1x4 72.5"
- 2 - 1x3 @ 15"
- 2 - 1x2 @ 29.75"
- 1 - 1x6 @ 68"
- 2 - 1x2 @ 21.25"
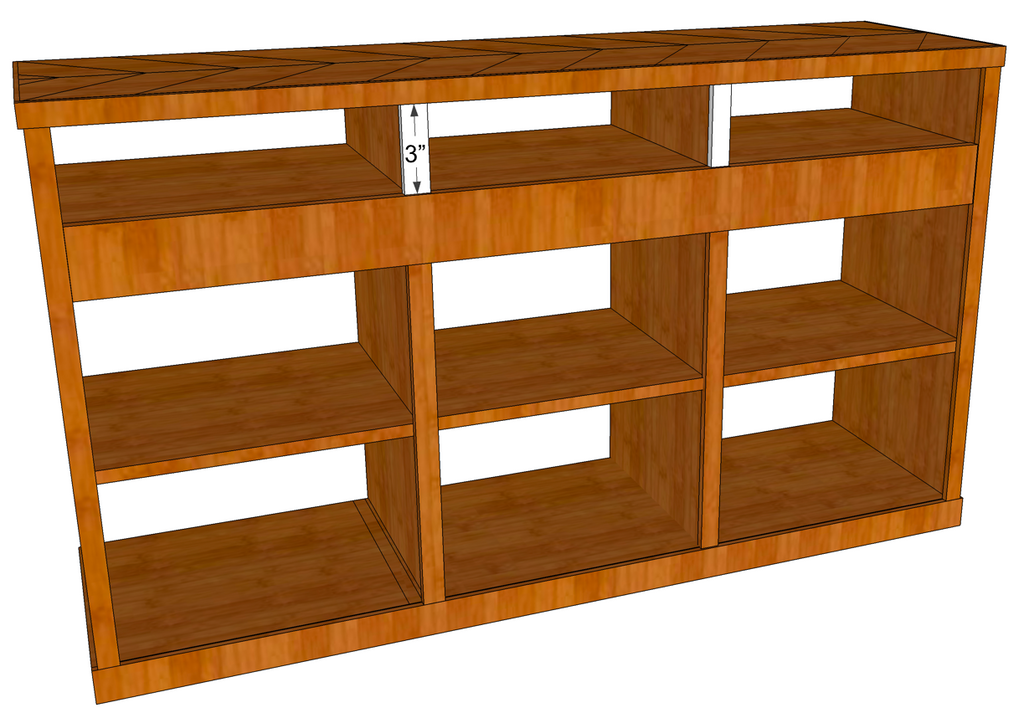
- 2 - 1x2 @ 2"
Note: Please be sure to measure before making any and all cuts for best fit.
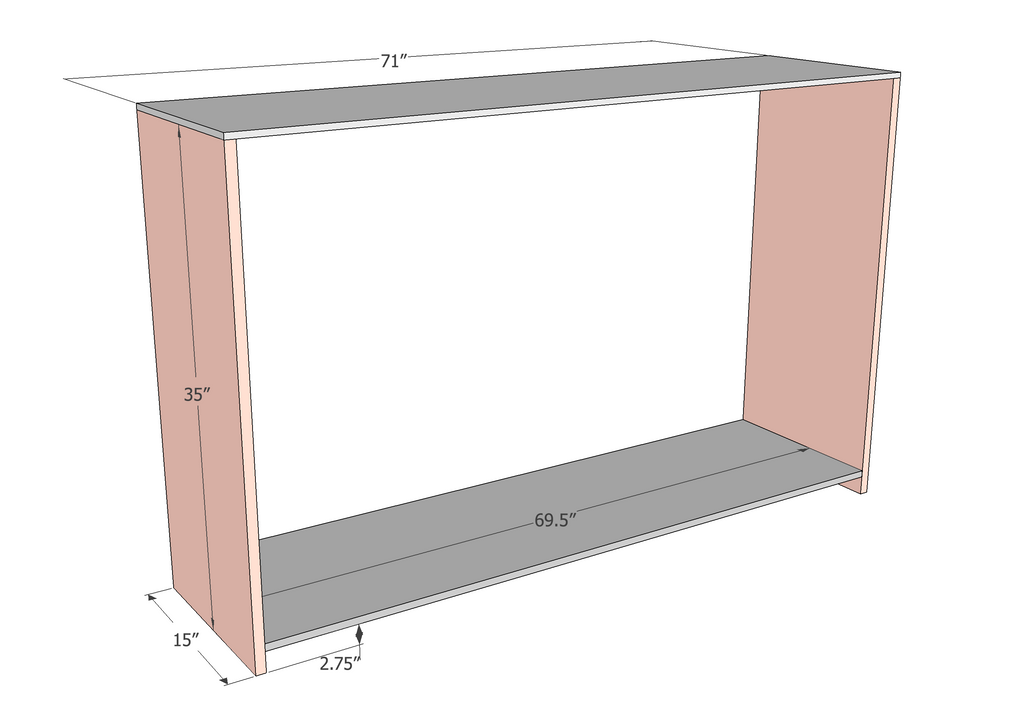
Step 1: Attach the two (15"x35") 3/4" side pieces to the top (15"x 71") and bottom(15"x 69.5") pieces using a Kreg Jig K4 Pocket Hole System on a 3/4" setting, with 1 1/4" Pocket Hole Screws to attach along with wood glue.
Step 2: Attach the two (15"x 31.5") center dividers using a Kreg Jig K4 Pocket Hole System on a 3/4" setting, with 1 1/4" Pocket Hole Screws to attach along with wood glue.
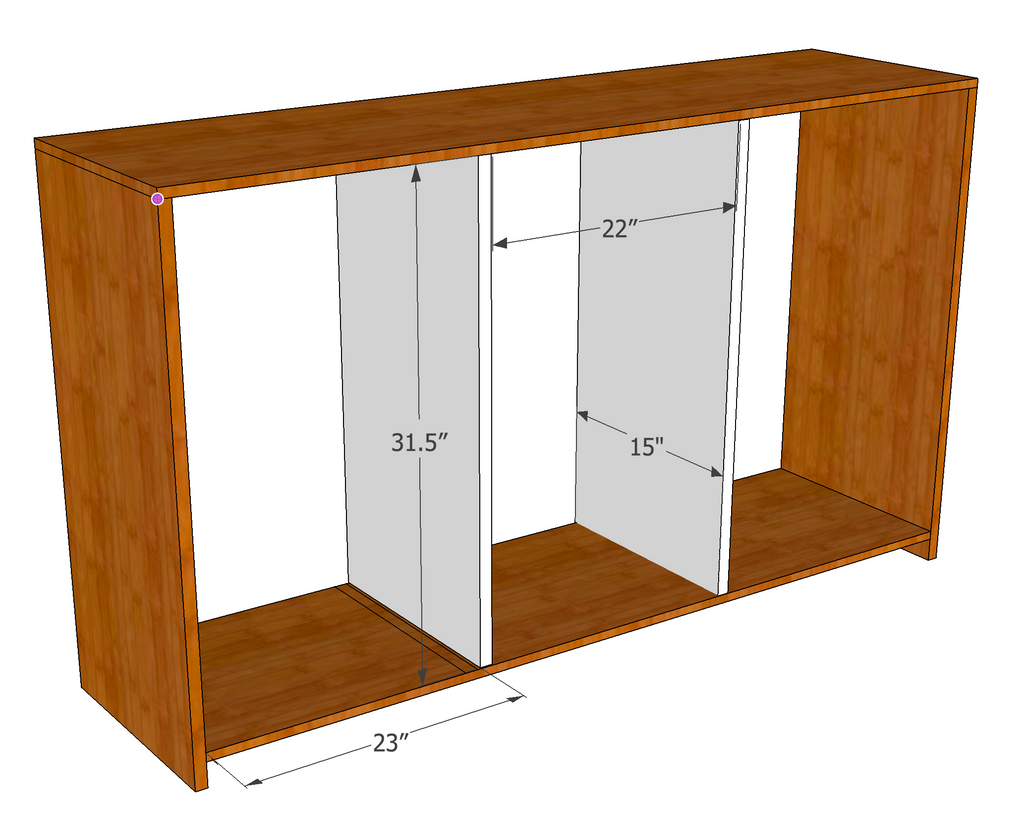
Step 3: Attach the four outer (15"x 23") shelves to the assembled console and the two (15"x 22") center shelves using a Kreg Jig K4 Pocket Hole System on a 3/4" setting, with 1 1/4" Pocket Hole Screws to attach along with wood glue.
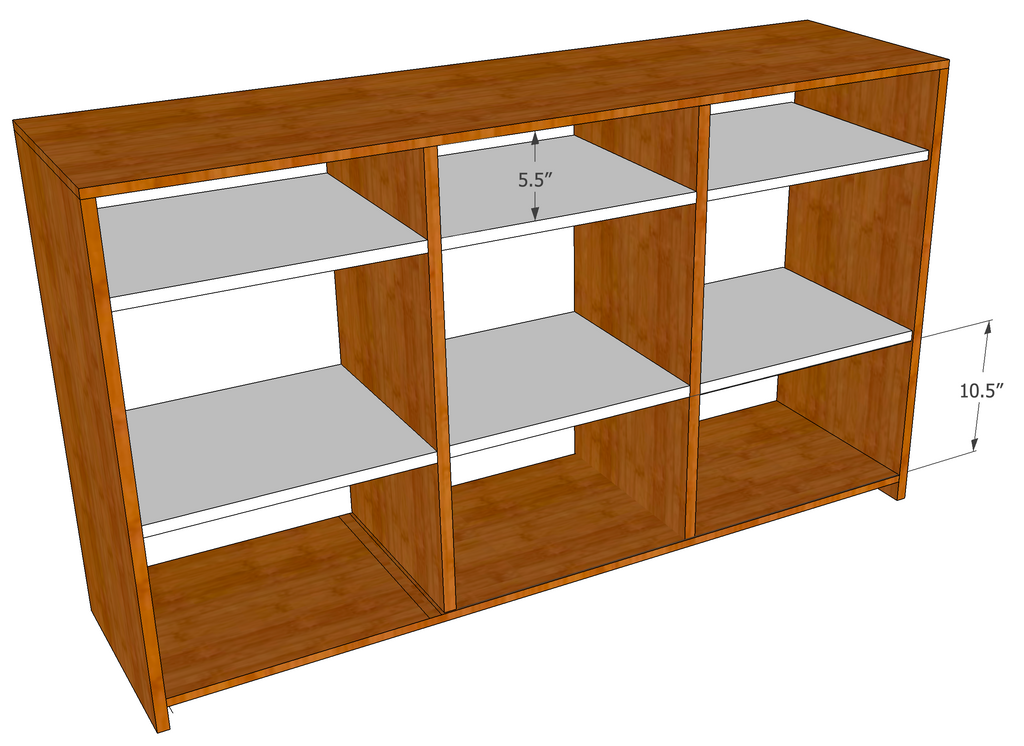
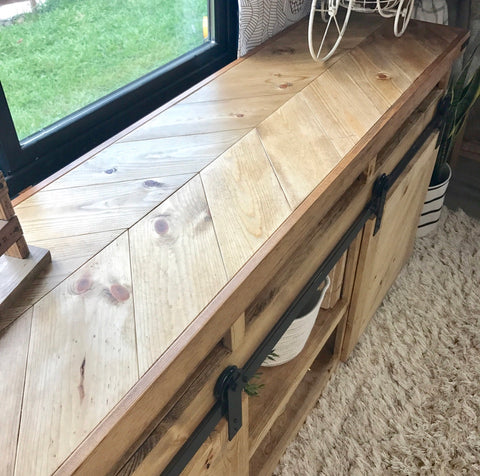
Step 4: Create a chevron pattern on the top of the console using 1x6s, wood glue and brad nails.
Note: Chevron pattern on the build pictured extended out 3/4" on the front for overhang.
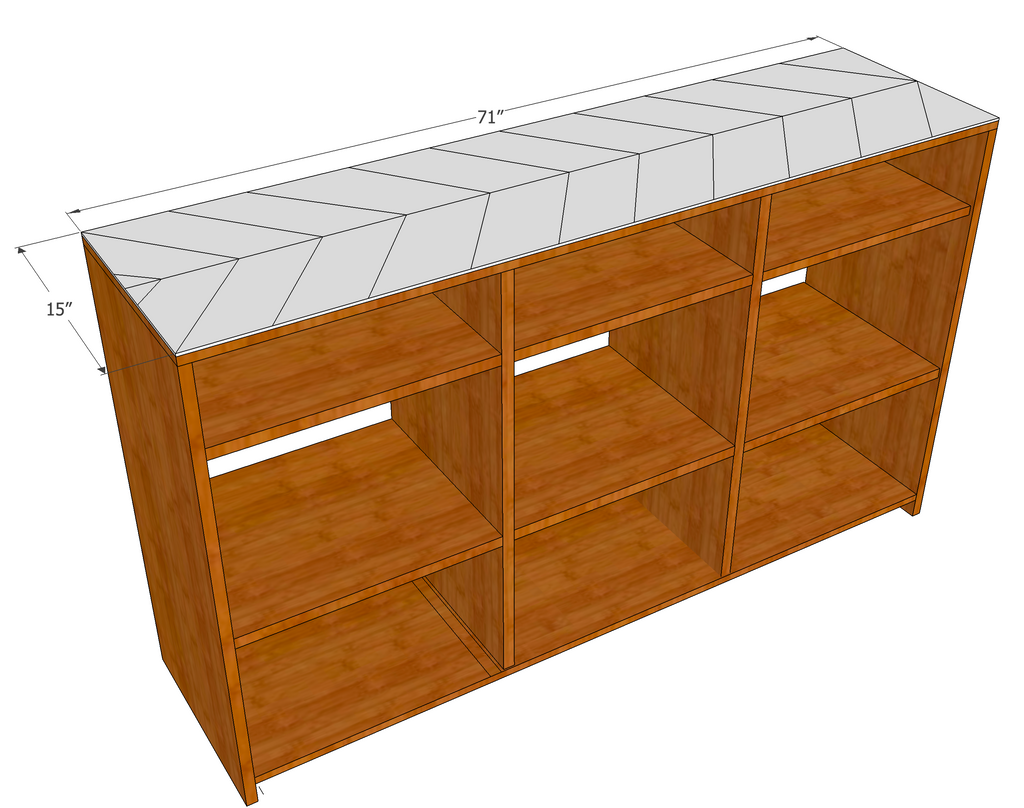
Step 5: Attach the top 1x3 and bottom 1x4 (15") trim , to the top and bottom of the console on both sides using wood glue, a brad nailer and finish nails.
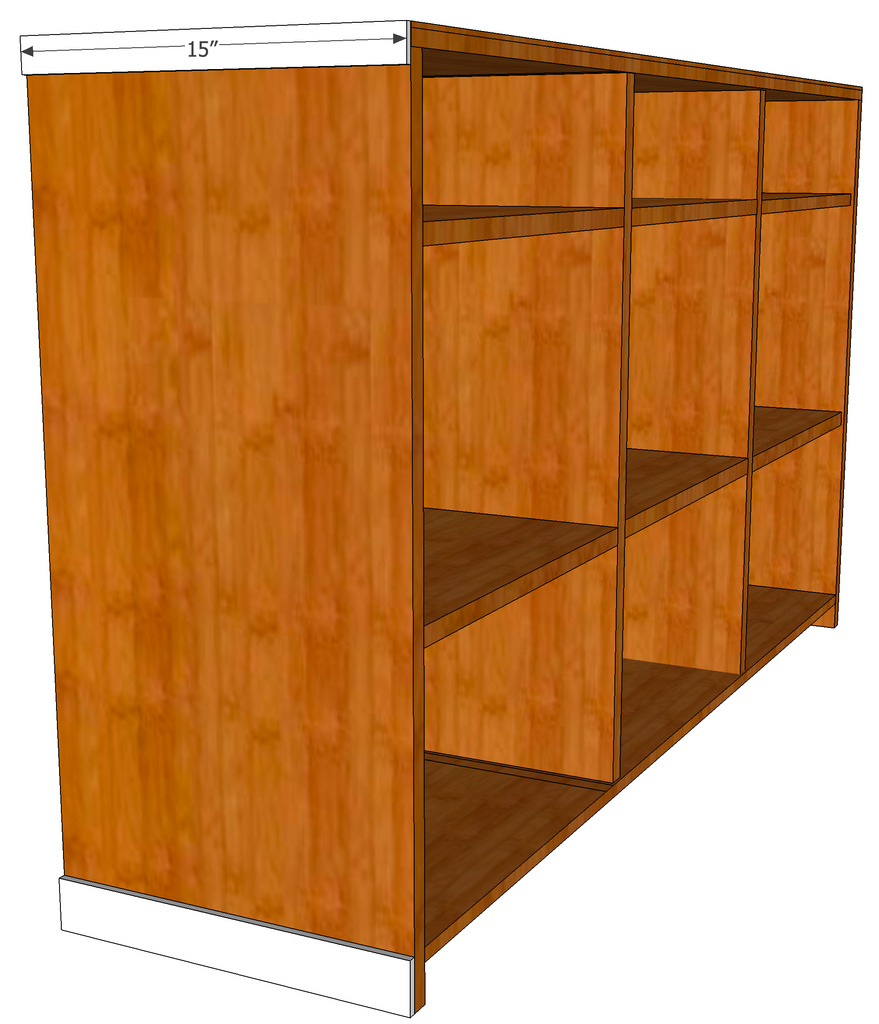
Step 6: Attach the top 1x3 and bottom 1x4 top and bottom trim and 1x2 side trim to the tv console using wood glue, a brad nailer and finish nails. The bottom 1x4 trim should be flush to the bottom of the tv console.
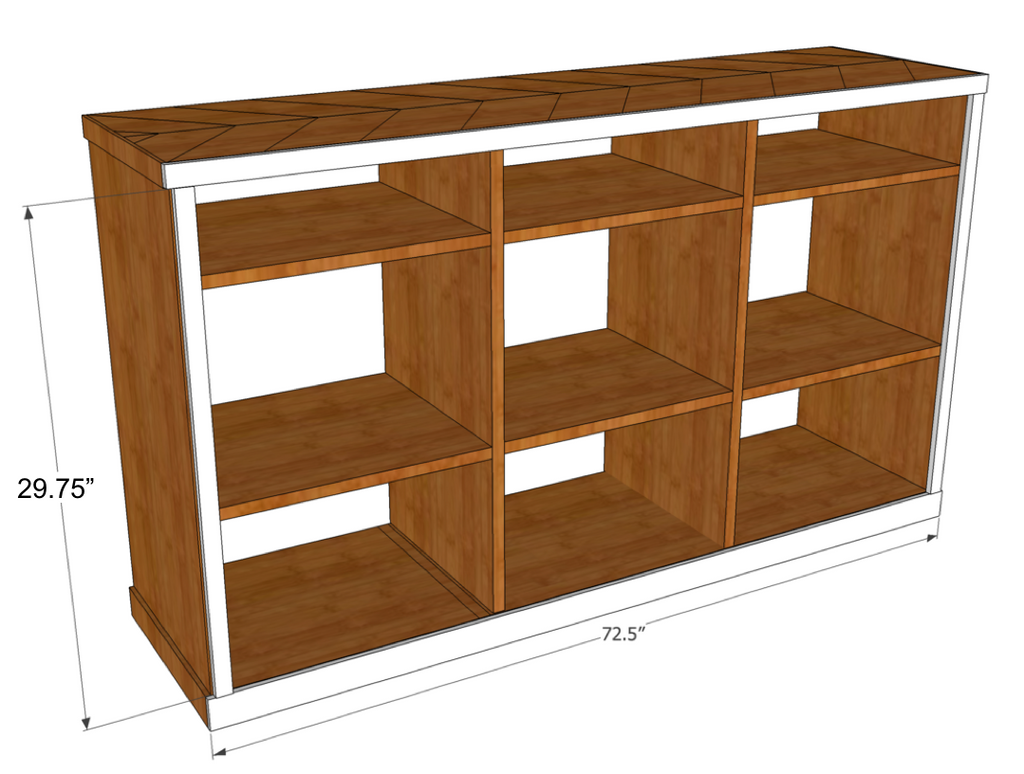
Step 7: Add the middle 1x6 trim to the console using wood glue and a brad nailer. The 1x6 should be flush with the first console row. Then add the remaining 1x2 trim to the console. The trim should sit directly on the center of the vertical plywood.
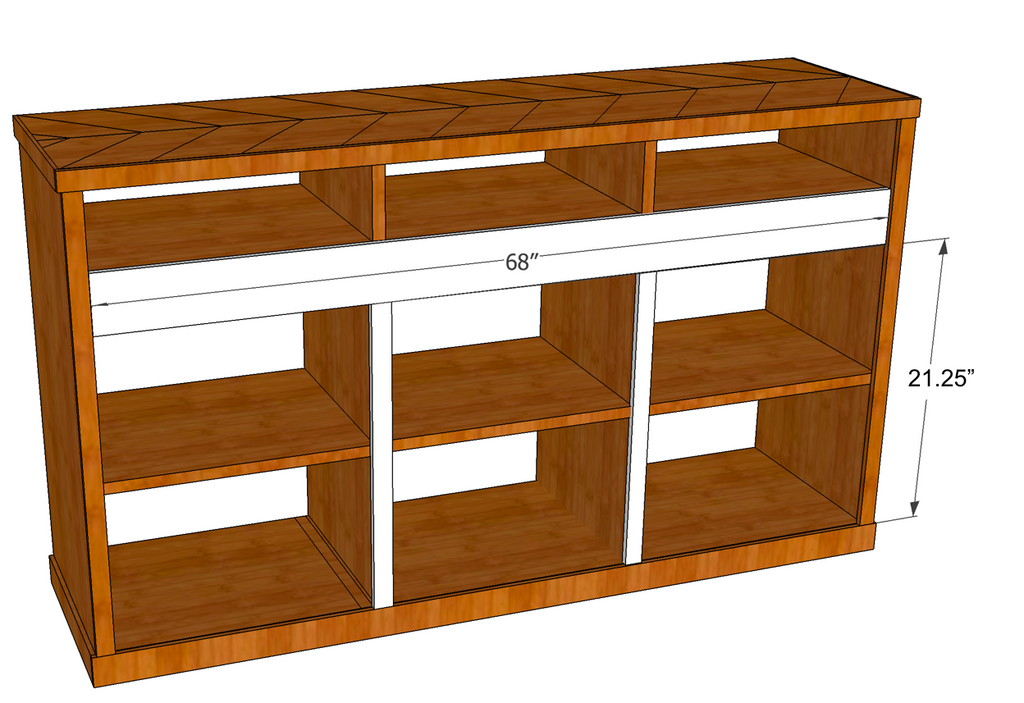
Step 8: Add the top vertical 1x2 trim to the console using wood glue and a brad nailer. The trim should sit directly on the center of the vertical plywood.
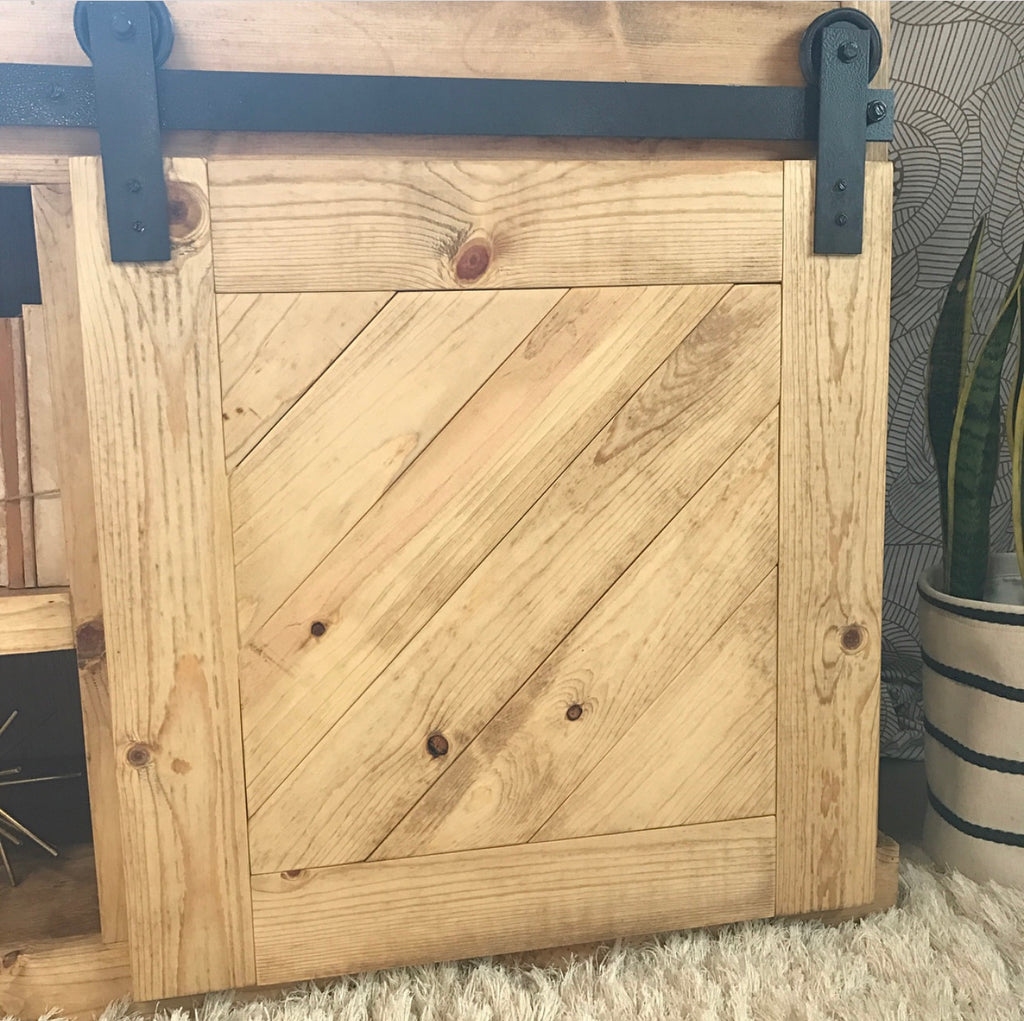
Step 9: Assemble Barn doors by attaching 1x4 trim to 1/4" plywood with wood glue and a brad nailer.
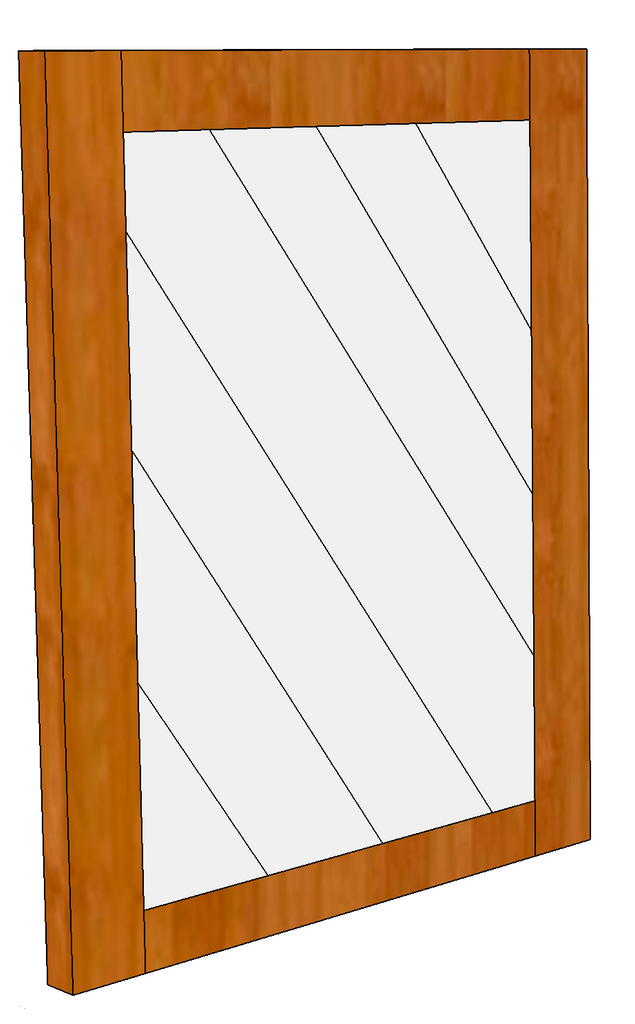
Step 10: Using 1x4 trim create a chevron pattern using wood glue and a brad nailer for both doors and attach doors to console using barn door hardware.
Step 11: Add the 1/4" (71"x 35.75") plywood backing using wood glue and a brad nailer.
Let's take another look at this amazing build!
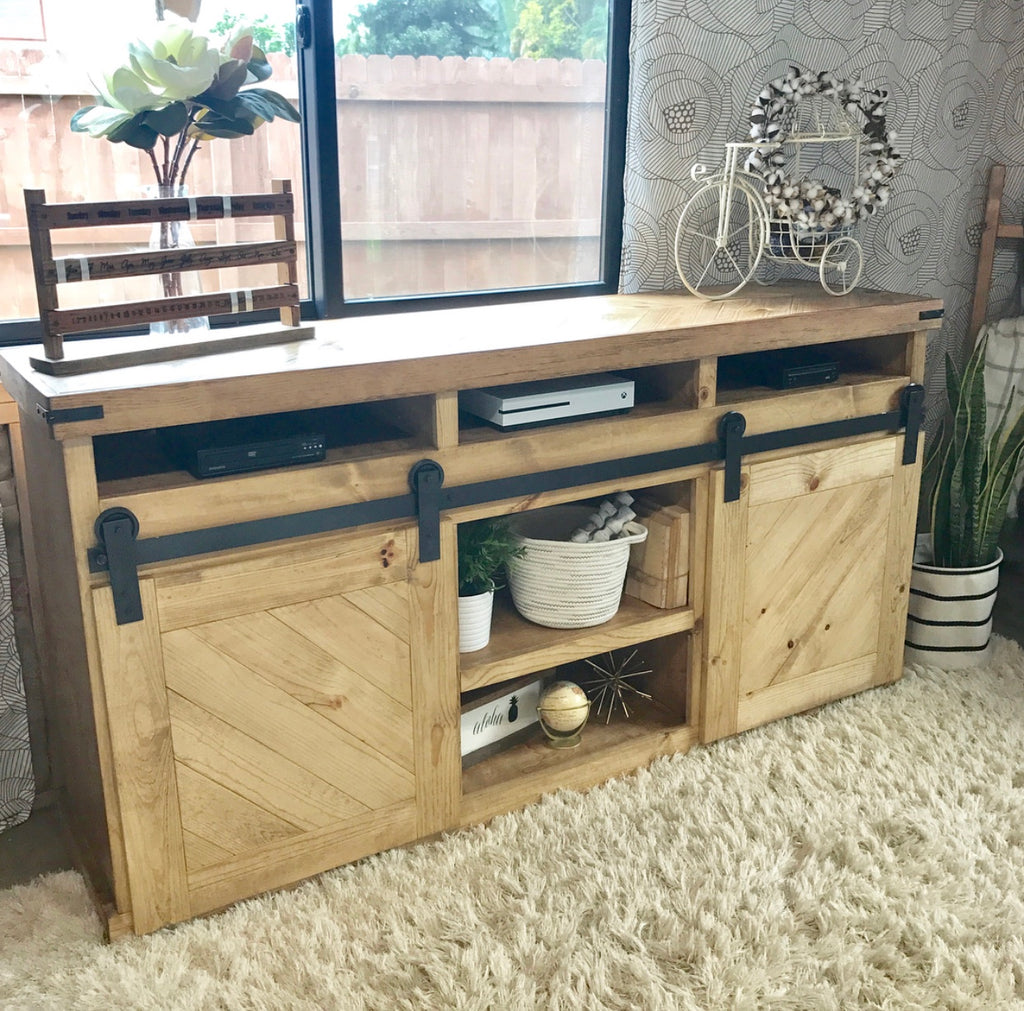 I've never seen a wood project look so sheek. The chevron pattern on the top really gives it character.
 I also really love the subtle detail of the sliding doors. Charlee did such an awesome job on this one. Be sure to check out her post for all the details on the finish and hardware.

Thanks for reading guys! XOXO Ashley


