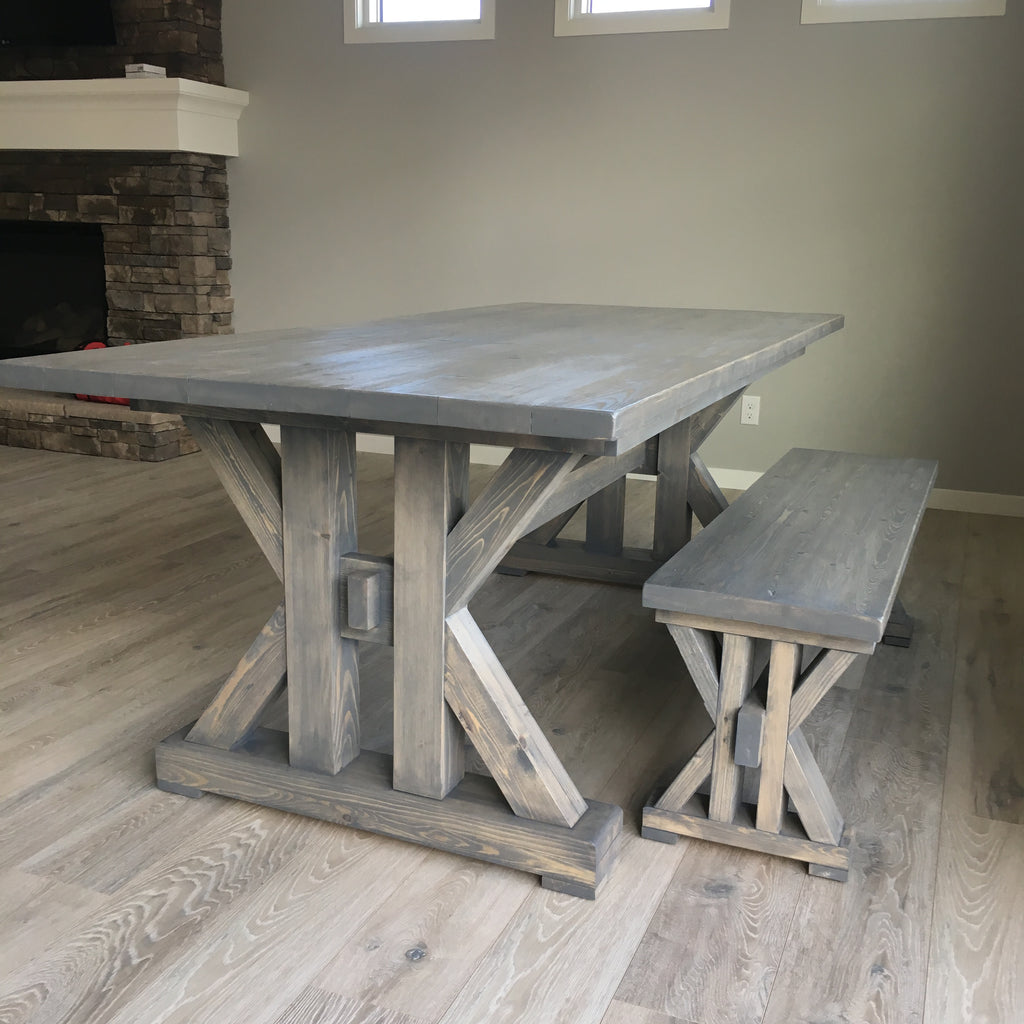
This dining table is giving French Farmhouse a whole new meaning.
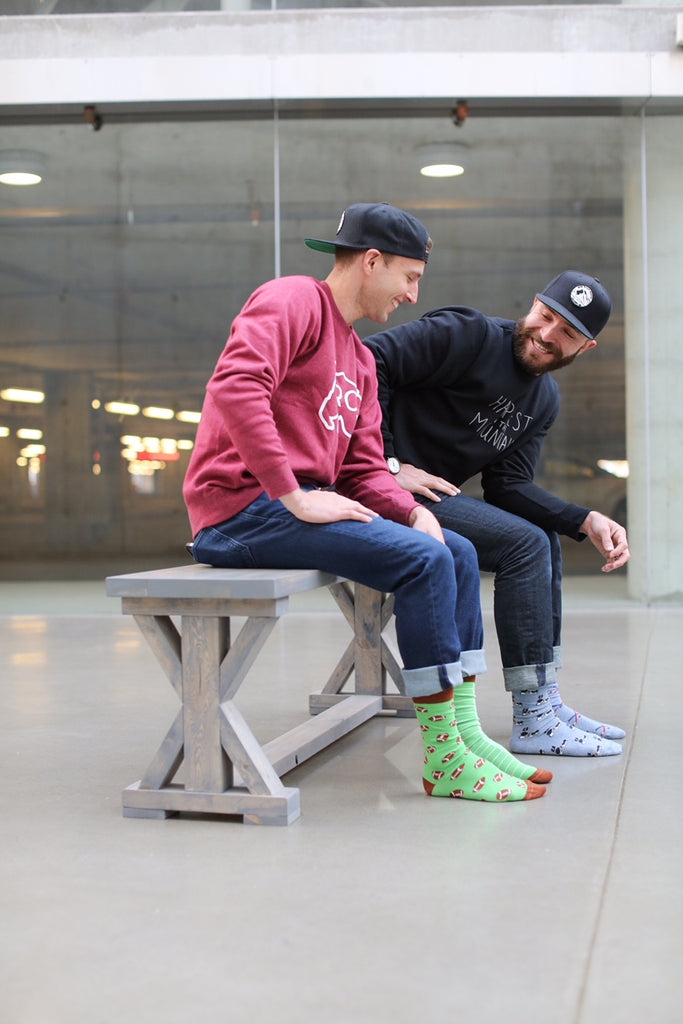 Today is an exciting day because I get to feature another group of great builders. Eddie Sheppard and Phil Armstrong of BowRiverRustic have built this B-E-A-UTIFUL French Farmhouse Dining table and today's your lucky day because we have partnered up so that you too can build your own table with my 3D plans. Be sure to go check these guys out and give them a follow on Instagram. I mean they look cool enough to follow, right? I sure think so. Today's post is to provide plans for the dining table but don't freight...plans for the bench are available here, I mean what's the peanut butter without the jelly right? HAHA! OK, I know you're probably thinking, enough blabbing, give me the good stuff. Well, I'd hate to disappoint you, so lets get to it!
Dimensions
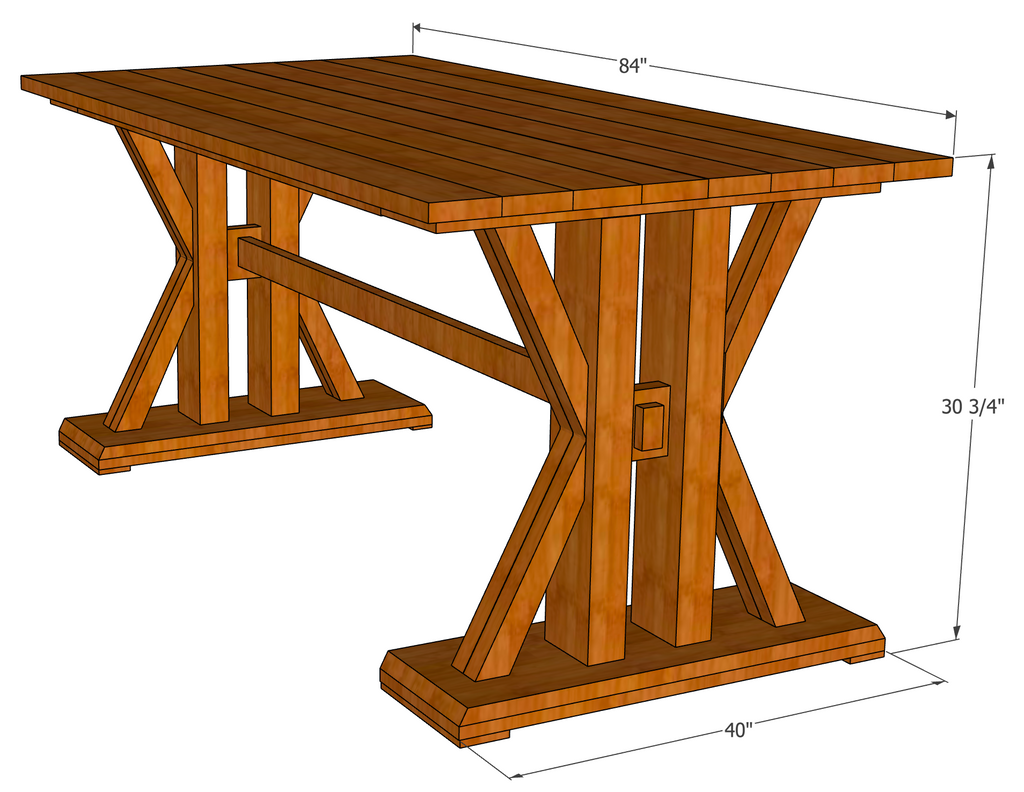
Materials List:
10 - 2x6 @ 8ft
1 - 4x4 @ 8ft
7 - 2x4 @8ft
1 - 1x4 @ 6ft
See Printable Plans for Cut List
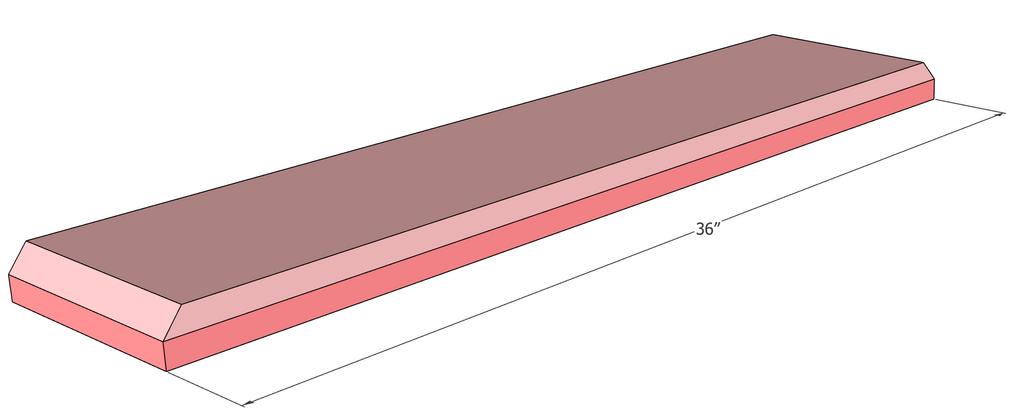
Step 1: Rip the four (36") 2x6 boards to 4 1/2" and glue two pieces together and secure with 2 1/2" wood screws. You should have two completed foot bases. To round edges, use a palm sander or cut at a 45 degree angle as an alternative. Note: Screw the boards on the side that will face the ground.
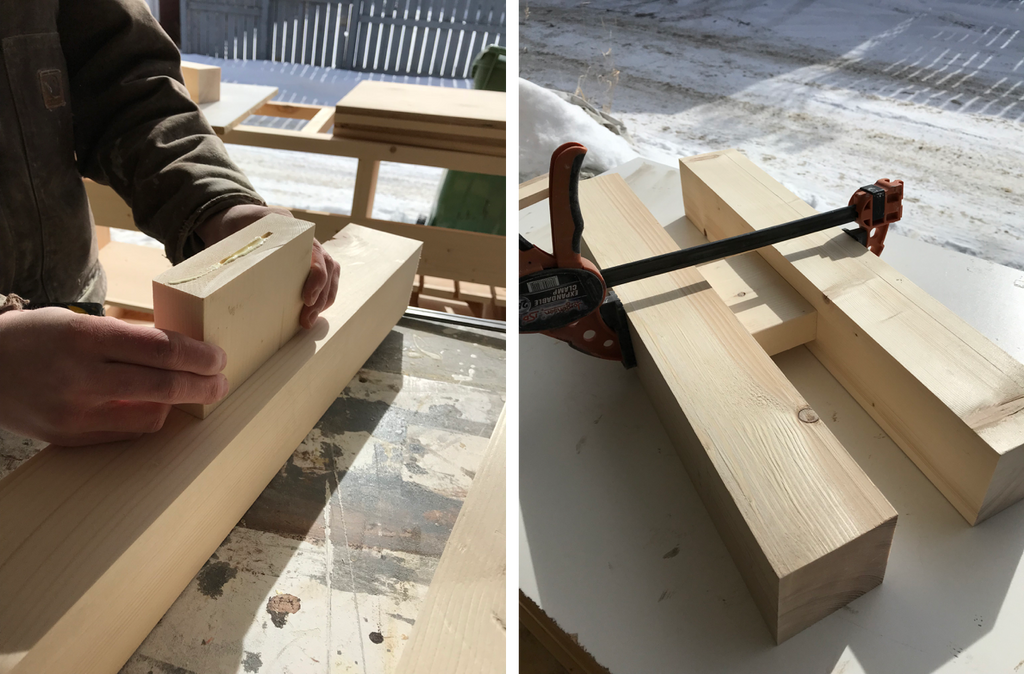
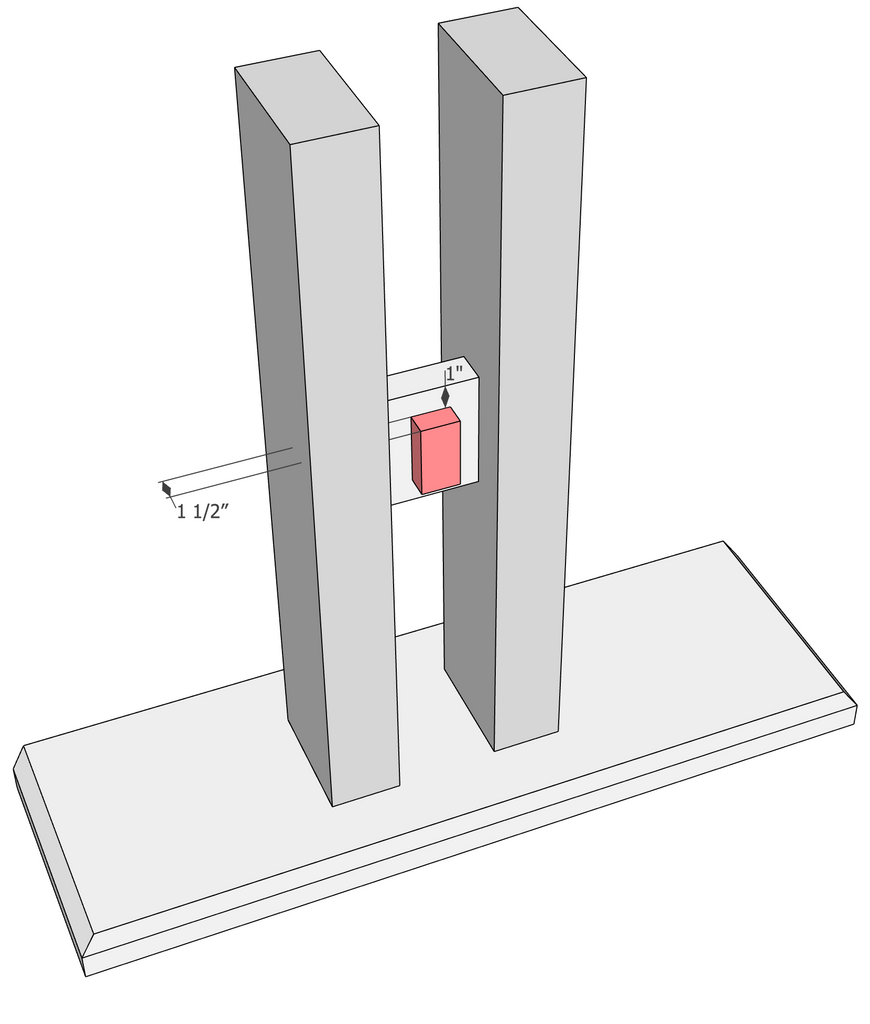
Step 2: Center and biscuit the 2x6 divider (3 1/2" piece) to the two (24") 4x4 legs. Crate the biscuit holes using a Biscuit Joiner along with biscuits and use wood glue to secure it in place.
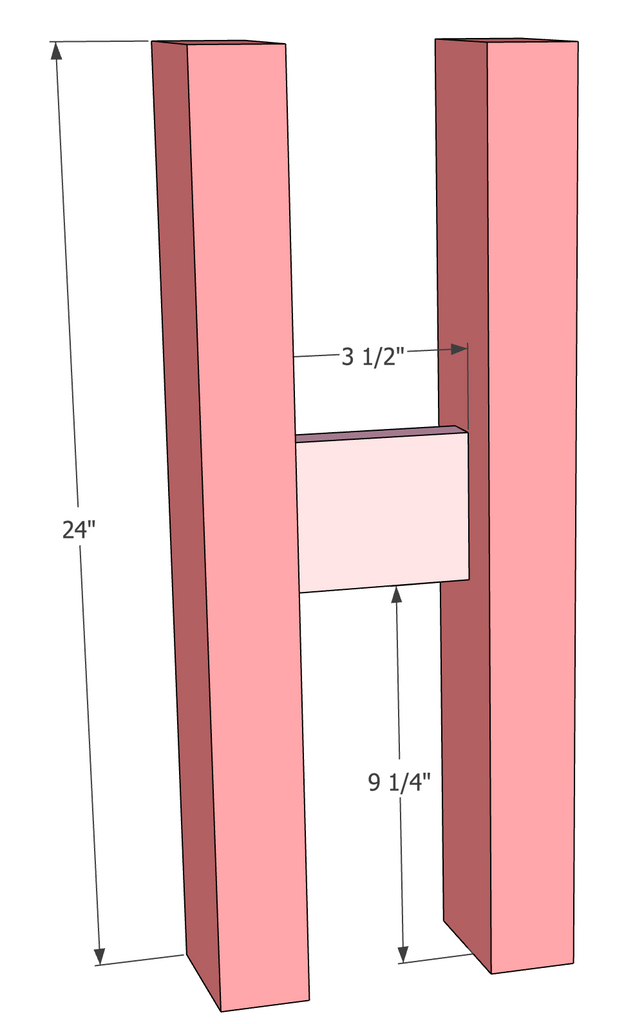
Repeat for the other side of the table.
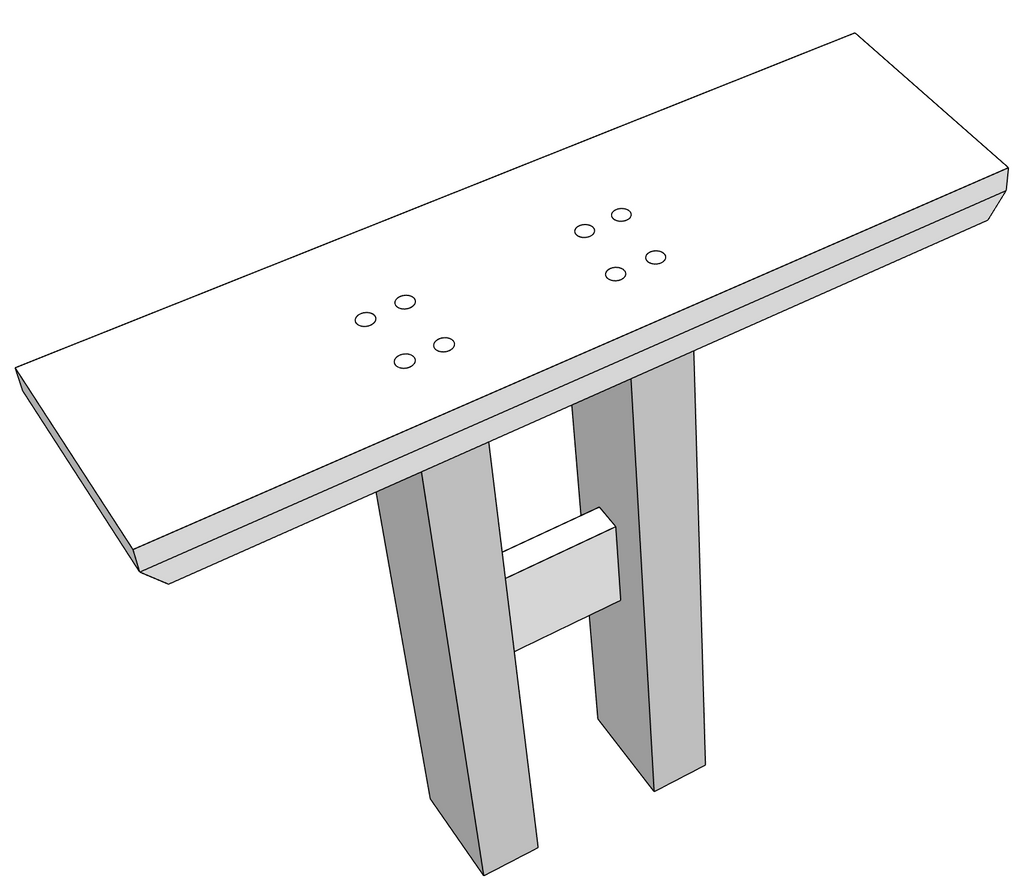
Step 3: Once the middle section is assembled, center the 2x6 base on top of it and drill into the 4x4 legs using 4" wood screws and wood glue.
Step 4: Attach the 2x4 decorative using a brad nailer and 2" brad nails. It should be centered on the 2x6 piece between the 4x4 legs , this will face out when the table is completed.
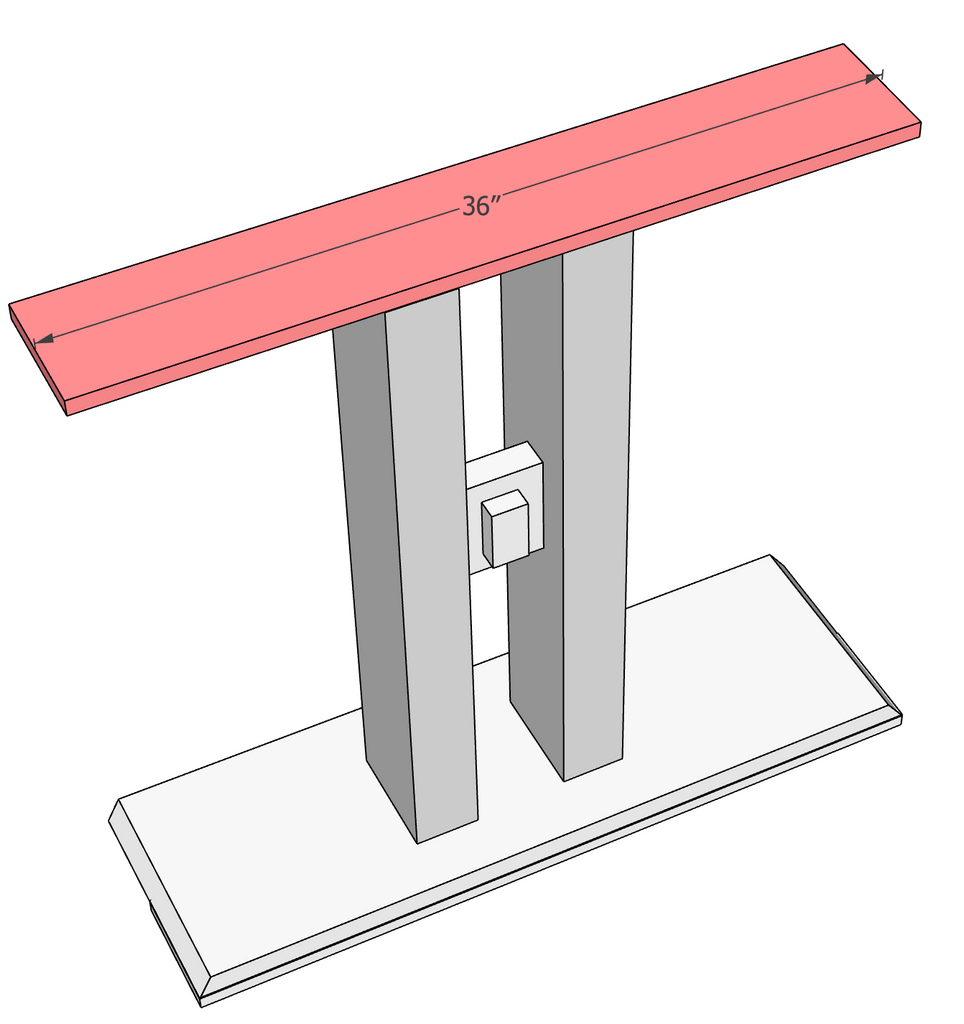
Step 5: Add the (36") 2x4 top valence to the assembled base using 2 1/2" screws. Screw from the top into the 4x4 legs.
Step 6: Assemble the 8 angled legs. Cut 16 2x4's to 18" ( longer to allow for any minor adjustments when cutting the angles). Rip each 2x4 to 3" and then attach two pieces together using 2" brad nails and wood glue.
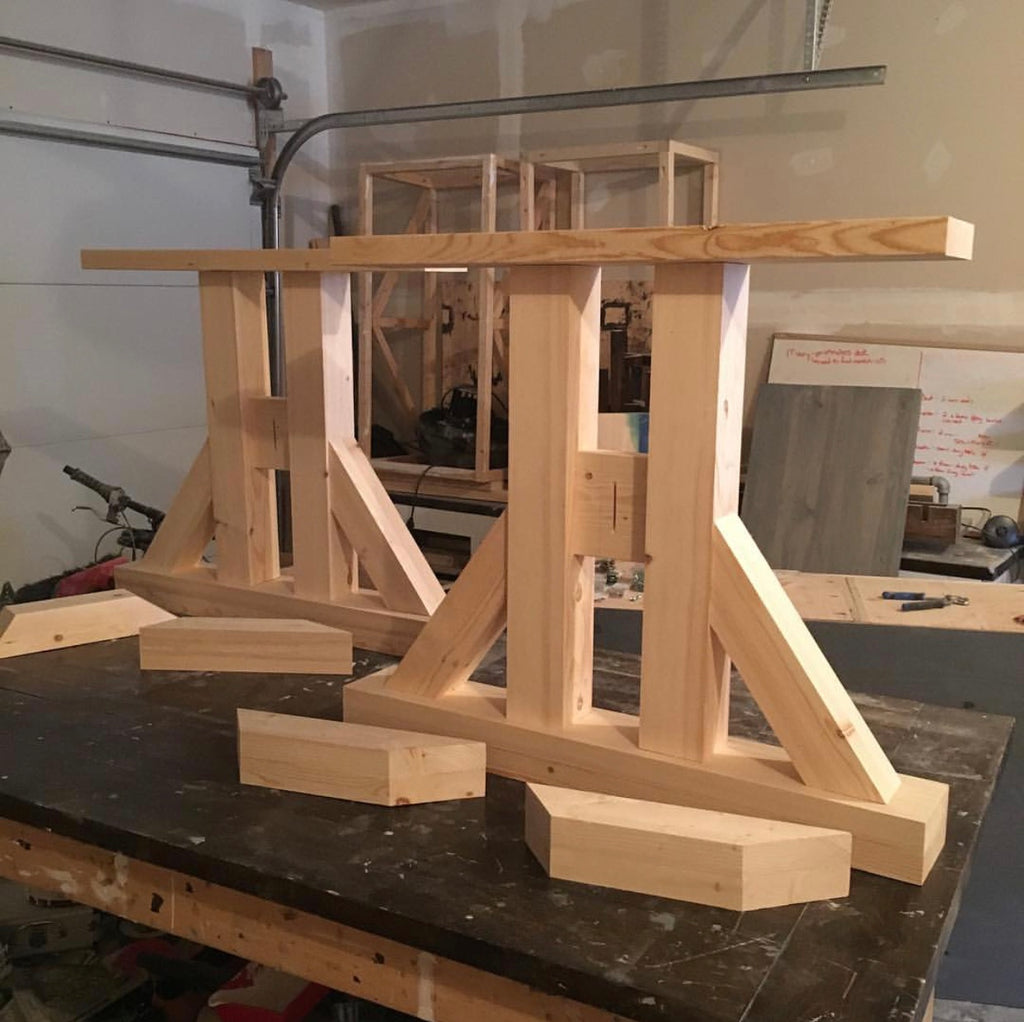
Once dried, cut both ends at 45 degrees off square. From long-to-long it should be 15".
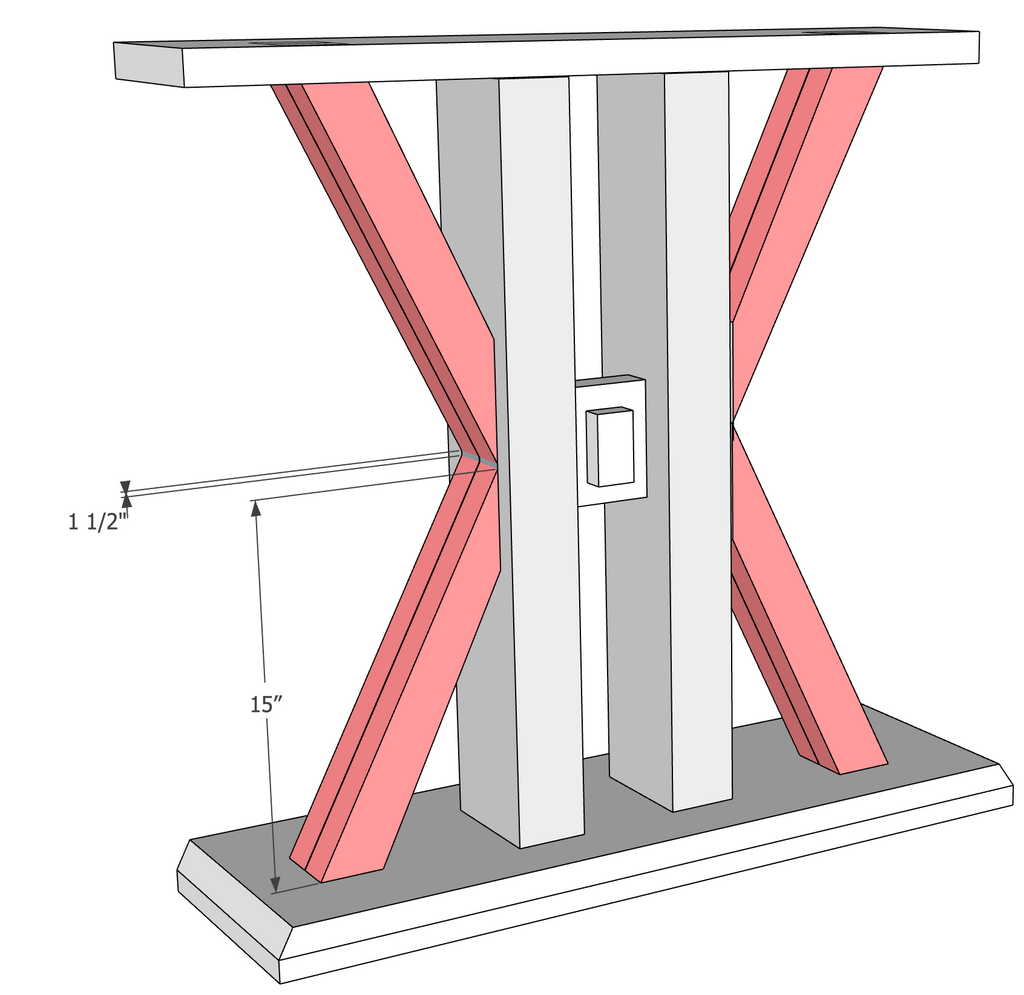
There will be a 1 1/2" gap between the angled pieces on each side of the leg. Then attach legs to the assembled base using 2" brad nails or 2" wood screws and plug holes. Note: Measure before each cut for best fit.
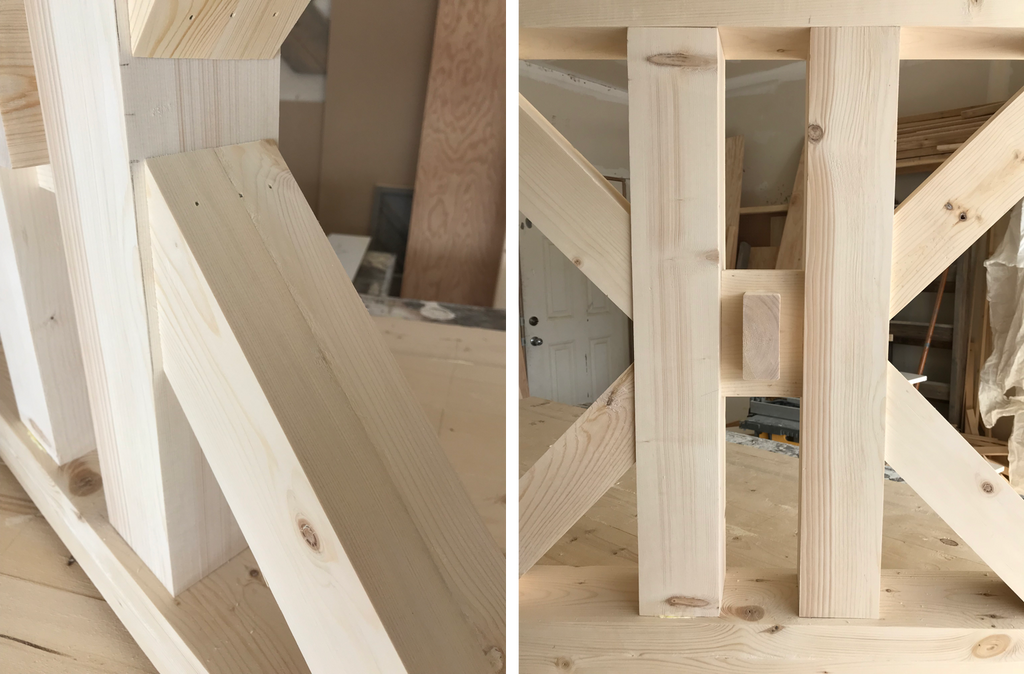
Step 7: Attach the 1x4 feet to the bottom of the table base using 2" brad nails and wood glue.
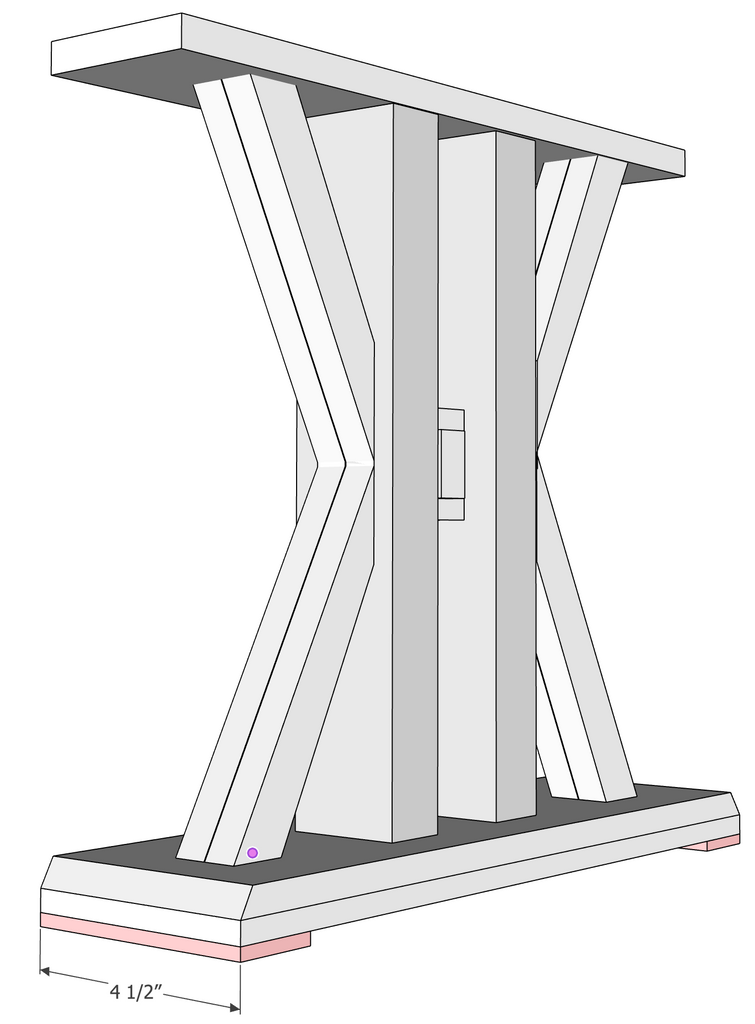
You should now have two assembled table legs that look like this.
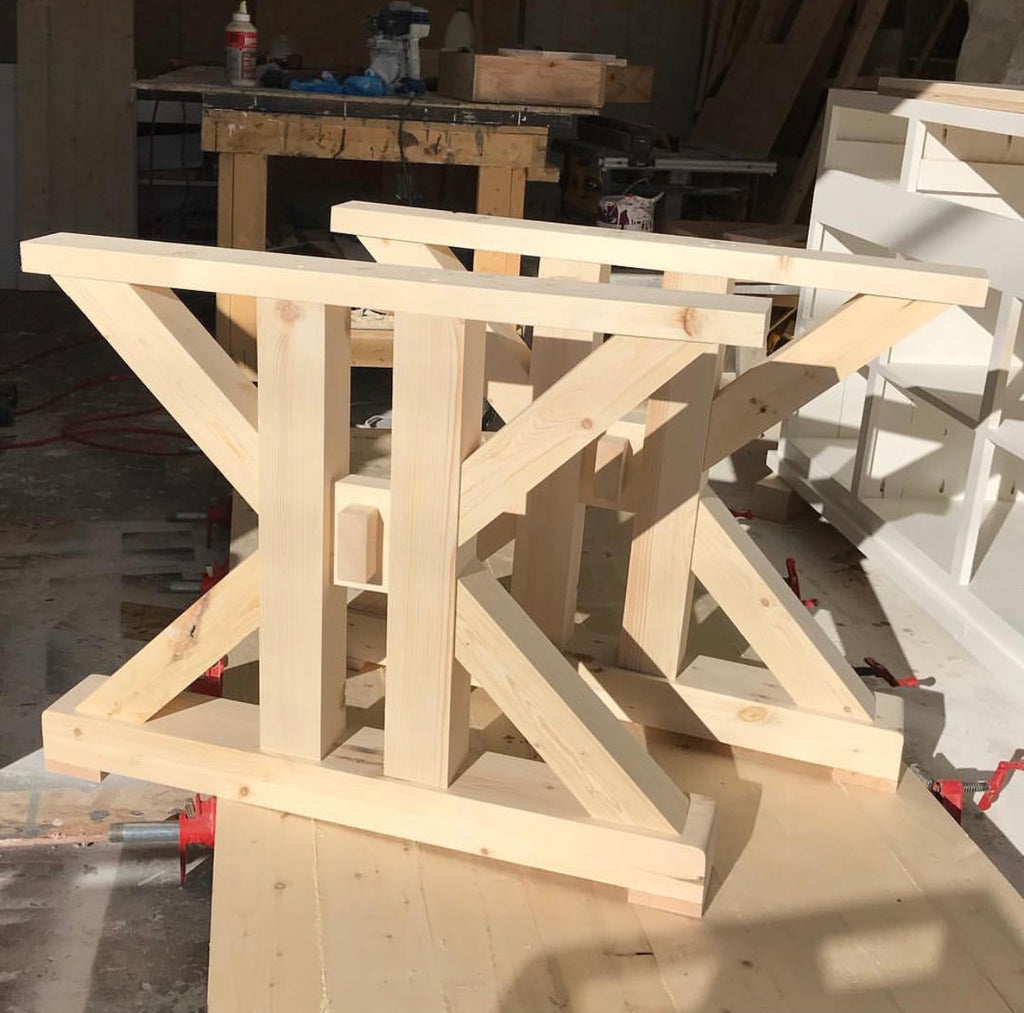
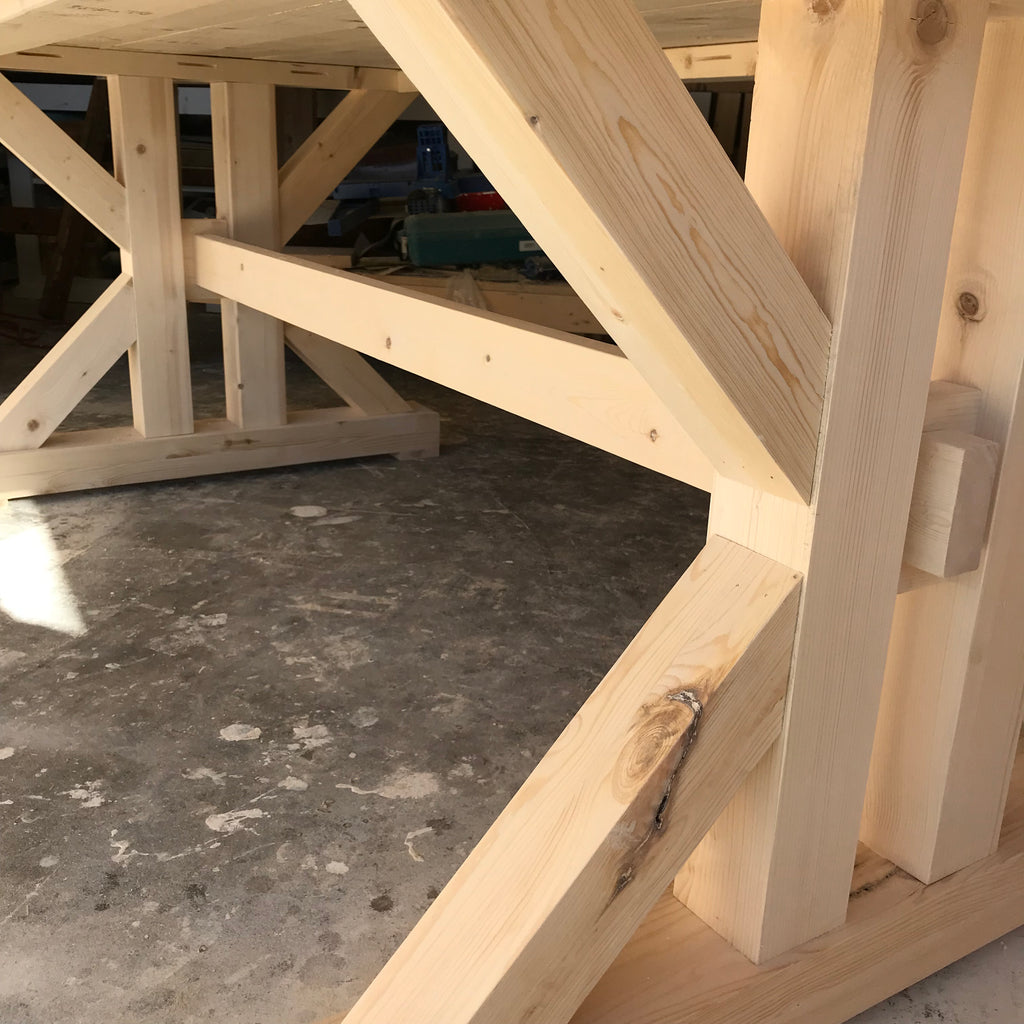
Step 8: Attach the middle 2x4 (72") runner using a Kreg Jig K4 Pocket Hole System on a 1 1/2" setting, with 2 1/2" Pocket Hole Screws to attach along with wood Glue. This piece will be placed in the middle of the 2x6 divider between the legs (the same as the outer 2x4 decorative piece).
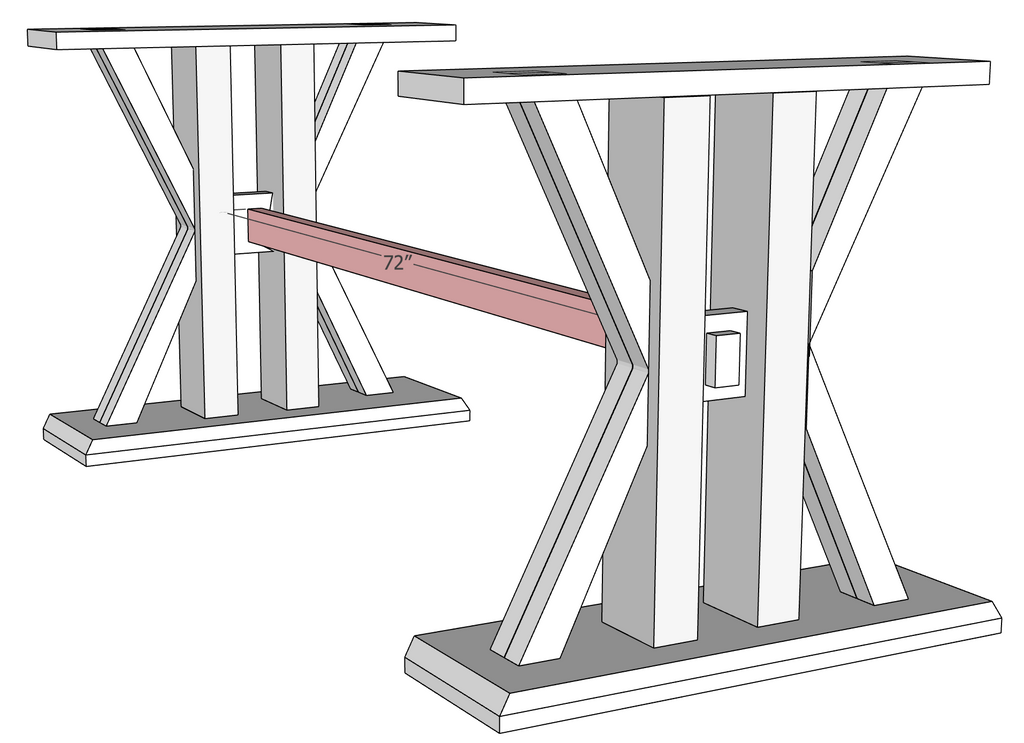
This will give the illusion of the runner going through the legs. Use pocket hole fillers to hide the kreg jig holes once screwed into place.
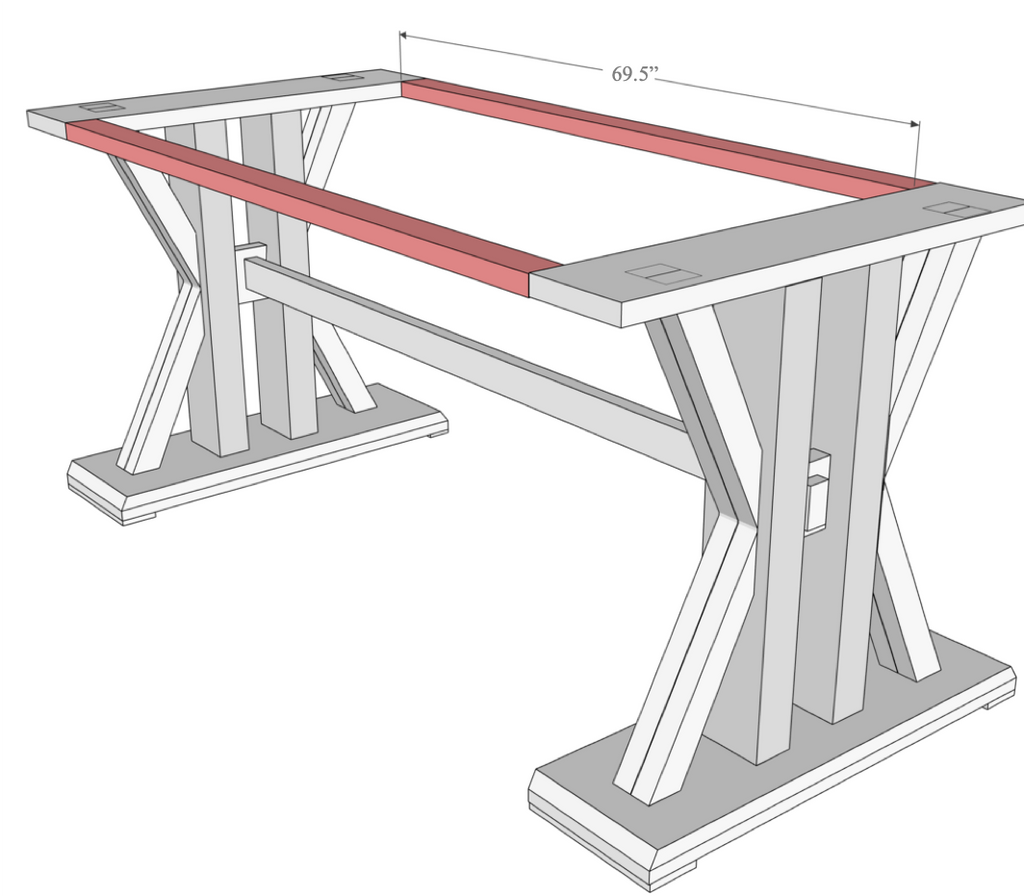
Step 9: Add the top 2x4 (69.5') side braces that runs the length of the table. Using a Kreg Jig K4 Pocket Hole System on a 1 1/2" setting, with 2 1/2" Pocket Hole Screws to attach along with wood glue to the side leg top valences.
Step 10: - Rip 8 2x6 (84") 2x6 boards and attach together using biscuits/ pocket holes and wood glue.
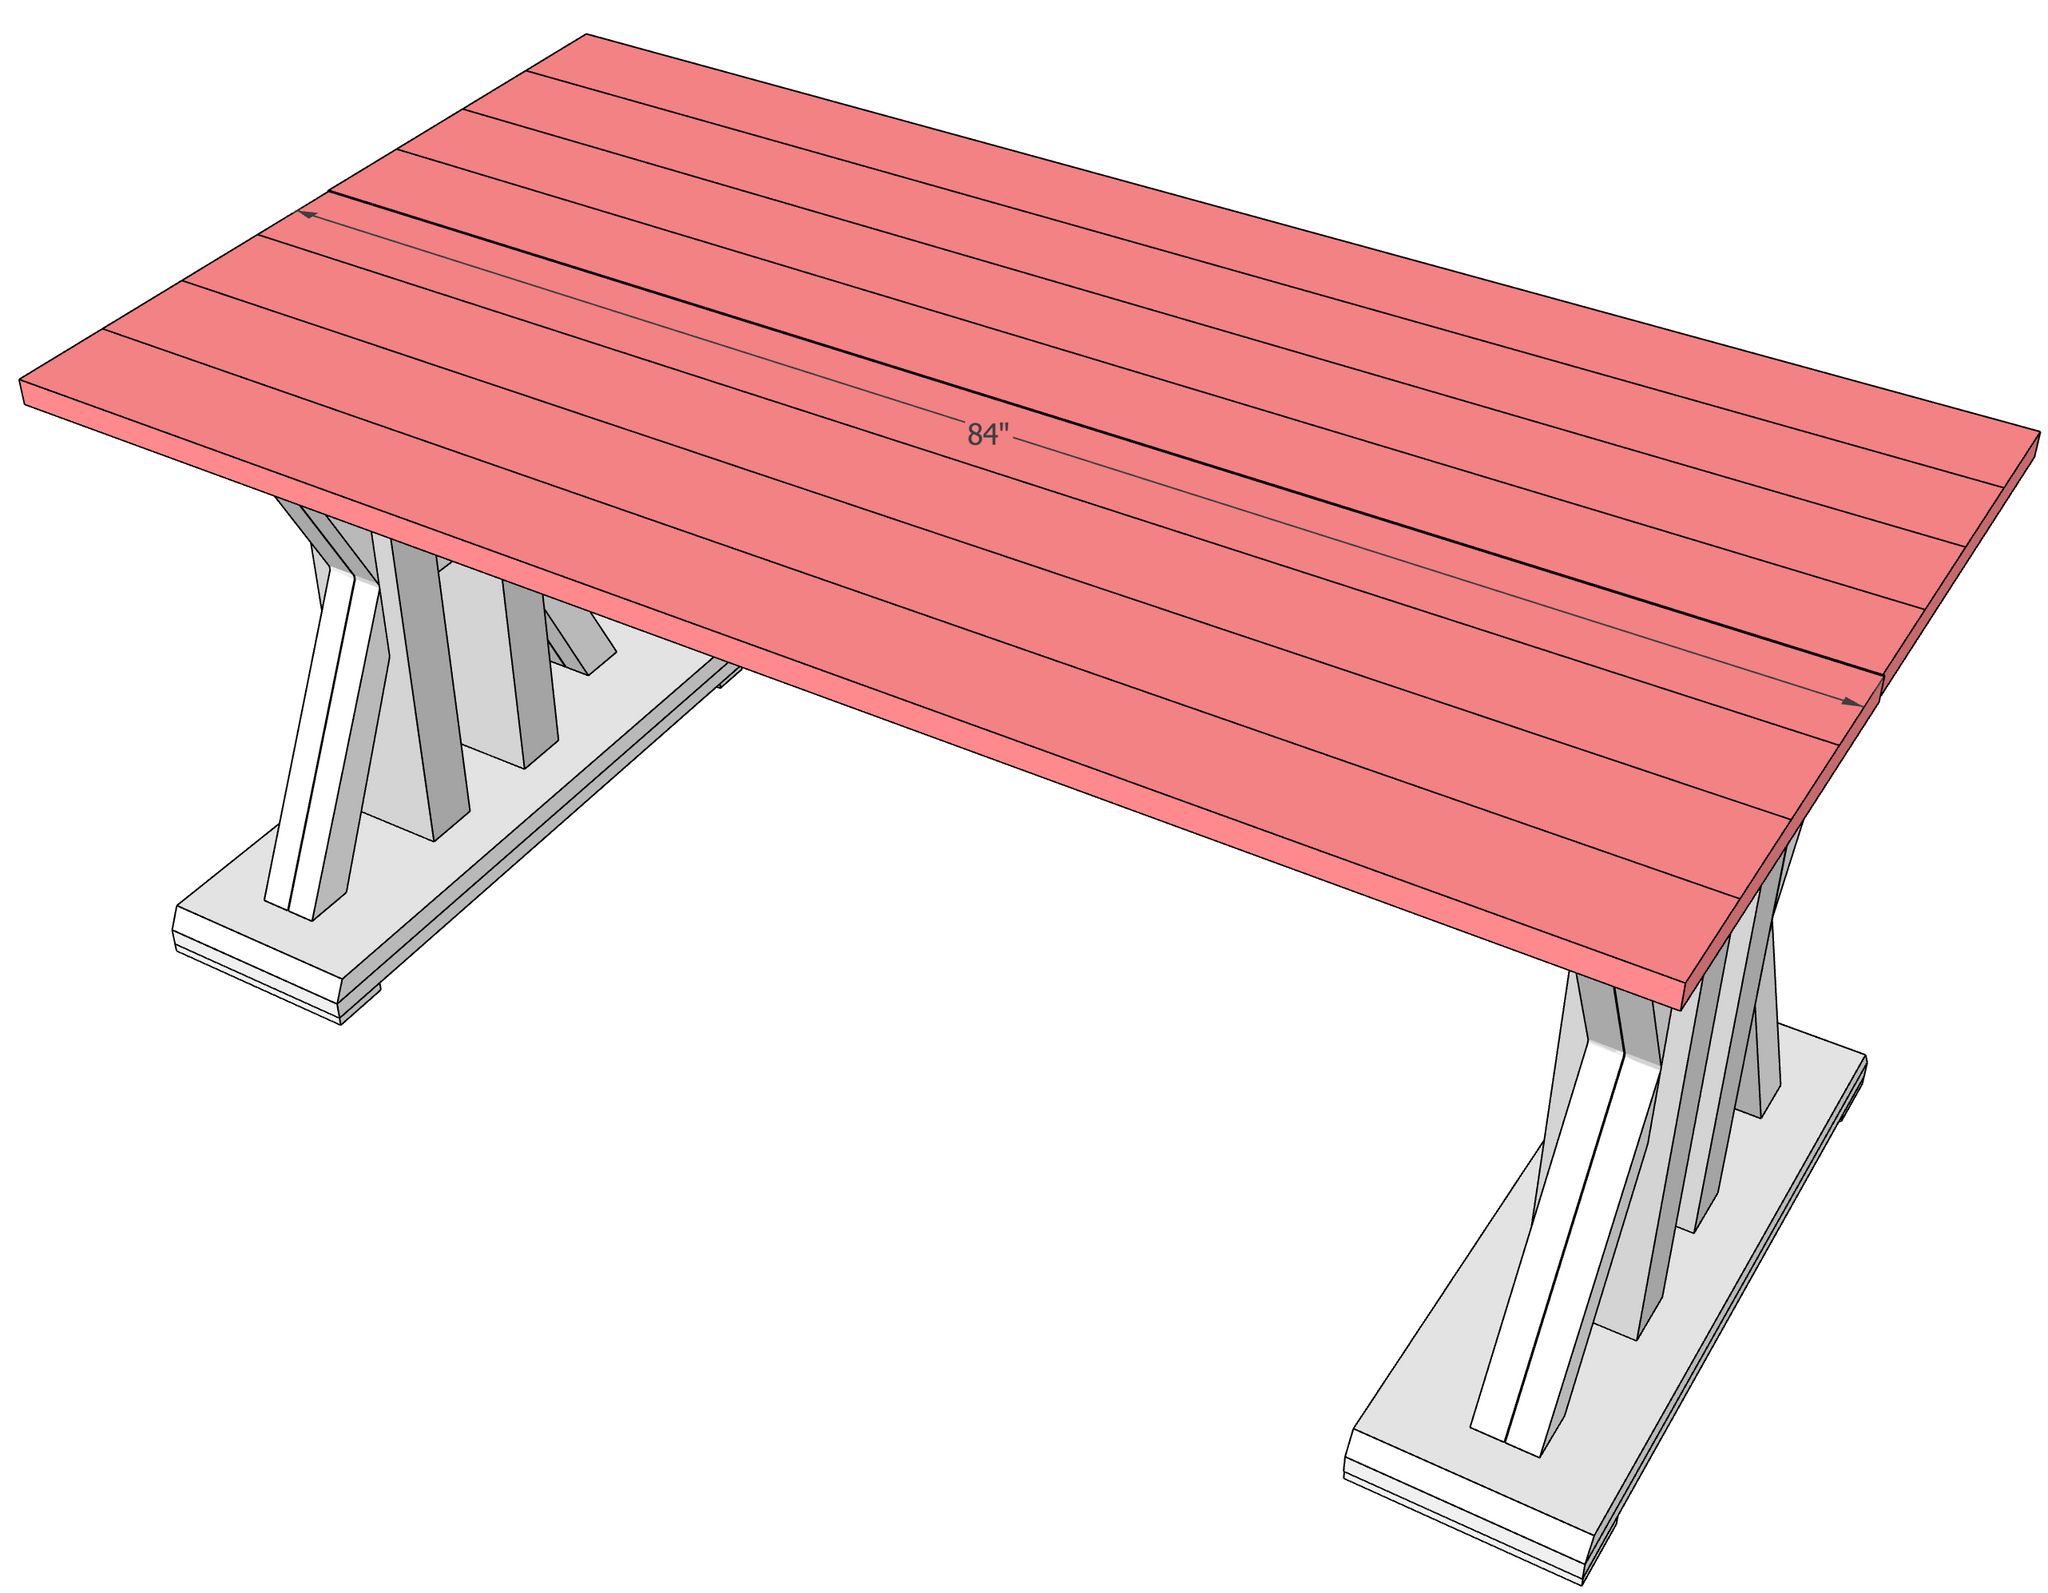
Attach the tabletop using Tabletop Z clips fasteners and finish the table off with Rustoleum Weatherd Grey or Minwax Classic Grey.
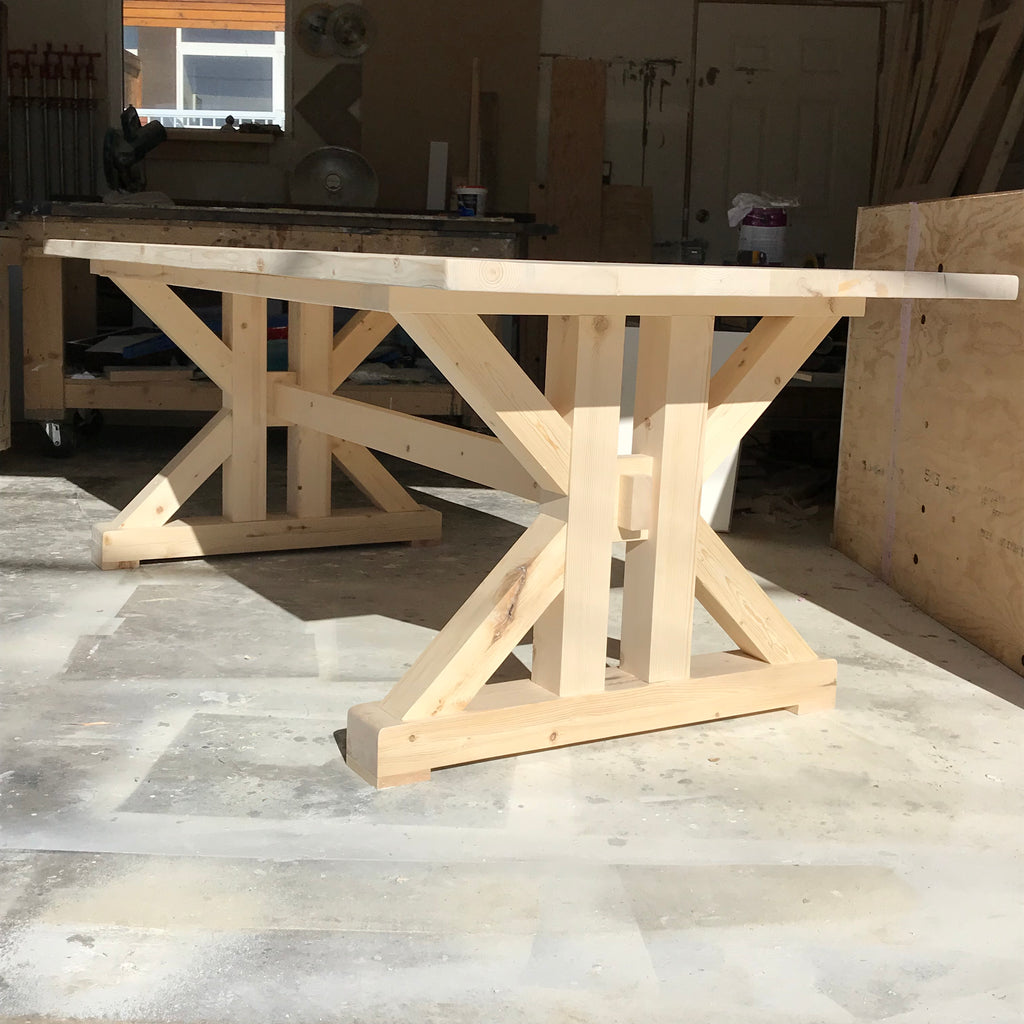
and Waaa-Laahhh! You are finished! Let's take another look at BowRiverRustic's Final Build again!!
Thanks for reading guys! XOXO, Ashley.


