"A DIY Industrial Coffee Table that will knock your socks off"
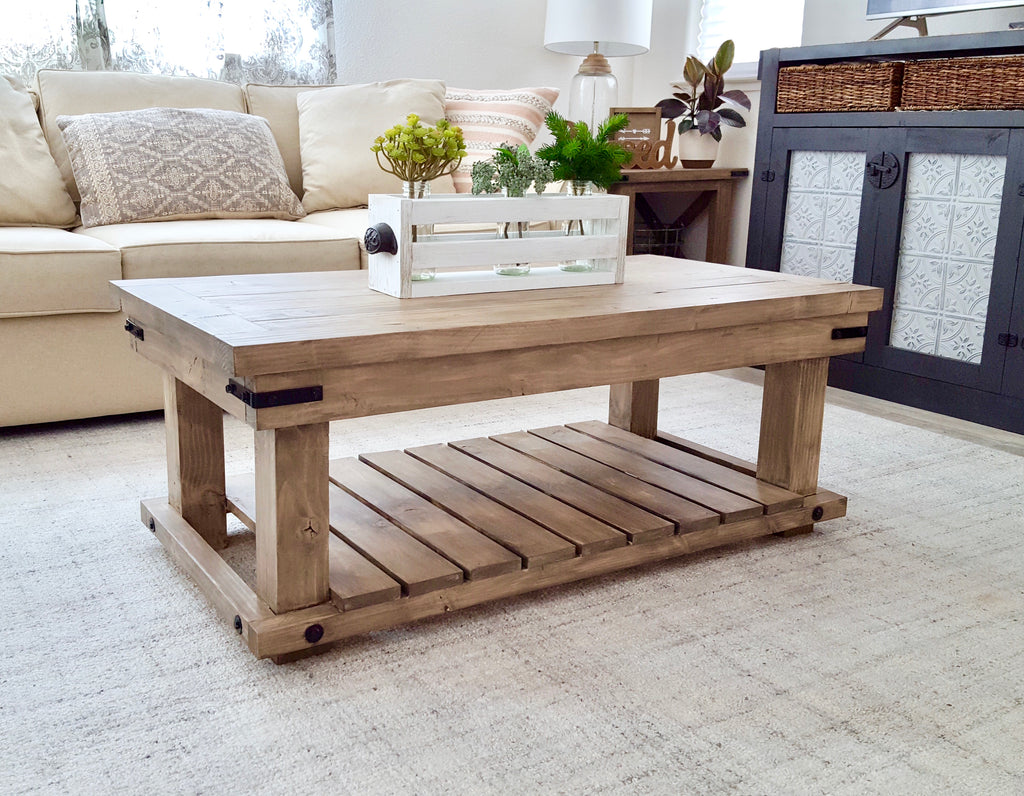
I've seen this industrial styled coffee table over and over online at World Market and have always wanted to create some plans for it. Thanks to my good friend and fellow builder Linda, you can now build this stylish farmhouse coffee table.
But before you read on, be sure to go check out my friend Linda on Instagram. She is a new builder that has created some awesome pieces and I'm super excited to be partnering up with her to bring you the free plans for this DIY Industrial Coffee Table she built. Isn't it stunning?
Now Lets get to it!
There are some affiliate links in this post, meaning I get a small commission if you purchase through these links, at no cost to you. Click Here to read my full disclosure.
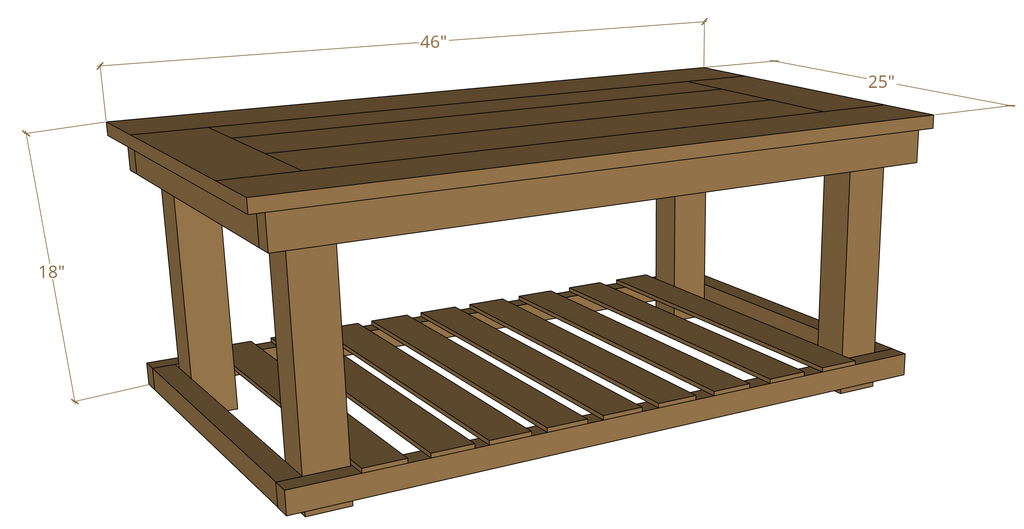
Dimensions
Materials
(3) 2 x 6 x 8ft
Cut List
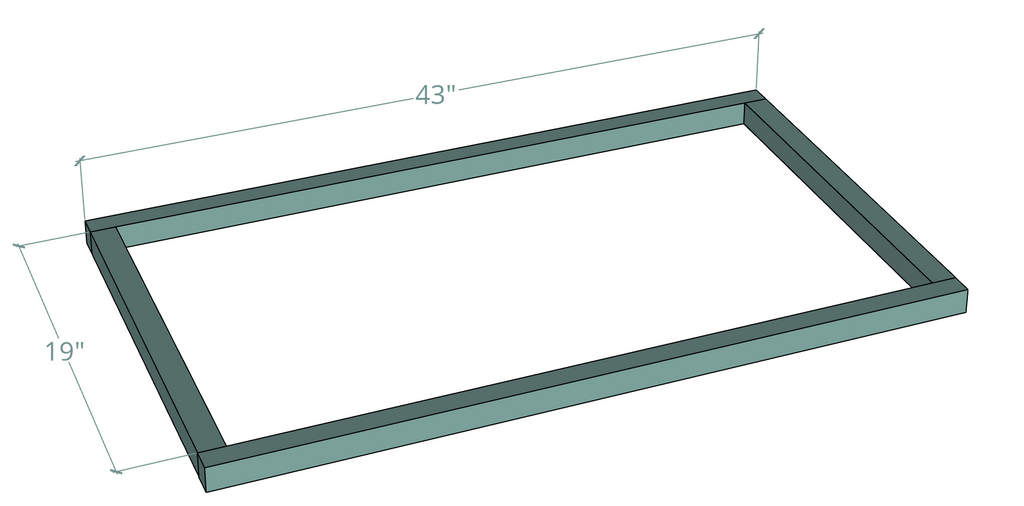
Step 1: Assemble the bottom rectangle by attaching the 2x2 (19") stretcher to the 2x2 (43") stretcher piece using a Kreg Jig K4 Pocket Hole System on a 1 1/2" setting, with 2 1/2" Pocket Hole Screws to attach along with wood glue.
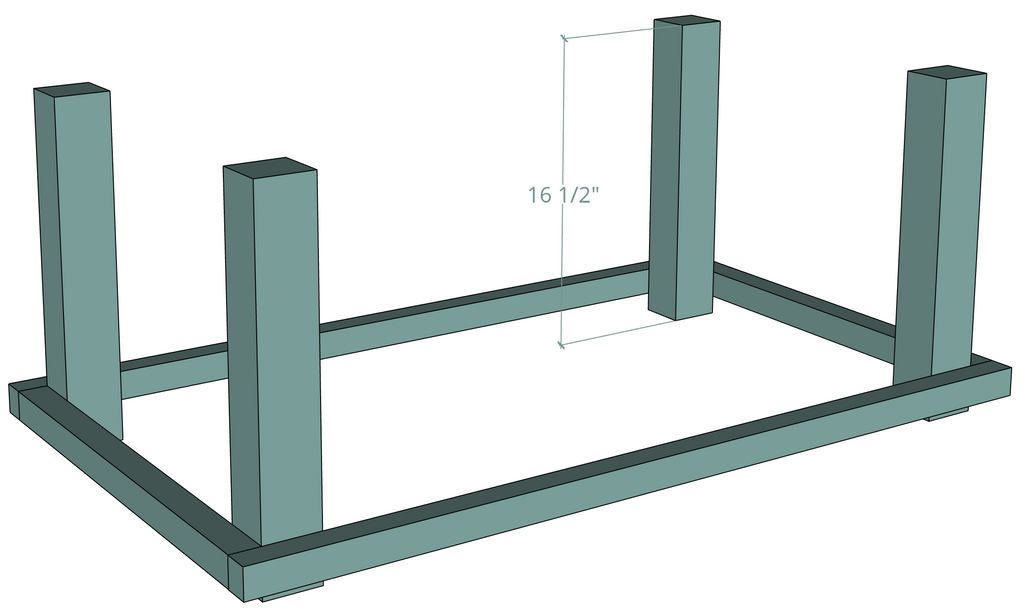
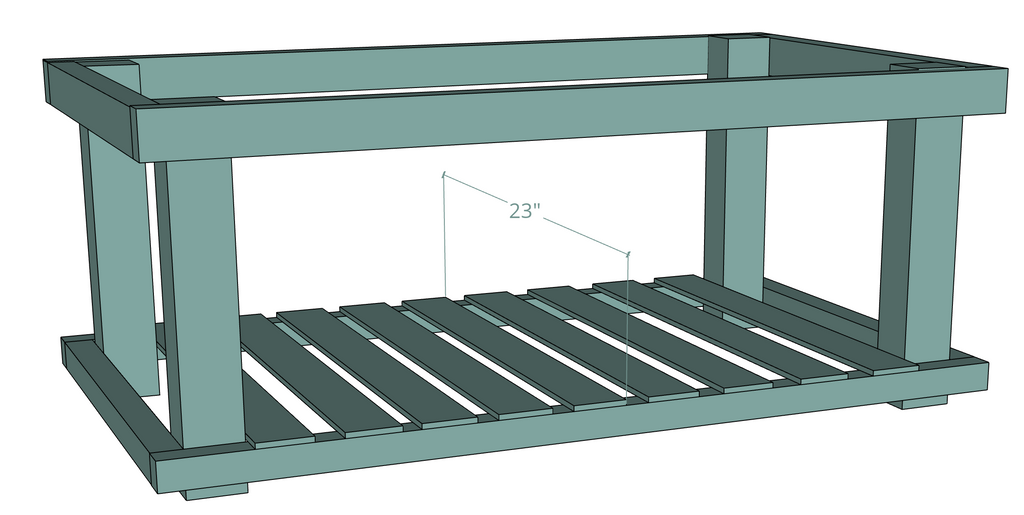
Step 2: Attach the assembled rectangle to the bottom of the four (16.5") 4x4s using washers and 2" Hex head cap screws. The assembled rectangle should be 1 1/2" above the bottom of the 4x4s.
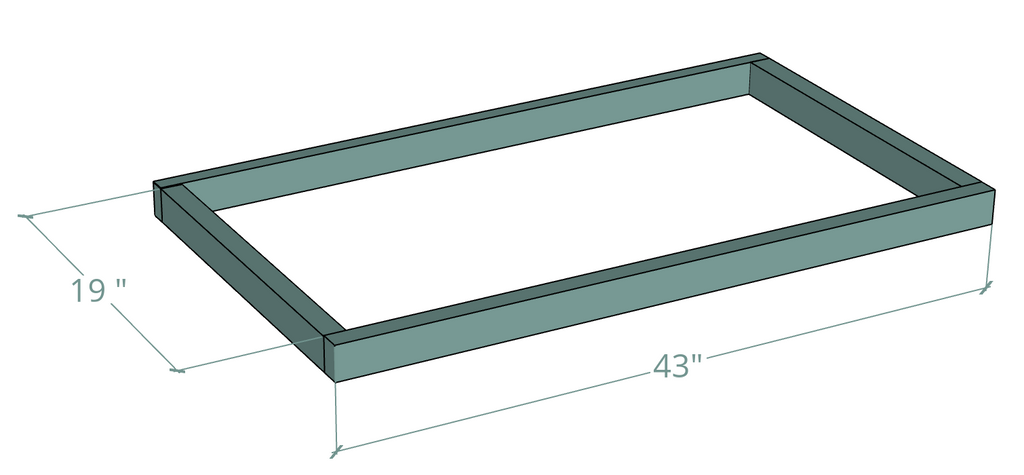
Step 3: Assemble the top rectangle by attaching the 2x4 (19") stretcher to the 2x4 (43") stretcher piece using a Kreg Jig K4 Pocket Hole System on a 1 1/2" setting, with 2 1/2" Pocket Hole Screws to attach along with wood glue.
Note: Pre-drill pocket holes into the sides of the rectangle facing upwards for attachment to the tabletop later.
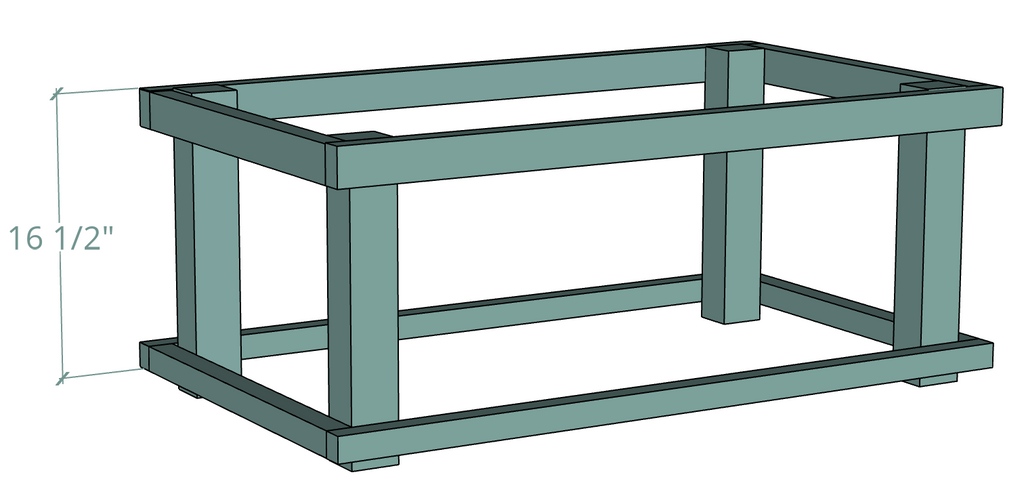
Step 4: Attach the assembled rectangle to the top of the four (16.5") 4x4s by using wood screws (Hardware will be added after the coffee table is built). Note: The assembled rectangle should be flush with the top of the 4x4s.
Step 5: Add the 9 1x4 (23") slates the to the bottom of the coffee table using a brad nailer and brad nails. The spaces between the slates should be approximately 1x4". Note: Do not nail down slates until all slates are in place.
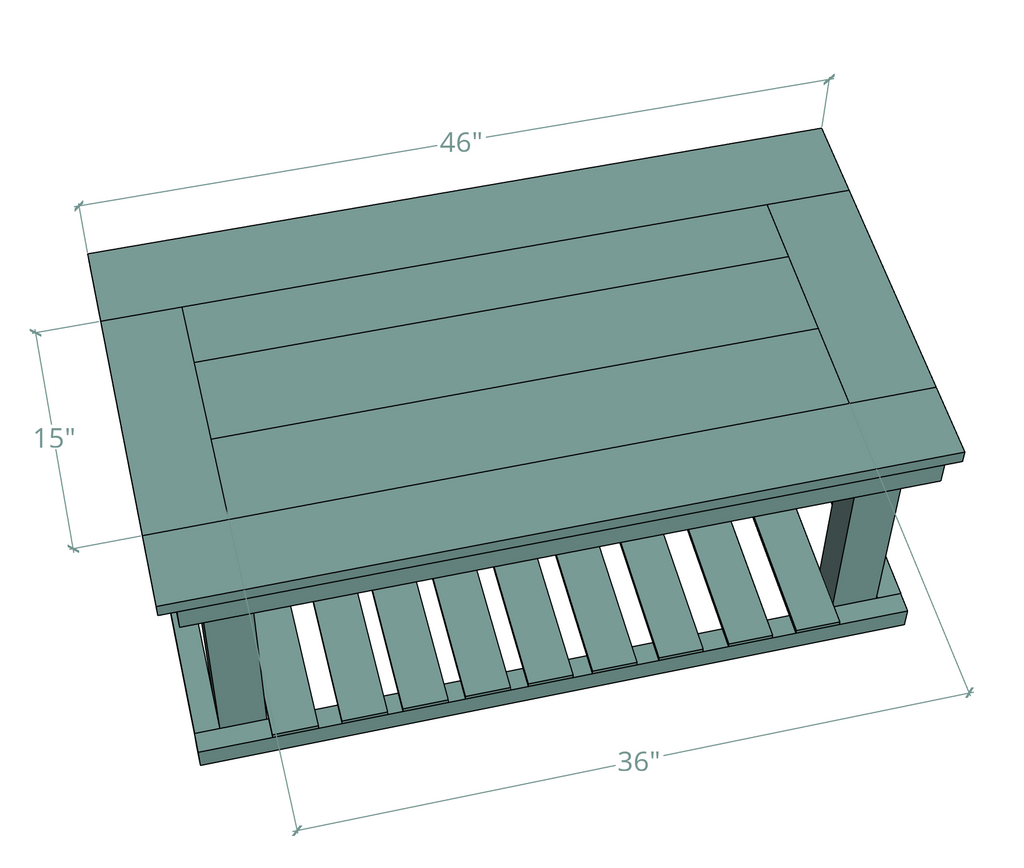
Step 6: Assemble the tabletop by first attaching the three (36") 2x6s together using a Kreg Jig K4 Pocket Hole System on a 1 1/2" setting, with 2 1/2" Pocket Hole Screws to attach along with wood glue. Then attach the breadboard ends the same way. Once that is assembled, attach the two (46") 2x6s to the middle of the table top using a Kreg Jig K4 Pocket Hole System
on a 1 1/2" setting, with 2 1/2" pocket hole screws to attach along with wood glue.
To attach the tabletop to the DIY coffee table, use the predrilled holes on the 2x4s with 2 1/2" pocket hole screws to attach along with wood glue.
The finished product should look something like this.
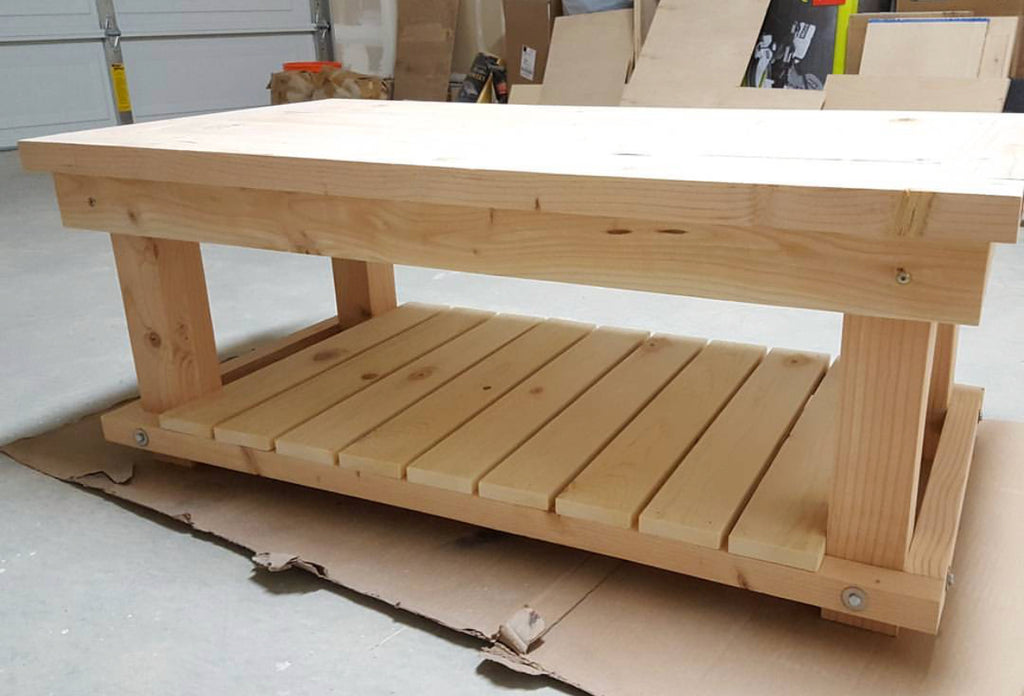
Let's take one last look at this beauty!

Thanks for reading guys! XOXO, Ashley

