
"A wall of mirrors is a statement piece you'll never forget."
"This post is sponsored by Discover Personal Loans."
I am so excited to share this project with you guys because I have been over the moon about my bedroom being finished. This Lake House renovation has already been a wild ride and I'm happy to finally have a space complete.
Today, I'm sharing all of the details on how I was able to bring this mirror wall to life and how Discover Personal Loans helped me get the job done!
There are some affiliate links in this post, meaning I get a small commission if you purchase through these links, at no cost to you. Click Here to read my full disclosure.
Step 1: Funding the Project | Discover Personal Loan
With a renovation, costs can add up quick, but luckily, I was able to find an option that I think would be great for anyone wanting to update their homes. Discover Personal Loans customizes your loan to fit your project and budget, with loans available between $2,500 and $35,000 and flexible repayment terms.
 You can borrow money without using your home as collateral and Discover Personal Loans can send funds directly to you in as little as one business day after acceptance.
I personally love Discover Personal Loans because projects can widely range in cost, but Discover has specialists to help tailor your loan to your project and your budget, so you only have to commit to the loan amount you need. As someone who just recently paid off all of my debt, being able to customize my loan to only take out what I need really is helpful when trying to keep my new debt under control.
 Also, if you're concerned about origination fees, you're in luck because Discover personal loans don’t have any. Origination fees are pesky charges that some lenders require their borrowers to pay to get the loan. Since the one-time fee is commonly calculated as a percentage of the loan, no origination fees can equal huge savings! Now that we’ve covered funding, let’s move on to executing the DIY mirror wall of your dreams.
Step 2: Installing the Wall Trim
To kick the wall off, I started by installing 1x3 trim. I cut it down to size on my miter saw and then fastened it to the wall with a bead of liquid nails on the back and then secured it in place using my brad nailer and 2" brad nails.
 I decided to only do half of the wall because I wanted to bring a luxury feel to the room without overwhelming the space. A full wall in the bedroom would have been a little too much, but halfway down gives the space just the right amount of “wow” factor.
Step 3: Cutting and Installing Mirrors
Once the 1x3 trim was installed, I started fitting in the mirrors. This was probably the most tedious part of the project, but also the most fun because I love learning new techniques.
Using glass cutters, I first would score the mirrors where they needed to be cut and then popped them on the line that I scored.
Each of my mirrors were approximately 19" x 21", so they were a pretty good size.

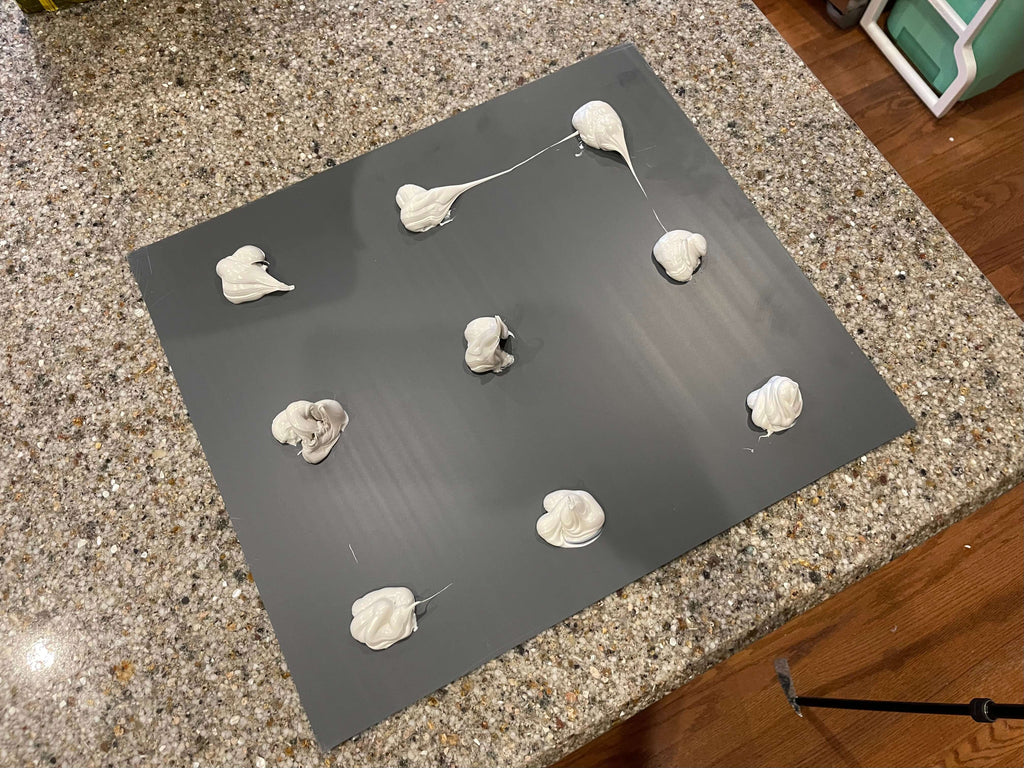
Once I cut the mirrored glass down to size, I installed them by added 9 beads of mirror adhesive to the back of the mirror and placed the mirrors in the appropriate slots.
I fit the mirrors in the dedicated holes first to make sure they fit and then installed them on the wall.
 I was able to get all of my mirrored glass from a local hardware store; I had to go to a few places to get 24 of them but eventually was able to get them all. They typically don't carry that many in stock at one store, so it took a few road trips to get enough (especially after breaking a few) but it was well worth it.
The good news is if you don't feel comfortable cutting the glass yourself; they will cut it for you for free; if you purchase their mirrors. However, if you go this route, be prepared for it to take a while.
I had them cut the first couple of mirrors but quickly learned that it would be way faster to just cut them on my own, so I decided to learn how to cut the mirrors myself. Either way, you have options.

They have two sizes available; both 24" x 30" and 30" x 36". I had to get both in order to have enough for this particular project but I will say that it was easier to cut from the bigger sheet.
Both mirrored glass sizes are priced well compared to what I've seen out there, I was quoted over $2k by two different sources to have them custom cut but I only spent around $700 to use these mirrors.
Step 4: Installing Top Trim
Once I started fitting in mirrors, it was time to add the top trim. I decided to do double trim to add dimension to the wall and I knew the color combo of black and white would look so good against the brown.
 I painted the trim black first and then installed it directly over the white trim. I installed it using 2" brad nails and my brad nailer.
Step 5: Adding Bottom Wall
Once the mirror wall trim was up, I started working on the bottom half of the wall. Because the mirror portion of the wall protruded out a bit, I wanted to also bring out the bottom portion of the wall to make things proportionate.
 Originally, I wanted the wall to come out a little more but my original plan didn't work out, so I opted to add a 3/4" board to the wall, to make sure the wall was proportionate.
I attached the board to the wall with 3" construction screws and liquid nails to make sure the wall was securely in place and then painted it with Behr paint in the color Caffeine to match the rest of the room.
Materials
- 1x3x8 Select Pine Boards
- 1x2x8 Select Pine Boards
- 2 - 3/4" MDF Boards
- Mirrored Glass
- 3" Construction Screws
- 2" Brad Nails
- Caulk & Puff & Paint
- Wood Filler
- Mirror Adhesive and Liquid Nails
Paint Colors Used
- Behr Paint Plus: "Caffeine" in Eggshell
- Behr Dynasty Paint: "Smokey Cream" in Eggshell
- Behr Paint Plus: "Etched Glass" in Hi-Gloss
- Behr Paint Plus: "Blackout" in Hi-Gloss
Tools Used
- Miter Saw
- Brad Nailers
- Glass Cutters
- Measuring Tape
- Variable Speed Grinder
- Paint Sprayer
Step 6: Style the Room
Now for the fun part, styling the room. Here are all the sources for the furniture I used to really make this room come alive!
The Final Reveal
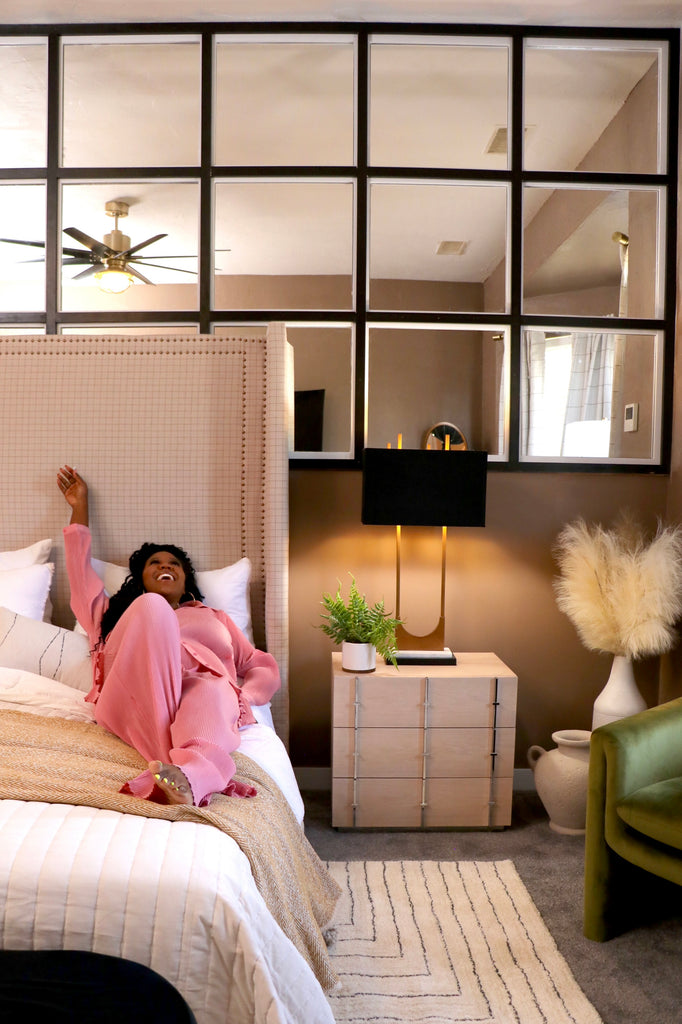
Now that we've gone over all of the details, it's now time for the final reveal, so here it is.

Excited is an understatement; I am over the moon with how this mirror wall turned out. It came out exactly as I envisioned it.
Most of you who followed along, saw the 3D rendering I did before I started the room and I must say, I hit it out of the park, because it looks almost identical to how I planned it (with a few minor changes).
If you're curious how I bring my 3D renderings to life, I share all of the details in my "Software to Success" Ebook here.

But to also remember where this room came from is amazing to me. Total night and day difference from where we started.

I'm probably most excited about that wallpaper trim being gone, because it was so outdated and this room was giving 80s vibes.
I must say, as much as I had confidence in myself, I was excited to see how the mirror wall was going to come to life and it far exceeded my expectations.
 The inspiration for this mirror wall was the wall in my previous house; I loved it so much that I knew I had to bring it to the Lake House.
 I didn't want to do the exact same thing, so I decided to put it in the bedroom and really add some depth with the double paneling and I'm not disappointed. The mirror wall really is a statement piece.

All in all, I am so excited about this mirror wall and even more excited that my room is that much closer to being complete and a big huge shout out to Discover Personal Loans for helping me bring this project to life.

As always, Thanks for reading guys, XOXO Ashley.
![]()


