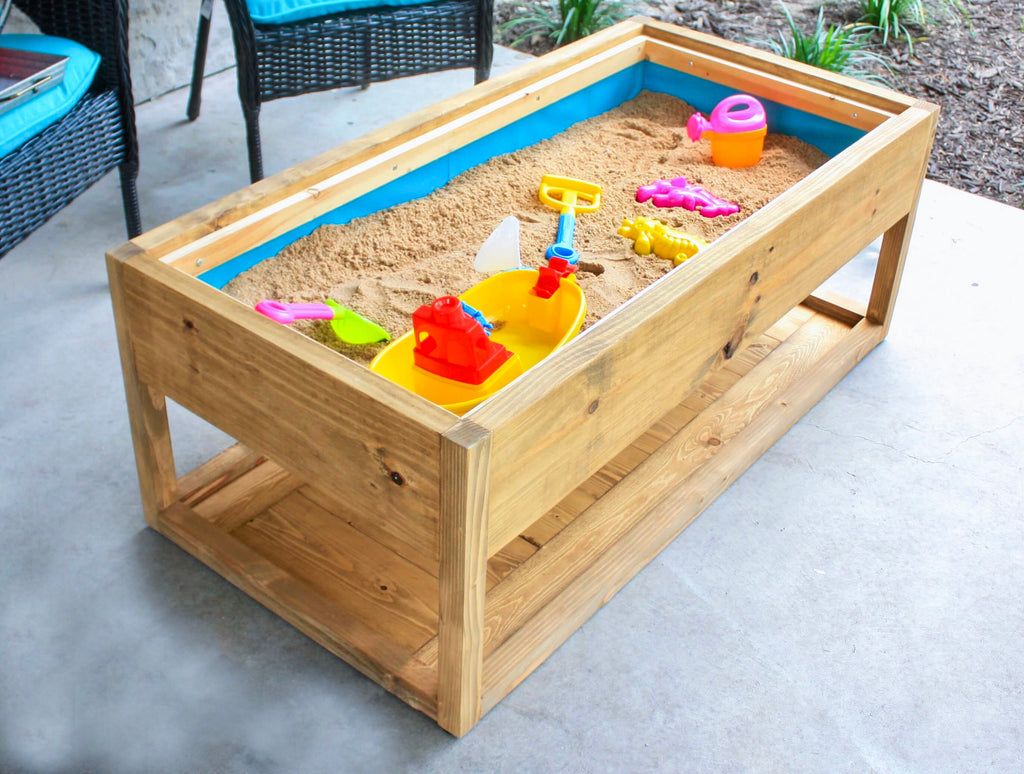
"An outdoor coffee table with a little extra underneath."
Hey everyone! I’m Cara from The Inspired Workshop , and I am excited to be teaming up with Ashley to bring you a few projects this year! First up is the tutorial and plans for this DIY modern outdoor coffee table that has an optional sandbox for the kiddos!
The build is simple and straightforward with only a few tools and materials needed. Plus the modern, sophisticated design of the coffee table easily hides the secret that it is a sandbox as well. I won’t tell anyone if you don’t! Lol! No more having to see the kids toys in the yard when you expertly disguise them into furniture!

The materials and step by step tutorial are listed below, but if you would like the downloadable plans they are available and straight to the point! You may need to use both the blog post and printable plans if there is an instruction you don’t understand!
Are you ready to get building? I bet you are!
Materials:
- 2 - 2x8x8
- 3 - 2x2x8
- 4 - 1x6x8
- 1 - 1x4x8
- 2 - 1x2x8
- Kreg Jig
- Saw
- Drill
- Stain (I used Thompson Waterseal in Teak)
NOTE: If you would just like to make the coffee table without a sandbox the supplies will be altered by only needing 2 - 1x6x8, you won’t need the 1x2x2s or the 1x4x8 or the waterproof fabric.
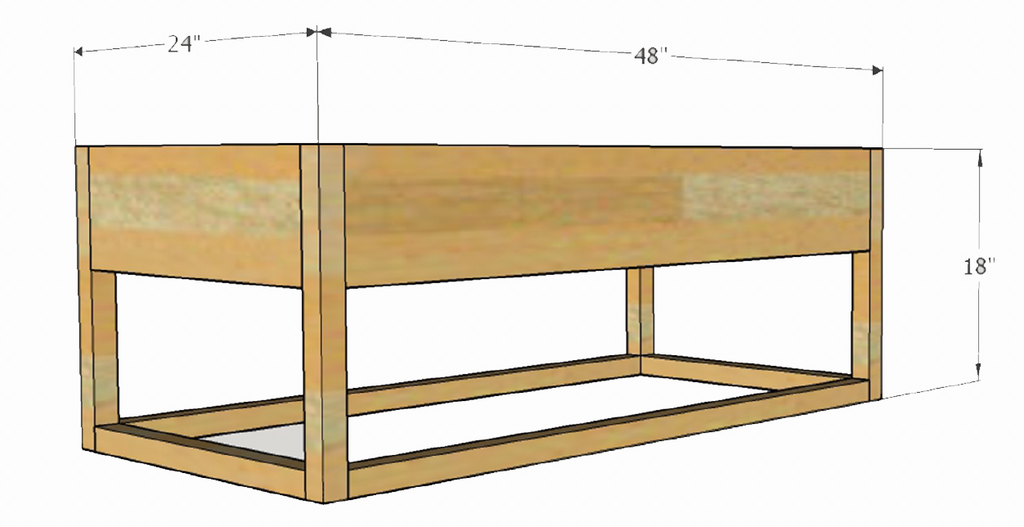
Dimensions:
Cut List:
- 2 - 2x8 @ 45” - Front and back, top rails
- 2 - 2x8 @ 21” - Side, top rails
- 4 - 2x2 @ 18” - Legs
- 2 - 2x2 @ 45” - Front and back, bottom rails
- 2 - 2x2 @ 21” Side, bottom rail
- 8 - 1x6 @ 21” - bottom of sand box (optional ¾” plywood cut at 45” x 21” - using a 2x4
project panel, if you would like a solid bottom without a liner)
- 8 - 1x6 @ 13 ¾” - Lid Boards
- 2 - 1x4 @ 44 ½” - Lid Boards
- 2 - 1x2 @ 45” - Lid support boards
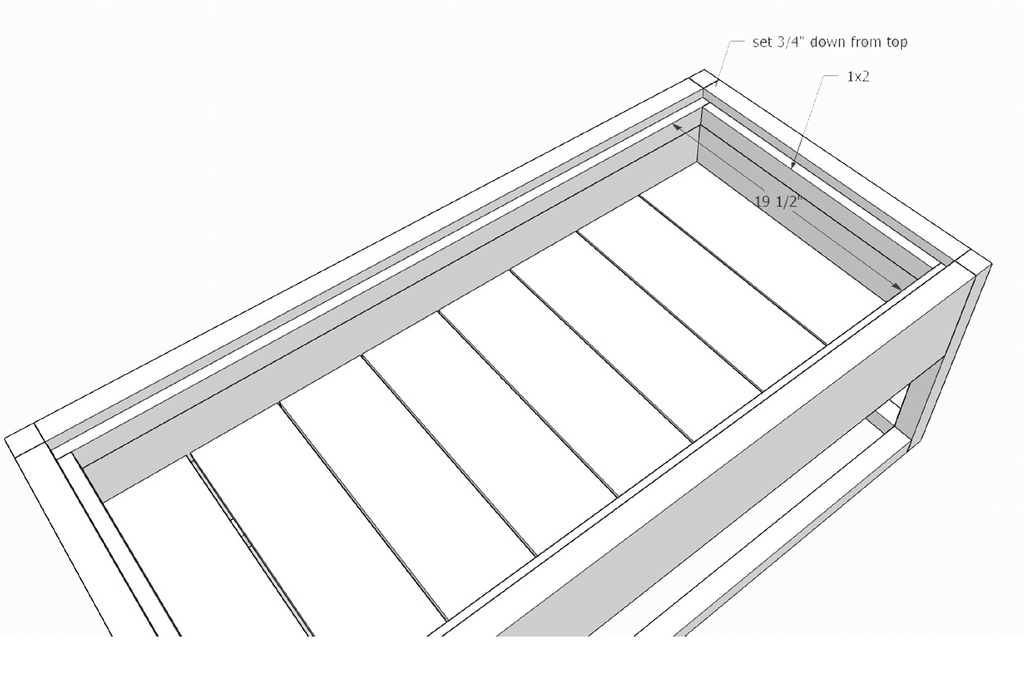
- 2 - 1x2 @19 ½” - Lid support boards
NOTE: If you want to build the coffee table without the sandbox, you can omit everything listed
after the 8 - 1x6 @ 21”.
Step 1
Cut and attach the boards for the front of the sandbox. Using your Kreg Jig , drill holes at a depth of 1 ½” and use wood glue along with 2 ½” pocket hole screws to attach. Blue Kote screws are specifically made to use in outdoor projects.
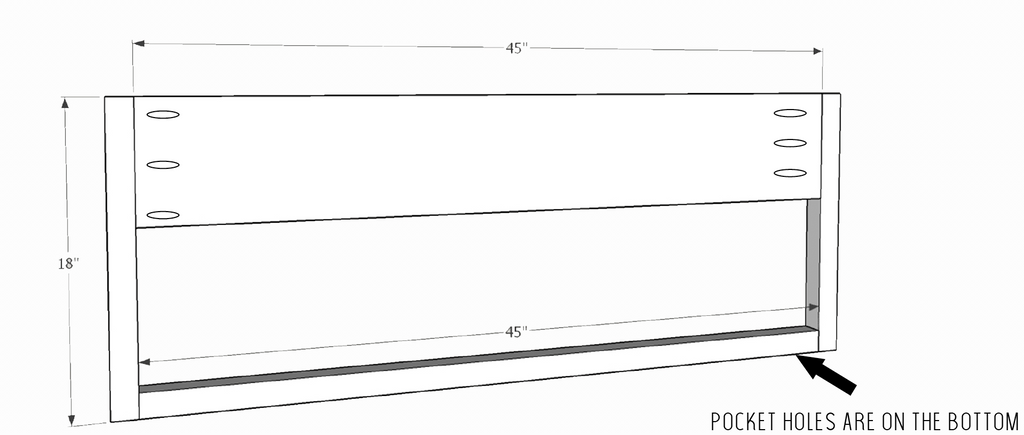
The bottom 2x2 has the pocket holes placed to the bottom of the table!
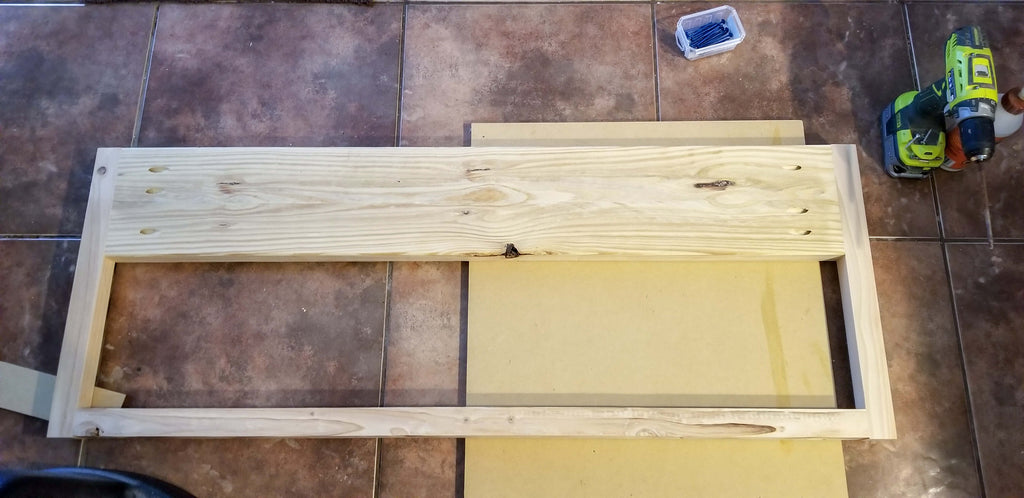
Flip it over, and Viola! It looks great already!
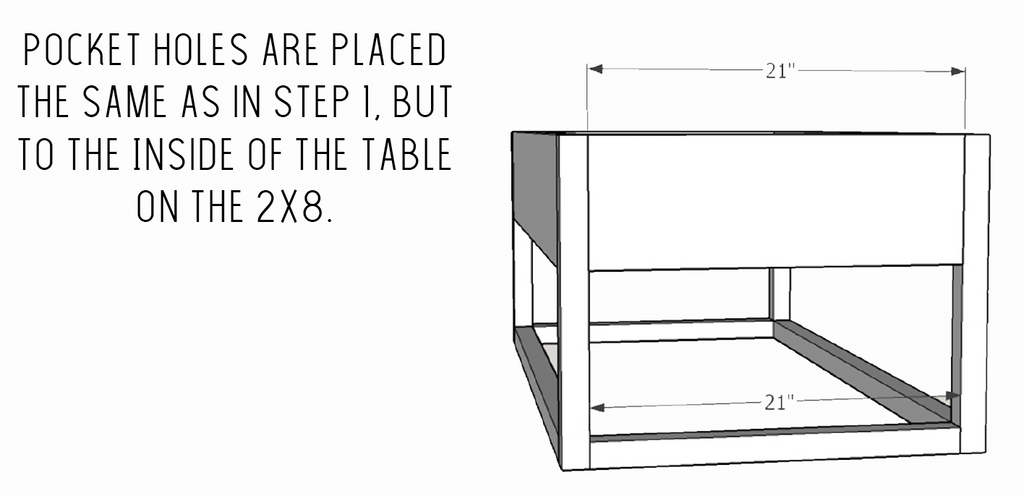
Step 2
Build another panel just like you did in Step 1, you will then have a front and back!

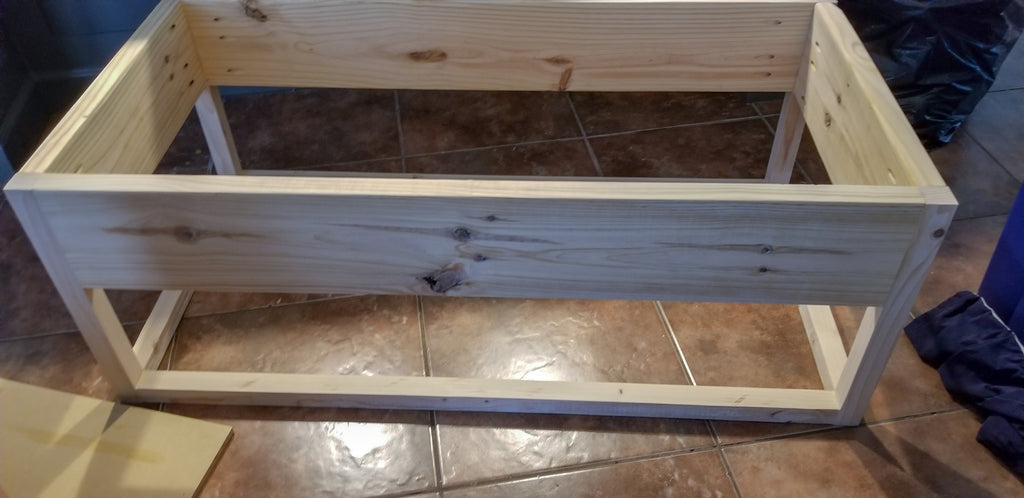
Step 3
Join the front of the table to the back of the table by adding the sides! You will still be using using a Kreg Jig K4 Pocket Hole System on a 1 1/2" setting, with 2 1/2" Pocket Hole Screws to attach along with wood glue. I attached the side boards (1 - 2x8 @ 21”, 1 - 2x2@21”) to each side of the top and then flipped it over and added the back.

Once it is all attached, it really starts to take shape!
Step 4
Add the bottom 1x6 boards to create a solid surface for the liner to rest on. At first I thought it would be best to have the single boards spaced out to allow drying of the liner, but as I was building, I really came to the conclusion that it probably wouldn’t matter if you just used a solid piece of plywood, as long as it is properly sealed!
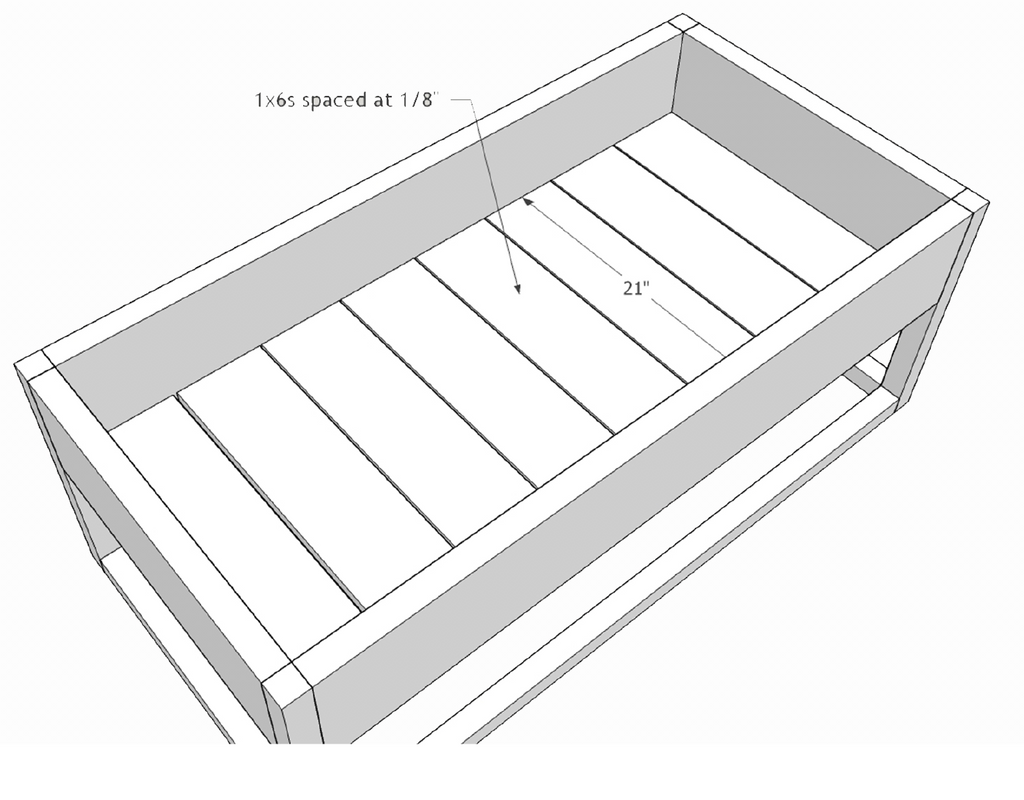
Since I used the single boards I will show you how I did it, the idea would be the same if you used a sheet of plywood. I drilled pocket holes at a depth of ¾” and used wood glue and 1 ¼” Blue Kote screws to attach.
I roughly spaced the boards ⅛” apart. I just cut a sliver of a board at about ⅛” and used that to space them all the same. The pic below shows the sandbox flipped over, which is how I attached the boards. They were a snug enough fit I didn’t have to do anything special to get them to stay in place while I screwed them in.
Don’t mind how shabby the bottom of the boards look! Lol! I was using up some not so great 1x6s I had laying around since they won’t be seen!
While the table was flipped over, I added the rubber feet here...and somehow managed to not take pictures! Ugh! But it is pretty easy, I centered the rubber foot on each 2x2 ‘leg’ and screwed it in with the screws provided. The rubber feet measure 1 ½” so they center perfectly on the leg.
NOTE: If you would like to build the coffee table without the sandbox, you can just attach those
1x6s you cut for the bottom of the sandbox and attach them as the top of the table, and boom...you’re done! Essentially it would look like this!
Step 5
At this point I sanded and stained the table so that I wouldn’t have to worry about trying the keep the stain off the liner. I then used polyurethane on the inside boards that would be beneath the liner. After comparing the poly to the Thompson Waterseal , I really could have used the Waterseal on both parts and saved myself the time of using the poly, it took forever to dry!
Step 6
I built the lid to the sandbox while all that was drying. The lid is a really simple design that allows the sand to air out to help reduce the chances of mold growing. I am not certain just yet as to how the outdoor fabric is going to hold up to the mold issue but I will try to update the post as time has passed!

You will attach all the lid boards to each other (not to the table) with the same ¾” pocket hole setting , wood glue and 1 1/4" Pocket Hole Screws. I started by attaching the two end boards first and then spaced them out from there!
The boards will be spaced at roughly a little less than ⅛” but more than 1/16”... the computer says 7/64” but that seems a little crazy for me to space, so I went with a hair over 1/16” and just have slightly larger gaps towards the center boards. For some strange reason, probably pure excitement, I didn’t get pictures of the lid before staining! Lol! So here’s the sketchup version for you!
Step 7
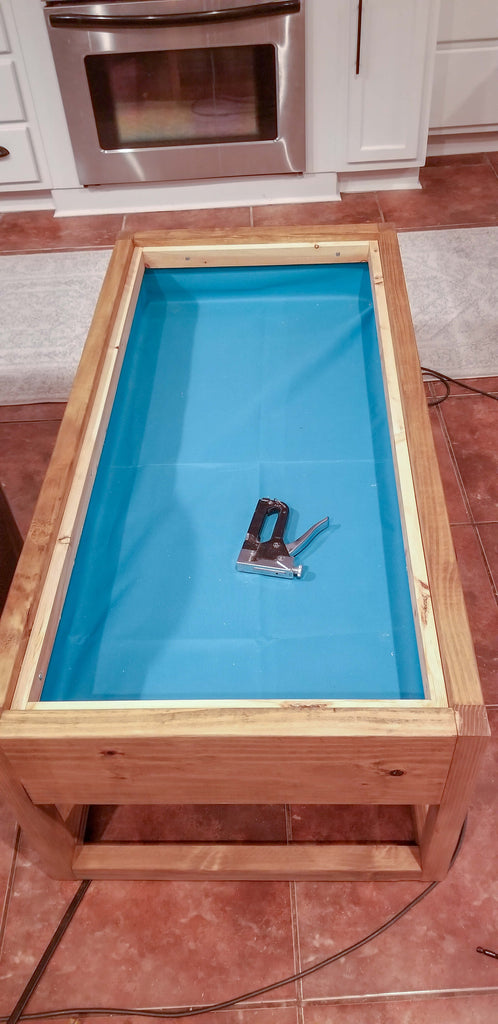
Attach the liner to the inside of the sandbox using a staple gun. If you used a solid piece of plywood, you don’t have to do this step! I bought 1 yard of fabric and didn’t cut it at all as I placed it inside, just stapled it and then cut it with an exacto knife .
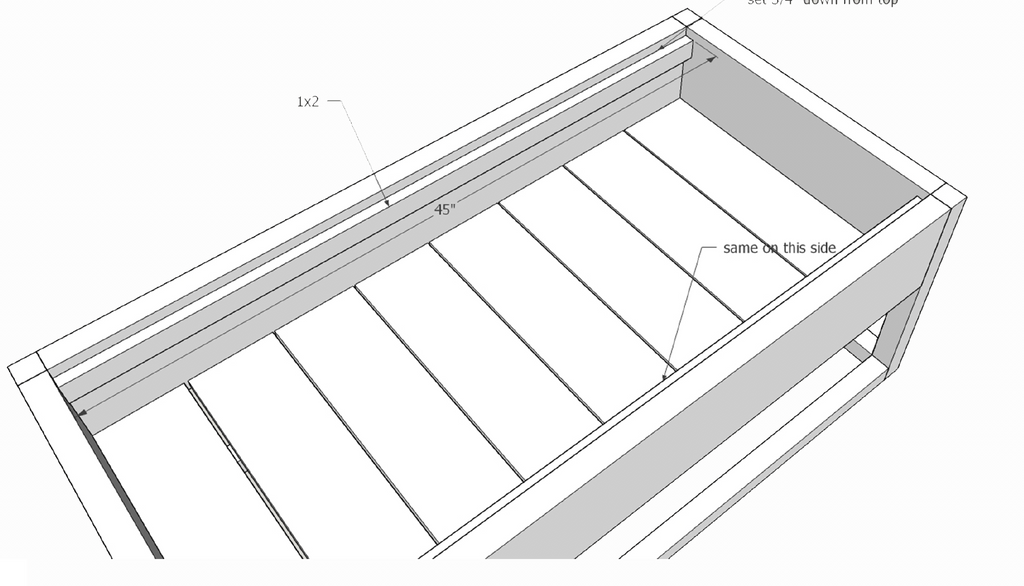
Last step was to add the lid support boards. I just screwed them in ¾” down from the top so that the lid would fit perfectly flush with the top!
I did not glue the lid support boards, I figured if the fabric didn’t hold up well, I could easily remove the liner and replace it! I just screwed 1 ½” screws into the boards, as you can see the heads in the pictures!
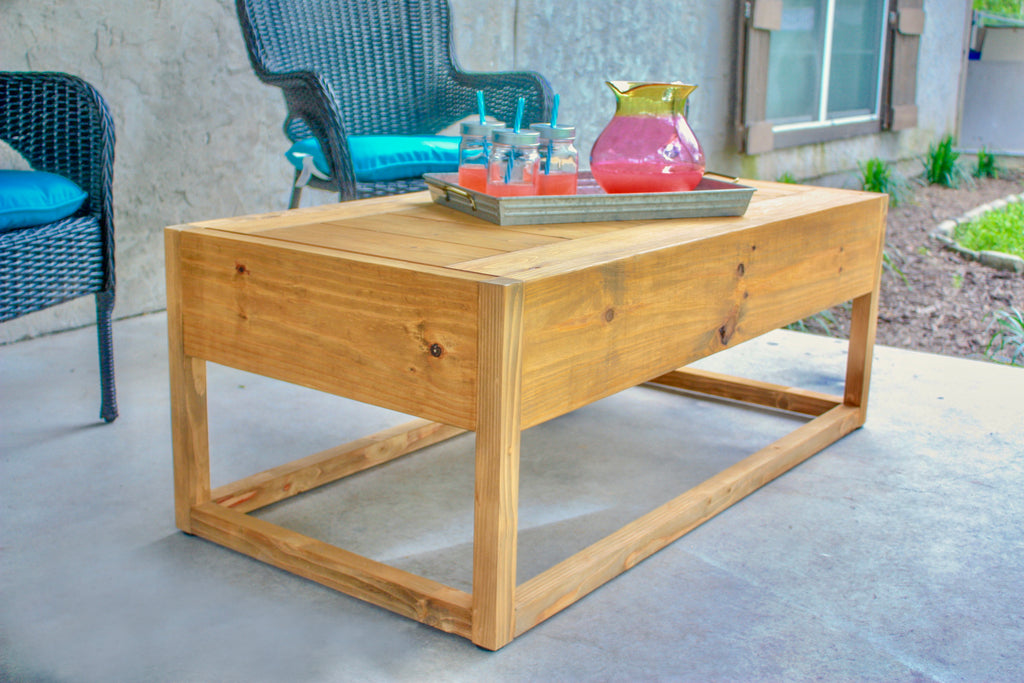
You will need to seal the boards to keep the moisture from getting to them! Guess what?! Place the lid on top, and... it’s done! The kiddos are happy, momma is happy...what more could you ask for?! Lol!
Ah yes, a refreshing drink...that’s what else you could ask for! Lol!

One thing I will note… I adjusted the measurements to allow for ½” instead of a ¼” on the lid size so you can get a finger in to grab the lid and remove it, you may want to add a handle or something to make removing the lid easier. I love the sleek look and didn’t want to add a handle, but it is kinda hard if you place the lid inside the bottom like I did in the picture below! I just lifted the sandbox up slightly and then was able to remove it!
Ooh, it is so cute!
I hope you enjoyed the build! I can’t wait to come back and share another project with you all, but feel free to come visit me over at The Inspired Workshop in the meantime! See you soon!