
"A DIY Wall Coat rack that will brighten up your entryway"
I always love simple DIYs and this coat rack is no different. I wanted to bring you guys a simple project, a little something different from my larger furniture projects that I usually do. So let's dive in.
Materiels
- 1 - 1x6x6 Select Pine Board
- 1 - 1x3x6 Select Pine Board
- 1 - 5/8" Wooden Dowel
- 1 1/4" Pocket Hole Screws
- ColorShot Spray Paint
- RapidFuse Glue
Tools List
For this particular project, I get to test out my new Ryobi Drill and Impact Driver Combo Kit. It comes packed with the drill driver and impact driver, two batteries, a charger and a bag.
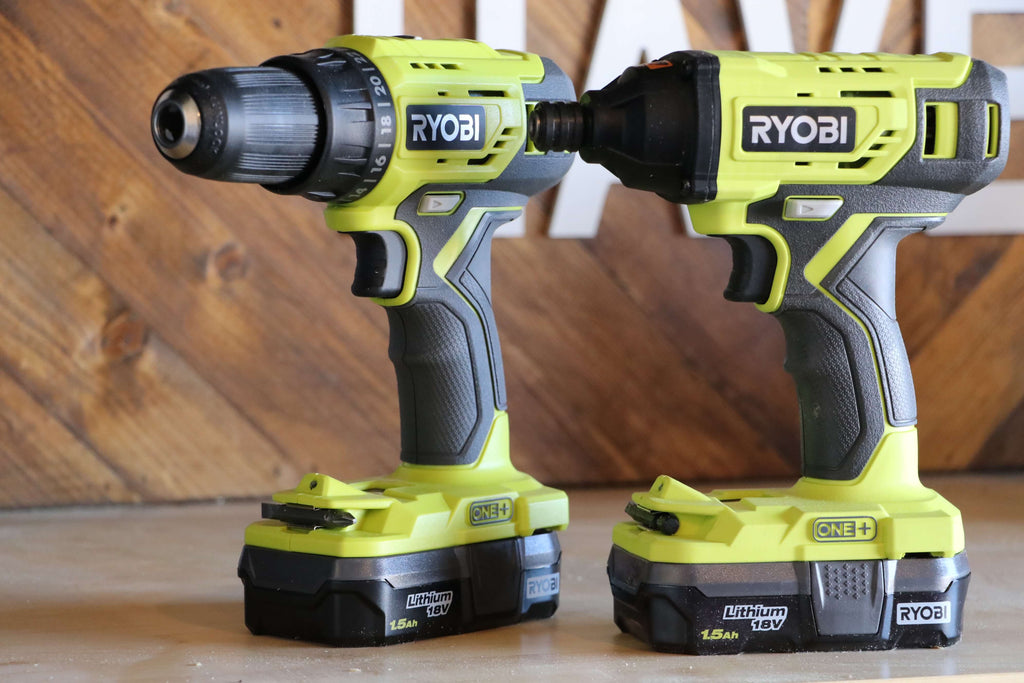 In this particular kit the batteries and charger have been upgraded for overall performance. So let's see how it stood up to the job.
Step 1: Drill Pocket Holes
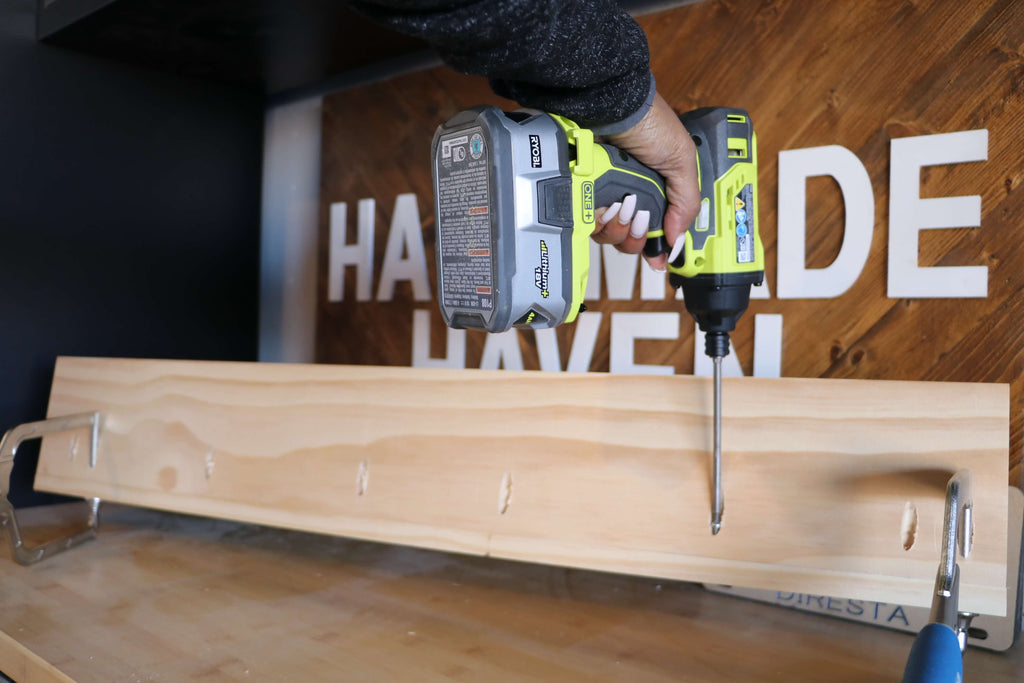
First, I cut my two select pine boards down to size using my miter saw. I opted to cut my boards down to 39" but feel free to make yours as long as you see fit. Once my boards were cut, I started drilling pocket holes into my 1x6 board using my RYOBI Drill/Driver.
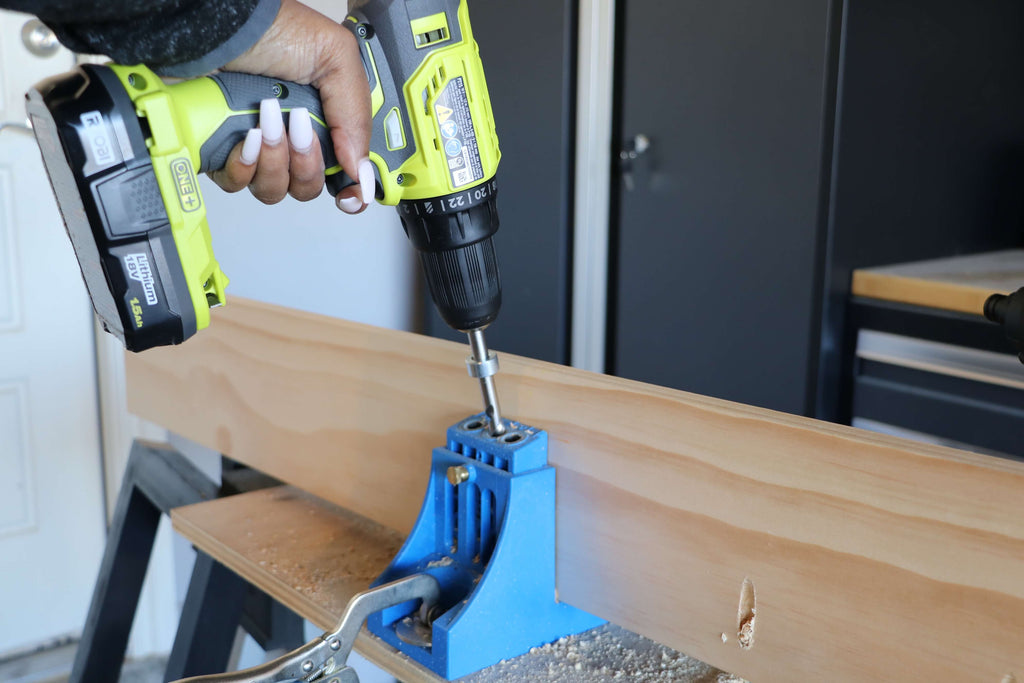
The new drill/driver has 500 in-lbs of torque that gives it power when doing activities such as these. I created pocket holes all along the back of the board and used my Kreg Jig to do so. For this board, I set my jig to a 3/4" setting.
Step 2: Assemble DIY Coat Rack
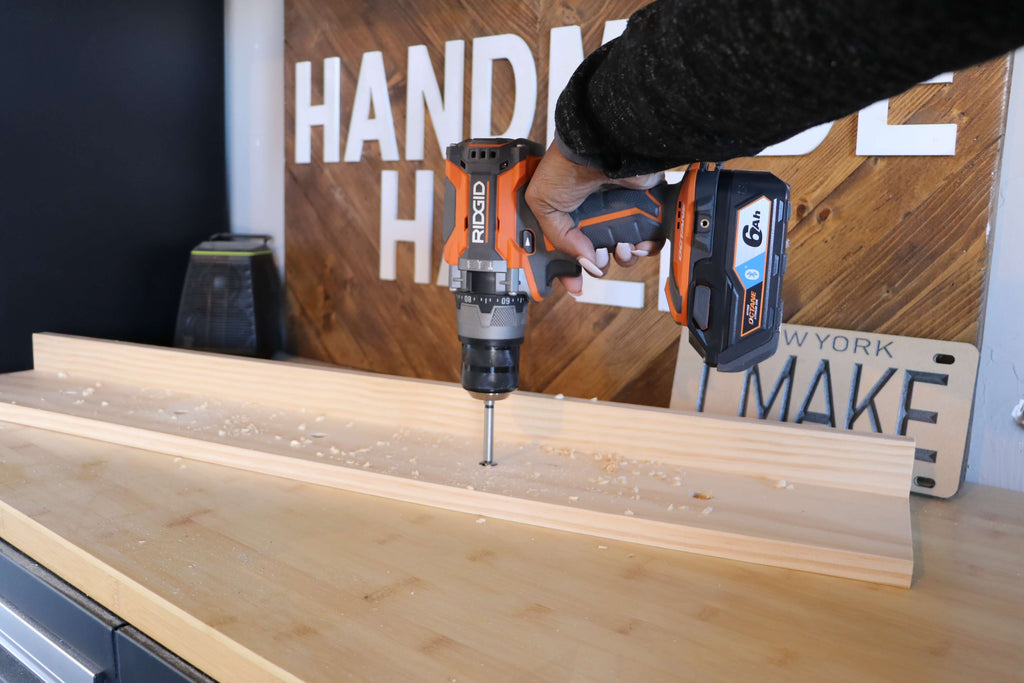
Next, I joined my boards together using pocket hole screws. I utilized my right angle clamps to hold the boards into place while I used my RYOBI Impact Driver to drill in the screws.
 The Ryobi Impact driver has 1800 in-lbs of torque to deliver increased speed when driving screws. I drilled in the outer pocket hole screws first to hold things into place and then proceeded with the rest of the pocket holes.
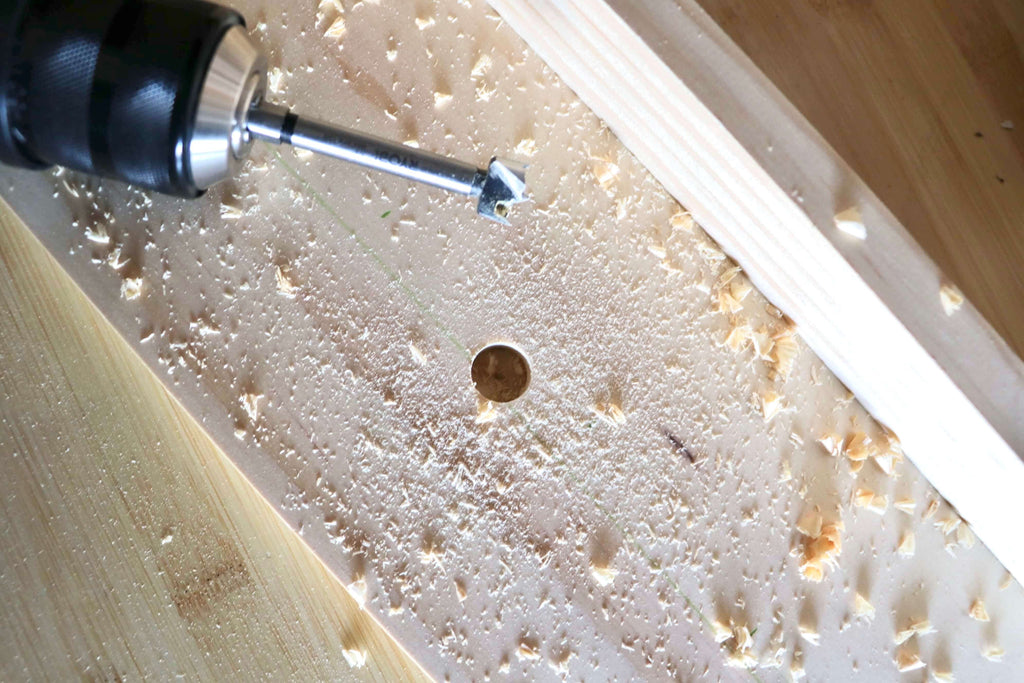
Step 3: Drill Dowel Holes
Next, I added the dowel holes. To create the holes, I used my 5/8" forstner bit. Now, you can use your Ryobi Drill/Driver to drill the dowel holes, but I decided to use my RIDGID Octane Hammer Drill instead because it was a lot faster. This baby has a ton of power, and was a better option for this particular task.
 I first marked the board in half at 2 3/4" and then marked evenly across the board to make sure my dowels would be evenly placed. I drilled my holes just deep enough so that the top of the Forster bit would be even with the top of the hole.
Step 4: Add Dowels to Coat Rack
Now I did this step third, but later on in the process, I realized that it was probably better to do this step after painting the coat rack. Lesson learned, do this step once your paint is dry.
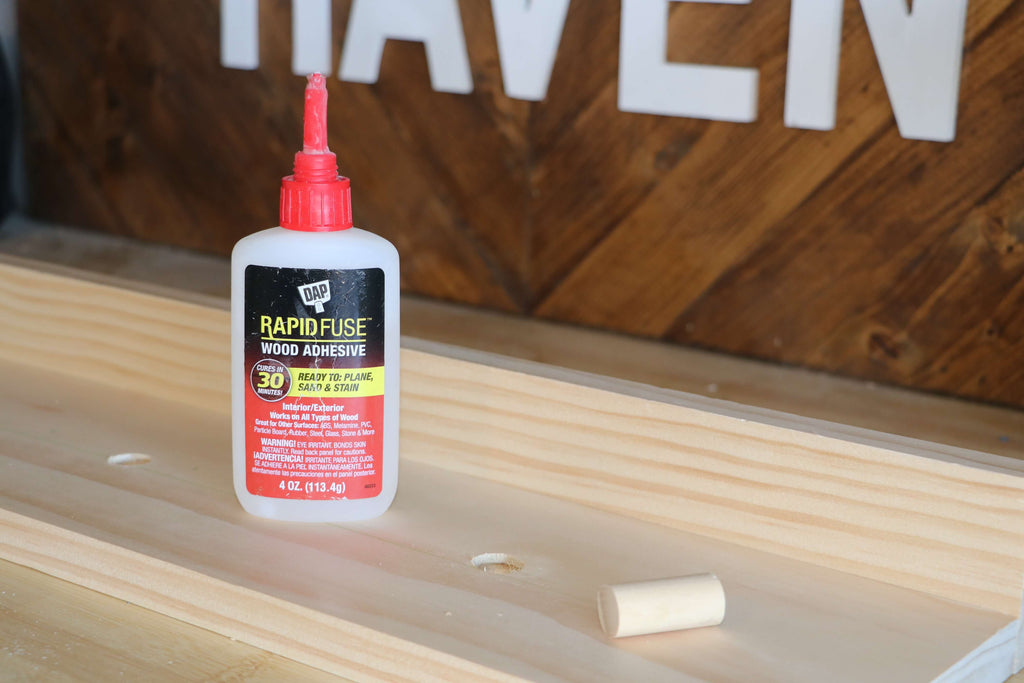 I used DAP RapidFuse Glue to attach the dowels to the coat rack. I use this glue all the time and I really enjoy using it. It always has a strong hold with whatever I'm applying it to and dries almost instantly.
Step 5: Paint your DIY Coat Rack
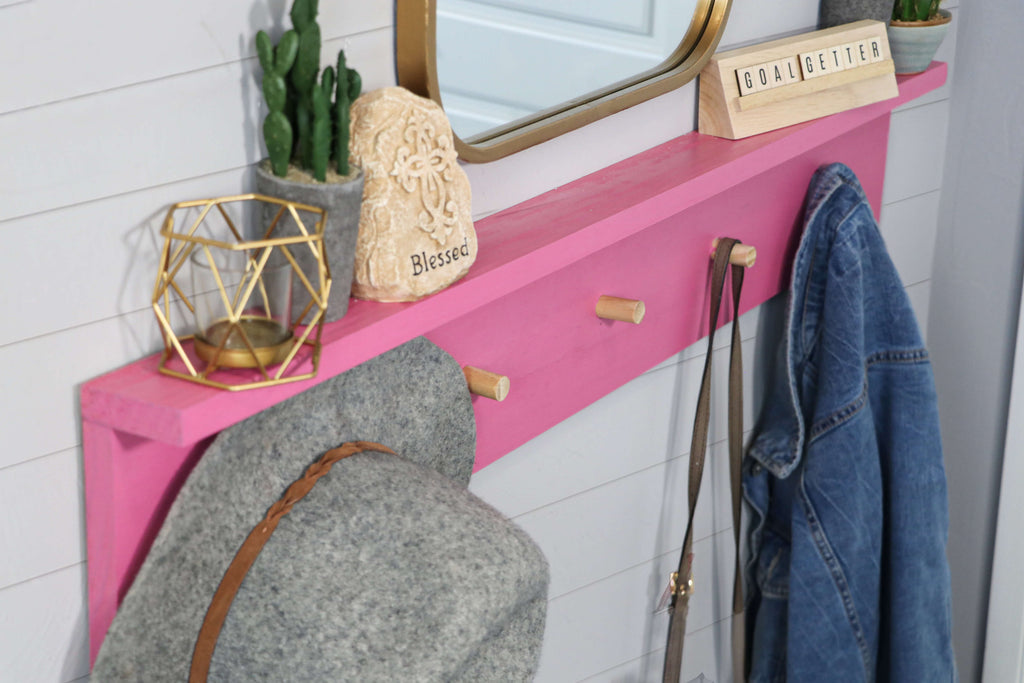
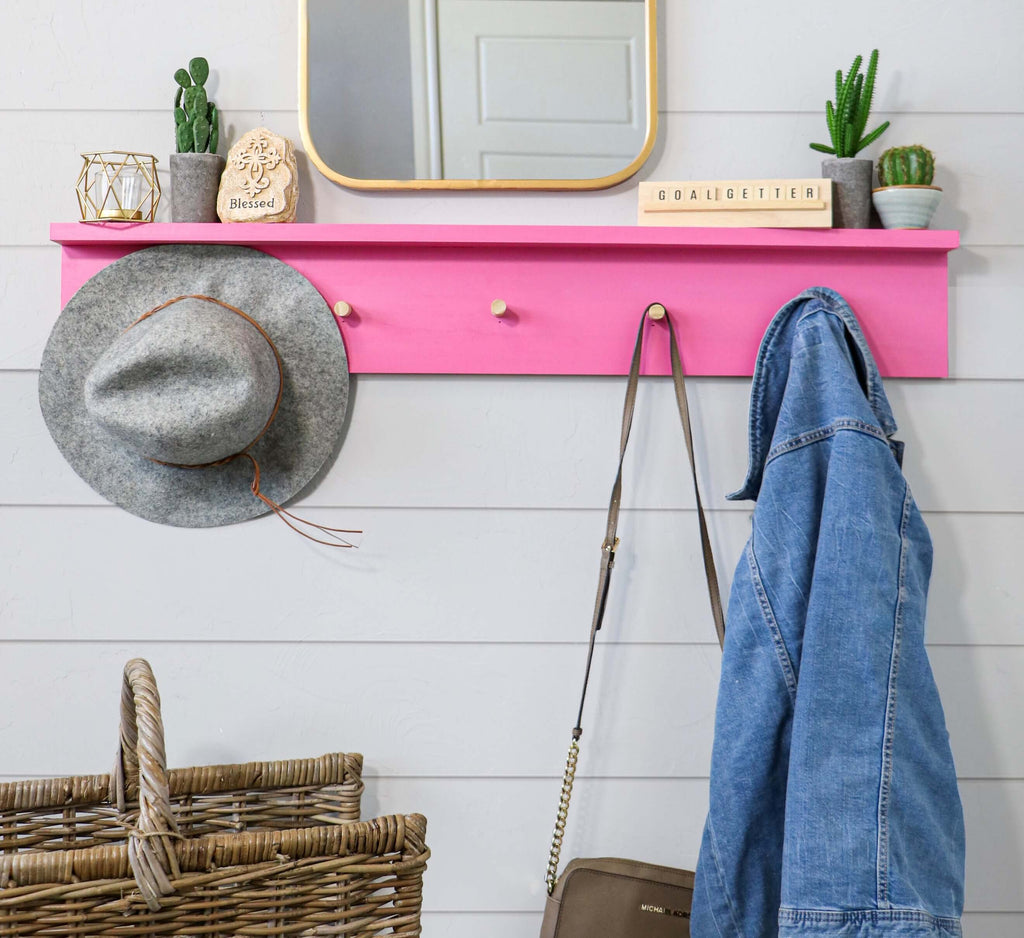
Now here is the fun part! Getting to choose a color for your coat rack. I went with something bold and fun, pink! This was also my first time trying out this new spray paint ColorShot.
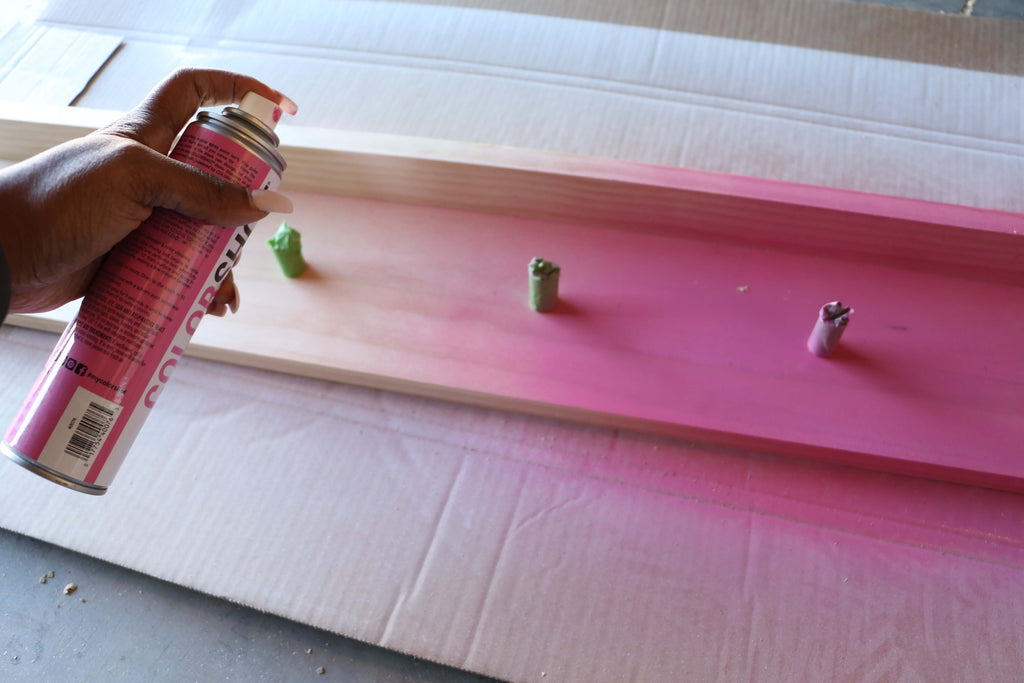 One thing that I noticed that I really liked was how quickly it dried. I sprayed a thin coat and it quickly dried to touch. This particular color is called Farmer's Daughter. I sprayed several coats and then let it sit to dry.

Step 6: Style and Enjoy
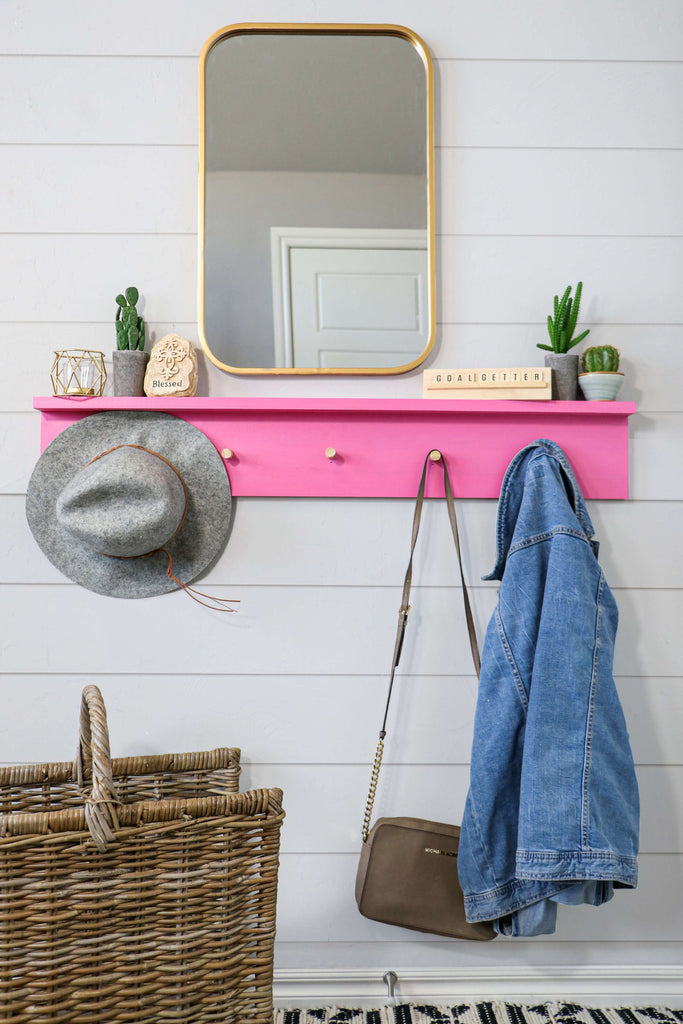
Once your DIY Coat Rack is all dry, you can style and enjoy. This project was a super simple project that I was able to knock out in a few hours but man does it make a corner space look good. I hope you guys enjoy and I can't wait to see your renditions of this coat rack. But before you go, let's get one last look at mine.
Thanks for reading guys, XOXO Ashley.


