
"An Oak Slat feature wall you'll love."
I have been super excited to share this oak slat wall with you because it is hands down one of my favorite feature walls to date. I have been obsessed with slat walls ever since I've seen them around and have been dying to do my own rendition of one and I finally got the chance.
"This post is sponsored by Weaber Lumber."
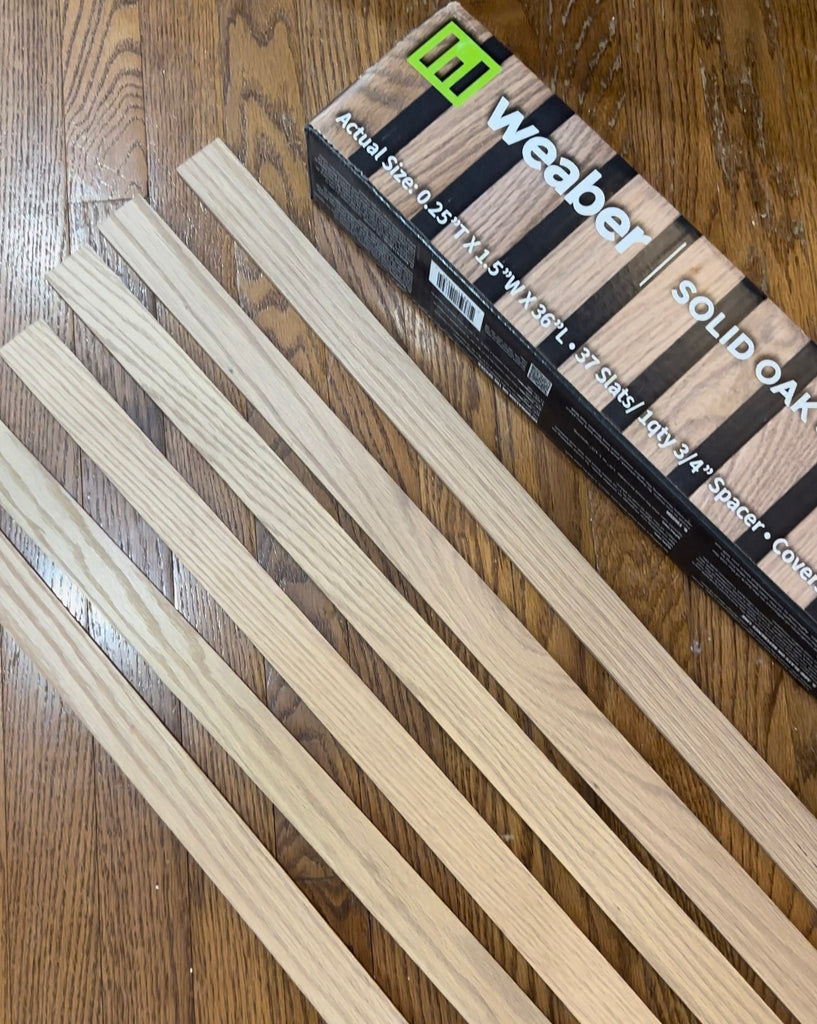
My good friends over at Weaber Lumber sent over these fun Oak Wood slats; a new product that they just introduced. Their sleek lines have an architectural quality that is super sophisticated. You can use them to create a multi-dimensional effect for a modern update. Learn more here.
There are some affiliate links in this post, meaning I get a small commission if you purchase through these links, at no cost to you. Click Here to read my full disclosure.
Materials/Tools
- Weaber Lumber Oak Slats
- Adhesive
- Caulk Gun
- Brad Nails
- Fil-Stick (Driftwood)
- Miter Saw
Project Prep
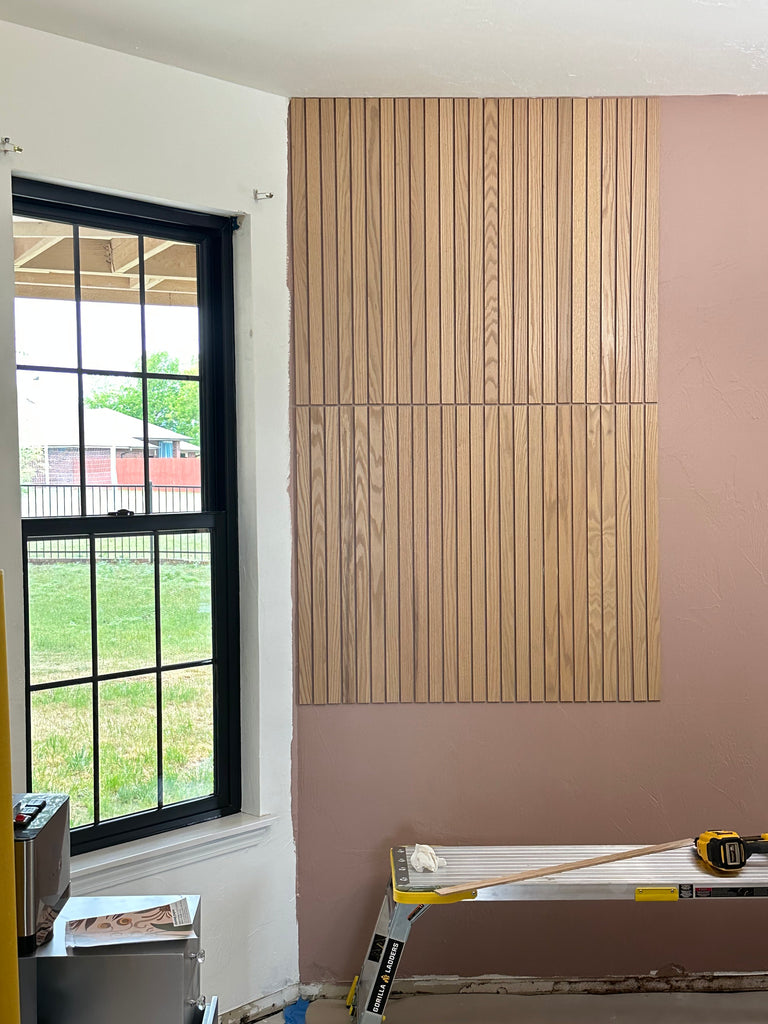
To prep for the oak slat installation, I first had to paint the wall. If you are installing these slats as I did, you will be able to see the wall behind the slats so you will want to paint the wall a color that matches your walls or a darker color to be more appeasing to the eye. I painted the wall with Behr's Sonora Rose in Matte.

Oak Slat Install
I am super excited to be sharing this new product with you guys. My friends over at Weaber Lumber reached out to me to try there new Oak Wood Slats that will be coming soon nationwide and man am I in love. I have been wanting to do a wall paneled wall for a while and this was the perfect product to get it done.
Here is a little info about what comes in each box:
- Solid Oak
- Actual Size – 1/4” X 1-1/2” X 36”
- 37 Slats Per Carton
- 1qty Spacer to provide the option for 1/2″, 3/4″ & 1-1/2″ Spacing
- One Box Covers 20.625 SQFT based on 3/4” Spacing
I opted to use one of the oak slats as my soccer but they provide a spacer that gives you an option to choose the spacing that works best for you.
 Once the wall was fully painted, I began installing the oak wood slats. I am attaching them to the wall by applying a small amount of paneling adhesive to the bak and then attaching it to the wall with 2' brad nails and my brad nailer.

I love that these were really simple to install; but made a really huge impact to the space. I was able to install two full rows and then had to cut the bottom slats down for them to fit the bottom. If you would like a more even, uniform look; measure your wall beforehand to figure out what cuts you would need to make it even on the top and bottom.
The best part about that slats is that they are refinished; so once you install them on the wall; the only thing left to do is filling the nail holes. i used a fit-stick to go back and fill all of the nail holes. I tried to keep the holes to only three to eliminate having to fill too many holes.
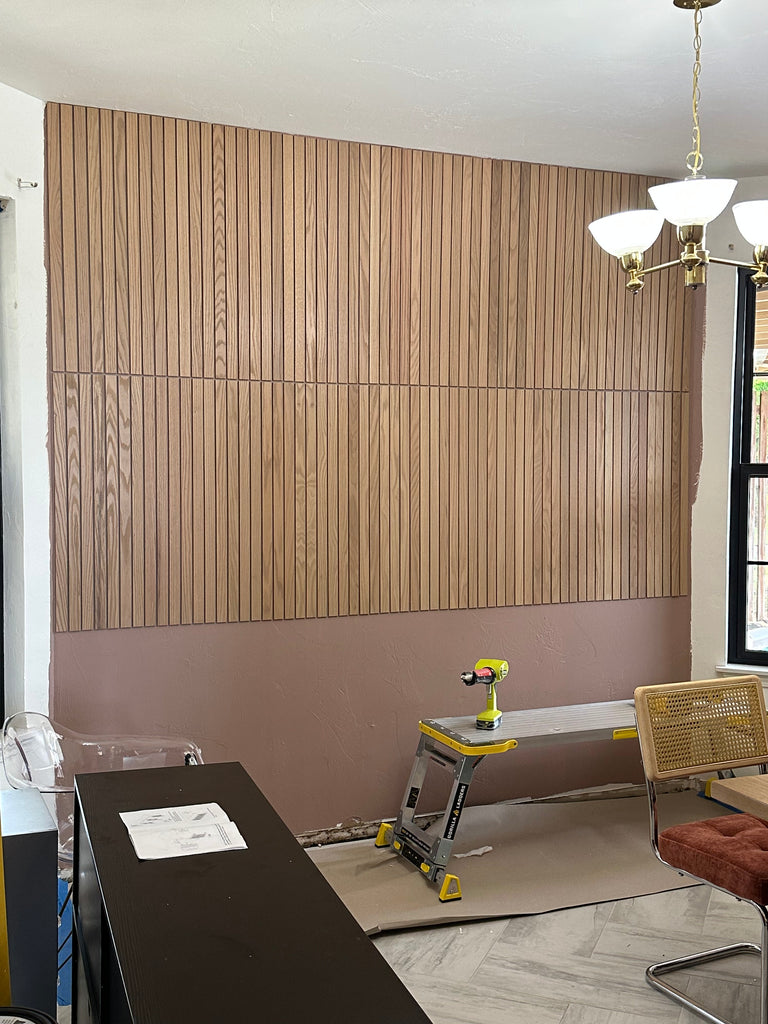
Overall, creating this oak slat accent wall was a really simple project and something that you can easily knock out in a weekend. Now, lets take a final look at the space.
Oak Slat Wall Final Reveal
I can assure you that the pictures don't do it justice; but this oak slat wall totally elevated this space.

This accent wall coupled with the wallpaper was the perfect mix to bring some texture and fun to the space. If you're looking for a product to help create a fun accent wall, these Weaber Lumber oak slats are perfect. You can use them in so many different ways to create awesome spaces.

Welp that wraps it up, thanks for reading guys, as always XOXO Ashley.


