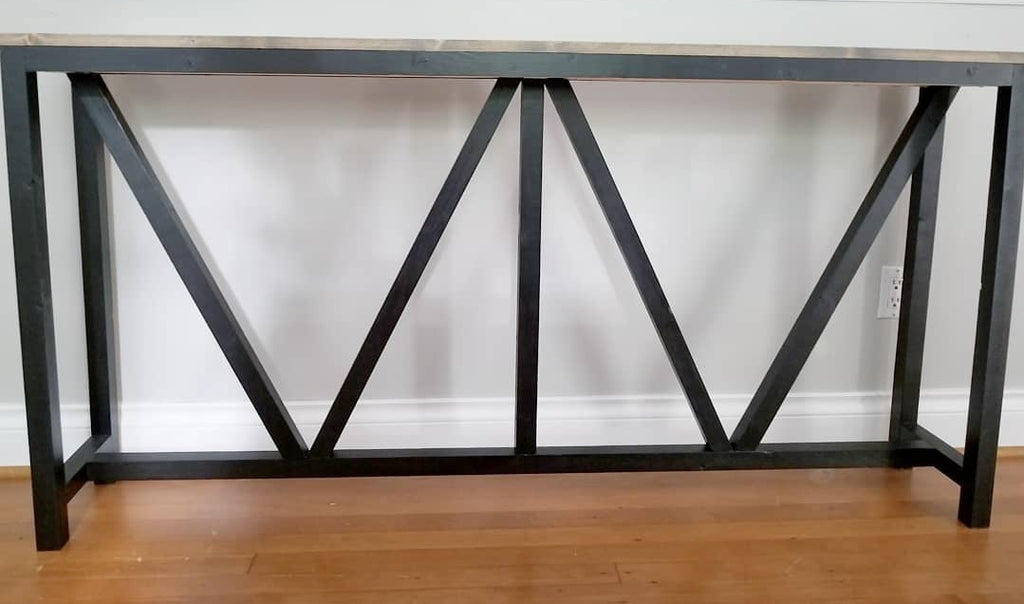
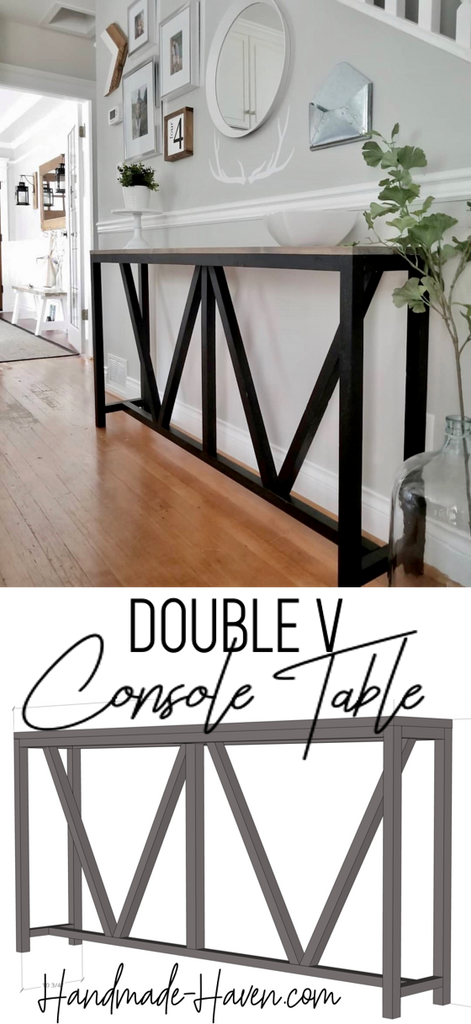
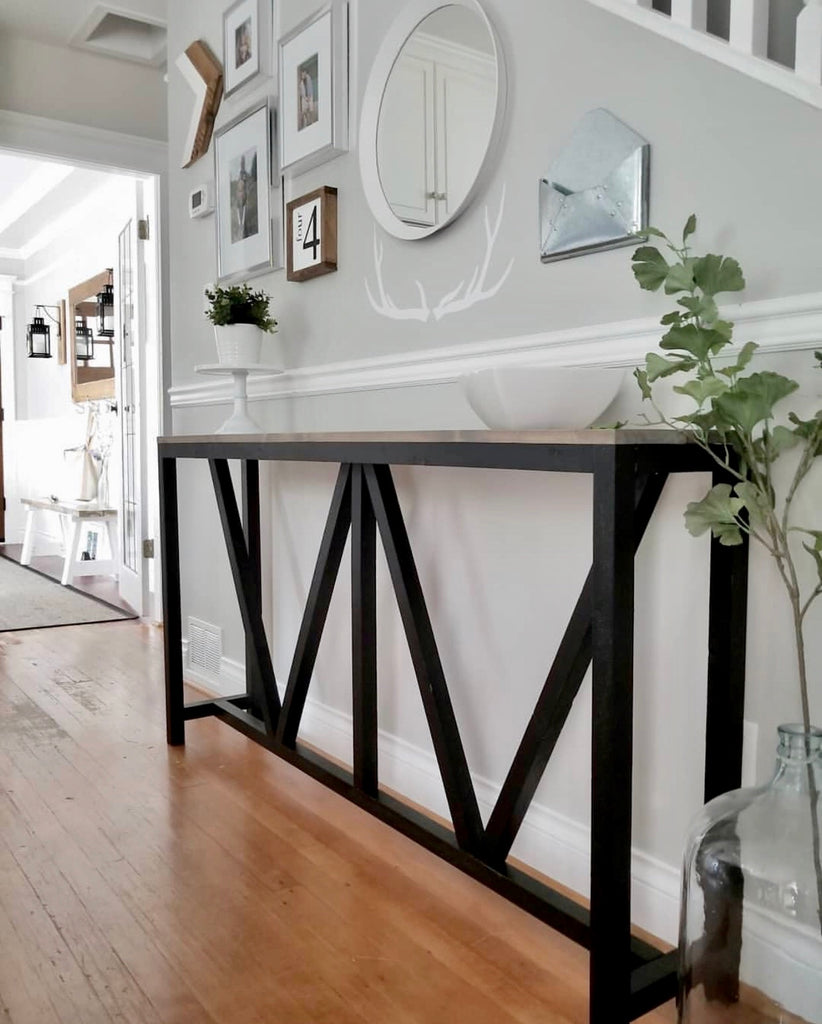
"This Console table is giving farmhouse a whole new meaning."
It's been a while since I've been able to feature a fellow builder, so I was super excited to partner up with Kelly from paisleyandwilliam to bring you the free plans for this Farmhouse V Console Table. But before you check out the free plans, be sure to go give her a follow on Instagram.
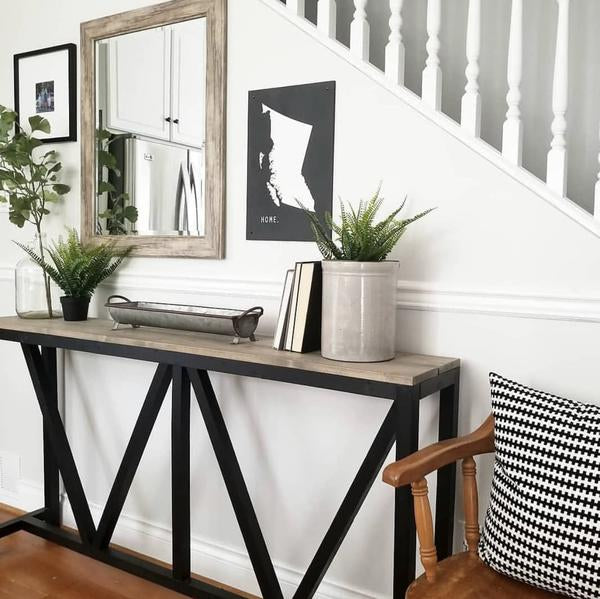 Console tables are probably one of my favorite kind of builds because it never takes too much work and it can really bring your entryway to life, and even better, this one was super cheap to make. I just love how this V console table looks in Kelly's entryway.
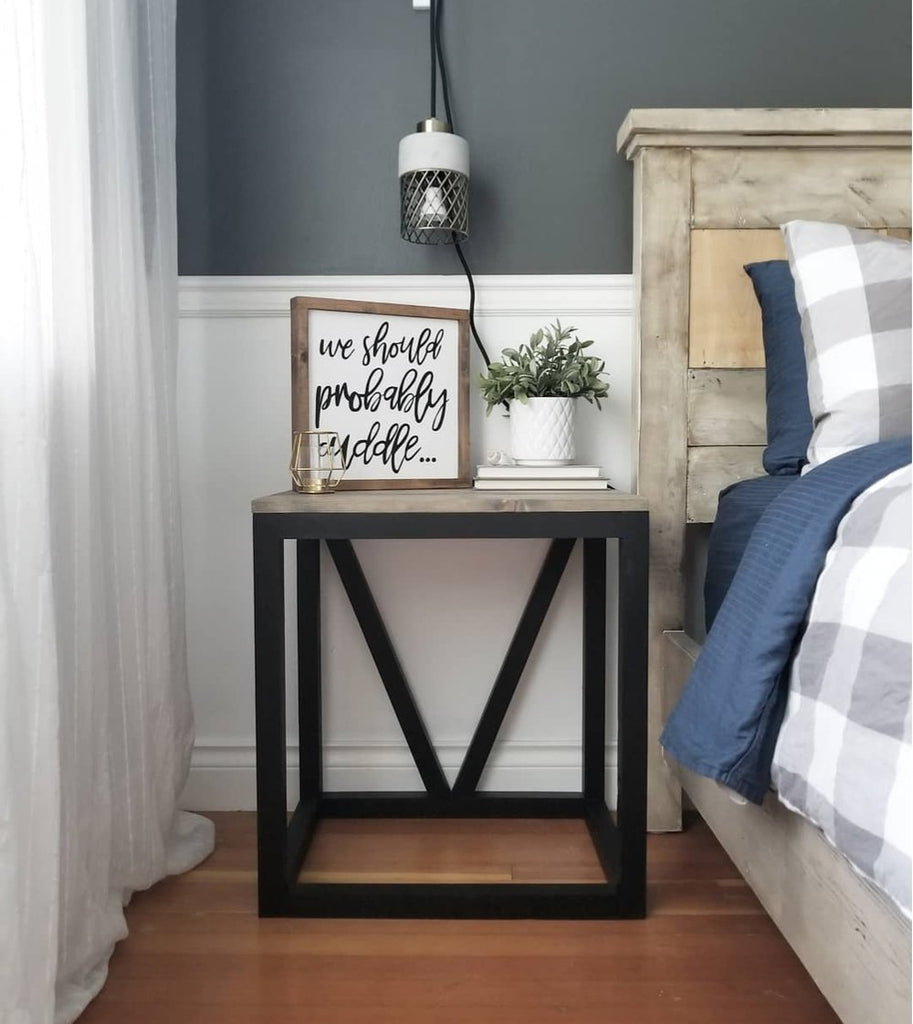
Kelly and I also partnered up together to bring you the free plans for this V Side table, so be sure to check it out when you’re done!
There are some affiliate links in this post, meaning I get a small commission if you purchase through these links, at no cost to you. Click Here to read my full disclosure.
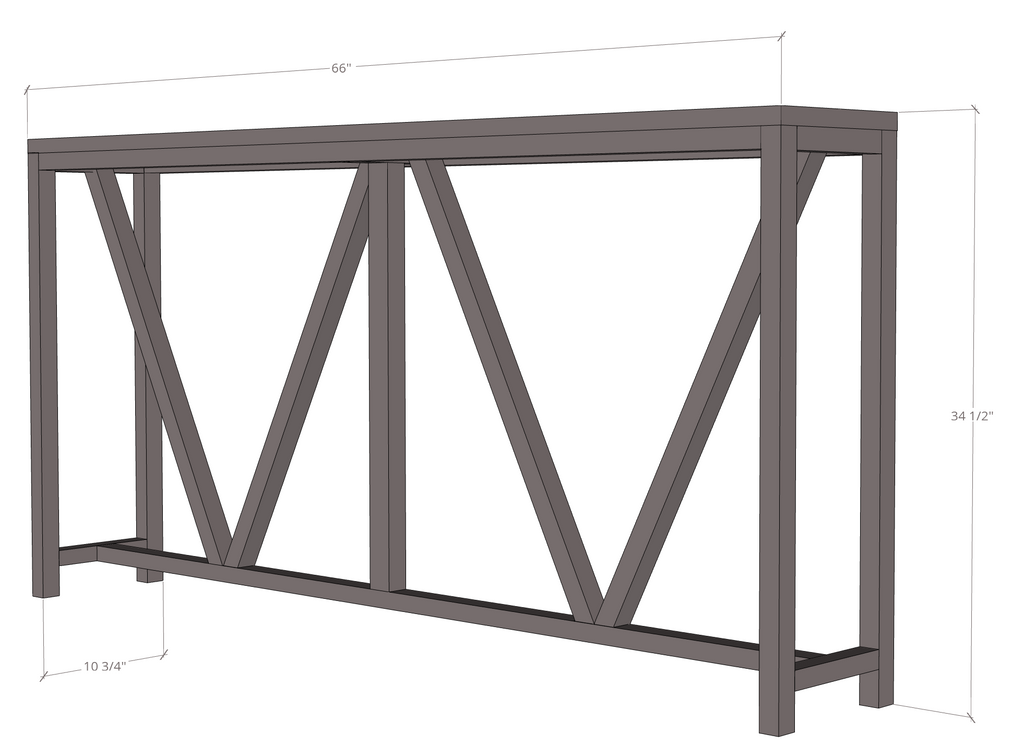
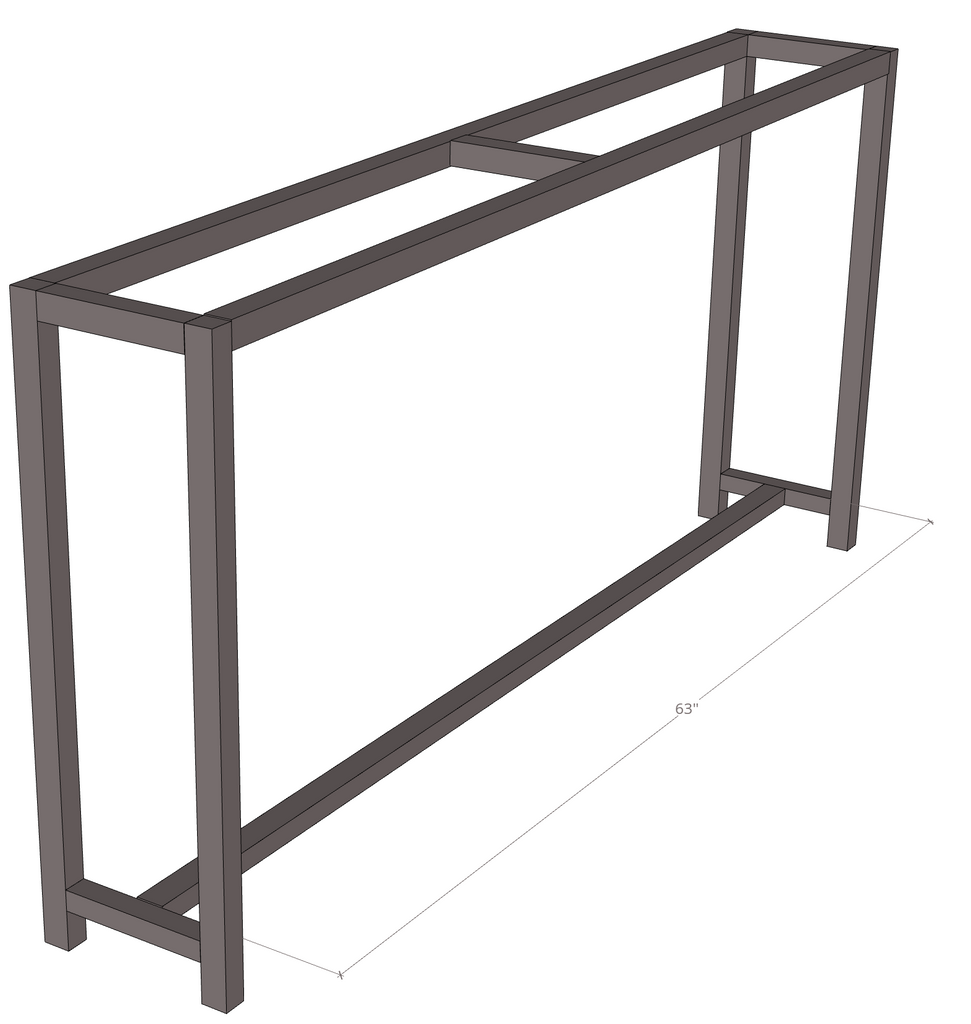
Dimensions
Materials
2 - 1x6 @ 8ft.
8 - 2x2 @ 8ft
Cut List
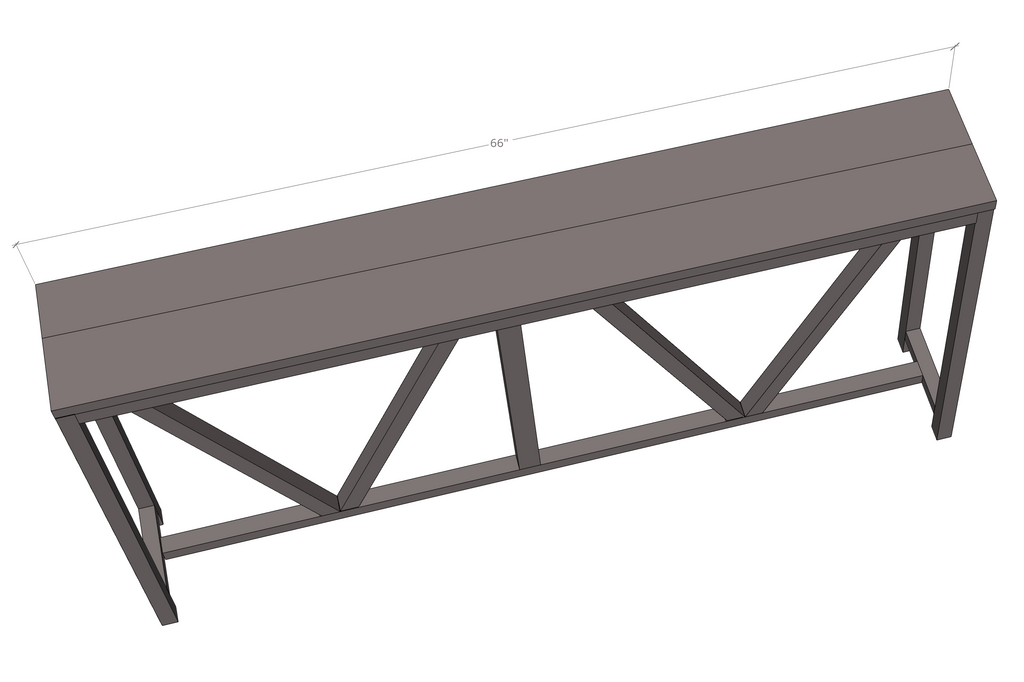
2 - 1x6 @ 66" (top)
4 - 2x2 @ 33" (legs)
3 - 2x2 @ 63" (supports)
5 - 2x2 @ 8" (supports)
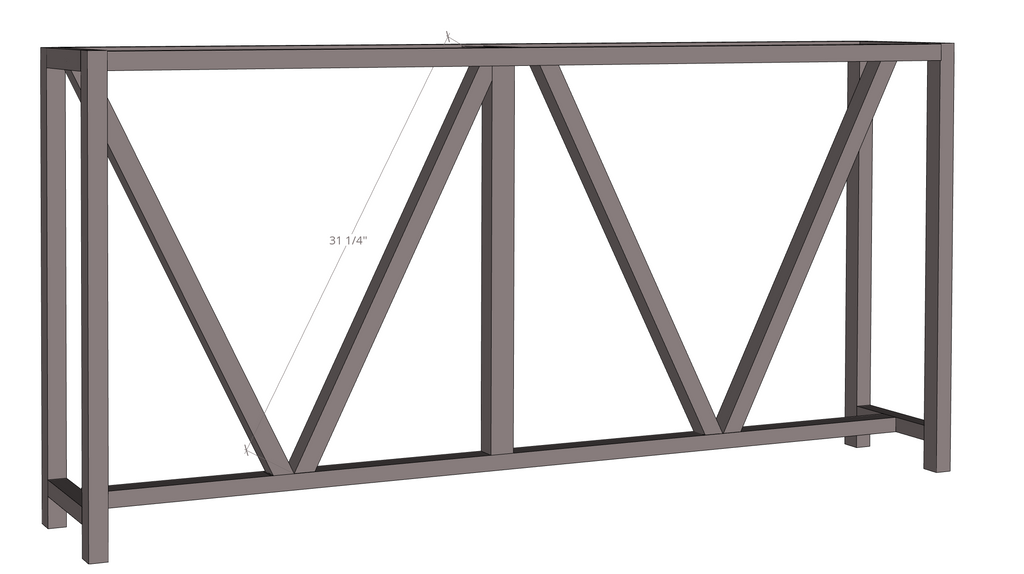
4 - 2x2 @ 31 1/4" (V Pieces) @ 26 degrees
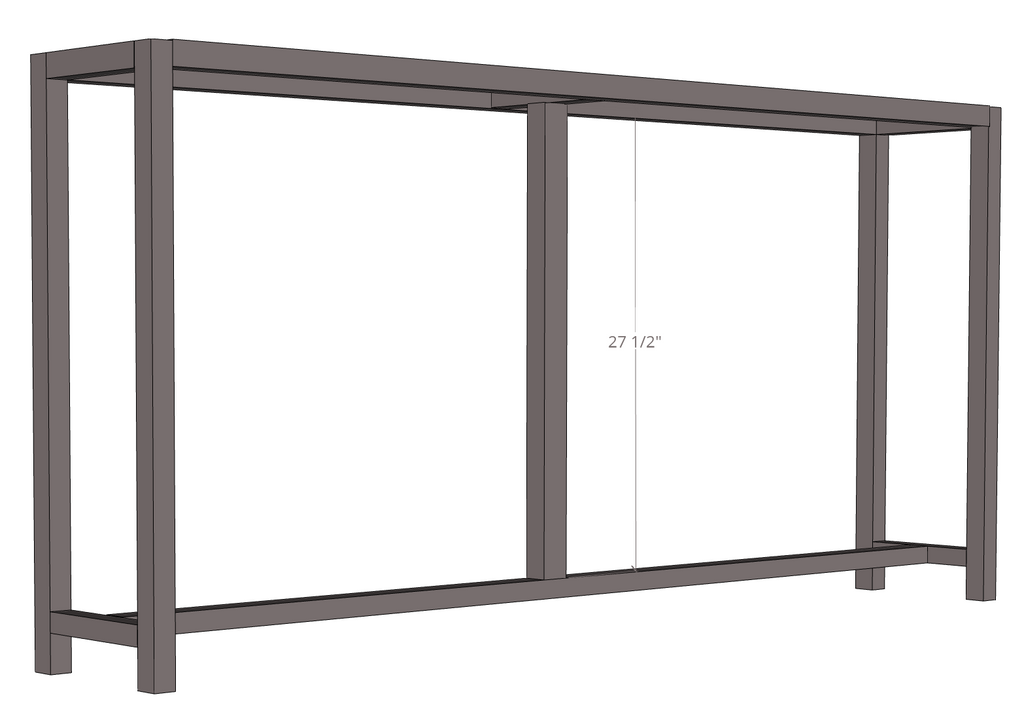
1 - 2x2 @ 27 1/2" (mid support)Step 1:
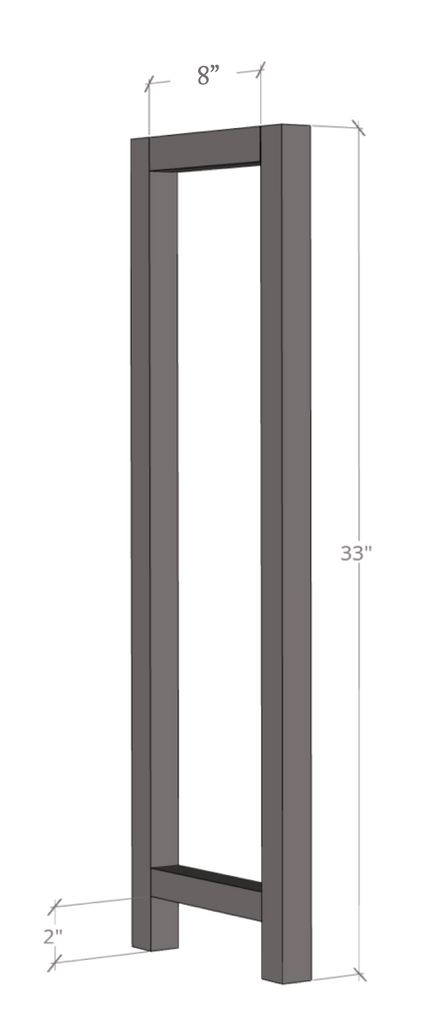
Attach the 2x2 supports (8") to the 2x2s (33") using a Kreg Jig K4 Pocket Hole System on a 1 1/2" setting, with 2 1/2" Pocket Hole Screws to attach along with Wood Glue. There should be a 2" spacing from the bottom support piece and the floor. Repeat step for the other side of the farmhouse console table. Note: The pocket holes on the supports should face down on the bottom support and inward on the top support.
Step 2:
Attach the 2x2 supports (63") to the assembled console table sides using a Kreg Jig K4 Pocket Hole System on a 1 1/2" setting, with 2 2 1/2" Pocket Hole Screws to attach along with Wood Glue. Note: Be sure to face the pocket holes upward. This will be hidden once the top is placed on the console table.

Step 3:
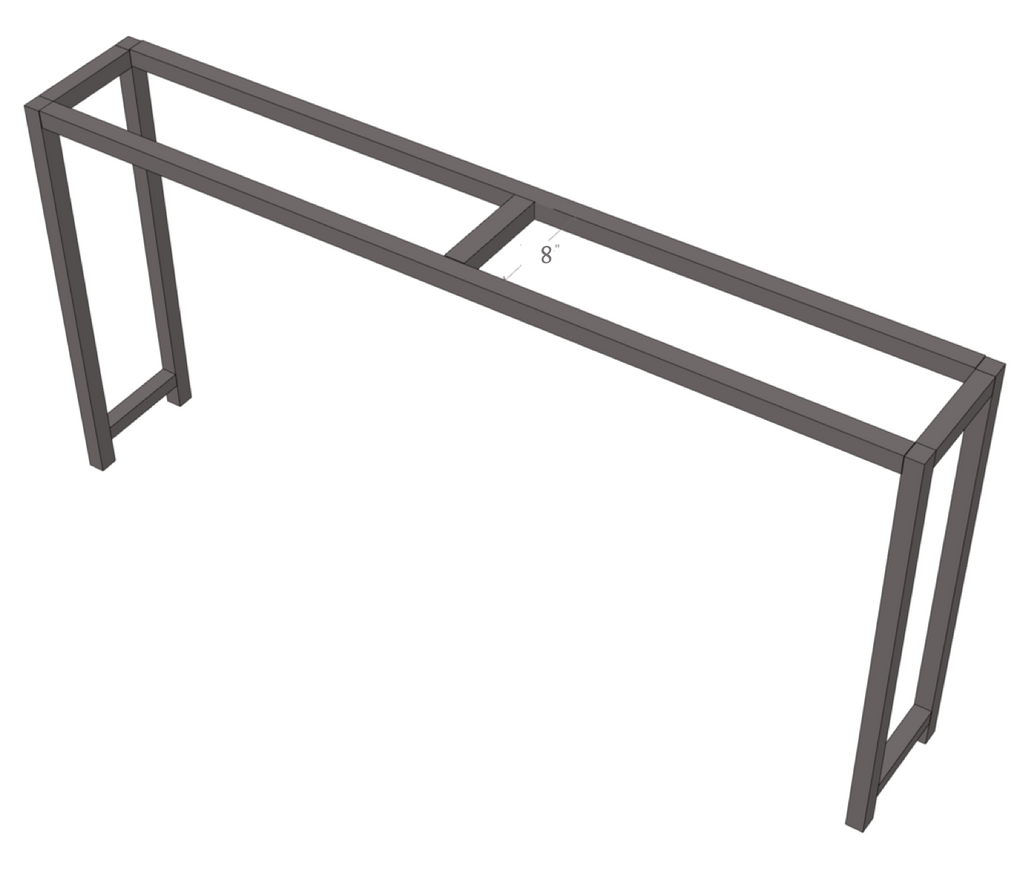
Attach the 2x2 middle support (8") to the assembled console table sides using a Kreg Jig K4 Pocket Hole System on a 1 1/2" setting, with 2 1/2" Pocket Hole Screws to attach along with Wood Glue. Note: Be sure to face the pocket holes upward. This will be hidden once the top is placed on the console table
Step 4:
Attach the 2x2 bottom middle support (63") to the assembled console table sides using a Kreg Jig K4 Pocket Hole System on a 1 1/2" setting, with 2 1/2" Pocket Hole Screws to attach along with Wood Glue. Note: Be sure to face the pocket holes downward.
Step 5:
Attach the 2x2 middle support (27 1/2"") to the assembled console table sides using a Kreg Jig K4 Pocket Hole System on a 1 1/2" setting, with 2 1/2" Pocket Hole Screws to attach along with Wood Glue. Note: Be sure to face the pocket holes to the back.
Step 6:
Attach the 2x2 V braces (31 1/4") to the assembled console table using a brad nailer along with wood glue. Alternatively, you can pre-drill small holes and use wood screws to attach.
Step 7:
After assembling the top together using a Kreg Jig K4 Pocket Hole System on a 3/4" setting, with 1 1/4" pocket hole screws to attach along with Wood Glue, attach the 1x6 tabletop to the assembled console table sides using wood screws from underneath the console table base.
Step 8: Fill all seen pocket holes with wood for a clean look. For help on how to easily fill pocket holes, check out my technique here.
and that wraps it up. Kelly did a great job on this build and now you can make one too.
For the finish Kelly used Rustoleum Ultra Cover Black paint for the bottom of the base and a mix of Minwax stains for the top (Minwax Gray and Minwax Special Walnut)
Be sure to share your go with Kelly and I. I absolutely love this farmhouse console table, I think my house needs one.
Thanks for reading guys, XOXO Ashley


