Three Drawer Console
I think its safe to say consoles are one of my favorite pieces to build..so this three drawer console was a no brainer. Check it out!

Follow my plans below to build!
Dimensions:

Materials List:
(2) 2X4s @ 8ft
(7) 2x2s @ 8ft
(1) 1x2s @ 6ft
(6) 1x12s @ 8ft
(1) 2x6 @ 10ft
(1) 2x6 @ 8ft
Step 1:
Assemble bottom shelf by attaching 2x2s to 1x12 with wood glue and brad nails.

Be sure to measure your 2x2s against the 1x12 before making your cuts. Attach the smaller 2x2 sides 1st.

Step 2:
Attach 2x4 legs to the assembled bottom shelf using a drill and 2 1/2" wood screws.
 Lay two 2x4s on the ground and stand shelf upright to attach shelf to the legs. Screw underneath shelf. Flip shelf and attach the other two legs.

Step 3:
Attach 2x2 braces using a Kreg Jig K4 Pocket Hole System on a 1 1/2" setting, with 2 1/2" Pocket Hole Screws to attach along with wood glue. Be sure to measure 2x2 to the console before making cut.

 Step 4:

Step 5:
Attach front 2x2 braces using a Kreg Jig K4 Pocket Hole System on a 1 1/2" setting, with 2 1/2" Pocket Hole Screws to attach along with wood glue.


Step 6:
Add middle console sides using a Kreg Jig K4 Pocket Hole System on a 1 1/2" setting, with 2 1/2" Pocket Hole Screws to attach along with wood glue.
 Step 7 :

Step 8 :


 Step 9:
 Step 10:

 and WAAAA-LAAH!


Assemble drawers using either glue and brad nails or using a Kreg Jig K4 Pocket Hole System on a 1 1/2" setting, with 2 1/2" Pocket Hole Screws to attach along with wood glue. Its best to measure the drawer to your console to determine what measurements you will need. Build your drawer to fit the opening.
Attach 1x2 cleats on side of each drawer (these will slide on the 2x2 cleats on the sides of the console) Make sure to leave 3/4" space for the drawer face.


There should be 1/8" of space on each of the sides of the drawers face for easy operation of the drawers.
 Step 9:
Attach 2x6s together using a Kreg Jig K4 Pocket Hole System on a 1 1/2" setting, with 2 1/2" Pocket Hole Screws to attach along with wood glue and attach to console with wood screws through the sides of the 2x2s.
 Step 10:
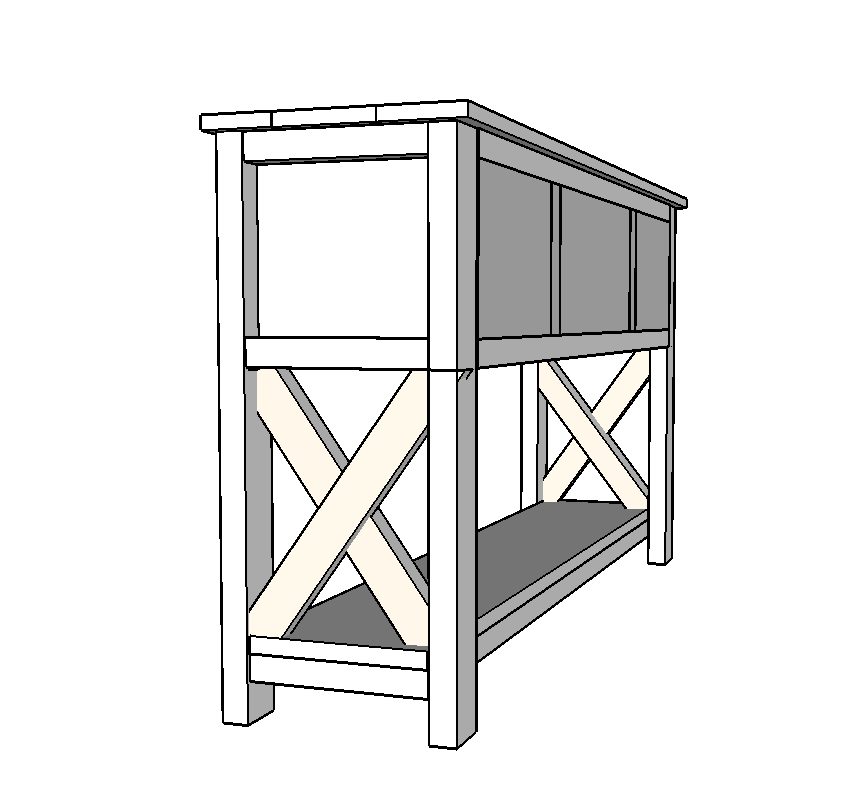
Attach 2x2s to make Xs on the side of the console using wood glue and brad nails.. It is best to measure and cut to fit the Xs perfectly.

 and WAAAA-LAAH!
I used Minwax Classic Grey and Minwax Polycrylic for my finish.


