
Projects

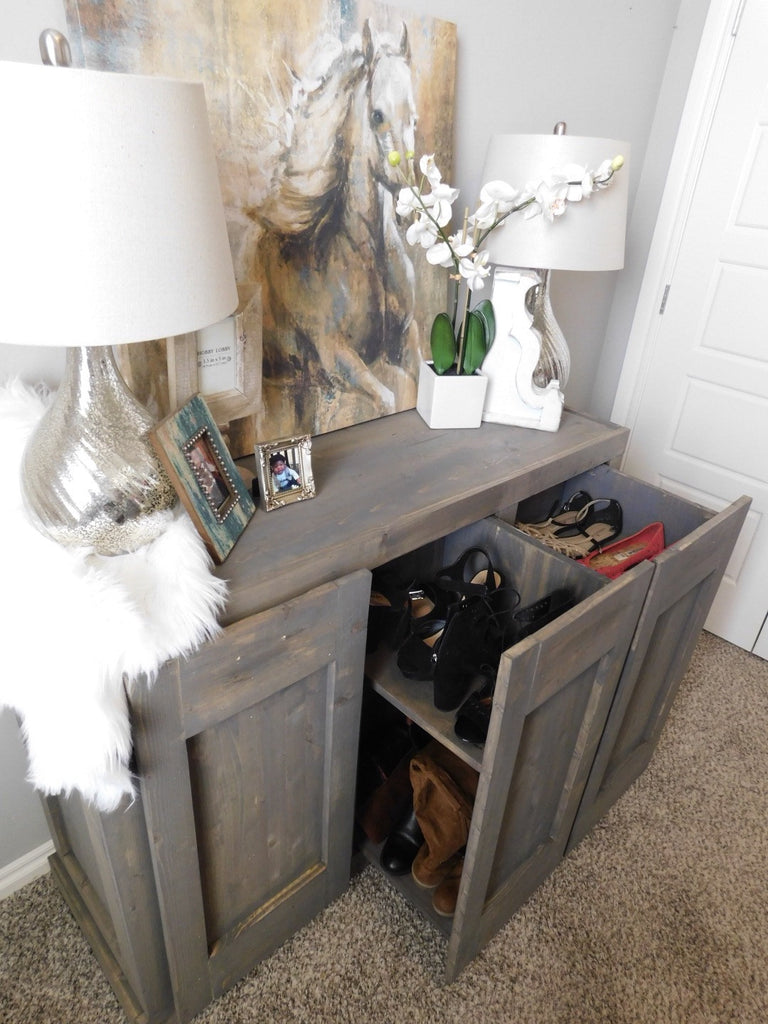
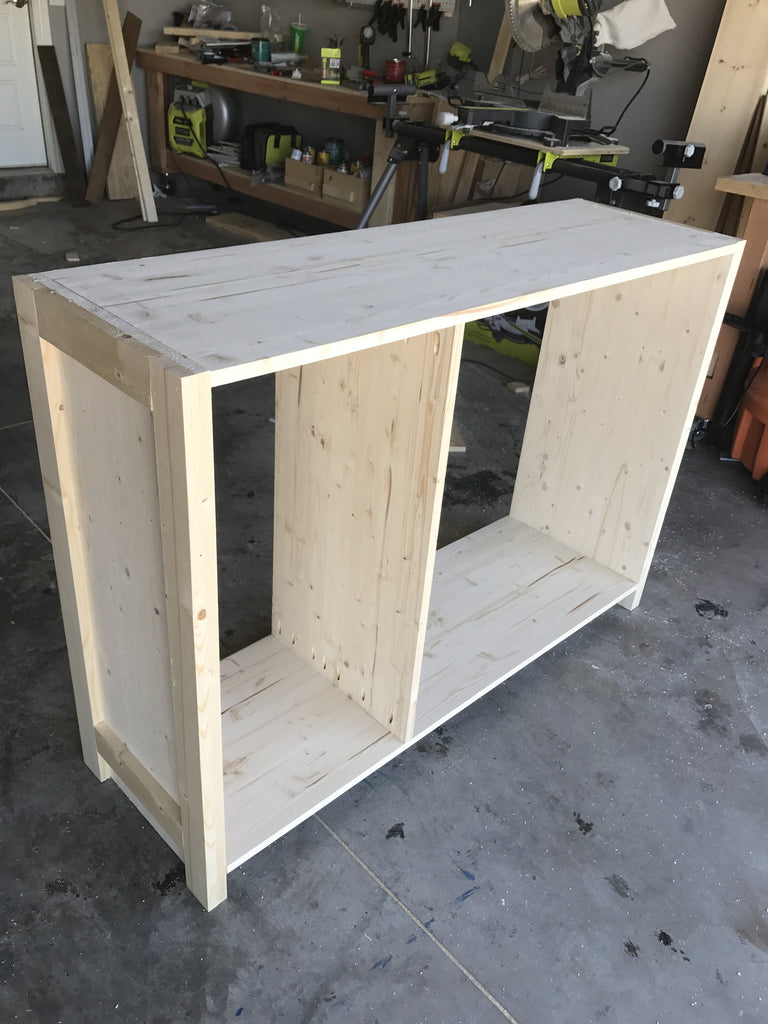
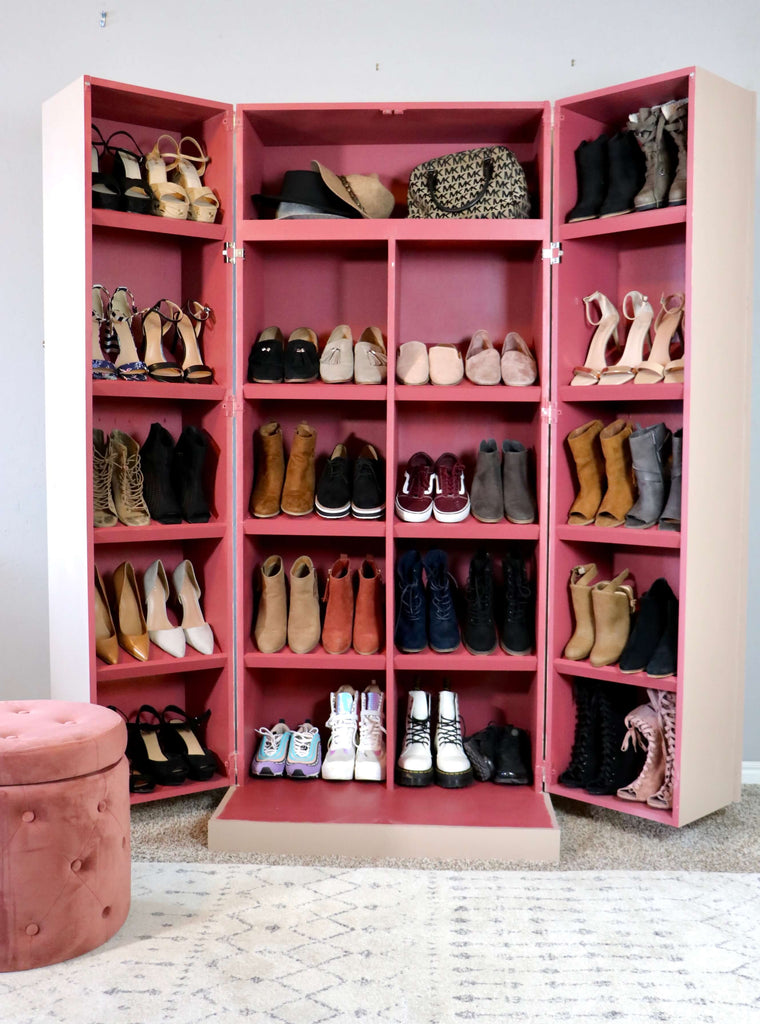
Hidden Shoe Cabinet
Hidden Shoe Storage never looked so good with this shoe cabinet.
A shoe cabinet is one thing, but a cabinet with hidden shoe storage? Well that's a whole notha' ball game. I am so excited to share today's build because it showcases one thing that I love A LOT. I mean love more than getting off work on a Friday love; that's right. A hidden shoe cabinet!!
This post is sponsored by Build Something and Kreg Tool!

Are you a crazy shoe lady that hoards pairs and pairs of shoes? Because I am. I have sooooo many shoes in my closet, and don't ask me how many of them I actually wear. Lets just say that ratio is definitely not what it should be, Ha!
There are some affiliate links in this post, meaning I get a small commission if you purchase through these links, at no cost to you. Click Here to read my full disclosure)
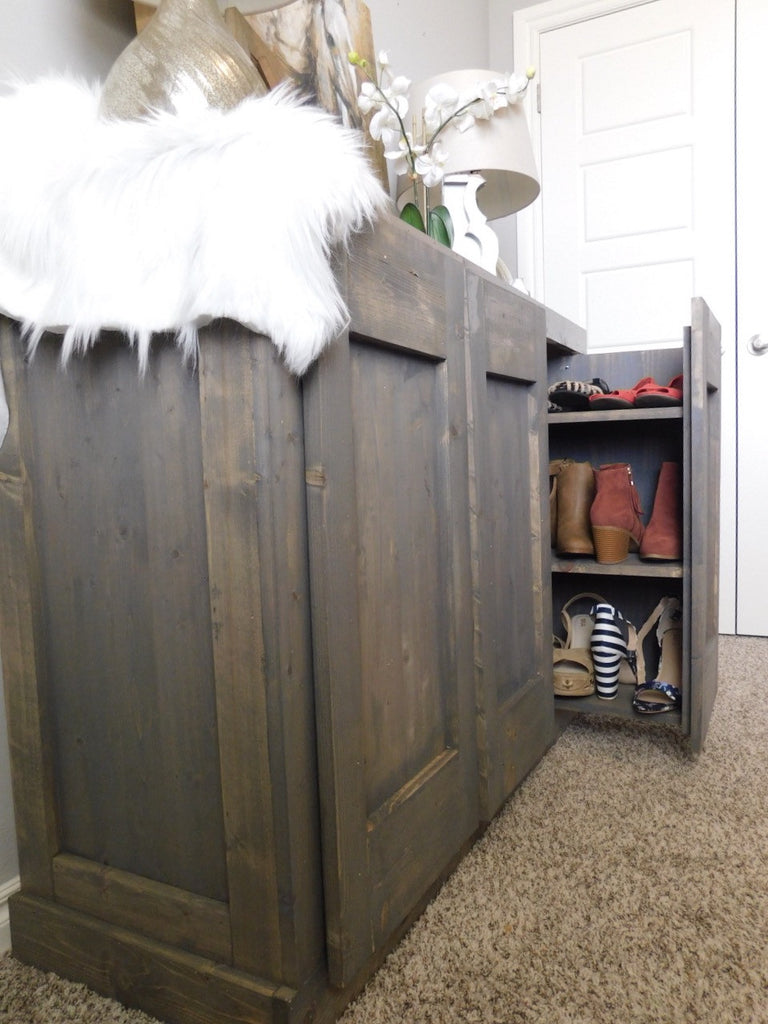
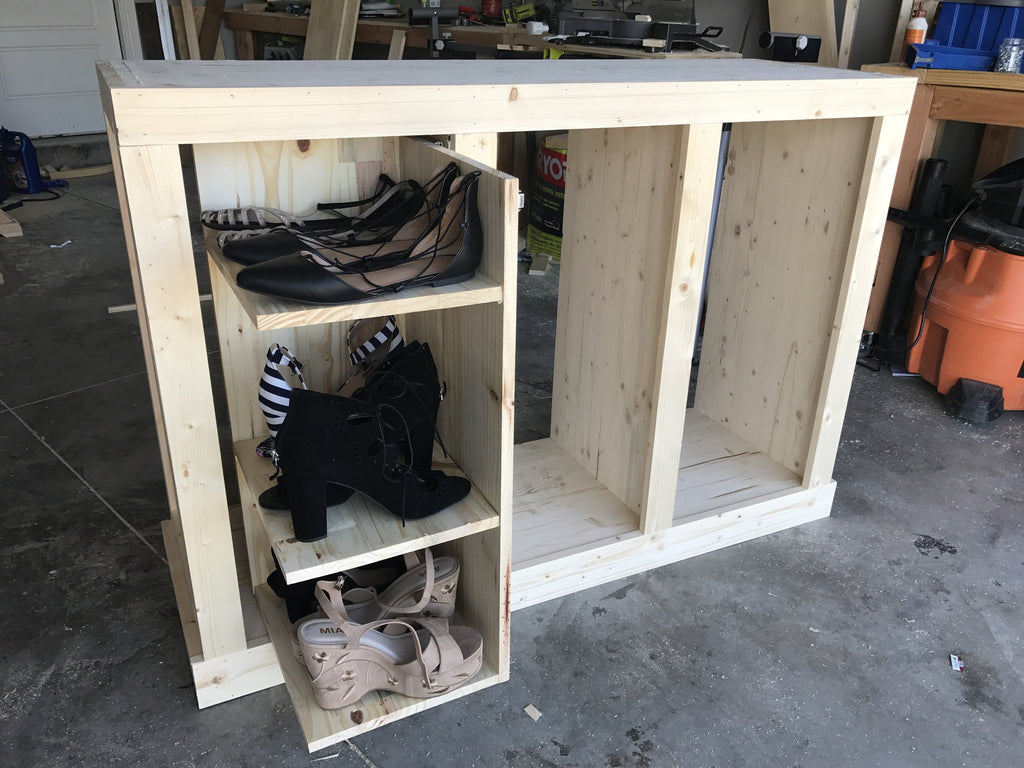
Because I am a shoe hoarder, and I know I'm not alone, I thought what better thing to build than a hidden shoe storage. But I decided to go a step further and make it hidden in a buffet cabinet. Its like Heaven on Earth! This baby holds 16 pairs of shoes; my closet is glad to have it's space back. If you want to be a shoe cabinet maker, you have come to the right place.
The best part is I have partnered with Build Something , Kreg's DIY project plan site, to bring you the free plans! But before you head over check out some building tips and my process of building this shoe cabinet.
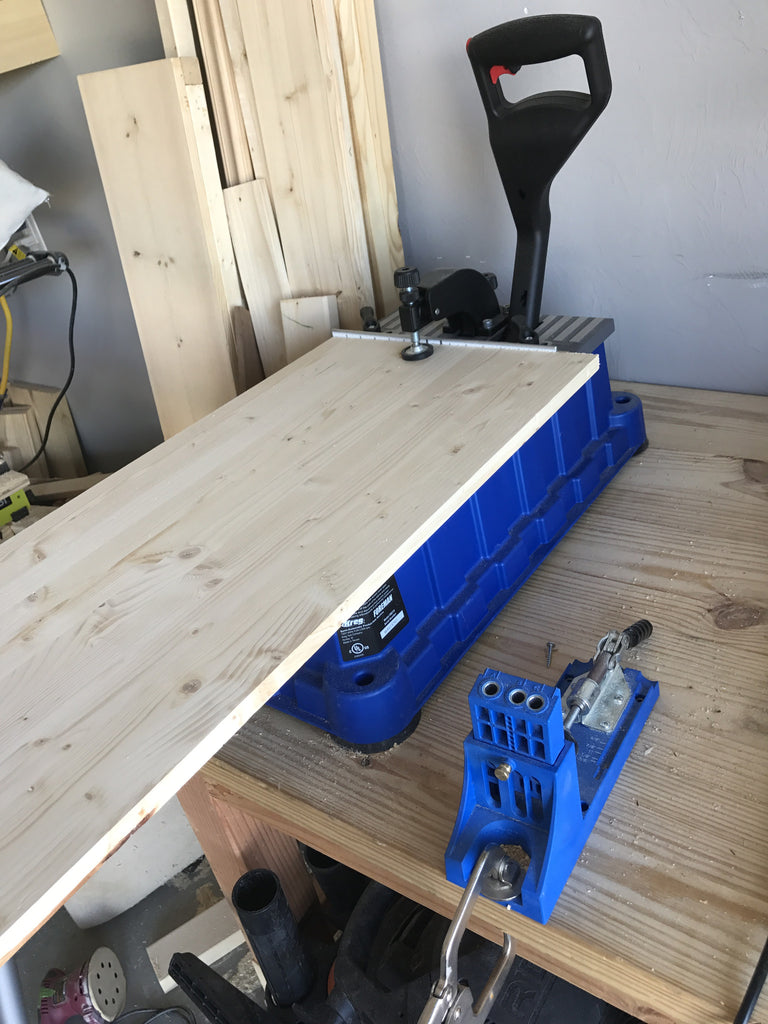
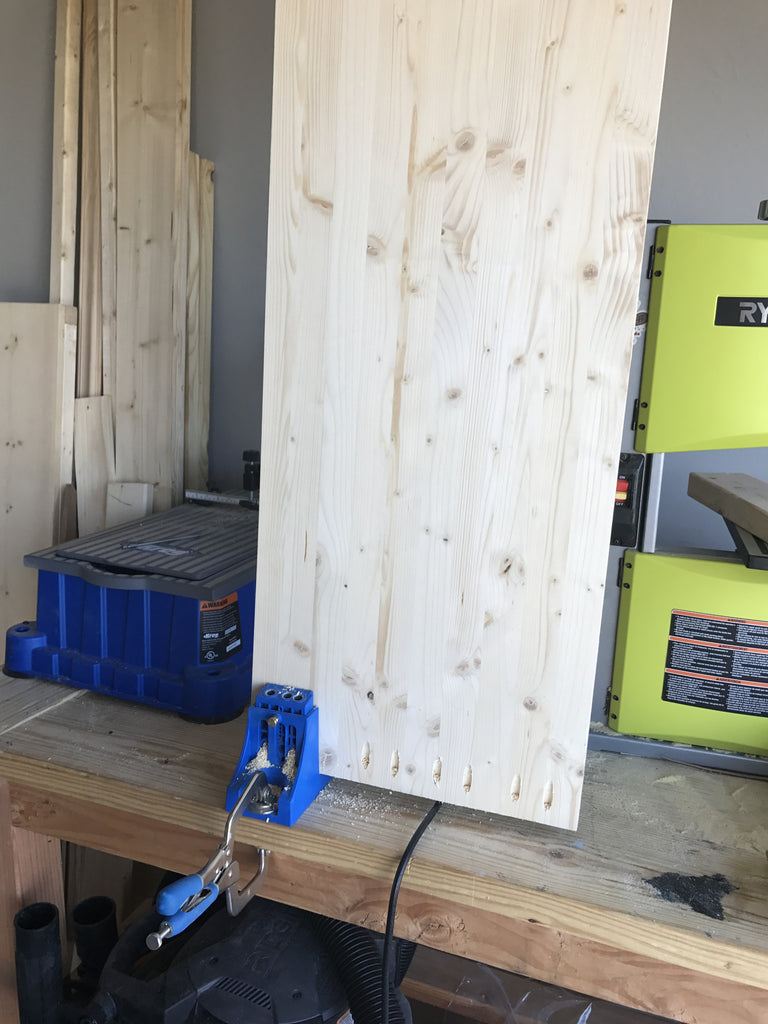
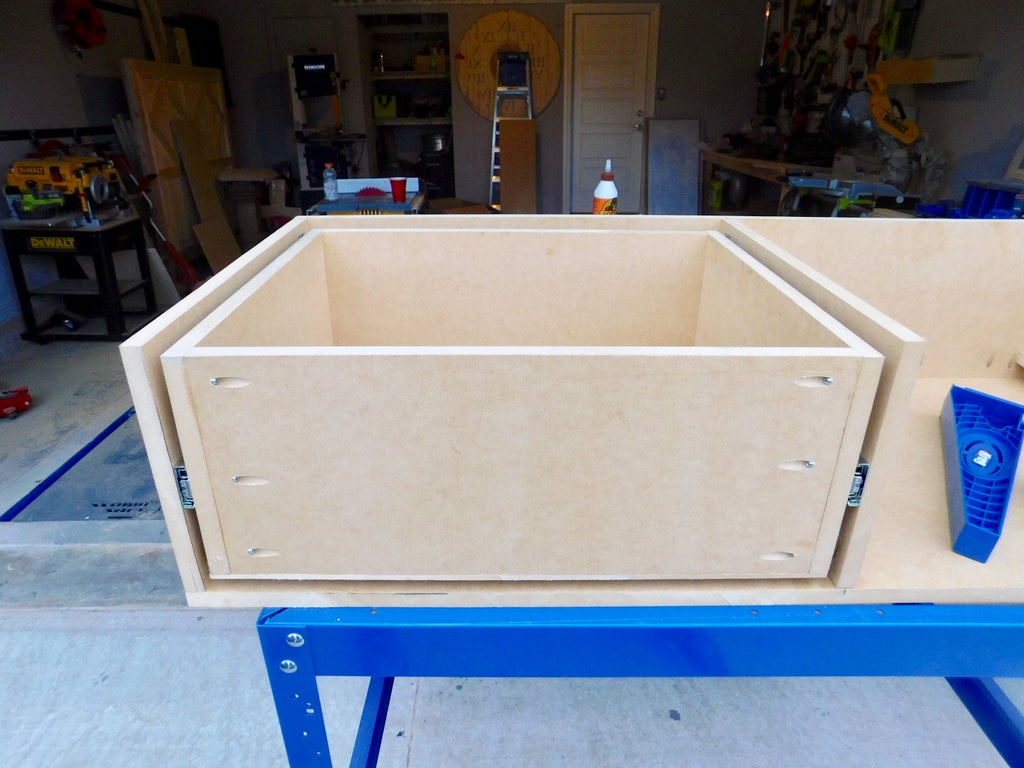
Honestly I love any project that lets me use my new Kreg DB210 Foreman Pocket-Hole Machine, Blue I love that thing. This thing makes me feel like a spoiled child. Its amazing how fast I can spit out those pocket holes; but I don't want my Kreg Jig K4 Pocket Hole System
 to get jealous so I let it be a part of the party too. Both tools are great and definitely get the job done!

I think its safe to say that pocket holes just makes life easier! I don't think there is one build that I haven't used pocket holes on. It makes assembly easy and clean. If you're wanting to take your building to the next level this is a tool to have in your arsenal.
This was such a fun build! As you can see halfway through the build I was already ready to fill this hidden shoe storage cabinet with my shoes. Lets just say my closet has been a little crowded!
When choosing the measurements for my drawers I made them based on my shoe size and heels height, so feel free to customize the pull-out shelves to fit your shoes, purses, etc.
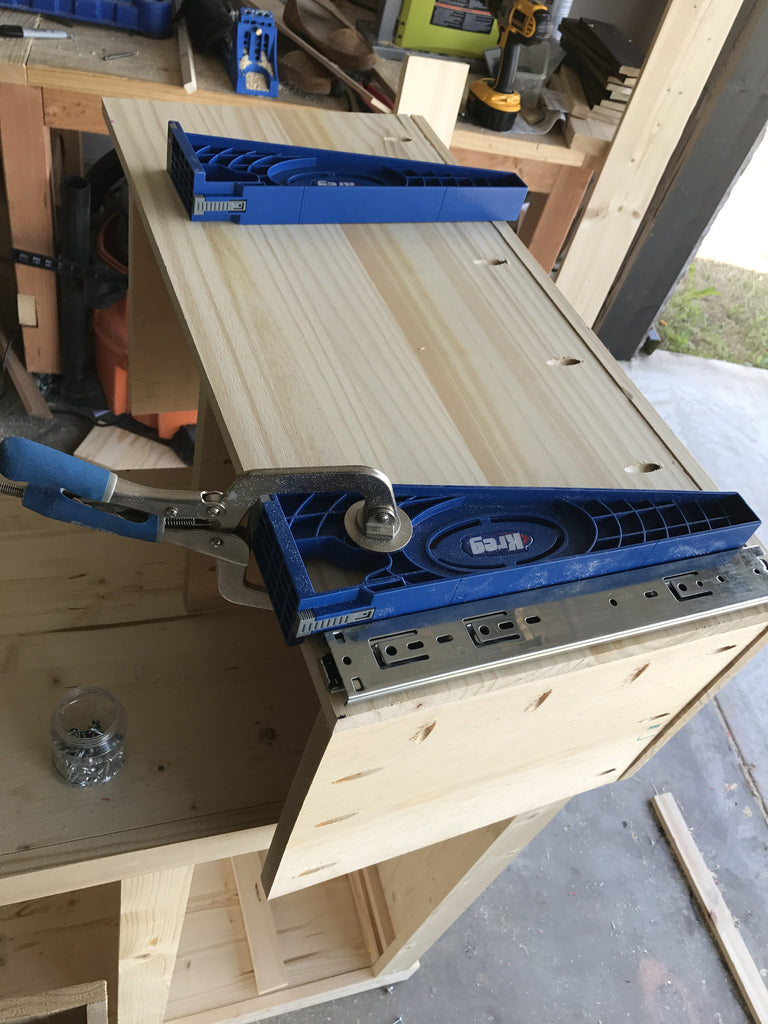
I was a little nervous about these pull out drawers because it was my first time using metal drawer slides, but of course Kreg comes to the rescue once again with these awesome Kreg Tool Drawer Slide Jig . Honestly, installing the drawer slides were way easier than I anticipated thanks to this drawer slide jig.
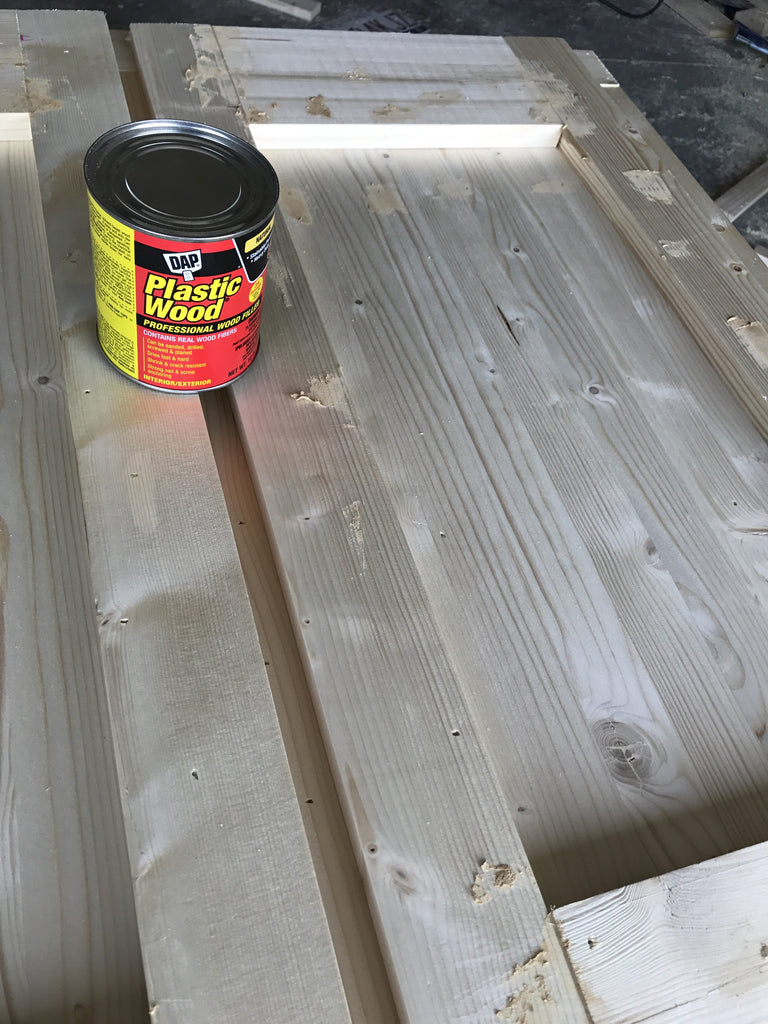
Once the shoe cabinet was all built I used DAP Wood Filler to fill all the holes. I use a putty knife (sometimes my fingers) to apply it to the holes and any openings I want filled. Highly recommend this stuff. It is my go to.
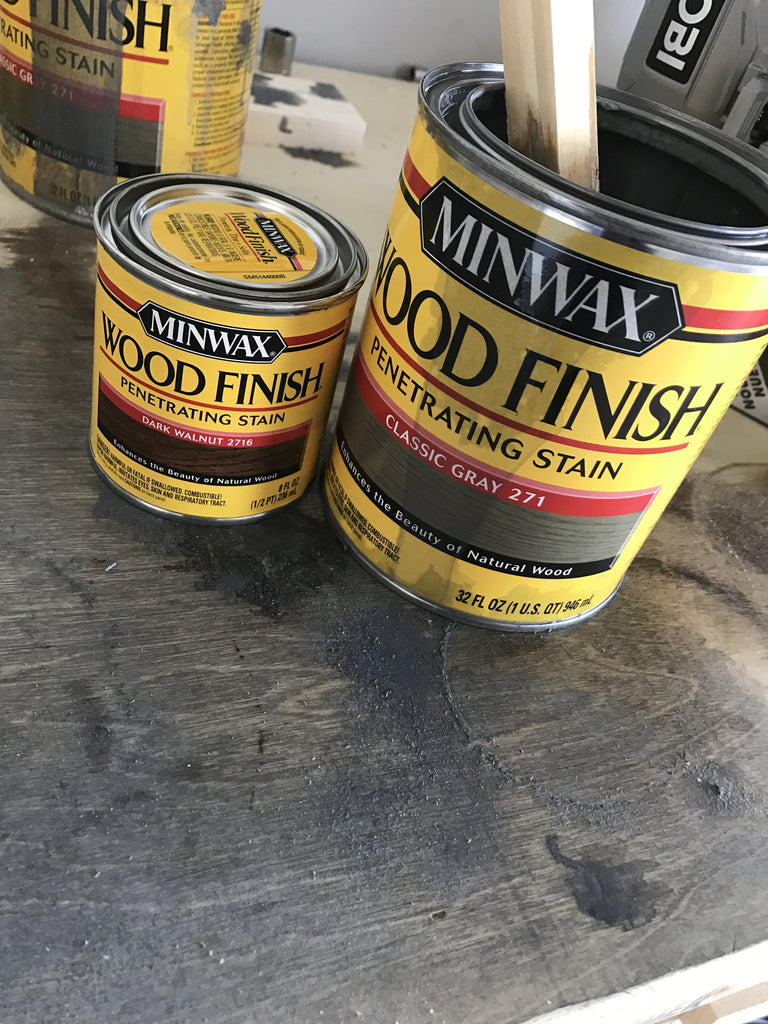
For the Finish, I used a custom stain that is one of my favorites. The stain is a mixture of Minwax Classic Grey and Minwax Dark Walnut. I used about 60% of this larger quart can in Classsic Grey and then dumbed the smaller can of Dark Walnut into the Classic grey, mixed it together and WAAA-LAAAh- Vintage Grey, or atleast that's what I call it! :)
Now, head on over to Build Something for the FREE PLANS!
If you are looking for some shoe storage with a little more room, then check out another Shoe Cabinet that I built. It holds 36 pair of shoes!

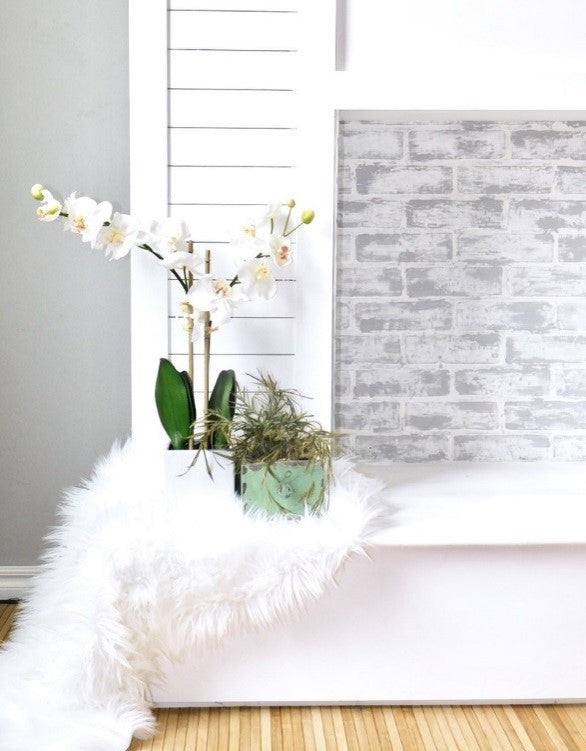
Faux Fireplace with Hidden Storage
A Faux Fireplace with a touch of Shiplap, show me more!
I have always been a fan of a cozy fireplace, so this faux fireplace with storage was a no brainer. My home didn't come equipped with a fireplace so I thought; why not make my own? Luckily, my good friends over at Home Depot helped to make my faux fireplace come to life!
"This post is sponsored by The Home Depot. The Home Depot provided me with product and compensation. The opinions I have shared about the products are my own."
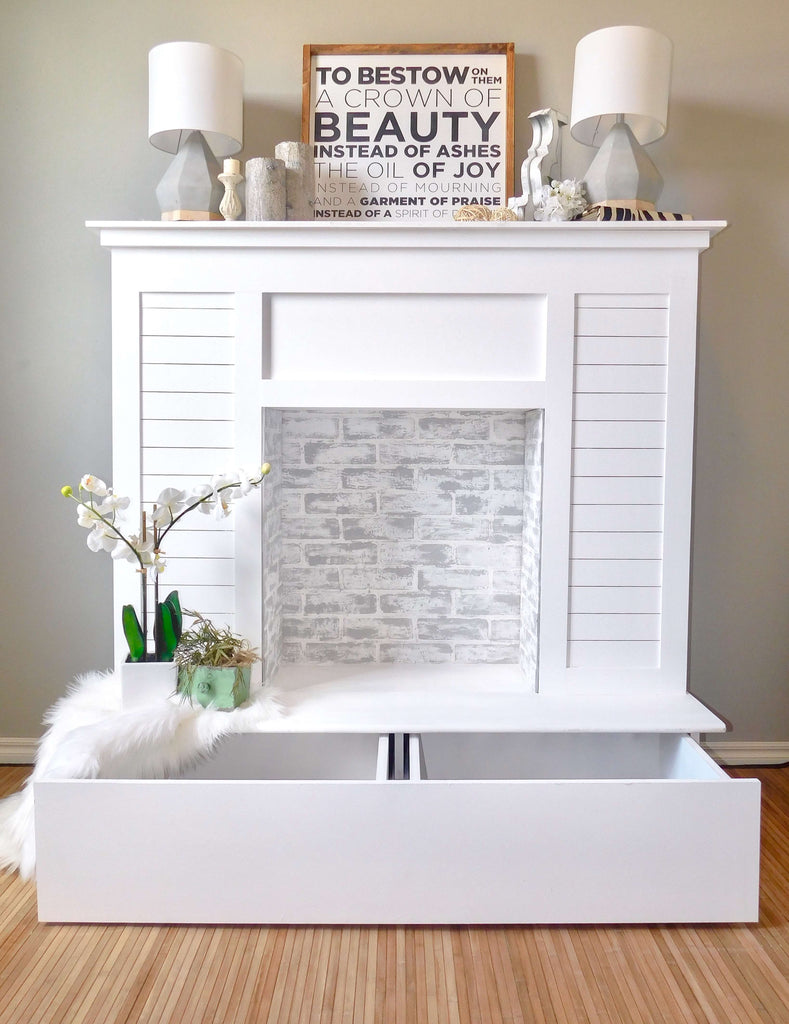
One thing I wanted to make sure of was not to waste all that space on the hearth, so I decided to turn mine into storage. Perfect for DVDs, books or anything you want to store in there.

There are some affiliate links in this post, meaning I get a small commission if you purchase through these links, at no cost to you. Click Here to read my full disclosure.
The drawers were a breeze with my Kreg Drawer slide Jigs and my beloved Kreg Jig (Of Course) and I was super excited about the soft-close ball-bearing drawer slides. I am obsessed!
After building this I thought man, Im not too shabby (humble brag). Honestly, part of me just wanted to leave it like this...but that wasnt going to happen.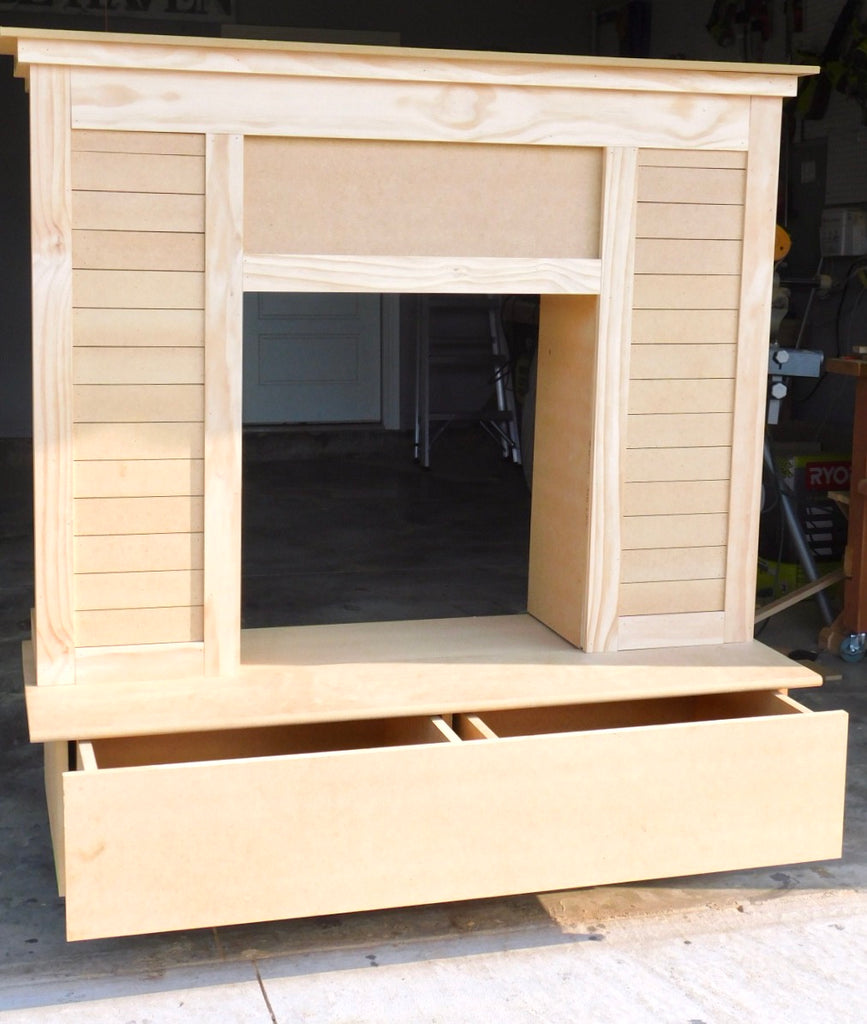

This was my first time I used MDF and man did I like working with it. Definitely much easier to paint, by far!
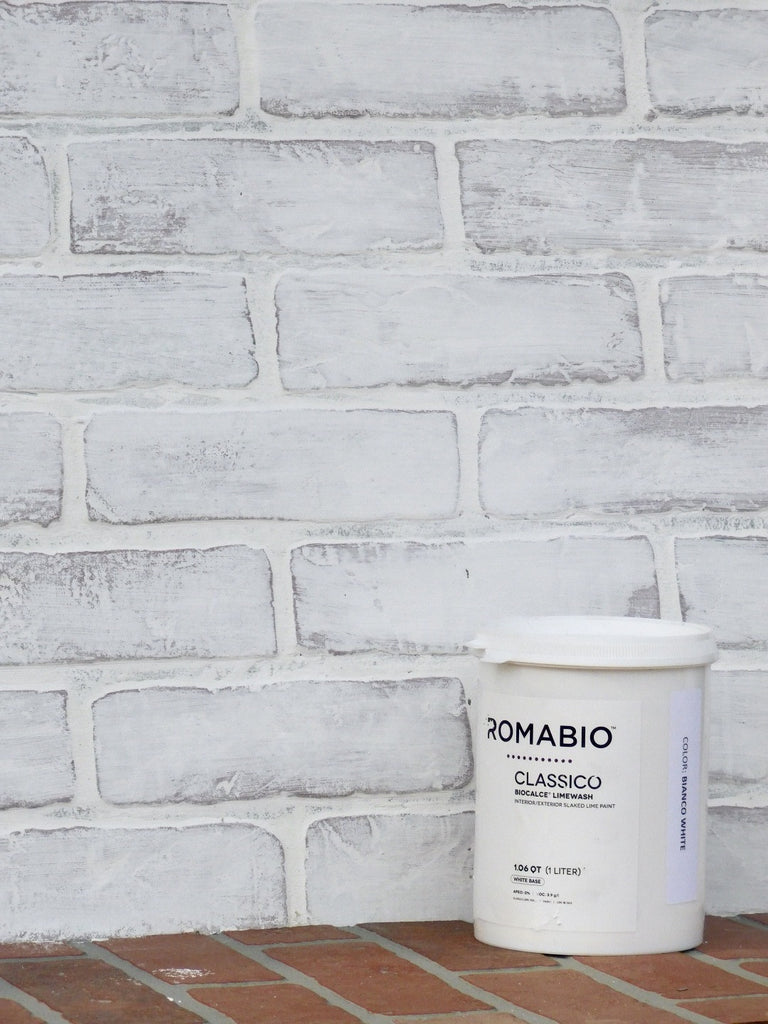
One of the most enjoyable parts of this faux fireplace with storage was painting the brick! This was my first time using this Romabio lime wash and it was super easy to apply! I really love how the limewash keeps that brick feel.

Paint can sometimes drown it out, so if you want a real defined brick look, limewash is the way to go. To see how I created the first look click here. The limewash is great for interior and exterior brick and it made my faux brick really come to life.
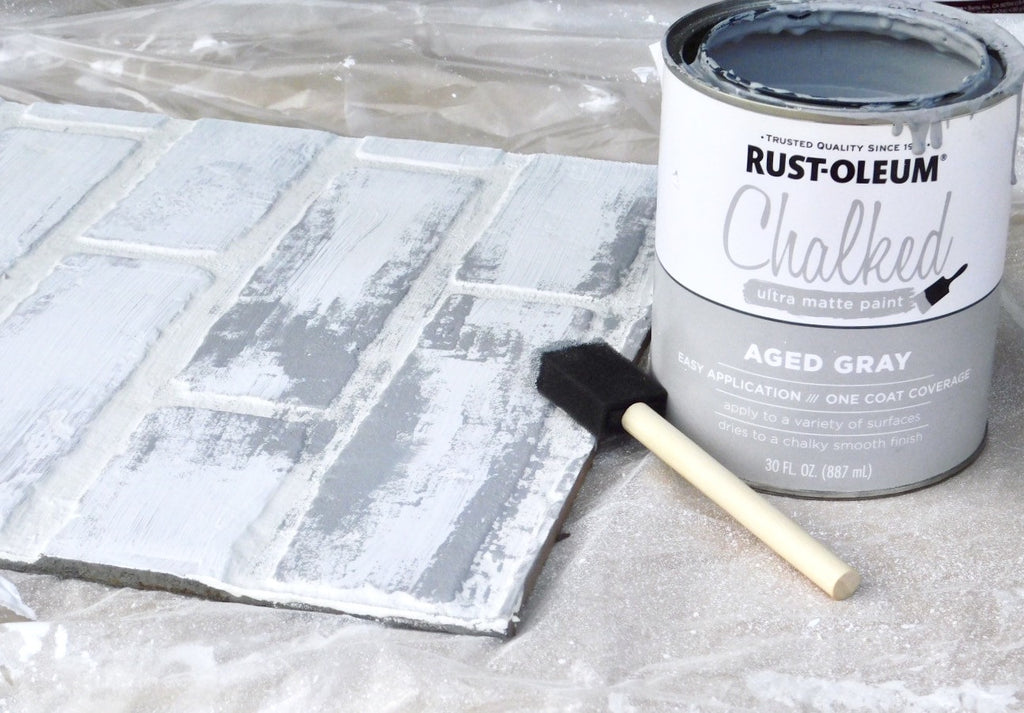
I am a HUGE fan of chalk paint and this RUST-OLEUM Chalk Paint didn't disappoint me! I used some aged gray chalk paint just to give the brick a little Flaaava; sooooooo glad I did!
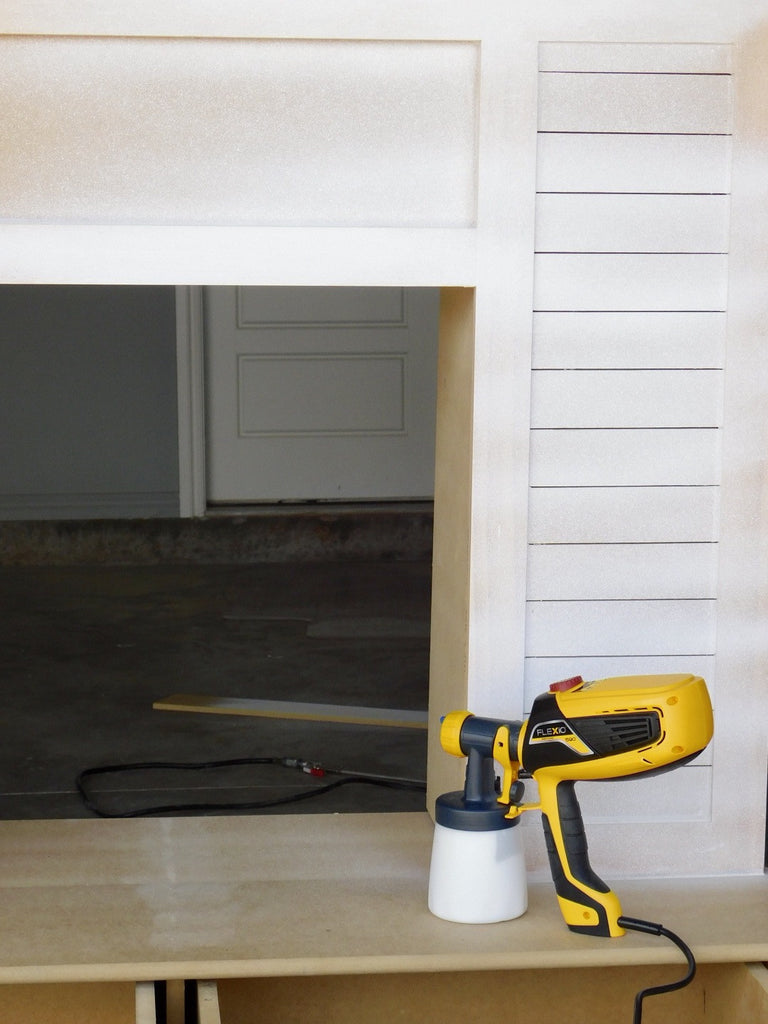
This build was also my first time using a paint sprayer and I'm trying to figure out why no one told me about using one of these before.
Painting is sooooooooooooooo much easier with one and it turns out clean. The Wagner Flexio 590 was super easy to set up, and I was super pleased with the paint job! I will be using this baby on the rest of my paint projects for sure!
Now head on over to the Home Depot Blog to check out how I created this Faux Fireplace with storage.
Happy Building!