Projects

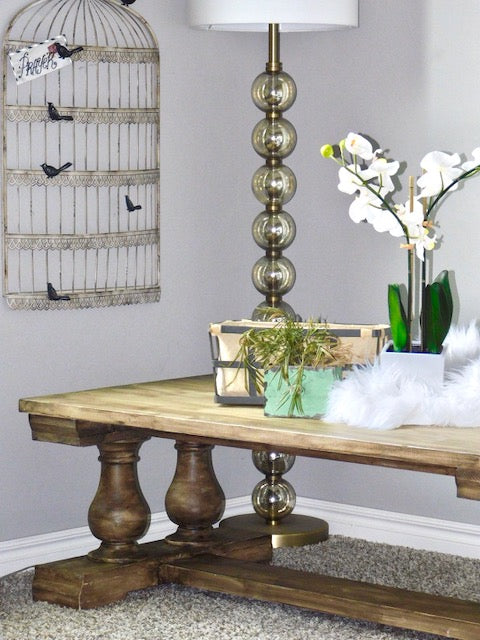
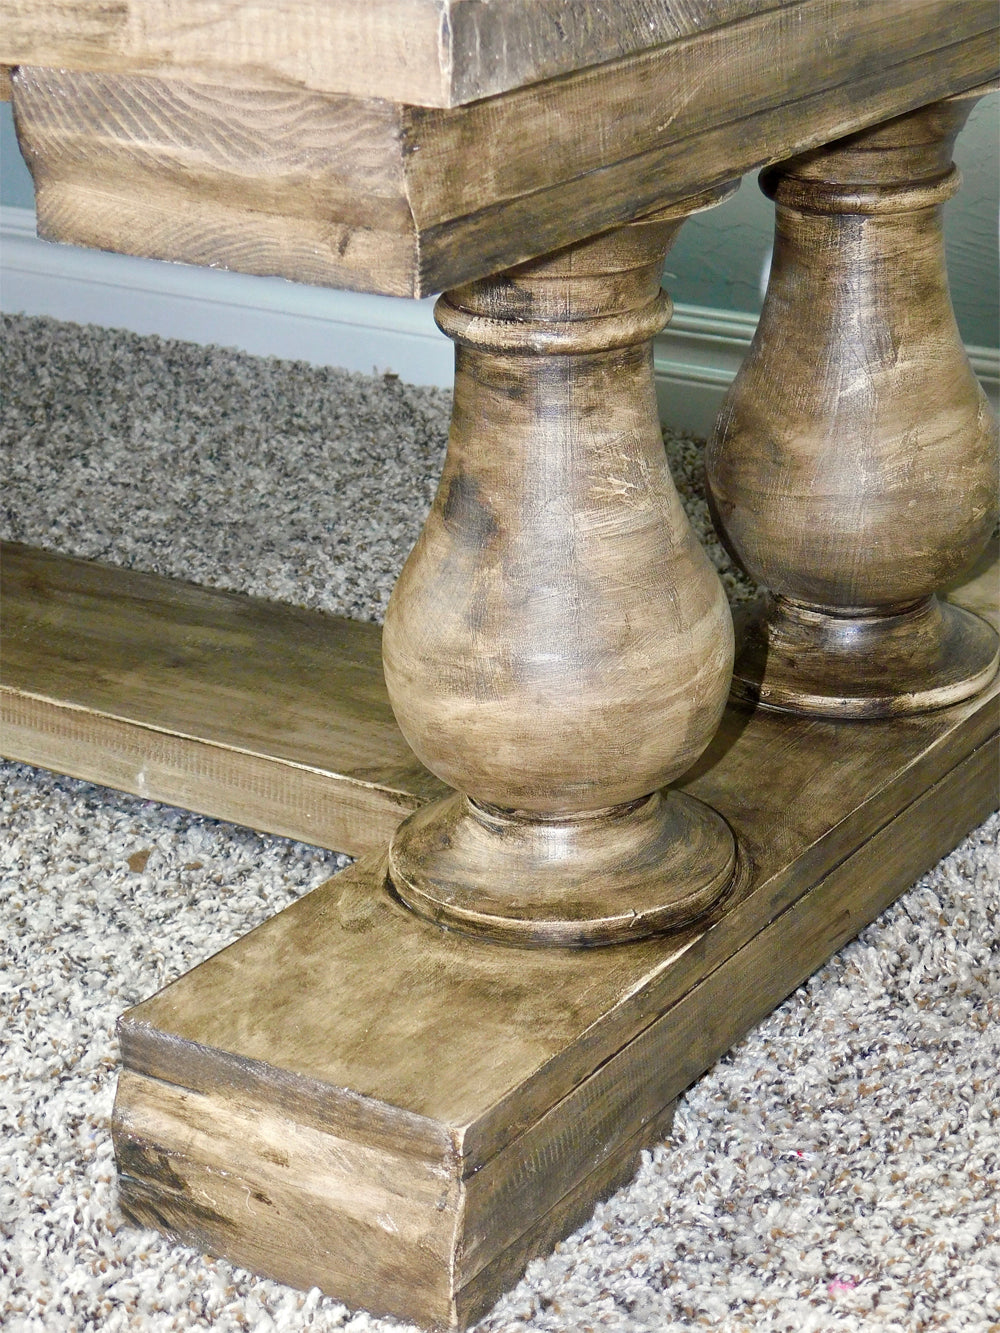
Industrial Console Cart
A DIY industrial cart that will make your entryway the talk of the town!
This review is sponsored by the Home Depot as a part of The Home Depot's Pro-Spective Campaign.

I am beginning to learn more and more just how much I love industrial touches. This console was so exciting to build because I am slowly trying to fill my house with more and more of that industrial feel; and this build just made me one step closer. I'm loving how it turned out!
There are some affiliate links in this post, meaning I get a small commission if you purchase through these links, at no cost to you. Click Here to read my full disclosure.
 But it wouldn't be right unless I shared the plans with you guys so you can build it too! YAYY. This project was super easy and I built it in one day. So if you need an easy weekend DIY project for your home entryway you have come to the right place!

Note: The console pictured was built 3.5" thinner than the plans to fit a particular space.

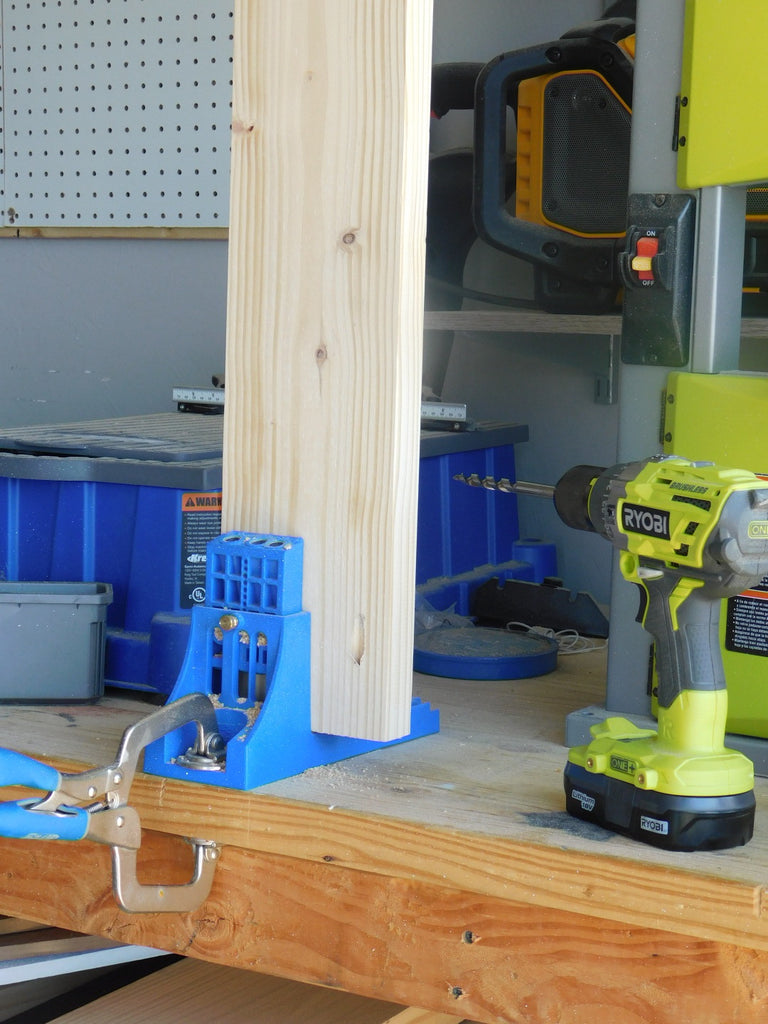
 The brushless motor provides more runtime, more power and longer motor life and the 3-speed switch is great for switching between slow, medium and fast speeds. I foresee me using this tool a lot in the near future. On to Step 2!
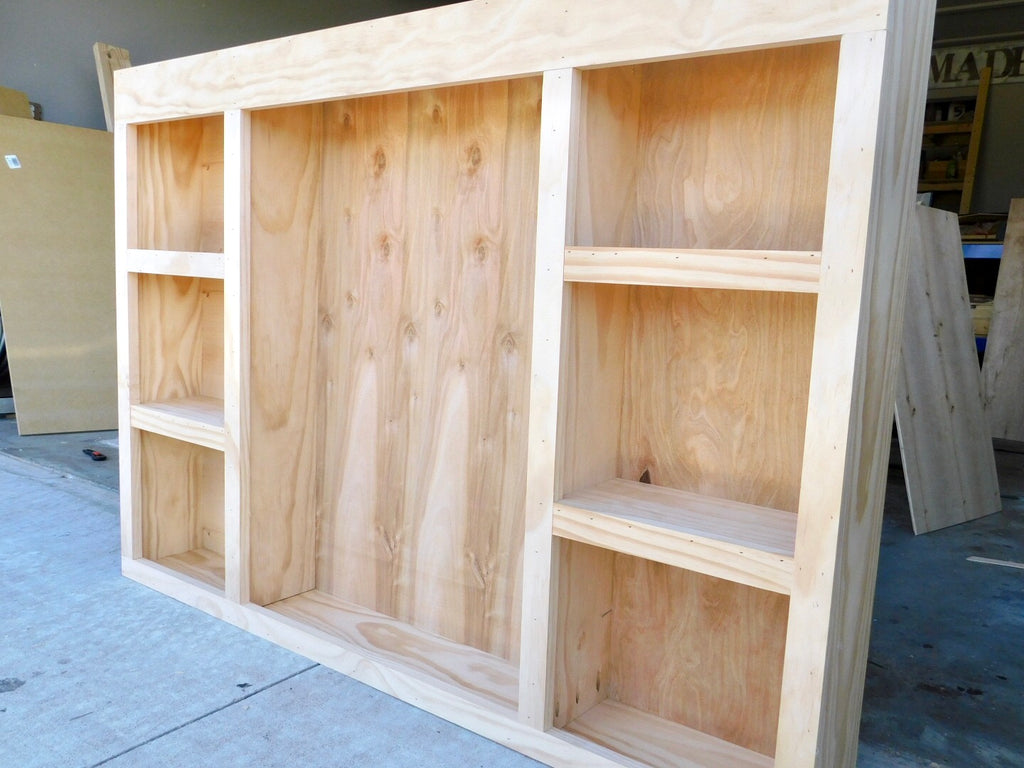
Step 2:
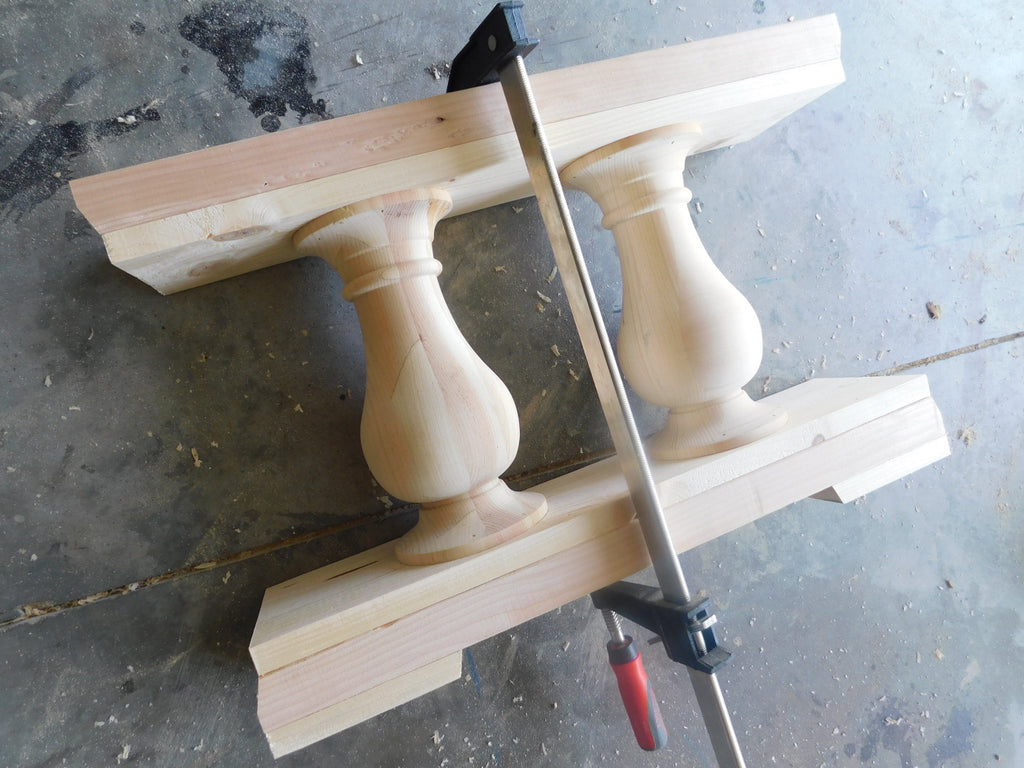
Attach the six 2x2 stretchers (36") to the assembled sides using a Kreg Jig K4 Pocket Hole System on a 1 1/2" setting, with 2 1/2" pocket hole screws to attach along with wood glue.

If you're wondering how I got my 2x2s to look so slick , let me confess now...it was nothing I did, I used select pine for this build. It's a little bit more expensive than regular pine but its worth the extra $ in my opinion. You can find it at your local Home Depot.

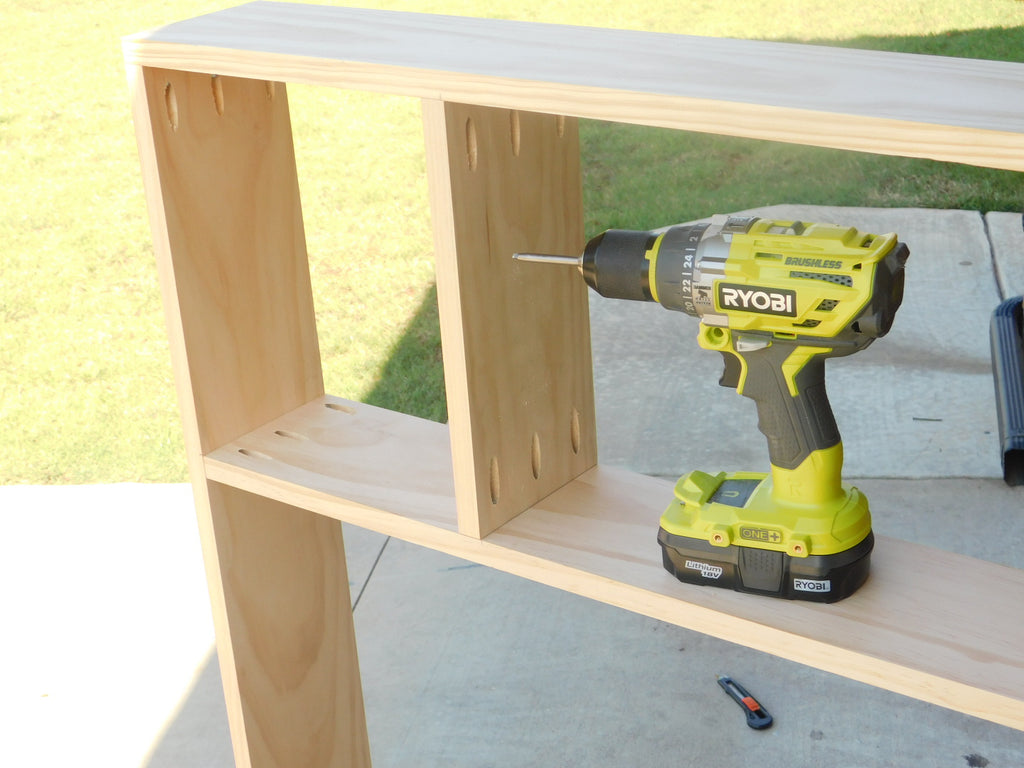
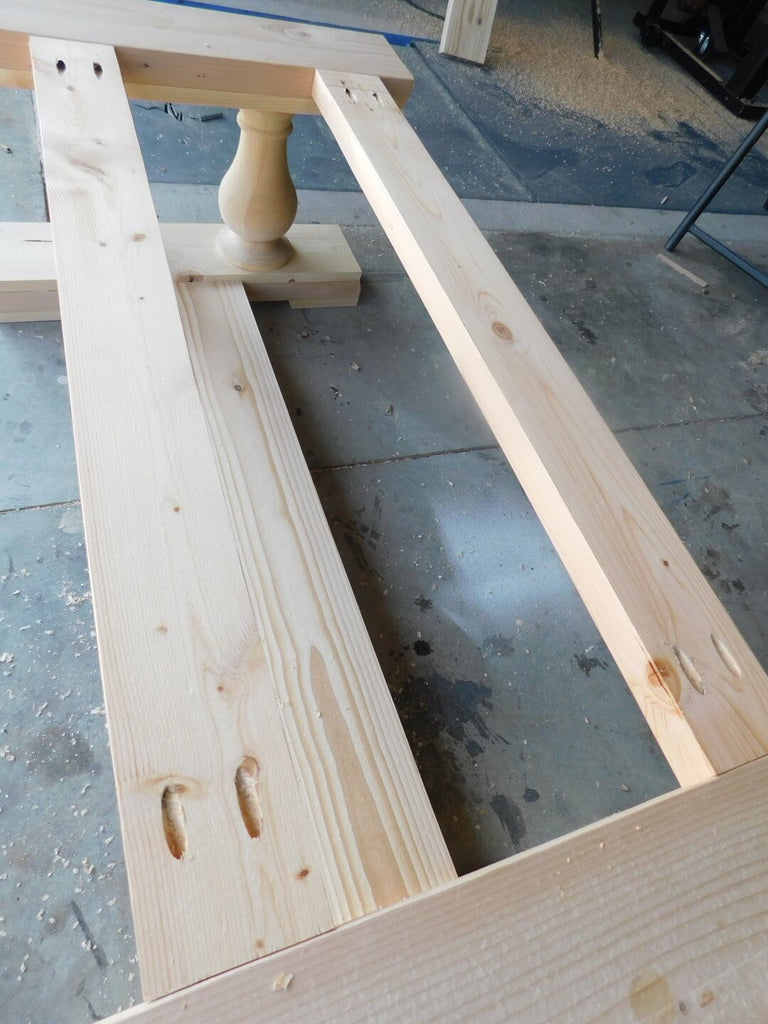
Step 3:
Attach the three 1x12s to the assembled console using a Kreg Jig K4 Pocket Hole System on a 3/4" setting, with 1 1/4" pocket hole screws to attach along with wood glue.

The 1x12s should be flush with the top of the 2x2s for each row.

Step 4:
Attach the 1x3 top pieces to the console using a brad nailer and 2" brad nails.

Step 5:
Attach the four cross braces to the assembled console using a brad nailer and 2" brad nails.

Measure the 2x2 up against the console for best fit of the braces.

Step 6:
Paint casters (if needed) and attach casters with screws and washers once dry.

I used Rustoleum Stops Rust spray paint in black to paint these casters I got from Northern Tool. I had these from a previous project but if you would rather have them pre-painted Home Depot sells some black Liberty Swivel Plate casters online.

This is my first project using casters; I have been seeing them on other blogger projects and have been wanting to use them and I finally got my chance!. Lets take another look at the finished product.
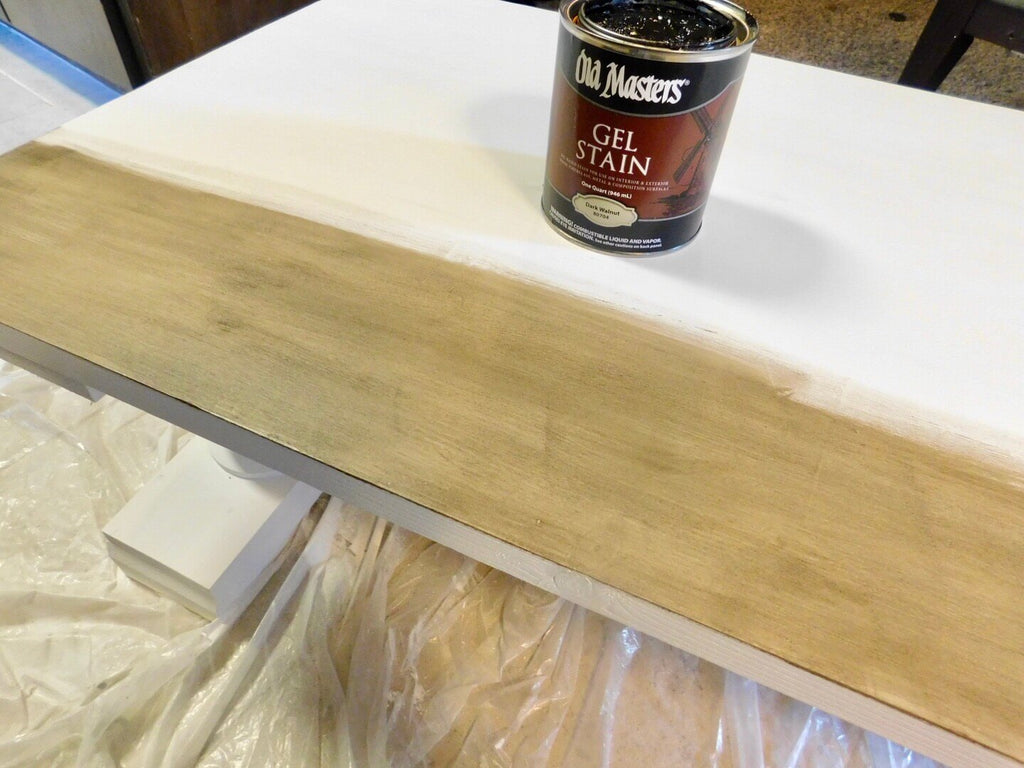
I stained the console in Minwax Early American and I think it was a fine choice.

Thanks for reading guys!
I acknowledge that the Home Depot is partnering with me to participate in the The Home Depot Pro-Spective Campaign. As a part of the program, I am receiving compensation in the form of products and services, for the purposes of promoting The Home Depot. All expressed opinions and experiences are my own. My post complies with the Word of Mouth Marketing Association (WOMMA) Ethics Code and applicable Federal Trade Commission guidelines.

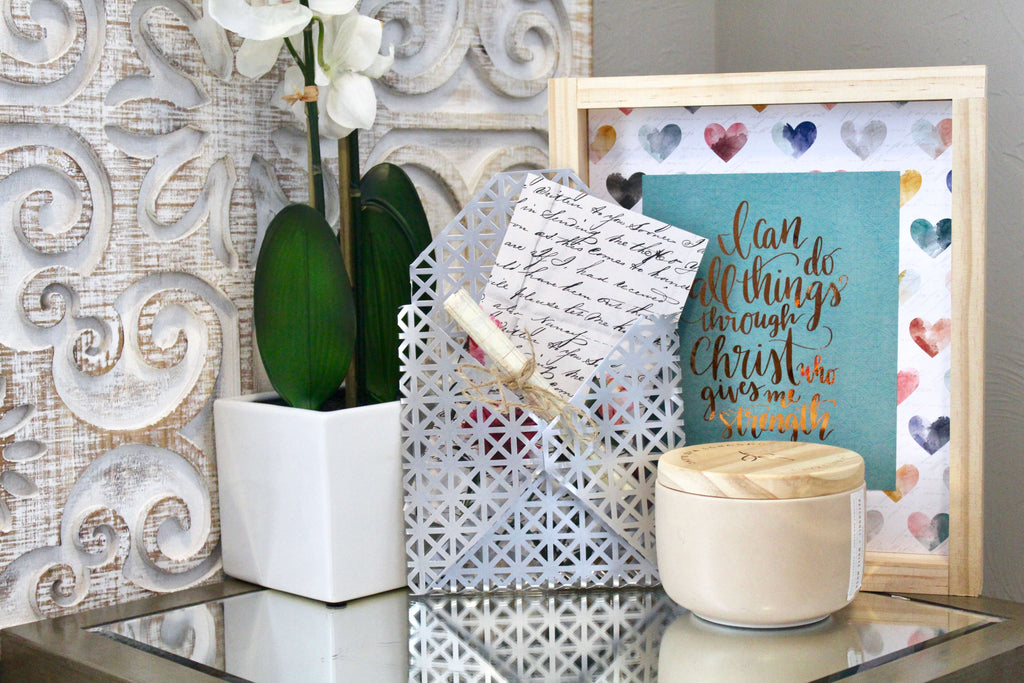
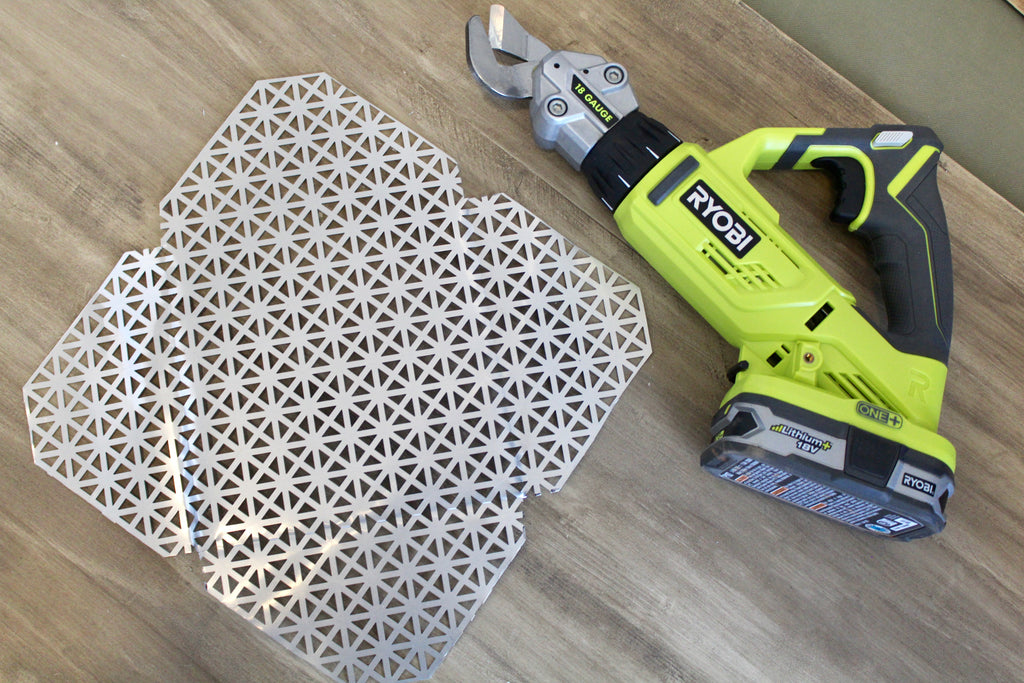
DIY Tin Envelope using Ryobi Shears
"Put your sheet metal to use with the 18-Volt ONE+ Ryobi Shears and create some tin envelope decor"
This review is sponsored by the Home Depot as a part of The Home Depot's Pro-Spective Campaign.
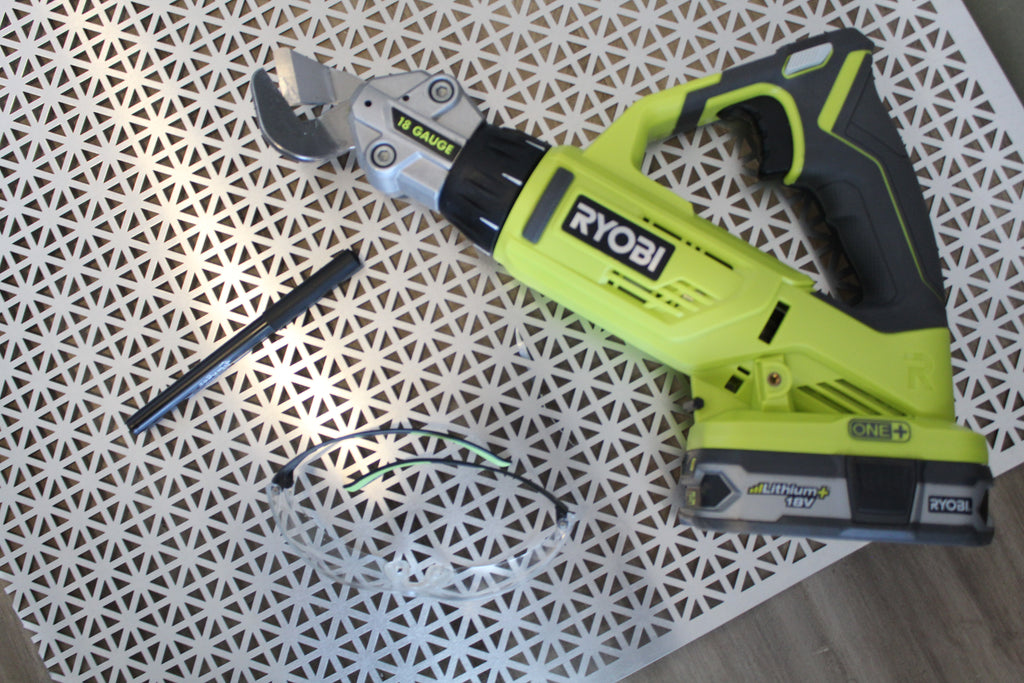
The day I saw the Ryobi One+ 18-Volt 18 Gauge Offset Shears in action was the day I knew I wanted this tool. Lucky for me, I finally got them! (Thanks Home Depot) I already had a list a mile long of what I wanted to do with them, but this project wasn't on the list.
There are some affiliate links in this post, meaning I get a small commission if you purchase through these links, at no cost to you. Click Here to read my full disclosure.
When I first got these babies I tried them out on a piece of leftover sheet metal I had and eventually I came up with this DIY envelope idea.
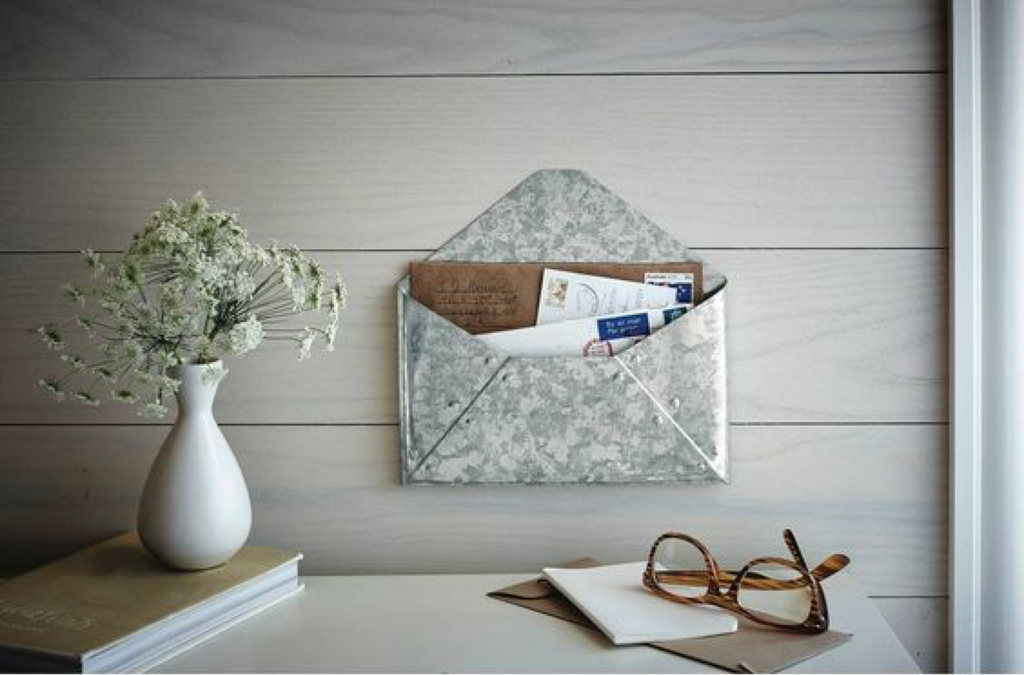 I've seen tin envelopes around like this cute one from target and thought this sheet metal tin envelope would make a cool rendition of my own. I look forward to making all different kinds of tin envelopes. Home Depot has all sorts of designs that I'm sure would look just as cool as this one does.
Materials Needed:
- Ryobi Offset Shears
- Aluminum Sheet
- Pen
- Safety Glasses
I love fun projects you can do in less than an hour and this project was no different. If you're more of a visual person luckily for you I video'd my process so check it out.
Step 1: The envelope design seems to work best with a square. First, I counted 20 lines on all four sides and then made markings on were to cut, after making markings I cut out the square with the Ryobi Shears.
Step 2: After I cut out the square from the aluminum sheet, I made markings for the four triangles on each side and cut them out.
Step 3: After cutting out the triangles, I cut off the tips on the top and bottom, folded the tin envelope and cut the remaining side tips.
USING THE SHEARS
I was really curious of how well I could handle these Ryobi Shears and to my surprise it was really easy to work with. My favorite feature on the shears is the variable speed trigger, it really helped with this particular project, especially with cutting out the corners.
I also noticed the rotating head for versatile cutting. It is supposed to be capable of cutting over 1,000 ft. of sheet metal and I look forward to putting it to the test and as always its always good that the Ryobi Tools use the same ONE+ batteries.
I have done projects with sheet metal previously and used regular shear scissors and I will defintely take these battery powered Ryobi shears over the regular shear scissors any day!
I acknowledge that the Home Depot is partnering with me to participate in the The Home Depot Pro-Spective Campaign. As a part of the program, I am receiving compensation in the form of products and services, for the purposes of promoting The Home Depot. All expressed opinions and experiences are my own. My post complies with the Word of Mouth Marketing Association (WOMMA) Ethics Code and applicable Federal Trade Commission guidelines.
YOU MAY ALSO LIKE...


Floating Deck: Final Reveal
A new backyard DIY floating deck that has all the neighbors talking.
"This post is sponsored by The Home Depot"
I am super excited to finally be revealing my backyard floating deck to you guys! It has been a looooooong time coming, but after some long days/nights, some bruised knees and some unexpected failures I can finally say that I pulled it off and I'm ready for the world to see.
Don't forget to check out Part One, Part Two and Part Three of the floating deck project to see how it came together.
If you haven't seen post 1, you missed that Home Depot provided me with $3,000 to create my floating deck and I totally pulled it off. So let's take a look at what my backyard looked like before the floating deck! Blah
 I'm not sure how I ever thought I was going to entertain with my backyard looking like that! It was pretty sad and has been ever since I purchased the house, but "look at her now"
There are some affiliate links in this post, meaning I get a small commission if you purchase through these links, at no cost to you. Click Here to read my full disclosure.
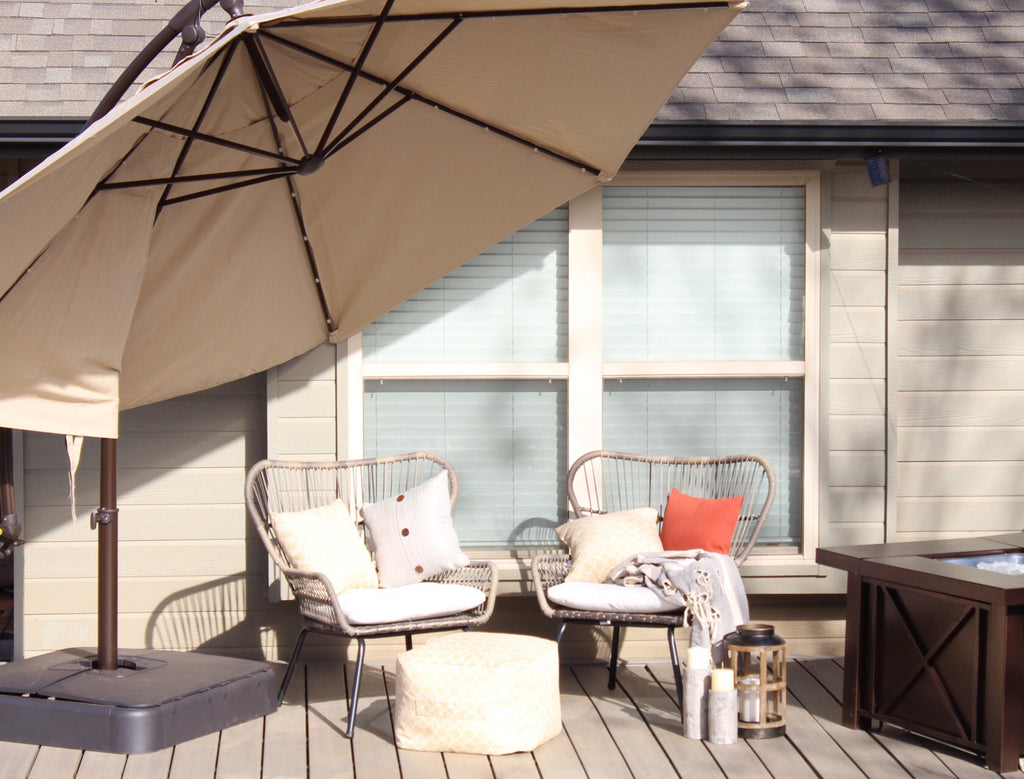
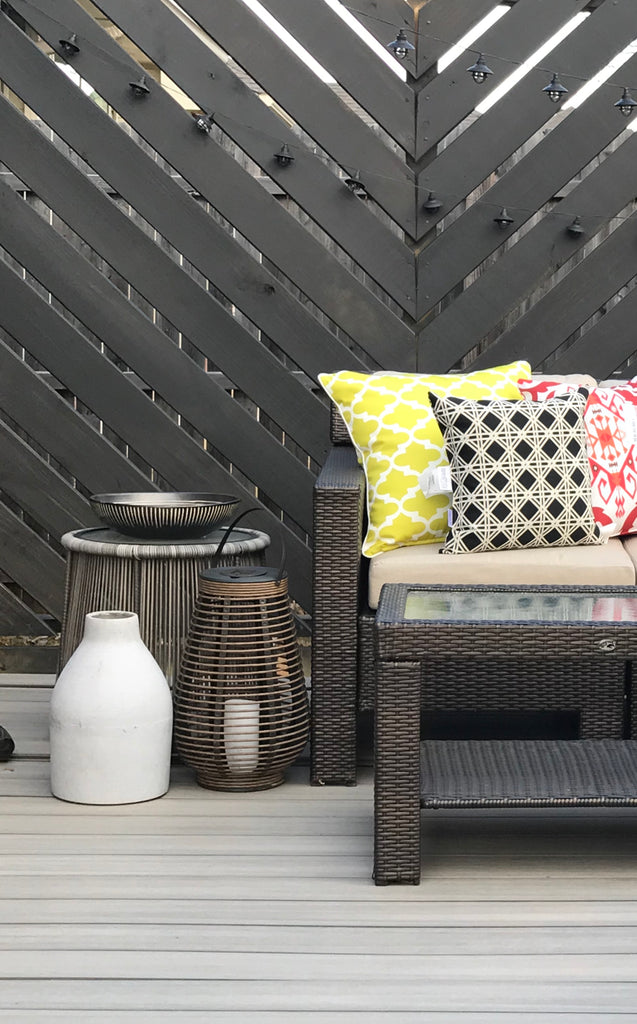
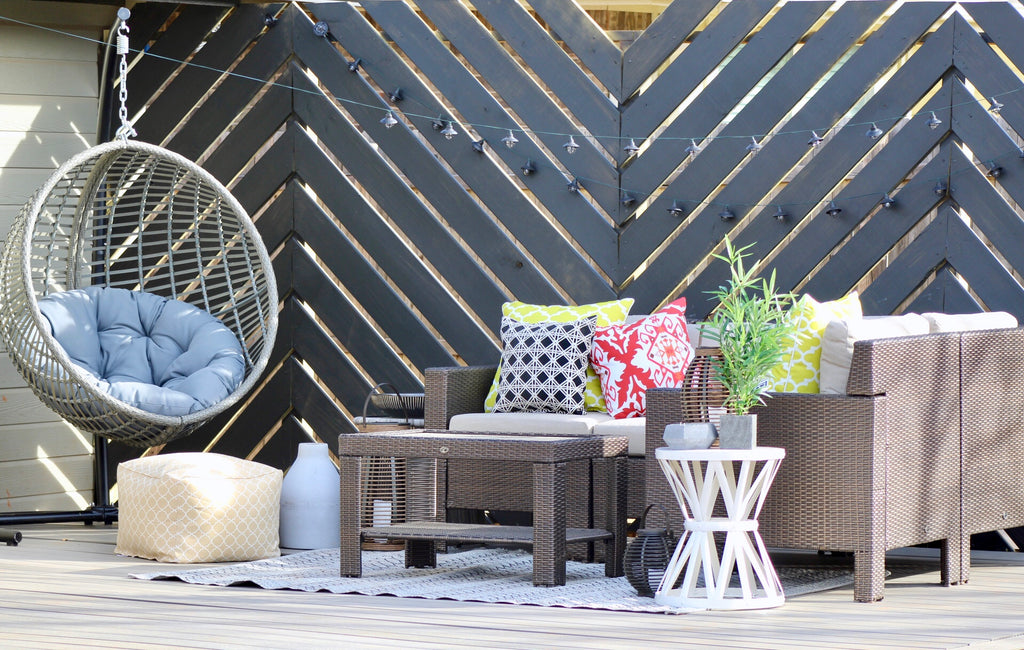 Definitely a big improvement from what was there before. When I first built this deck, I wanted to go for a Bohemian/Morrocon feel so I had lot's of fun playing with neutral colors and some pops of color with these fun outdoor pillows.
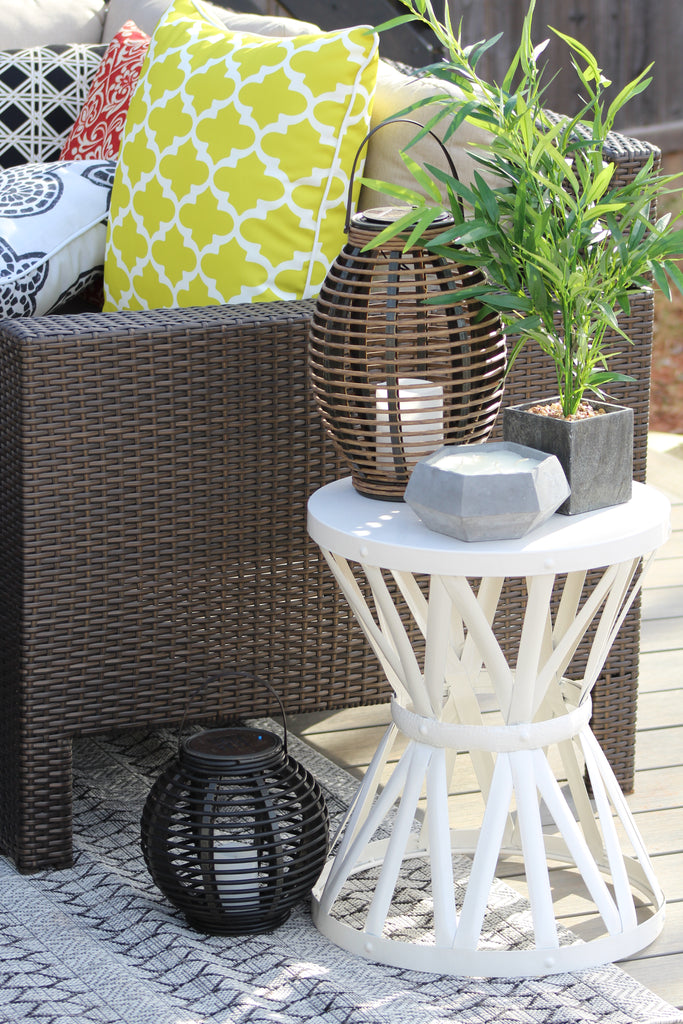
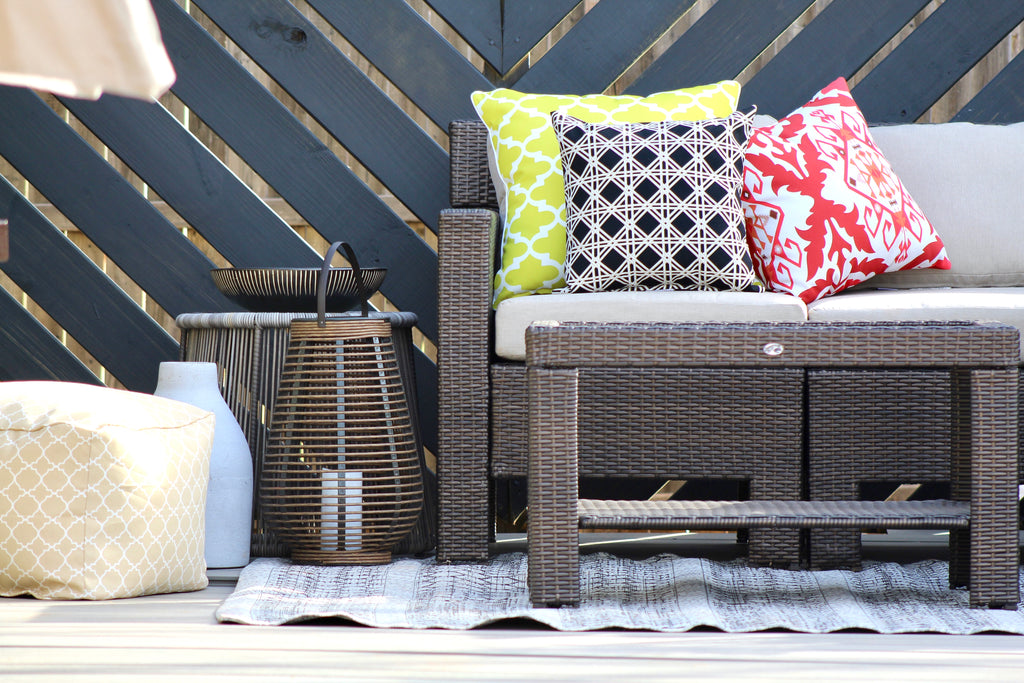 I originally wanted to use a neutral color palette for the end tables but I couldn't resist this garden stool in chalk. The design is right up my alley and the contrast that it brings beside the Beverly Sectional made it a perfect fit!
I especially love this Hampton Bay Umbrella I picked up from the Home Depot. But better than that I am in love with this New TechWood Composite Decking. It wasn't my original plan, but I am so glad I decided to go with it. It makes the deck look like a real getaway oasis and I can't get enough.
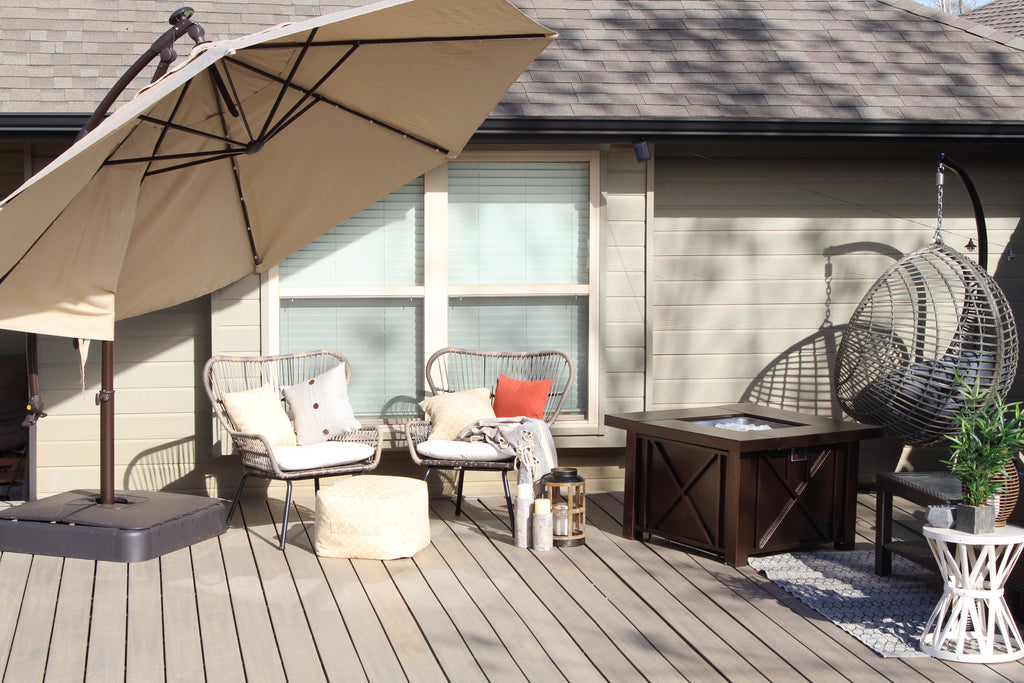
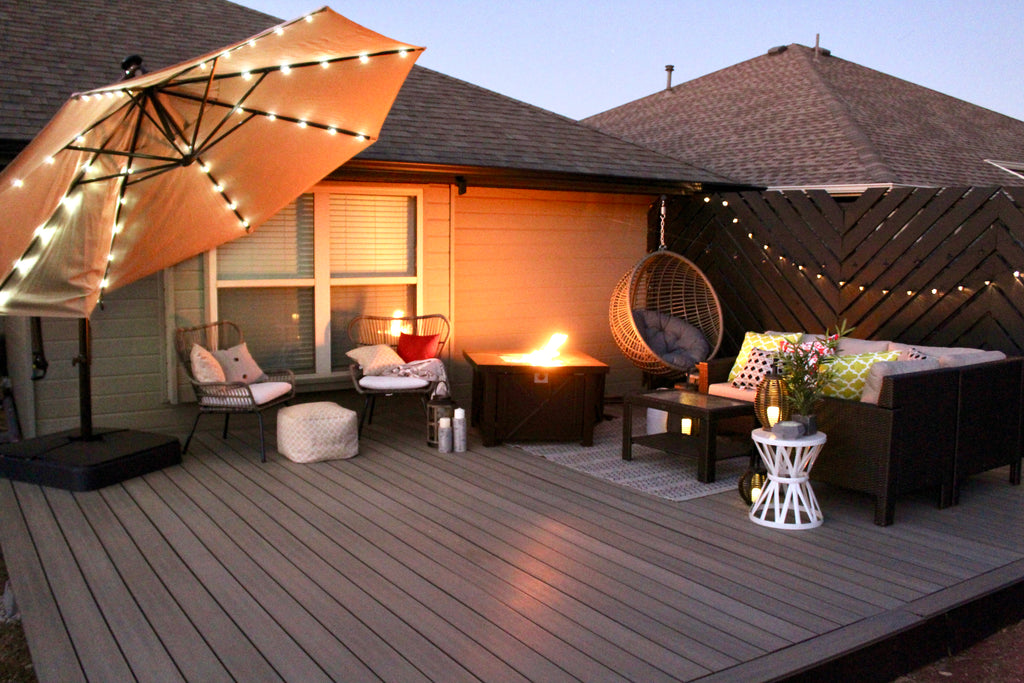
My favorite part about the new deck is lighting up the solar lights and fire pit when the night sky starts peaking in. I can assure you many nights will be spent here! My Chevron privacy wall was a great choice as an additive to the deck and I'm am really glad I went with black for my color choice. The trim on my house is black so it fits right in.
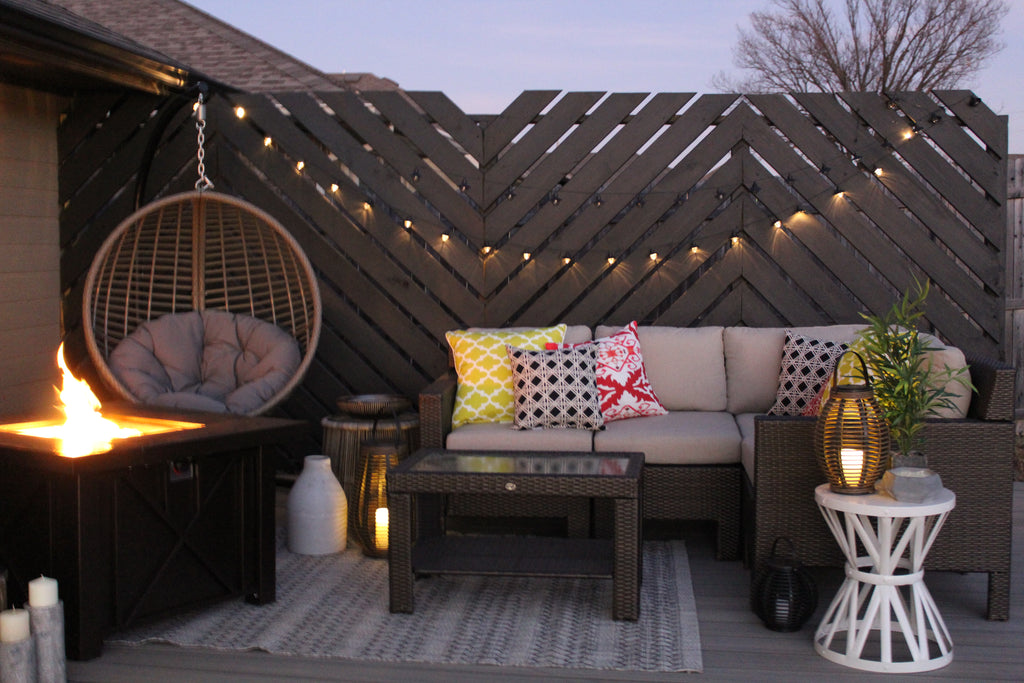
Not having to worry about plugging in any electrical is a MAJOR plus. The LEDs on the Hampton Bay Umbrella definitely made the purchase worth it. With one day of sun the umbrella was fully lit and the power button on the side makes it easy to turn on/off when needed.
Shop This Post

But I won't keep you waiting for too long. Head on over to the Home Depot Blog to see the Full Reveal!
Check out my FLOATING DECK REVEAL HERE !
YOU MAY ALSO LIKE...


DIY Floating Deck Phase 3
A DIY Floating Deck with a Moroccan feel right in the backyard!
The last and final phase before the big reveal. Man this project has been one to tackle by myself but I haven’t given up! In this post, I’m going to be covering both how I painted the deck and how I laid down the decking boards. Enjoy!
This post is sponsored by the Home Depot.
If you missed Phase 1 or Phase 2 of this project be sure to check it out!
and just for fun here's a quick look of what my backyard looked like before building the deck.
Painting the Deck
Materials Used
There are some affiliate links in this post, meaning I get a small commission if you purchase through these links, at no cost to you. Click Here to read my full disclosure.
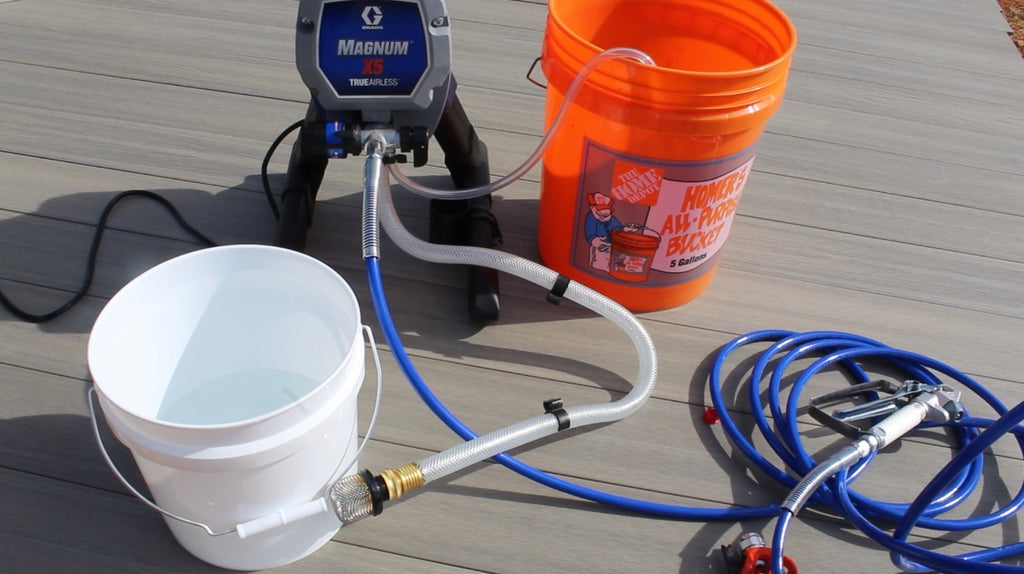
This was one of the more enjoyable parts of the projects. Mainly because I got to try out the Graco Magnum X5 sprayer that Graco sent over; this baby is a beast.
 I used Solid Color Behr Waterproofing Stain and Sealer - Slate in the color Slate to paint. I went back and forth on what color to use. I knew I wanted black but I was nervous of how it would turn out but I’m glad I went with my gut because I absolutely love it!
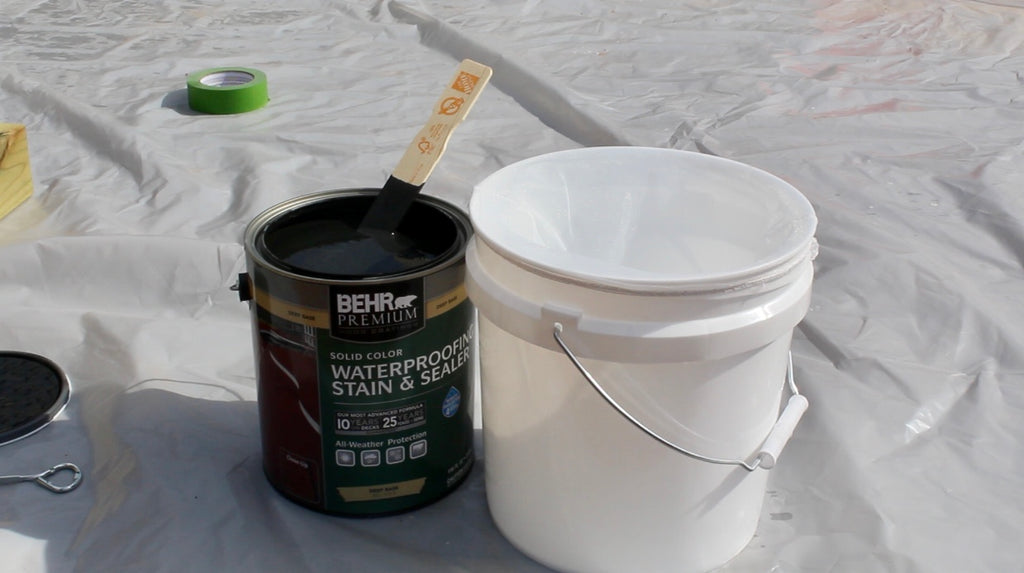 I painted two light coats over the deck with my sprayer and then used a brush to spread it evenly. I used two gallons of the stain and sealer; it provided excellent coverage and using the paint sprayer cut my paint time in half.
I would recommend this sprayer for any big paint projects. I usually don’t like using sprayers because of the cleanup but I was able to get this thing cleaned up in 5 minutes and it didn’t take too much effort so A+ from me.

The only issues I had with the sprayer was keeping prime, which I realized was happening because I didn’t have enough paint in the bucket. So word of advice; make sure you have a good amount of paint to where the hose is fully immersed in the paint and you should have no problems.
Check out the video below to see how I used the Graco X5 to paint my deck!
Laying Down the Decking Boards
Materials Used
- UltraShield Naturale Voyager Series Roman Antique Hollow Compositie Decking
- NewTechWood UltraShield Plastic T Clip Hidden Fastener
Tools Used
Originally I had planned on using Douglas fir for the top decking boards but after talking to a buddy he convinced me to go with composite decking and I’m soooooooo glad I listened. I ended up going with the UltraShield Composite Decking in Roman Antique.
I knew it would look nice but when I actually saw the boards in person I knew I had made the right choice. It did take a while for them to come in so I would suggest ordering them way ahead of time if you plan on tackling a project like this but the boards were WELL worth the wait!
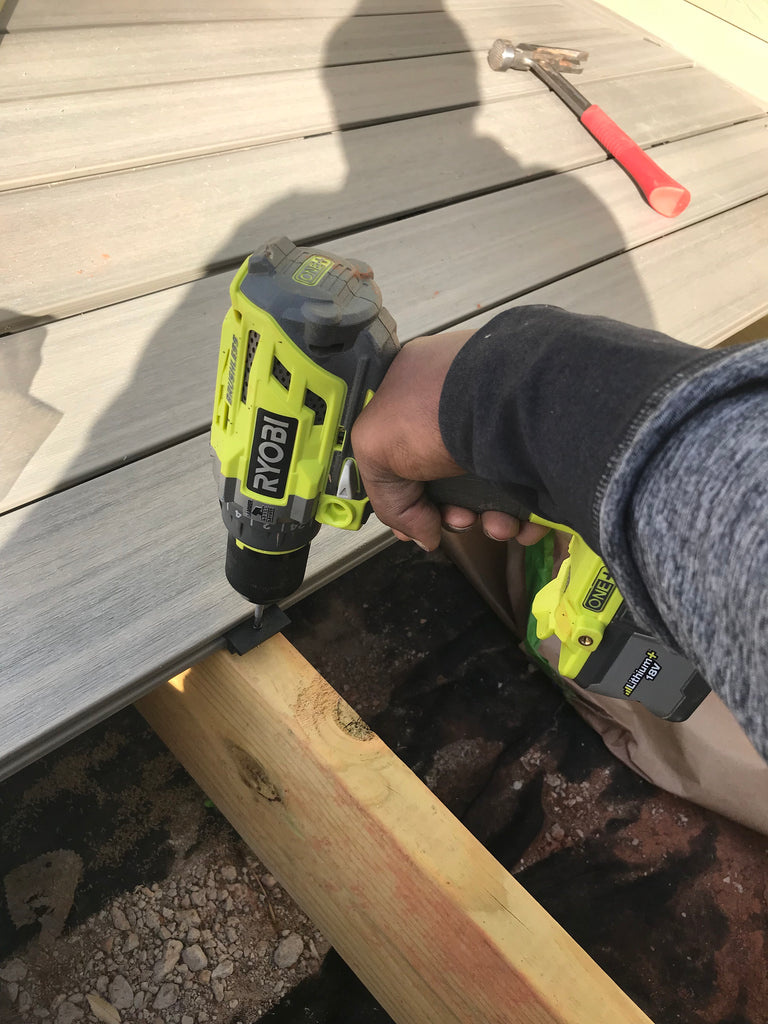
The process of putting the boards down were really simple. I used the T Clips to install the boards. They come with screws and each box covers about 50 sq. ft. My deck is 16' x 21' and I used a little more than 6 boxes.
You place one board down and screw down the T clips halfway down into each joist and then slide the next board under the T clip and screw the T clip all the way down. That’s it! Easy enough!
My only advice would be to make sure you screw the T clips in slowly to make sure you don’t strip up the screw. Other than that, it's really simple, literally anyone can do it!
I finished it up in about 6 hours…this included carrying the boards to the back; with two people it would have gone way faster!
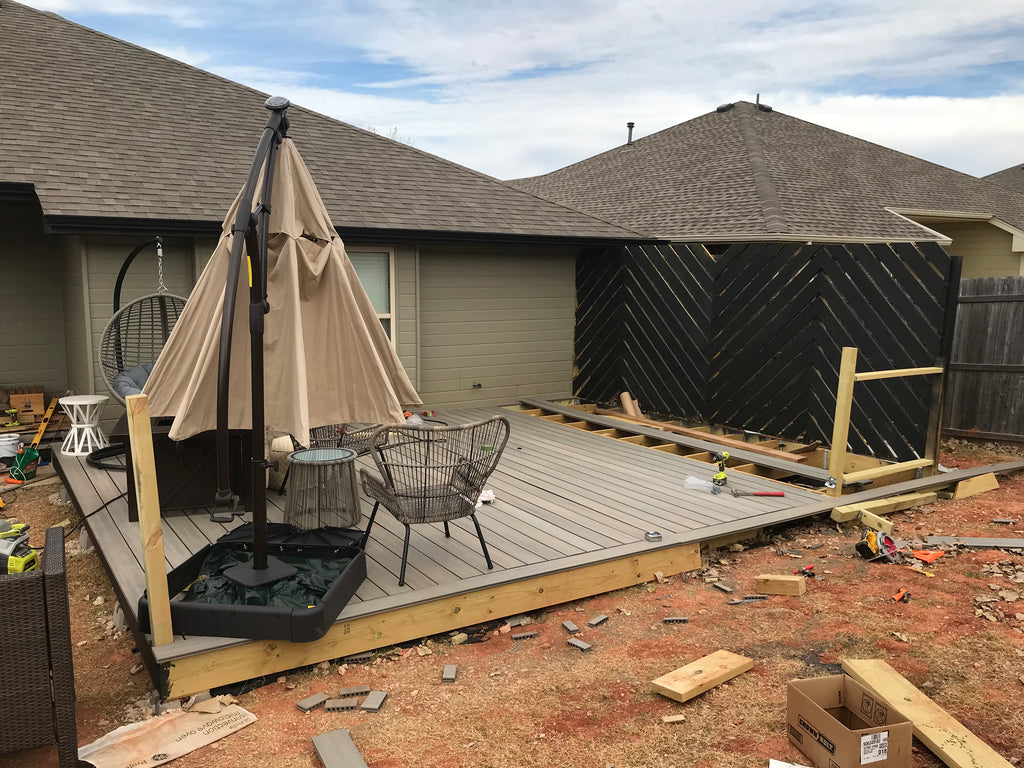
Once the boards were installed, the deck was finished! and I'm so excited to share the reveal with you guys! But for now here's the little sneak peak!
Check out the final reveal here!

Metal Christmas Snowflake Ornaments
Metal Christmas Ornaments that will give you the chills!
The more I get into DIY, the more I fall in love with metal, so these metal christmas snowflake ornaments were a no brainer! Even better, it took less than 30 minutes!

If you are anything like me, you like to change things up a bit. These metal snowflake Christmas ornaments are an easy way to bring some new flavor to the Christmas tree. So LETS GET TO IT!
Materials Used

This project was really simple. First step, was just cutting out the snowflake. I found it easier to cut out a bigger snowflake just to get it off of the sheet and then cut the snowflake down to the desired size.
Be sure to cut the snowflake so that the top has a hole to be able to wrap the aluminum wire.

The best part about this aluminum is that you can make them any size you want...I did 3 different sizes for my tree. Large, medium and small snowflakes.

After cutting them I took about 4 inches of the aluminum wire and wrapped one end around the top of the snowflake.
and then I got to hang them! Eazy Peezy!
 These metal snowflakes really brought my tree out! and the fact that it took less than an hour was an extra plus! If you're looking to take up some room on the tree than this is the perfect quick project for you!

Thanks for reading guys!

DIY Shiplap Bed Frame
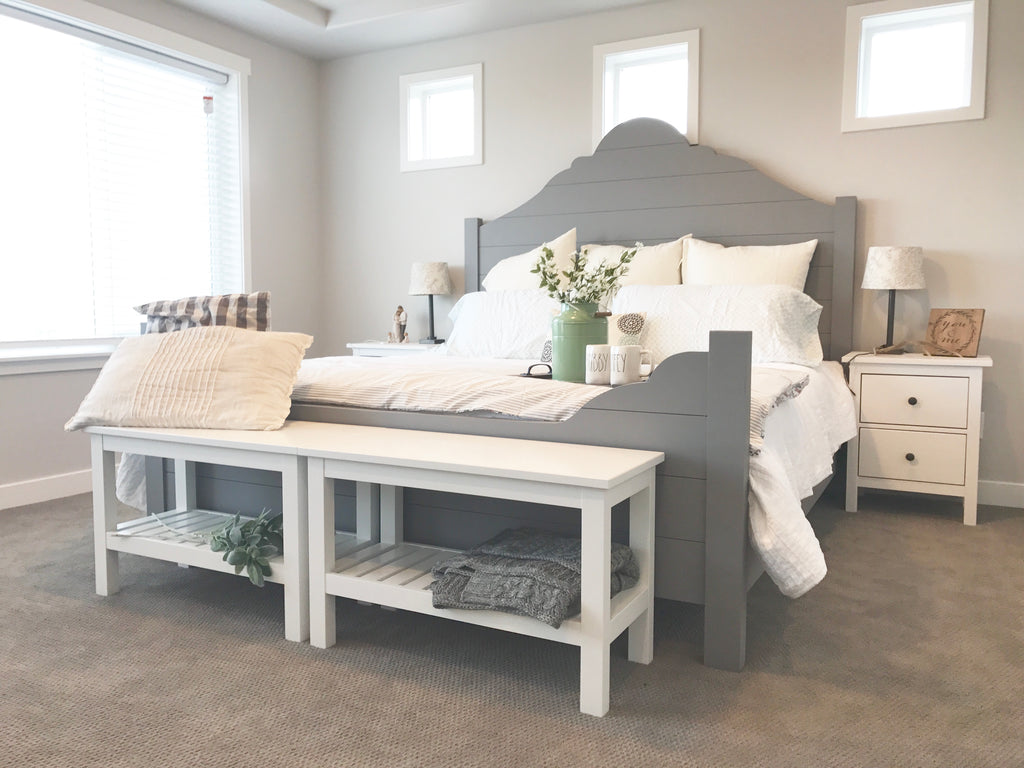
A DIY Shiplap Bed Frame that will knock your socks off!
Ian with Black Timber Company is definitely one to watch out for! Building gives me great joy, but I love seeing other talented builders showcase their talents and Ian is giving me life right now! I mean just check out some of his other designs (love that concrete nightstand)..his talents speak for themselves! Soooooooooo good!!! Be sure to check him out on Instagram!

Today I am featuring one of his builds because I just love it sooooooo much! This king bed with a shiplap design is sure to have all of your family members talking! I mean just look at it! and with a couple sheets of plywood and some extra lumber you can create it too.

Lucky for us, Ian recorded his entire process of creating this beauty so we can all make our version of it too! *inserts happy dance*
If you want to build this bed frame for your home, check out Ian's video tutorial below!
This is definitely a new addition to my long list of things I want to build! Ian killed it on this one!! If your debating whether to build this or not. You definitely should!
I am excited to see what Ian builds next! I will be sure to stalk his Instagram to see whats next to come! Thanks for reading guys and go give Ian a follow!


DIY Floating Deck Phase 2: Chevron Privacy Wall
Chevron + Privacy Wall = a Perfect Backyard Oasis
Guys! I am SUPER excited to share this part of the floating deck because it is the BIGGEST and BADDEST project I think I've tackled thus far! A chevron privacy wall! If you missed my last post, don't forget to check out Part One of my Backyard Makeover
This post is sponsored by The Home Depot.

If you missed my first post, you missed that I am partnering with Home Depot to makeover my backyard, featuring a DIY Floating Deck and the best part is that they provided me with $3,000 to do it! Yes you read that correctly.
Here's a quick before for you if you missed my first post...pretty BLAH I know!
This Chevron privacy wall is Part 2 of this project and I am here to show you my process. My inspiration for this project was found here on DIY Passion. I just loved this wall and had to do a rendition of my own.
There are some affiliate links in this post, meaning I get a small commission if you purchase through these links, at no cost to you. Click Here to read my full disclosure.
Materials Needed
- 4x4 Pressure Treated Lumber
- 1x6 Pressure Treated Lumber
- 2x4 Pressure Treated Lumber
- 1 board of 1x3 lumber
- 3" Galvenized Nails
- 1 1/2" Galvenized Nails
- 2x4 Connectors
- Bolts
Tools Used
- Ridgid Palm Nailer
- Miter Saw
- Clamps
- Hammer

I started of with setting the 4x4 posts. I realized late in the game that it would have been better for me to leave the posts I set in the concrete blocks long to use for the privacy wall but this is where my inexperience messed me up! But luckily I found a way to put the wall up still.
I built this wall section by section. I put up 4x4 posts and connected them together with 2x4 pressure treated lumber.

In order to secure the posts, I first put it up against the 4x4 posts that were set in the concrete blocks and clamped them tight to hold it into place. Once they were secure I screwed in 4 5" screws into the sides to secure it a little more.

After securing it with the 4 screws I drilled two holes in the post to put in two bolts to go through the 4x4 post and 2x8 lumber boards.
To secure the 4x4 posts together, I put 2x4s on the top and bottom using the 2x4 connector brackets, 1 1/2" nails, and my palm nailer. The 2x4 should be placed near the end of where the 1x6 boards can be nailed into them.

At the end I also decided to add a 2x4 board down the middle for extra security and nailed the 1x6s straight down the middle into the extra 2x4.

Once the posts and 2x4s are were secured, putting on the 1x6s was a breeze. Just measure cut and nail. I used my Ridgid Palm nailer to nail in the 3" nails ( two per side) and it definitely made my life easier.
When starting a new section I began with the board that touched the tip of the bottom of the deck and worked my way down and then back up. I cut the board so that both ends would meet at the middle of each 4x4 posts. It will make it easier for measuring to draw a line directly down the center of each 4x4 post.
All cuts were made at 45 degrees on my 12" Sliding Miter Saw.

In order to get the boards perfectly spaced, I used a 1x3 board to place in between. This worked perfectly in making sure the spacing was on point.

I was super excited when this wall was finally finished, the rain was fighting me all the way. I did this project over a couple of days but with an extra hand and clear weather, you could definitely knock it out in a day or two.

The wall cost me about $350 for all of the materials, but probably could have been a little cheaper with some better planning. But not bad for a 16 ft. privacy fence.

I just love how it came out! If you have any questions don't hesitate to ask. I'm on to the next part of the project! Stay tuned for updates and thanks for checking out the post. Later guys and if you haven't check out Part 1 of this project go check it out now!
Check out Phase 3 of my floating deck here!
My post complies with the Word of Mouth Marketing Association (WOMMA) Ethics Code and applicable Federal Trade Commission guidelines.
YOU MAY ALSO LIKE...


Backyard Makeover: Floating Deck - Phase 1
What's a backyard these days without a floating deck?
I am super excited to announce that I am partnering with Home Depot to turn my backyard from drab to fab and the best part is they are providing me with $3,000 to do it! Yes you read that right. You may ask how I swung that; well read on to find out!
This post is sponsored by the Home Depot. There are some affiliate links in this post, meaning I get a small commission if you purchase through these links, at no cost to you. Click Here to read my full disclosure.
Orange Tank Pitch Session
This year, I attended the Haven Conference in Atlanta and one of the coolest things that happened at Haven was being able to participate in the Home Depot Orange Tank Pitch Session. Before Haven, Home Depot created an opportunity for attendees to submit a project for them to sponsor. There were three budget tiers: $1,000, $3,000 and $6,000. I entered my project for a backyard makeover for $3,000.
I was presently surprised when I was notified by email that I was chosen as one of the 12 finalist to present at Haven. I was super excited. The pitch session was an awesome experience. We had 2 minutes to pitch our project and 2 minutes to answer questions.
Here is the mock up of what I pitched, a floating deck; which is phase 1 of my backyard makeover. Massive deck! a whopping 16.5'x21'!

Hoestly, after the pitch session I didn’t think I was going to get picked. There was an attendee who pitched a service project to help an older lady in need and I thought for sure she probably deserved it ha!
But to my surprise at the closing ceremony, they called my name as the one chosen for the $3,000 budget tier! I was super excited! I even have a photo that captured my excitement! HA along with my new blog friends! (Lauryn Moon and Cammie Malaga)

and now the project is well underway! I am doing my best to document the process so you too can tackle a project like this. I must say it has been A LOT of work! but if one ole gal can make it happen I'm sure you can too.
Let's check out the space!
This looks so sad and boring; I know! I can't wait to get this deck complete. This is the space where the floating deck will go and I also plan on re-doing my covered patio space. I haven't quite got it all planned out because I'm waiting to see how the deck will turn out. But that part will be Phase 2 of my project. Goodbye Pallet Sectional! Your time has come

Now let's get to it!
First I would like to say, I am by no means a deck expert but I did my best to follow decking guidelines.
Step 1: Check Local Codes and Permits
This step is super important and its a step that I'm sure most people don't think of. Before I started my project I called the City of Norman to make sure I didn't need any required permits. Luckily, I didn't need any. The only thing they suggested was to watch out for water drainage lines, which is another thing I hadn't thought of. Every city is different, so make sure you check before building.
Step 2 : Purchase Materials
This is the step I didn't do all at once, I bought materials as I went a long and this was THE worst mistake!! I would need something and didn't have it and then would have to stop or wait to get it. Take it from me. Plan out everything you need and purchase it all at once.
Materials (Part 1)
- Paver Base/Stone Dust
- Deck Blocks
- 4x4 Pressure Treated Lumber
- 2x8 Pressure Treated Lumber
- Joist Hangers
- Landscape Fabric
- Lanscape Fabric Staples
- 3" Screws
- Strong Tie connectors
- Simpson Strong Tie 1 1/2" nails
- Simpson Strong Tie 3" Nails
Tools Needed (-->Tool Guide for Building a Deck)
- Drill
- Miter Saw
- Tape Measure
- Palm Nailer
- Hammer
- Air Compressor
- Level
- Gloves
- Safety Glasses
- Hearing Protection
- Respirator Mask
- Shovel
Step 3: Lay Deck Blocks
This step was probably the most labor intensive. It is super important to make sure everything is level to ensure you get the best results for your deck.
Dig Holes
I used a good ole shovel to dig out these holes and I must say I don't want to see another shovel for a looooong time. Oklahoma clay is very hard to work with, so before digging I wet the ground a bit to help with the digging. It made it a little messy but definitely helped ease the labor of getting that clay out.
My backyard is on a slope so some of my holes needed to be dug further down then others. Based on how low you want your deck to be, you may want to dig a little ways down to account for the paver Base/Stone Dust.

Add Paver Base and Lay Down Deck Blocks
I added 6" of paver base to the bottom of the hole and then watered it just a little and tamped it down. I tried to make the paver base as level as I could before putting down the deck block to make it easier when leveling.
I used about 2 bags of paver base per hole for under the deck block and filling the hole after the deck block was level.

Once the paver base was somewhat level I laid down the deck block and put a level on it. I added paver base as needed underneath to make sure it was level. I stepped on it a couple of times to make sure it was secure and then leveled it one last time to make sure it was exact. you want to be meticulous with this step. The more level the better in the long run.
The deck blocks were 5' apart. Once the first deck block was all level I used that as a reference for the surrounding deck blocks. I leveled them and then used a longer level to make sure they were aligned with the other blocks.

Step 4: Lay Beams
Once the deck blocks were in place, I laid the wood beams, line by line. I ended up with 5 lines in total.
I first put the 4x4 posts in the deck blocks....no particular length, just long enough to surpass the 2x8. Then I laid a 2x8 board on the deck block right up against the 4x4 posts.
Note: This process I used was what worked best for me being that this was a solo project.
Leveling the Beams
For the first beam, I placed a level on it to check if it was leveled and then made marking on the 4x4 posts where they should be cut and cut them down and screwed downt eh first beam,

When putting down the second beam, in order to check to see if the beams where level, I place a spare board across the two beams and used scrap pieces of wood to make sure it was level. I placed this spare board at the back, middle and front to make sure each section was level. Once it was level on the x-axis, I placed the level on the beam.
 If your deck blocks are deep enough, then your beams should come out level. If not then most likely your deck blocks aren't as deep as they should be.Once everything was all level, I used a marker to mark where I should cut the 4x4 post and cut them down to size.

Then I used 5 structural screws and washers on each post to lock it down into place.

NOTE: I made the mistake of not putting the 5th beam on the outside of the 4x4 post.
Step 5: Lay Landscape Fabric
I read a couple of tutorials just to see what kind of materiel they used for the grass underneath and I saw on many post that they used Landscape Fabric.
I was thinking surely there must only be one type of fabric because I never found any links to anything but when I went to Home Depot there were like 6 different kinds and I stood there for like 20 minutes trying to figure out which one to get...so luckily for you I'm providing the link to the exact one I used! This Landscape Fabric was super easy to work with and seemed really durable.

I began laying the fabric line by line. In order to get the fabric underneath the wood by the deck blocks I just used a utility knife to cut slits in between. The material is easy to cut so any kind of blade/knife will work fine. I laid down the fabric little by little and then held it in place with some landscape Fabric Staples. These things are a must or else your fabric will go flying.

Once the landscape Fabric was secure down with the staples I poured a bag of paver base over it for extra hold.
Step 6 : Installing Joist Hangers
This process took a while but it was pretty straight forward. Measure, Cut and Joist away! The joists were placed 16" apart from each other. I used Simpson Strong Tie connectors to attach to the vertical beams and used 1 1/2" nails to drive into the vertical beams and 3" Nails to drive into the connectors diagonally into the joist.
 When installing my joist hangers this Ridgid Palm Nailer definitely made the joist process a whole lot easier. It does require an air compressor, I used my Ryobi's Pancake Air Compressor.
 It has a magnetic guide for precise fastener placement and is compact and low in weight. It is compatible with common nails 1-1/2 in to 3-1/2in. See the video below to see how I put this tool to work on my floating deck.
 The Ridgid Palm Nailer retails for $59.98 at The Home Depot. Check out the video below to see it in action.
This by far was the hardest and longest process of my floating deck and I'm happy to move on to the next step.

Check out Part 2 of my Floating deck! The Chevron Privacy Wall!
Also be sure to check out my tool guide for building a deck.


Installing Kitchen Cabinet Hardware
These liberty hardware kitchen cabinet pulls are giving me all the feels"


Step 1: Remove Old Hardware
I first used my Ryobi Hammer Drill to remove all of my old hardware from my kitchen cabinets. This step went pretty quickly. This can also be done with a screwdriver but any excuse I can have to use my fancy power tools is good for me!

I made sure to put the drill on a low setting to make sure I didn't mess up the existing knobs, I'm sure I will be using these somewhere else.
Step 2: Re-finish Cabinets and Fill Holes
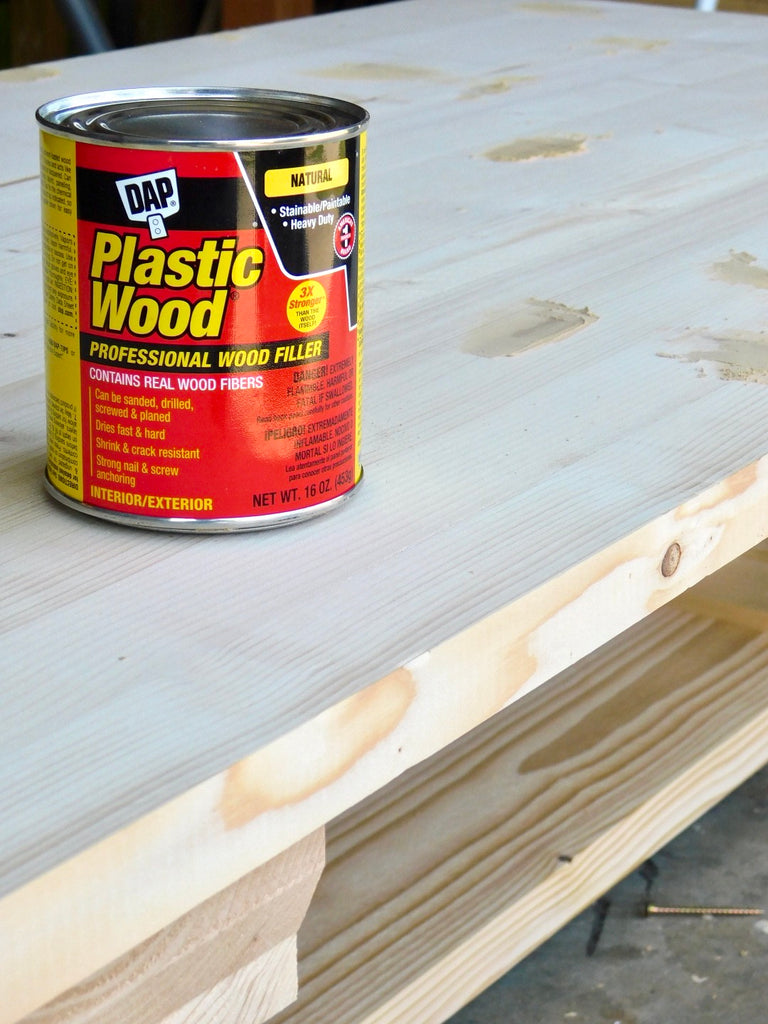
Once I removed all of the hardware I noticed the pulls left some spots on the cabinets so I used some Minwax stain just to refresh the cabinets. I also filled in the pull holes on the drawers with DAP wood filler, since I had to screw new holes.

Putting the stain on the cabinets gave them a fresh new look; with the knobs off this was the perfect opportunity to do so.

Step 3: Drilling New Holes
With the help from my Kreg Cabinet Hardware Jig Kreg sent over I was able to whip these holes out in no time. This jig has adjustable guides for accurate hole placement, it will make you feel like a cabinet wizard and its not super expensive.

Step 4: Add New Knobs
Now on to my favorite part of the process, adding these new knobs! I could tell after the first knob that these were going to give my kitchen a whole new look, and they didn't disappoint.


YOU MAY ALSO LIKE...


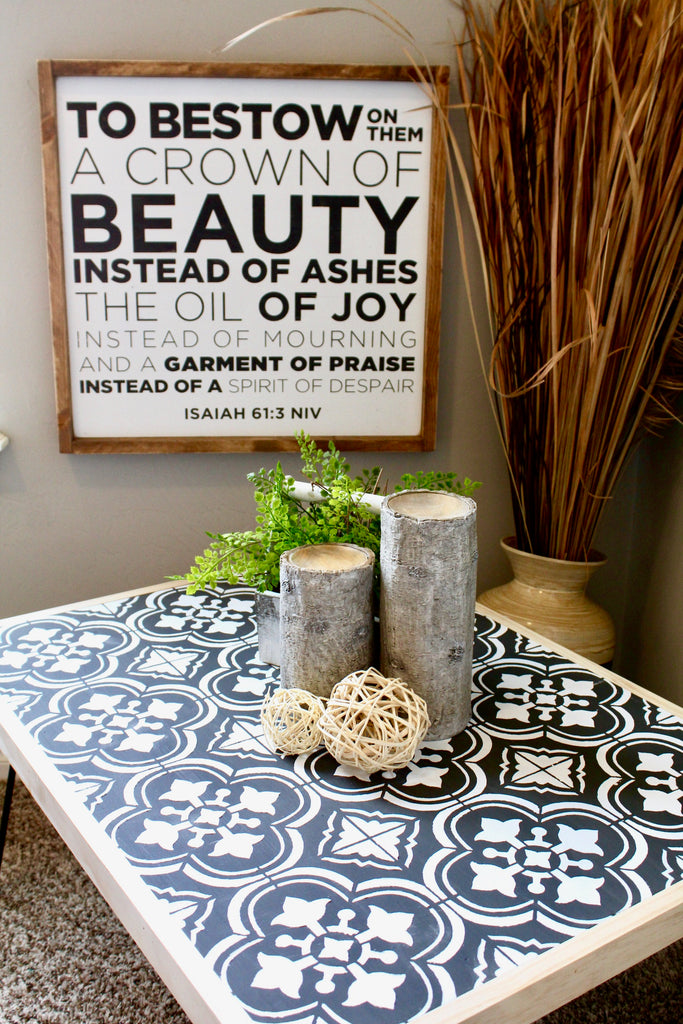
DIY Hairpin Coffee Table with Stenciled Tile
Don't let this DIY Hairpin Coffee Table fool ya, that's a stencil design!
I have seen DIY hairpin legs start to make themselves known and I thought this project would be a great way to dive into a new trend. So I made this DIY hairpin coffee table featuring a tile stencil on top!
Luckily for you guys, I videoed the process! Check it out and be sure to read up on all the details I missed in the video below.
There are some affiliate links in this post, meaning I get a small commission if you purchase through these links, at no cost to you. Click Here to read my full disclosure.
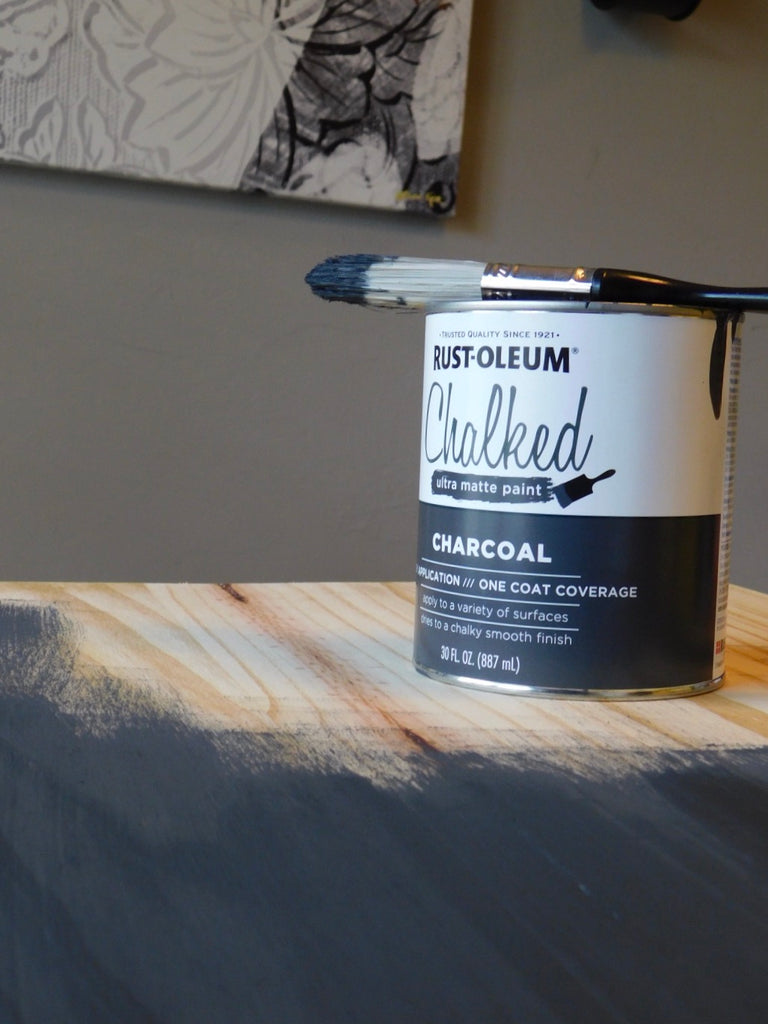
I am a huge fan of chalk paint and normally I use Annie Sloan but ever since I used Rustoleum chalk paint on my fireplace, I wanted to try it out on this build and I love it! Even better it's the third of the price of Annie Sloan! Sorry Annie! But Rustoleum is taking the win on this one! I'm excited to see how it holds up! I used the Rust-Oleum Charcoal for the under bottom and the Rust-Oleum Linen White
for the top. This was the perfect paint for a stencil because it dries so quickly. Idk if I would have enjoyed this project as much if I used regular paint.
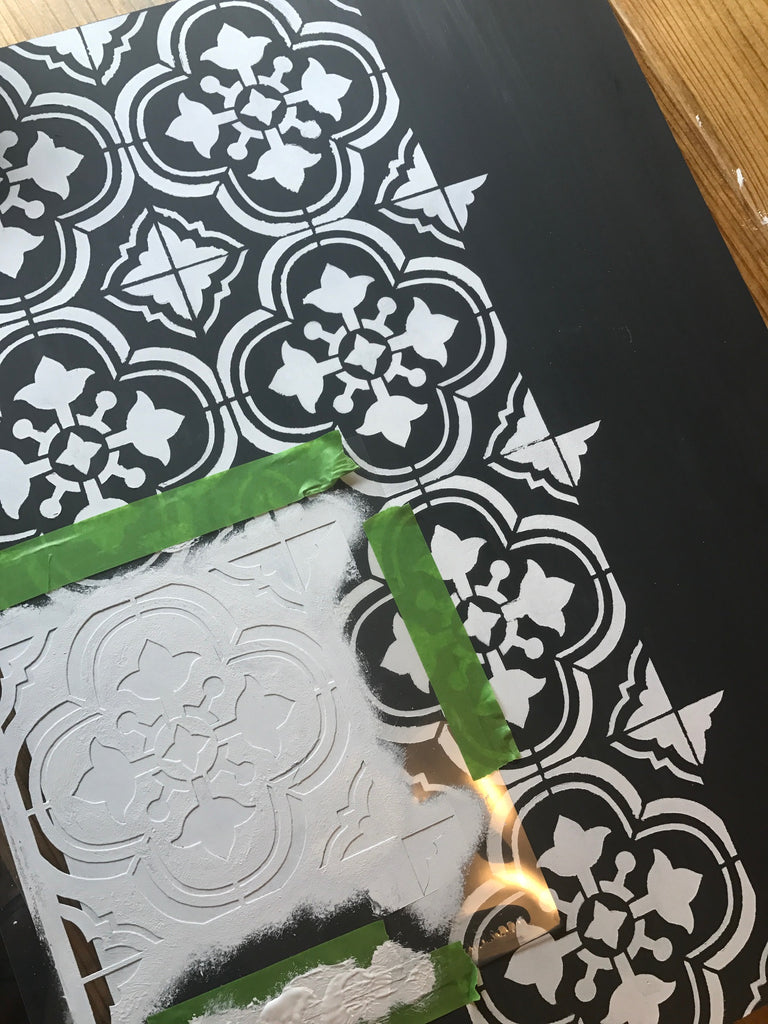
I have been seeing these Santa Ana Tile Stencil everywhere and since I couldn't use them for my floors, I thought what better to use them on then a piece of furniture! The best part was it was only $9.99! Nothing like a cheap stencil to make my day! I cut the wooden piece down so that I could fit the stencil on there 4 times. The stencil comes in two sizes so depending on the size you can decide the length you want. Mine was 24x36.
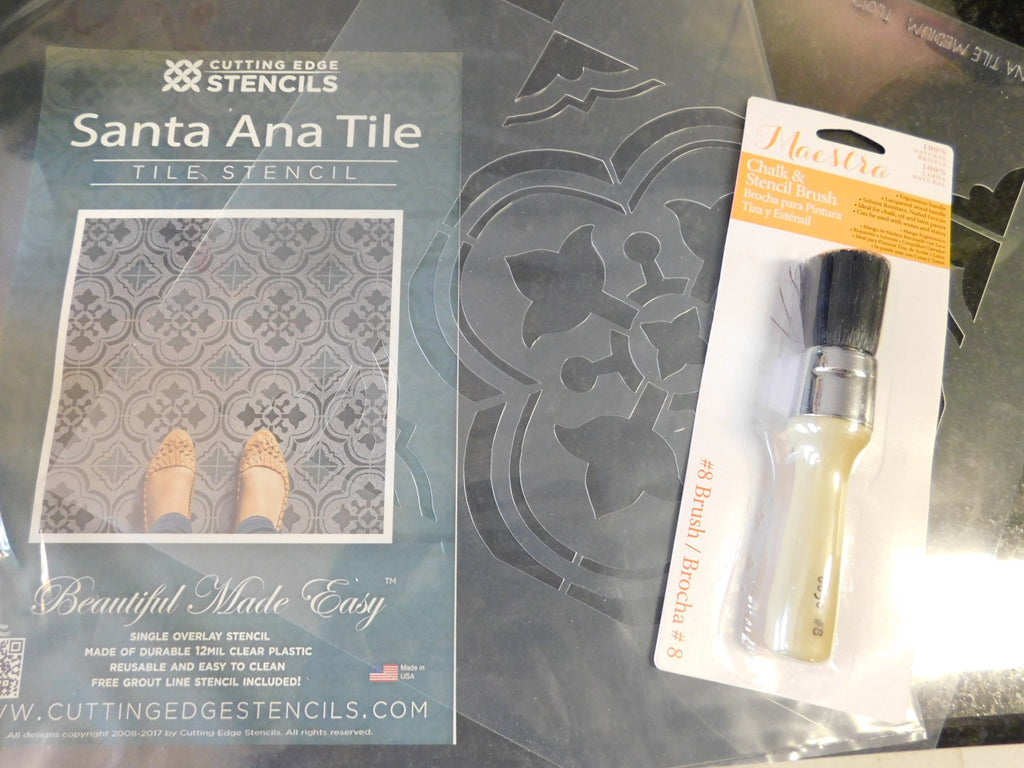
This was my first time using a stencil so I definitely learned some good tips for getting a clean finish. Rule # 1 don't put a blob of paint on the brush and expect to get clean lines. IT AINT GONE HAPPEN'.... I would suggest practicing on a scrap piece of wood first to get the hang of it, unless you want to be a brave soul like me and just thug it out. Either way, it wasn't that hard to do. I think a good brush is key, I picked mine up from my local Home Depot. Once I finished stenciling the table top I coated it with Rust-Oleum Clear.
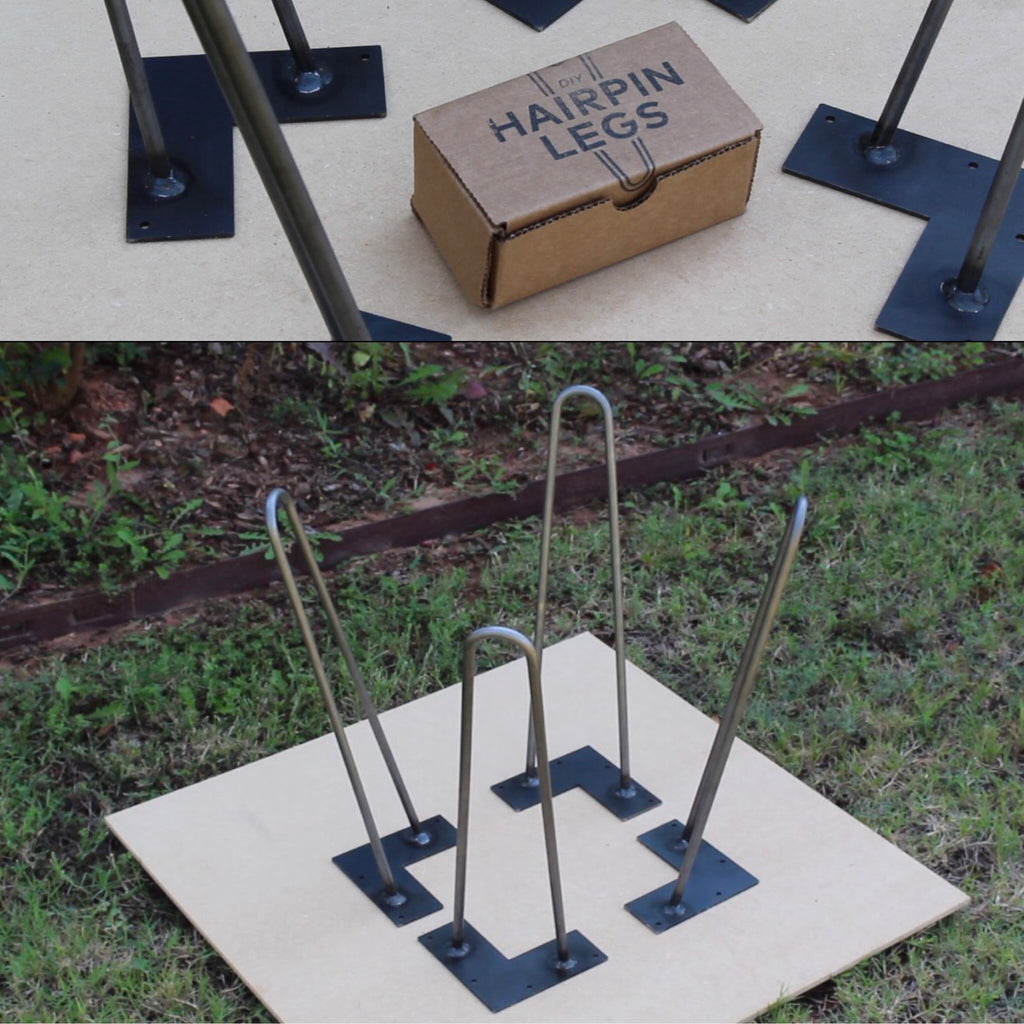
This was my first experience with hairpin legs, as well and I loved using them. They were super easy to incorporate into my DIY hairpin coffee table . Huge shoutout to DIY Hairpin Legs for sending these babies over! I loved that the legs came equipped with screws, I wasn't expecting that at all. It also came with full instructions on how to use them, even though its pretty straight forward. I used Rust-Oleum Flat Black and Rust-Oleum Matte Clear
on the hairpin legs and it really made them come to life.
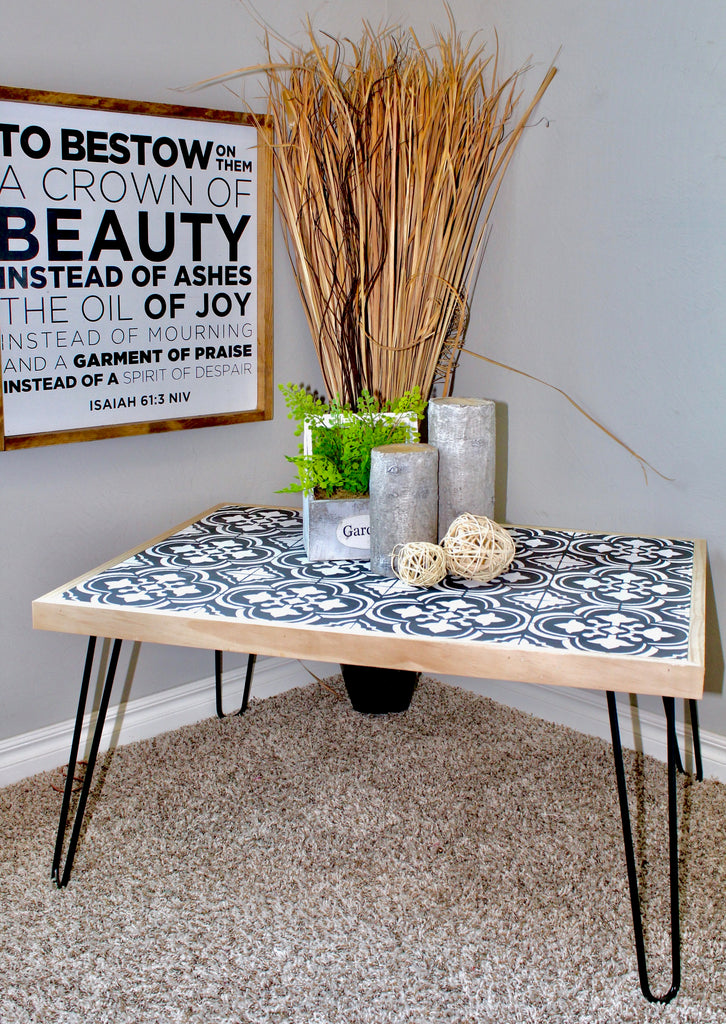
I am so happy with how this build came out. It was my first industrial type build and I couldn't be happier with the outcome. I think we need one last look!

I love that this DIY hairpin coffee table has such a modern feel to it and it only took one afternoon to get it finished! I would love to see your go at this modern hairpin coffee table.
"I received product for this post but all thoughts and opinions are my own."

DIY Barn Door Coffee Bar Center
A DIY Barn Door Coffee Bar never looked so good!
I've seen many DIY coffee bars but I wanted to switch things up a bit. A coffee bar with barn doors was the perfect idea. I have been dying to build some furniture with sliding barn doors and I'm so glad it was a SUCCESS. Even better, I have partnered up with my friends over at RYOBI Nation to give you the step by step tutorial. But first lets drool over this DIY barn door coffee bar.
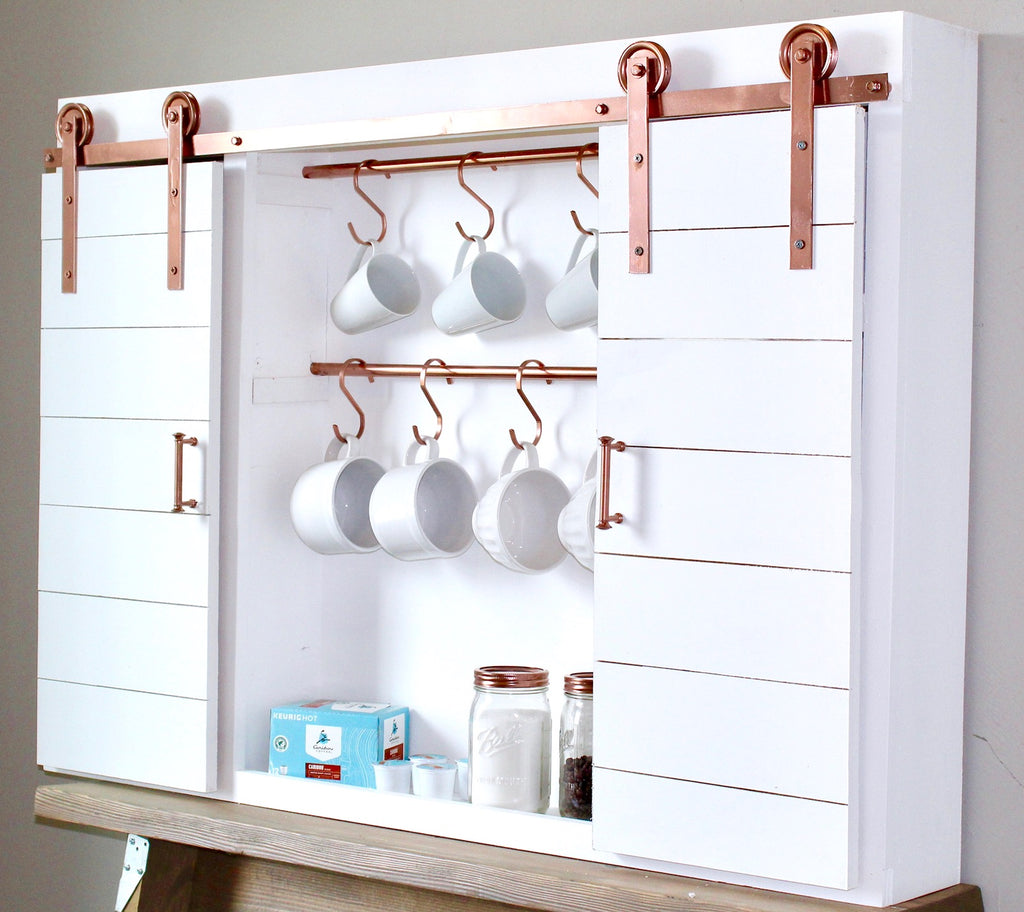
I was trying to come up with some different DIY coffee bar ideas and I must say my favorite part about this build is HANDS DOWN the metallic finish on the barn door hardware. I haven't seen hardware that comes in this finish, so I decided to create my own!
There are some affiliate links in this post, meaning I get a small commission if you purchase through these links, at no cost to you. Click Here to read my full disclosure.
 I used Rust-Oleum Copper
 and man does this hardware Shine. The copper pipes and the door pulls just brings it all together. But lets talk about this Rust-Oleum Comfort Grip
by RustOleum. Makes spray painting so much easier. Pops right on in seconds!

More and more I'm learning that I love hidden storage..and this diy barn door coffee bar center was no different! Behind the barn doors is plenty of storage room for all of my coffee supplies that I don't want everyone to necessarily see! I love making unique pieces for my home and this really makes my kitchen worth talking about!
Just a little inside scoop. I always use select pine from Home Depot when using pine wood. It's a little more expensive than regular pine but its so much better to work with and makes my builds a lot cleaner. I always have a struggle with wanting to paint or stain my furniture after I finish building it. It just looks so pretty the way it is.
No build of mine happens without my beloved Kreg Jig K4 Pocket Hole System, but one of my other favorite tools is Ryobi's Hammer Drill. There aren't too many Ryobi tools I haven't tried and their hammer drill is definitely in my top 5. Check out my full tool review on the Ryobi 18V Hammer Drill here. These tools really brought this build together. Let's take one last look!

Now head on over to RYOBI NATION for the full tutorial for this DIY coffee bar! But one more thing before you go!

a Rafflecopter giveaway
*This post and giveaway is sponsored by Ryobi Power Tools. I have received product and compensation for this post but all opinions, thoughts and designs are my own.

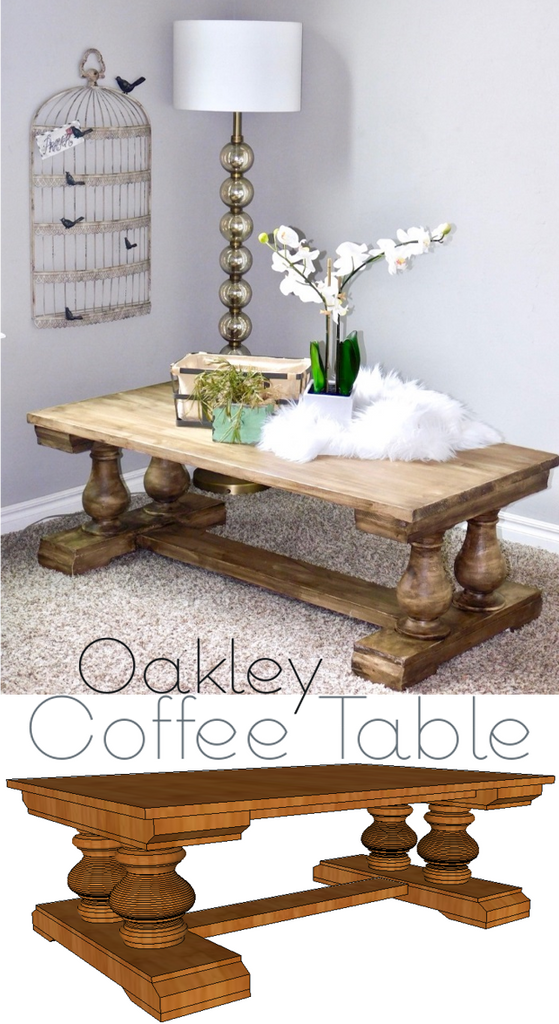
Oakley Coffee Table
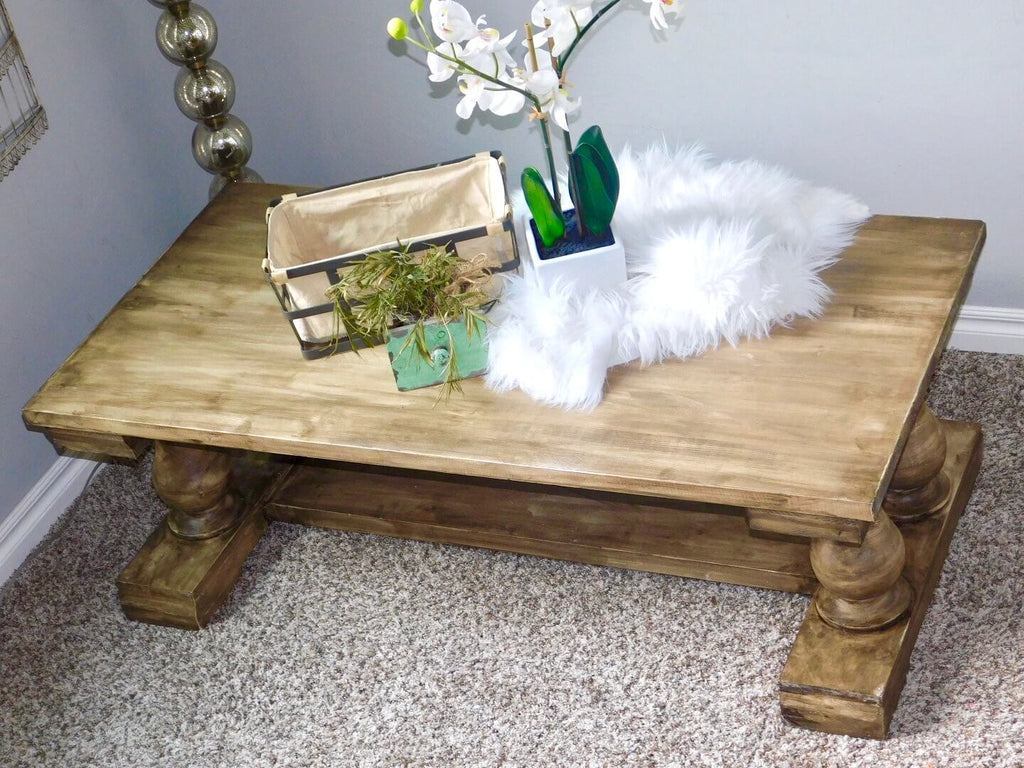
Who doesn't love a farmhouse coffee table with a nice set of turned legs?
These legs are super popular in the woodworking community and I couldn't wait to get my hands on them. Thankfully, my friends over at Build Something are partnering with me to present the plans so you can create your own! Build Something is Kreg Tools plan site where you can find free plans for some awesome DIY furniture.

and that about wraps it up!
Now what are you waiting for? Head on over to Build Something to check out the free plans!
or Pin it for later!