
Projects

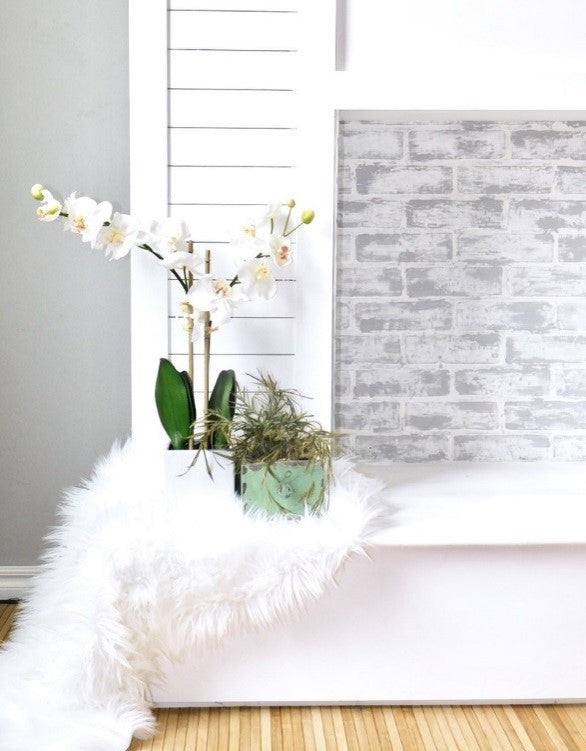
Faux Fireplace with Hidden Storage
A Faux Fireplace with a touch of Shiplap, show me more!
I have always been a fan of a cozy fireplace, so this faux fireplace with storage was a no brainer. My home didn't come equipped with a fireplace so I thought; why not make my own? Luckily, my good friends over at Home Depot helped to make my faux fireplace come to life!
"This post is sponsored by The Home Depot. The Home Depot provided me with product and compensation. The opinions I have shared about the products are my own."
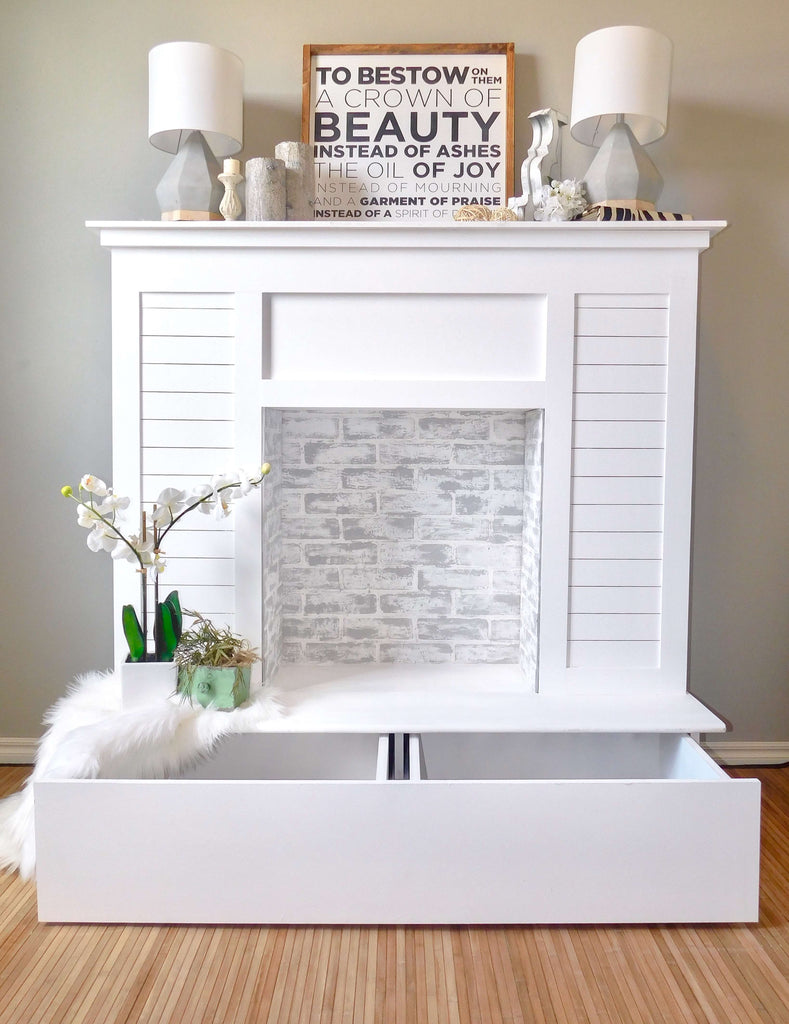


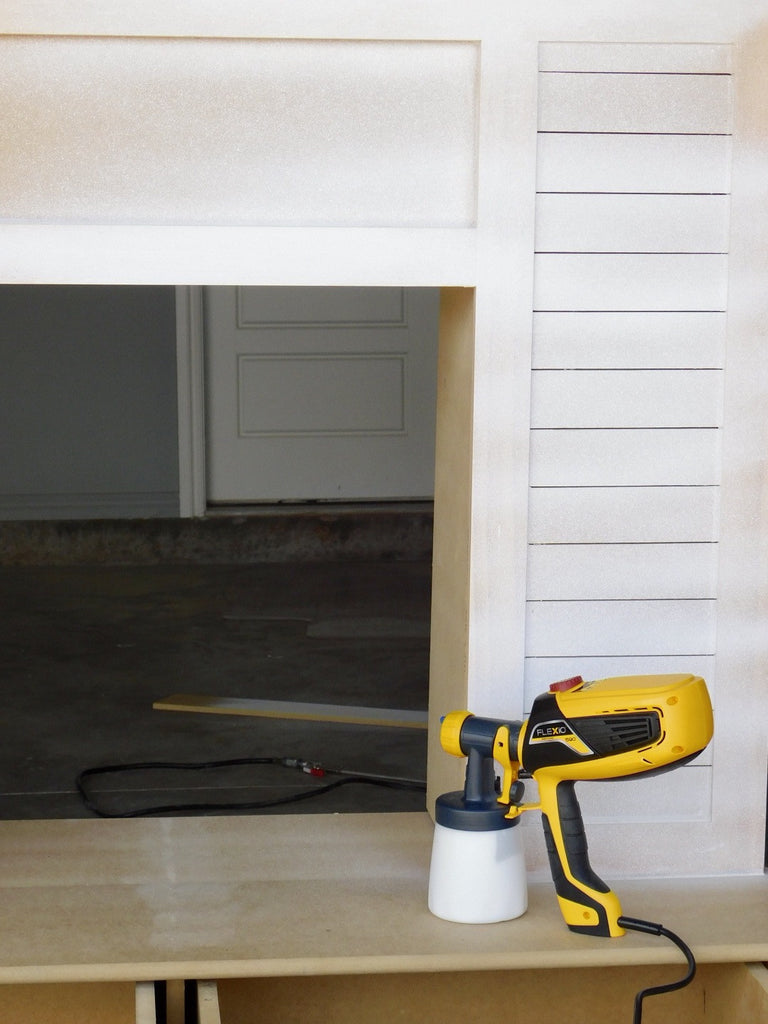
Now head on over to the Home Depot Blog to check out how I created this Faux Fireplace with storage.
Happy Building!

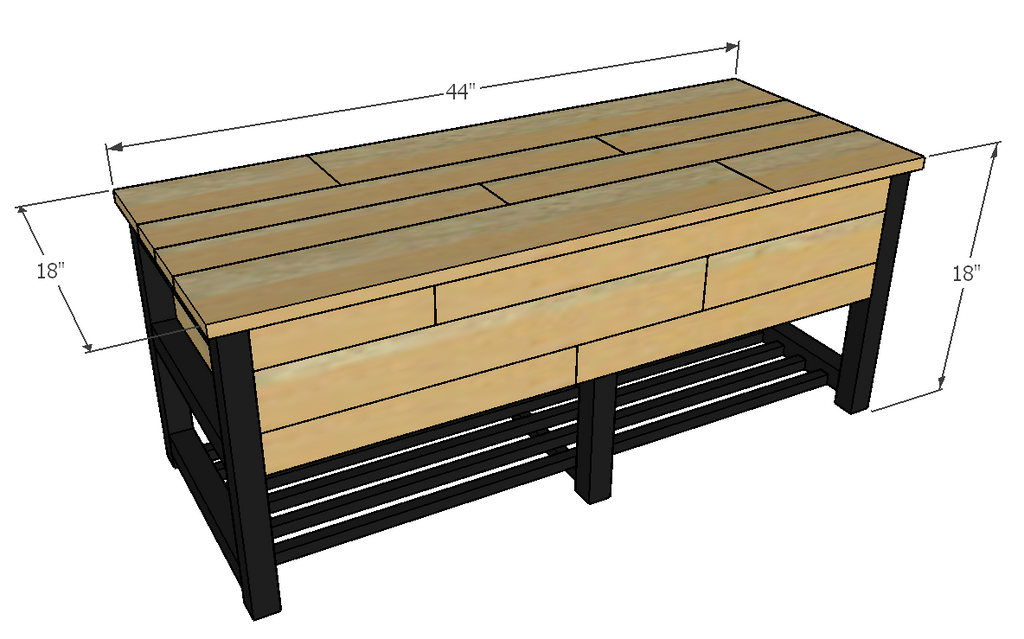
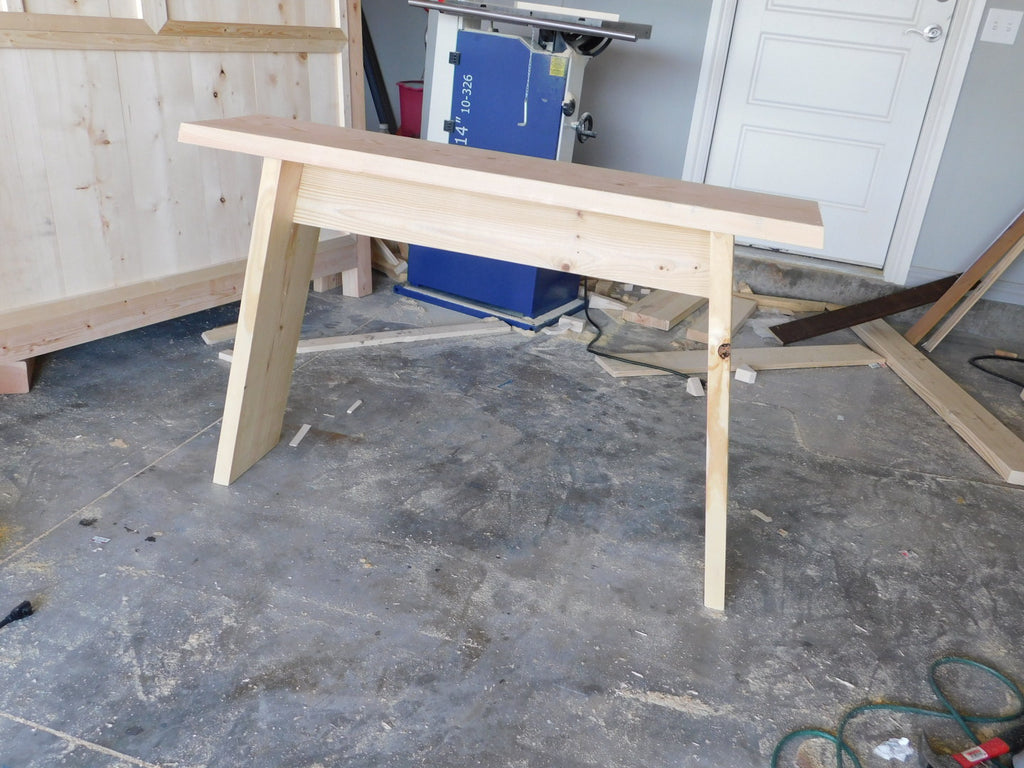
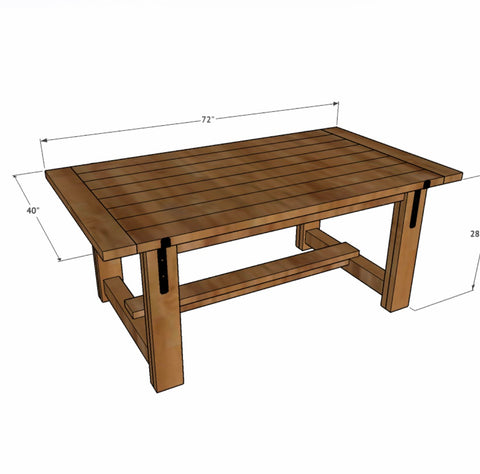
Farmhouse Crate End Table
I have partnered up with Jennifer with MadisonMadeDecor to give you the how-to on making this awesome end table! Check her out on Instagram and give her Etsy shop a look and then get to building!
Isn't she a beauty?

(There are some affiliate links in this post, meaning I get a small commission if you purchase through these links, at no cost to you. Click Here to read my full disclosure)
Dimensions

Materials List
2 - 1 x 10 @ 8ft
2 - 1 x 6 @ 8ft
2 - 1 x 2 @ 8ft
2 - 2' x 4' 3/4" plywood
1 - 2 x 2 @ 8ft
Everbilt 3/4" in x 48" Aluminum Flat Bar
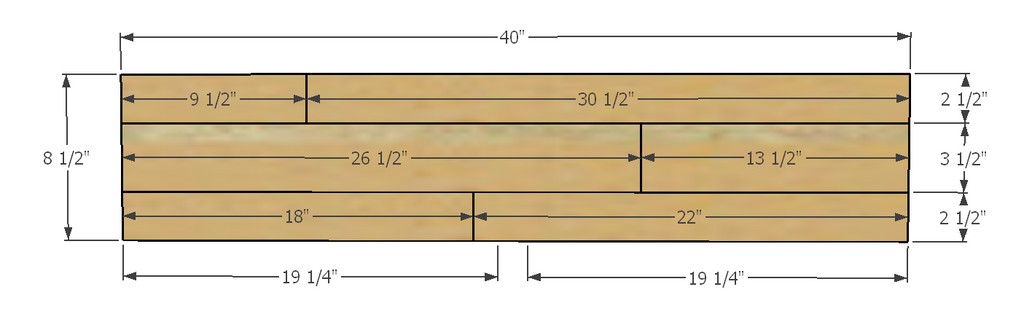
Cut List
4 - 1 x 10 @ 17.25"
2 - 1 x 6 @ 17.25"
4 - 1 x 2 @ 25.25"
4 - 1 x 2 @ 14.25"
2 - 1 x 10 @ 25.75"
1 - 1 x 6 @ 25.75"
2 - 3/4" plywood - 16.5" x 25.75"
3 - 1 x 6 @ 27.25"
8 - 2 x 2 @ 11.50"
(There are some affiliate links in this post, meaning I get a small commission if you purchase through these links, at no cost to you. Click Here to read my full disclosure)
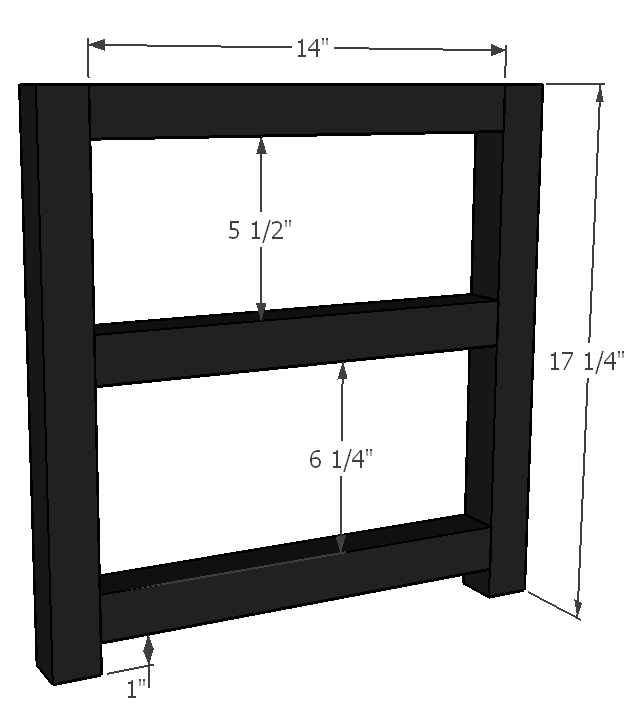
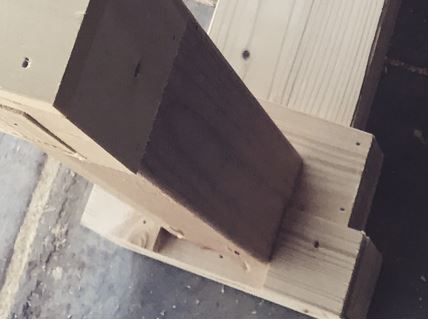
Step 1: Attach the 1x10 ( 17.25") and 1x6 (17.25") to the 1x2 outer trim using wood glue and brad nails.

Step 2: Attach the two 1x2 ( 14.25") trim pieces to the end table sides using wood glue and brad nails.

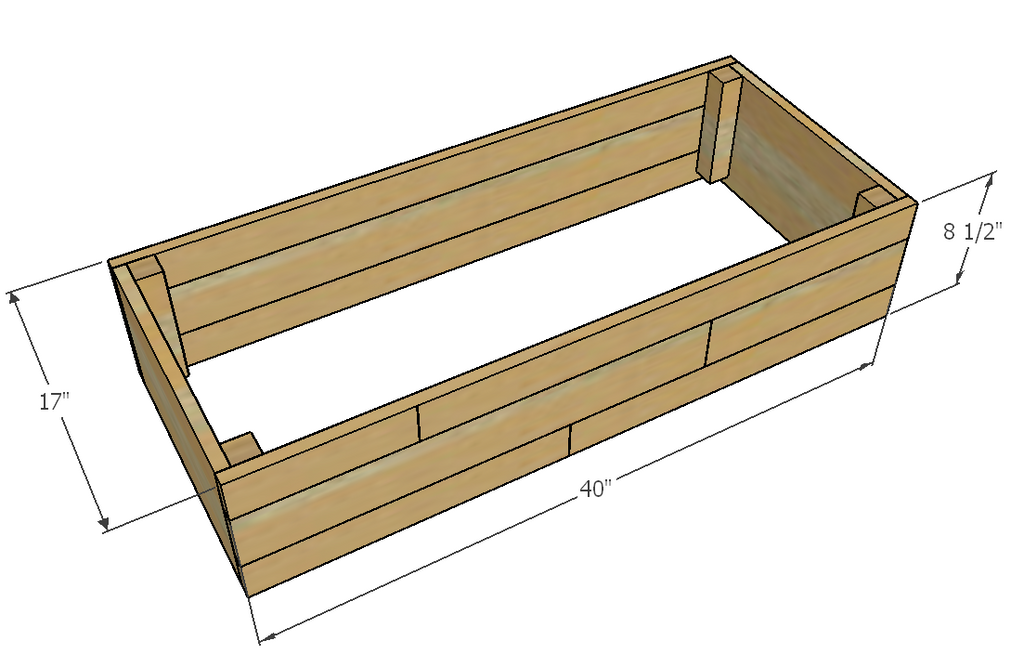
Step 3: Attach the 1x8 and 1x6 (25.75") back pieces of the crate by using a using a Kreg Jig K4 Pocket Hole System on a 3/4" setting, with 1 1/4" pocket hole screws to attach along with wood glue.

Step 4: Attach the bottom middle and top pieces to the crate. Attach the middle and bottom piece by using a using a Kreg Jig K4 Pocket Hole System on a 3/4" setting, with 1 1/4" pocket hole screws to attach along with wood glue. Attach the three top pieces using wood glue and brad nails. Attach the two outer pieces first, so that they are flush with the outside and then place the middle piece in.


Step 5: Add the eight (11.5") 2x2 supports on each side using wood glue and brad nails. Supports should be inset 3" from each side.

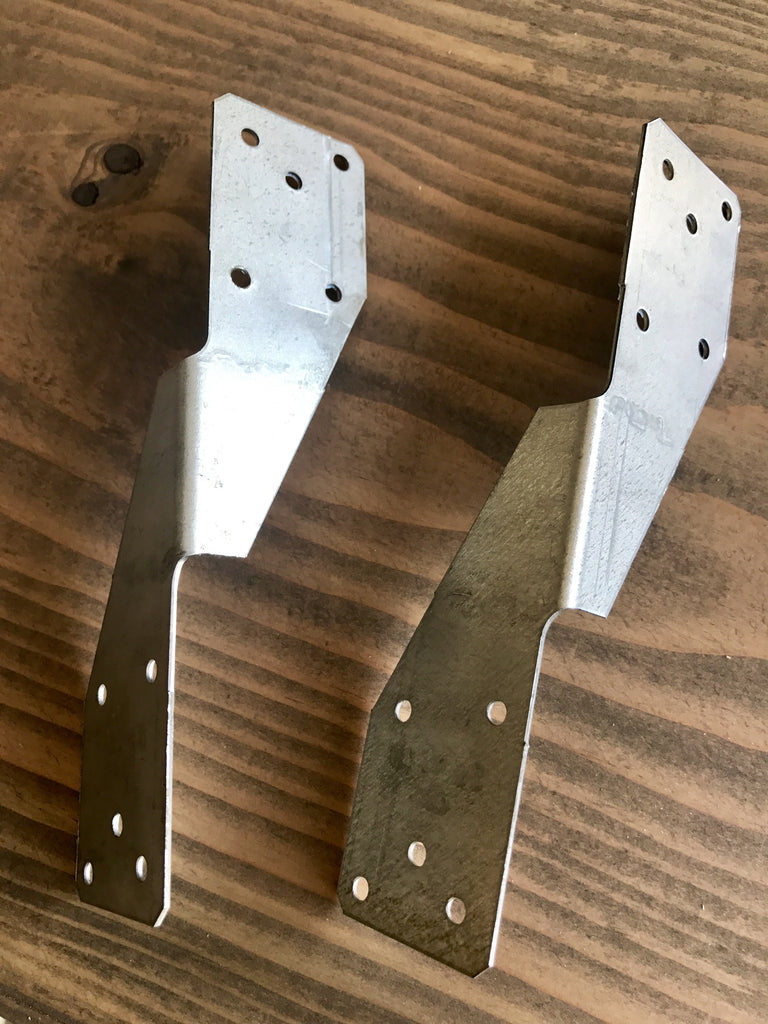
Step 6: Cut the Aluminum Bar to fit into the corners of the crate. Measure and then cut with a Dremel 4300 Rotary tool. (Use blade for cutting metal)
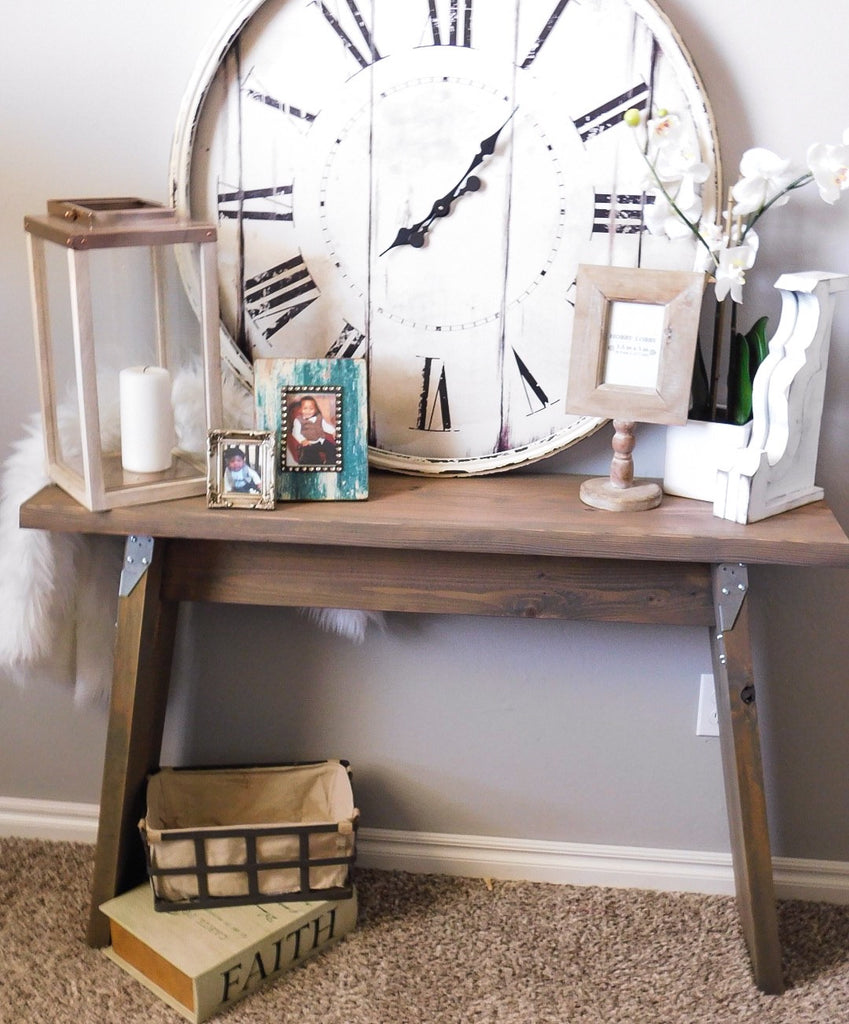
Let's take another look at Jennifer's build!
For the finish, Jennifer used one layer of Minwax Special Walnut and one layer of Minwax Classic grey.


or Pin it for later

YOU MAY ALSO LIKE...

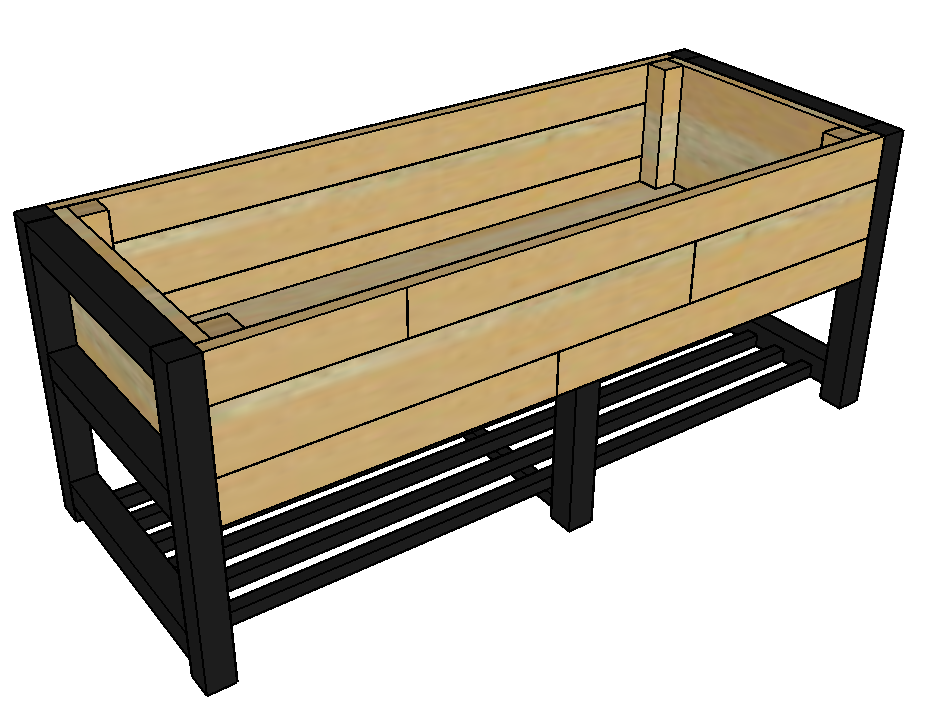
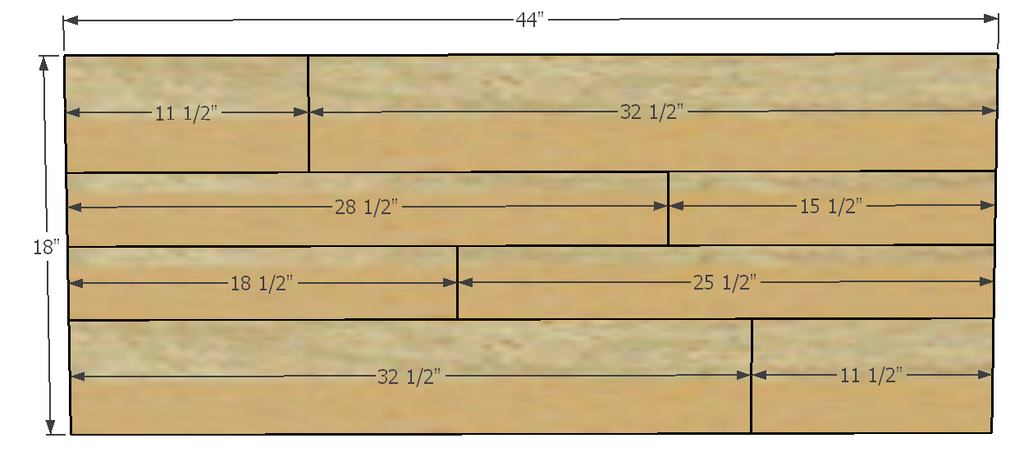
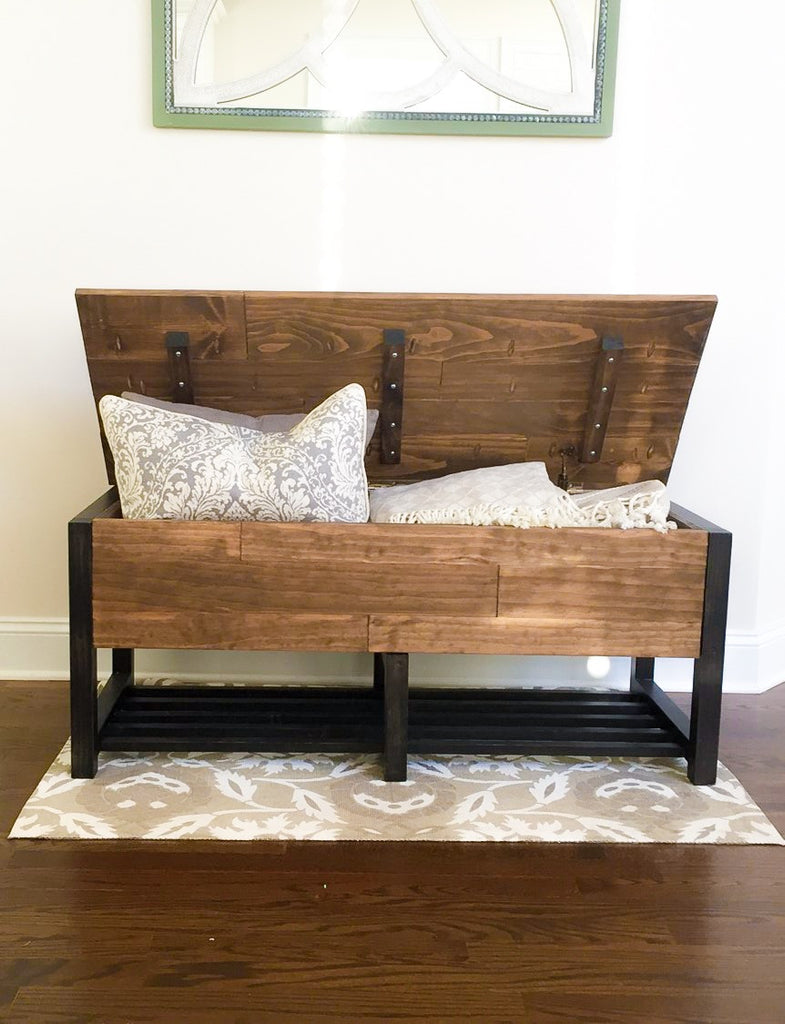
EntryWay Storage Chest
An entryway storage chest you can't help but to love.
This DIY entryway storage chest is the perfect project for your home entryway. The hidden storage gives it the perfect balance of functionality and decorative. Giving entryway storage a whole new name.
 I love partnering with fellow builders and today I'm presenting a build by Mandi of HoneySuckle & Sawdust!. She built this cool entryway storage chest and I'm happy to present the 3D plans for her awesome entryway storage chest! Be sure to check her out on Instagram and Facebook!
(There are some affiliate links in this post, meaning I get a small commission if you purchase through these links, at no cost to you. Click Here to read my full disclosure)
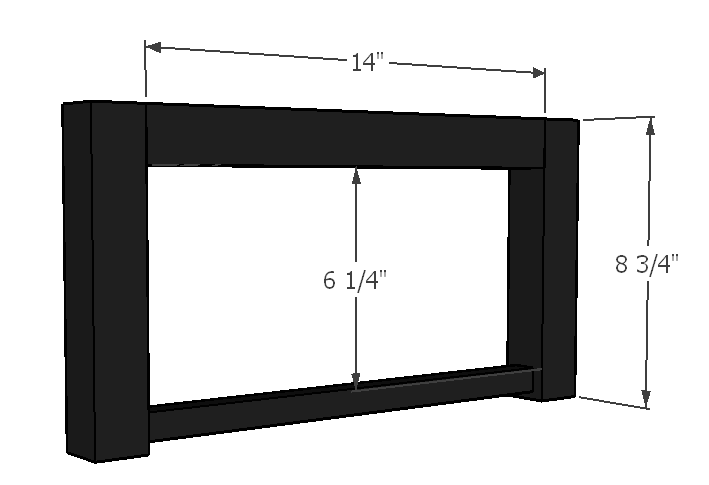
Dimensions
Materials List
3 - 1x1 @ 8 ft
2 - 1x3 @ 8ft
2 - 1x4 @ 8ft
1 - 1x6 @ 8ft
3 - 2x2s @8ft
1- 3/4" sheet of plywood
2 - 1x2 @ 8ft (optional replacement for 1x1s_ see note below)
Cut List
See Detailed Printable Plans for Cut List
Step 1: Attach the side chest pieces together using a Kreg Jig K4 Pocket Hole System on a 3/4" setting, with 1 1/4" Pocket Hole Screws to attach along with wood glue. Make two of these for both sides of the entryway storage chest.
Note: Use biscuit joinery or add 1/4" plywood to inside to hide pocket holes.
Step 2: Attach the end plywood sheets to the side pieces using a Kreg Jig K4 Pocket Hole System on a 3/4" setting, with 1 1/4" Pocket Hole Screws to attach along with wood glue. Add 4 2x2s (7 3/4) to four corners for support. Pocket holes should be made on the inside of both sides of the plywood sheet.
Step 3: Attach the bottom plywood sheet to the assembled chest using a Kreg Jig K4 Pocket Hole System on a 3/4" setting, with 1 1/4" Pocket Hole Screws to attach along with wood glue. Pocket holes should be made on the bottom of the plywood sheet.

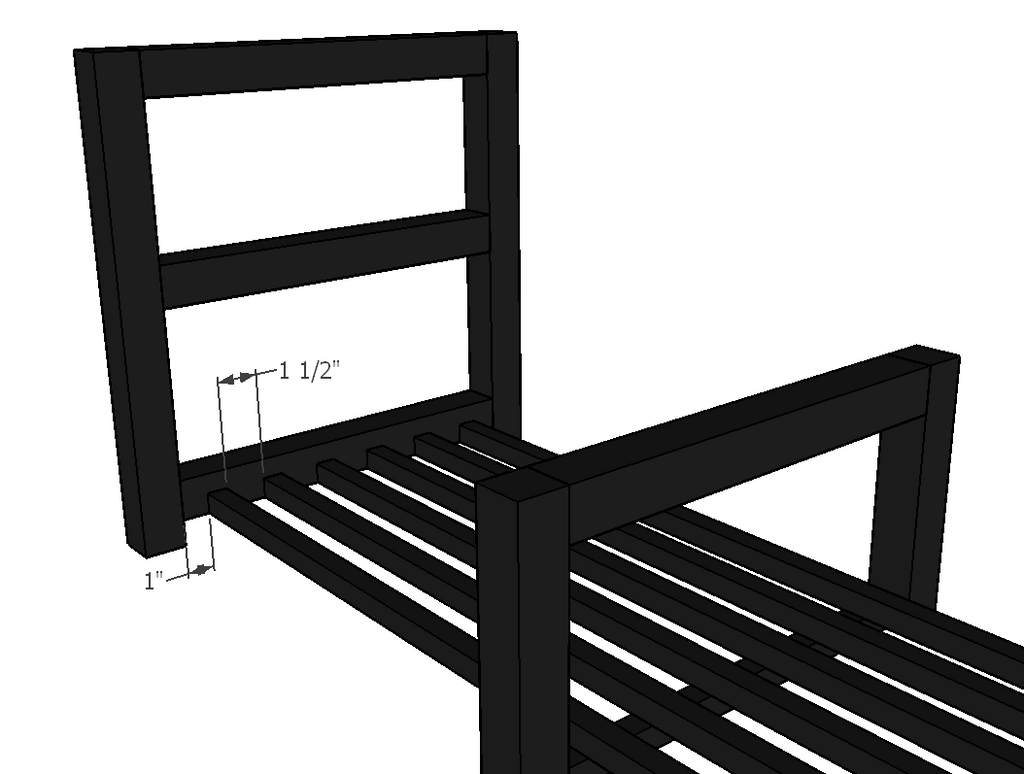
Step 4: Assemble the two end pieces by attaching the 2x2 side leg braces to the middle leg braces using a Kreg Jig K4 Pocket Hole System. On the 2x2 uses a 1 1/2" setting with 2 1/2" Pocket Hole Screws on the 1x1 use a 3/4" setting, with 1 1/4" Pocket Hole Screws to attach along with wood glue.
Step 5: Assemble the middle piece by attaching the 2x2 side leg braces to the 1x1 middle leg braces using a Kreg Jig K4 Pocket Hole System. On the 2x2 uses a 1 1/2" setting with 2 1/2" Pocket Hole Screws on the 1x1 use a 3/4" setting, with 1 1/4" Pocket Hole Screws to attach along with wood glue.
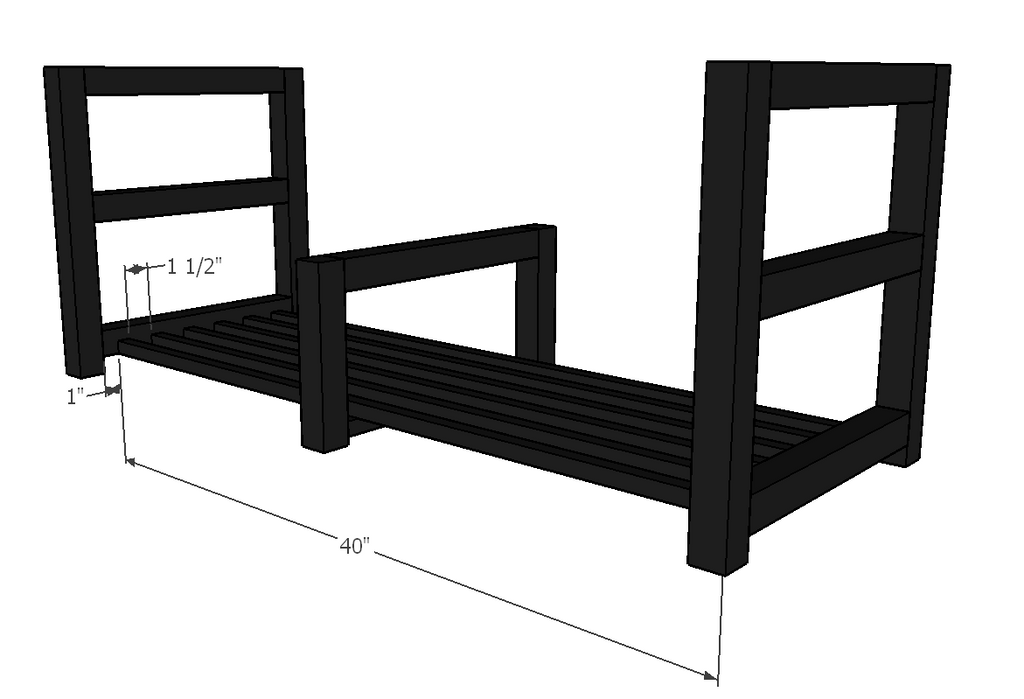
Step 6: Connect the 3 pieces together by attaching the 1x1 (40") support pieces to the two end pieces using a Kreg Jig K4 Pocket Hole System on a 3/4" setting, with 1 1/4" Pocket Hole Screws to attach along with wood glue.. Then screw in (40") support pieces into the middle support leg.
Step 7: Attach the bottom half of the chest to the assembled box with 2" wood screws.
Step 8: Assemble the storage chest top using a Kreg Jig K4 Pocket Hole System on a 3/4" setting, with 1 1/4" Pocket Hole Screws to attach along with wood glue, add lid support hinges underneath and then attach to the storage chest by attaching piano hinges to the back.

Let's take another look at Mandi's awesome build!


DIY Coffee Table Round-Up
Coffee Tables seem to be a very popular build within the woodworking community! So I wanted to round up some of my favorite unique designs. Hope you enjoy!

MODERN COFFEE TABLE - LoveCreateCelebrate
It was love at first sight when I first saw this modern coffee table! Lindi over at LoveCreateCelebrate definitely killed it with this design! and the color is to die for!
Check it Out Here

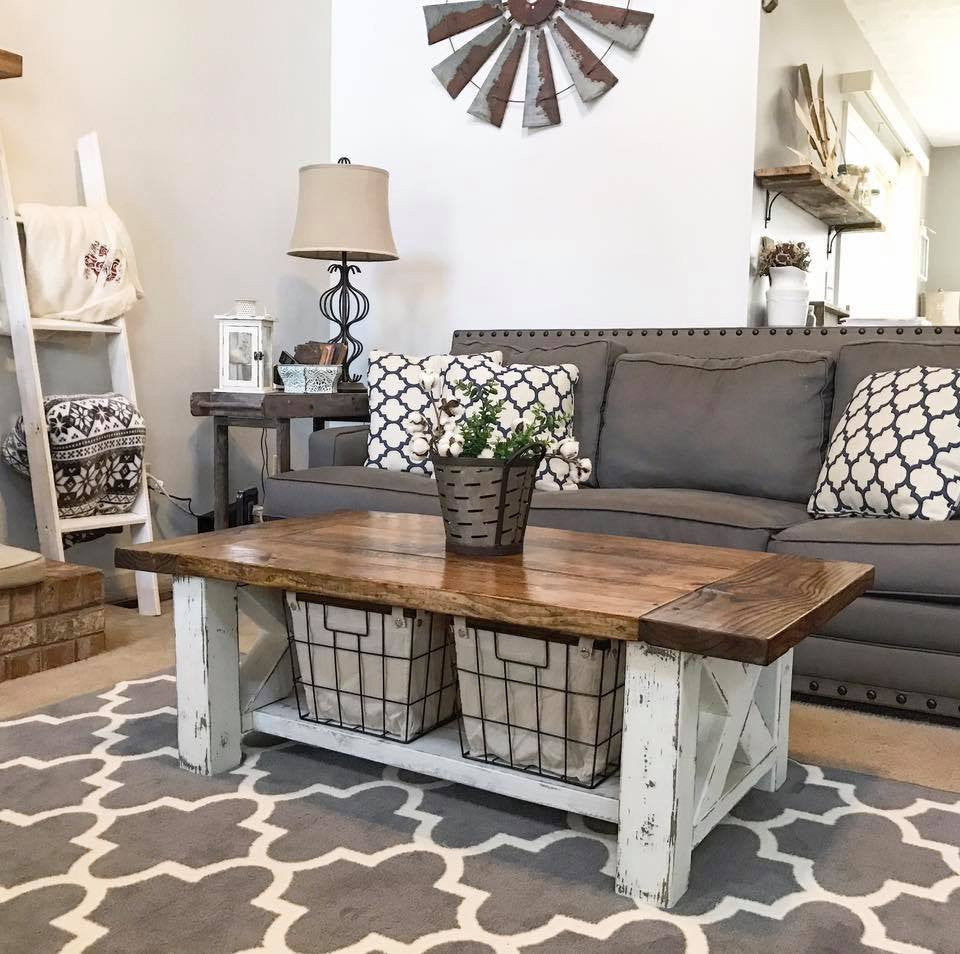
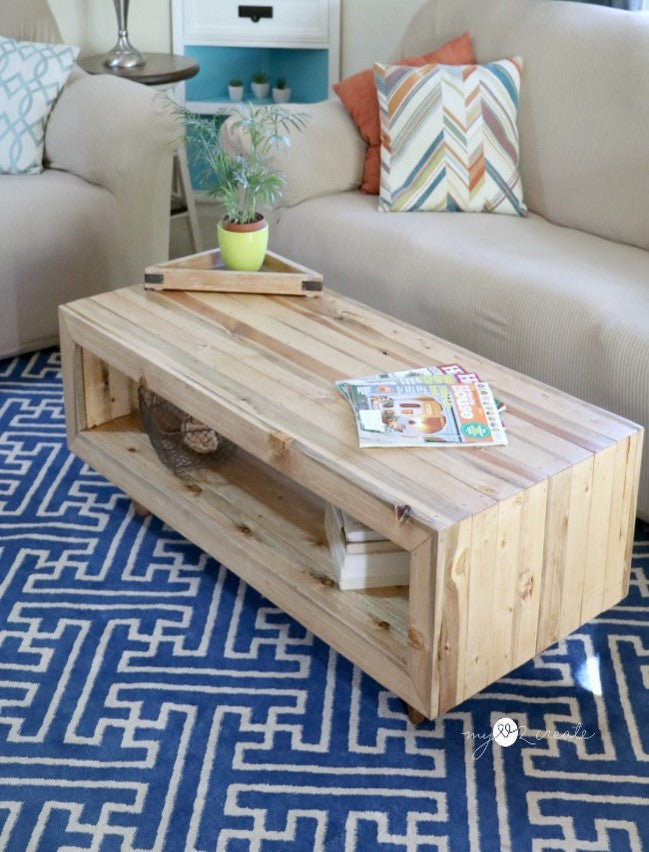
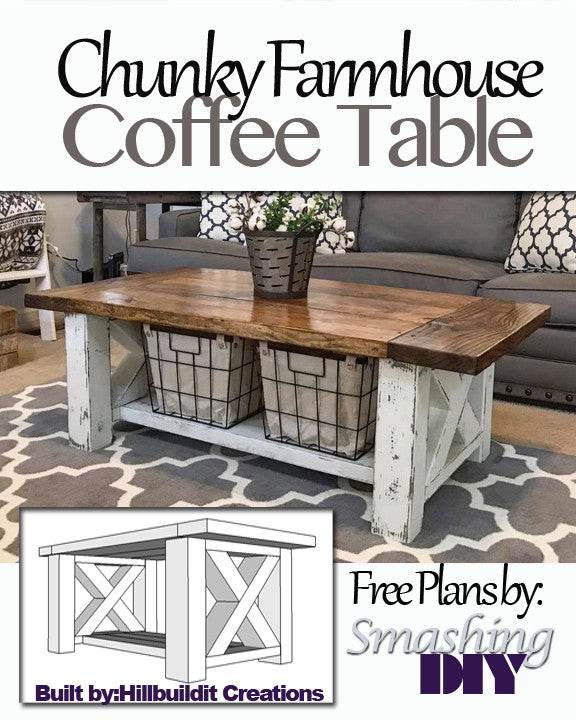
CHUNKY FARMHOUSE COFFEE TABLE - HillBuildItCreations
I love that this coffee table is so simple to make but still unique. And this staging looks like it's straight out of a magazine.
Free Plans Here

GEOMETRIC WOOD ART TABLE - DIYHUNTRESS
This coffee table is definitely the definition of unique! Sam aka DIYHUNTRESS really did a great job on this one!
Check it Out Here

Oakley Coffee Table - HANDMADE HAVEN
This was one of my favorite coffee table builds. I cant get enough of these turned legs.

Square Coffee Table - Shanty 2 Chic
I absolutely love this coffee table by Shanty- 2 - Chic! They always put out great stuff and this coffee table doesn't disappoint.
RECLAIMED WOOD COFFEE TABLE - MYLOVETOCREATE
Check out Mindi's cool coffee table over at MyLovetoCreate. Her design was made from reclaimed wood. Love the way it looks!

Tile Stenciled Hairpin Coffee Table - Handmade Haven
I loved using this tile stencil to create this fun tabletop, and these hairpin legs are to die for!

Concrete Paver Outdoor Coffee Table - Ana White
I think it's safe to say that all of Ana White's builds are golden but this coffee table was one of my favorites!

Outdoor Convertible Coffee Table/Bench - Industrial_Vibe
What's better than a coffee table? A coffee table that converts into an outdoor bench.

Balustrade Coffee Table - Thrifty and Chic
I absolutely love Alicia's version of the Balustrade coffee table. The color on this thing is perfect.
Hope you Enjoy!

Rustic V Wall Decor
As some of you know, I was chosen to be one of Weaber Lumber’s Winter Brand Reps, and I have enjoyed working with these awesome wall boards Weaber Lumber has provided me. Mainly because they come ready to rock and roll right out of the box.

To purchase some of your own weathered wall boards, CLICK HERE.


Attach the first 28" board and then the last 28" board to ensure you have a perfect rectangle, and then nail the rest of the boards down.
Once the 28" wall boards are nailed down, flip the piece and add the V braces.
Cut the first V wall board at a 35 degree angle, at 27 3/8" from side to side (longest side)

Be sure to make sure the board fits before gluing and nailing it down.

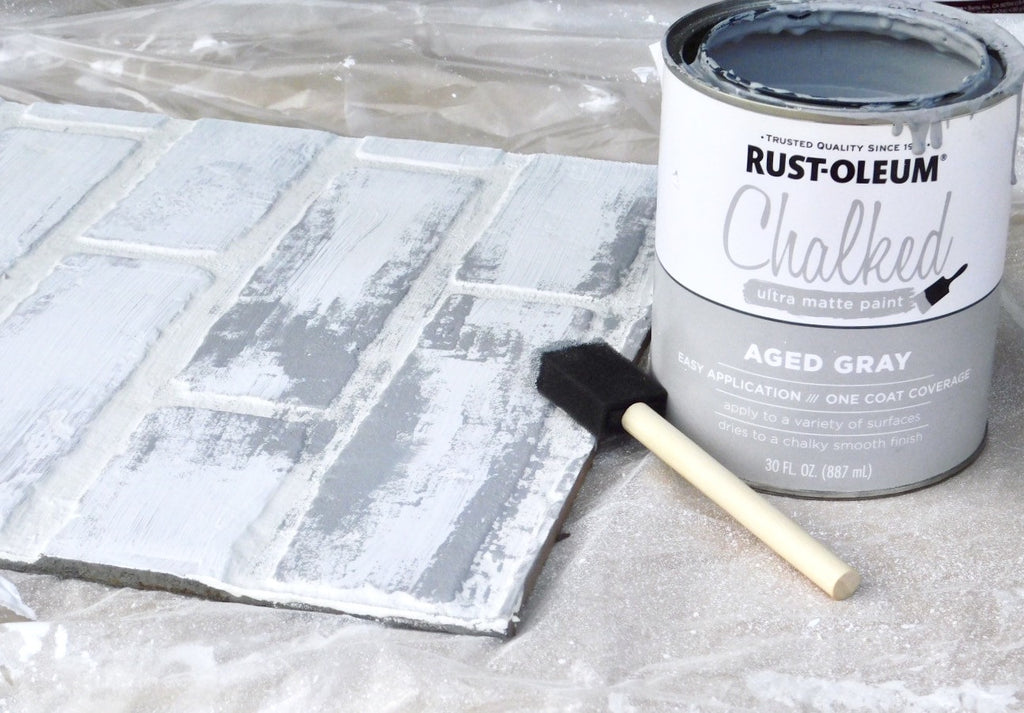
Make the same cut for the other side and you are finished assembling! After the wall piece was assembled I started painting it with Annie Sloan Chalk Paint in Pure White.

I personally loved using these weathered wall boards for this project because the texture of the wall boards gave the wall piece a rustic look without even having to sand it. I did a light first coat and then did a second coat to cover all of the brown.
Feel free to paint as desired, the textured boards will create the rustic look as you paint.
Once I finished painting I let it dry and she was ready to be hung! Or at least after I took this picture! :)

Perfect Wall Art or home decor to fill an empty wall or make a cabinet pop!


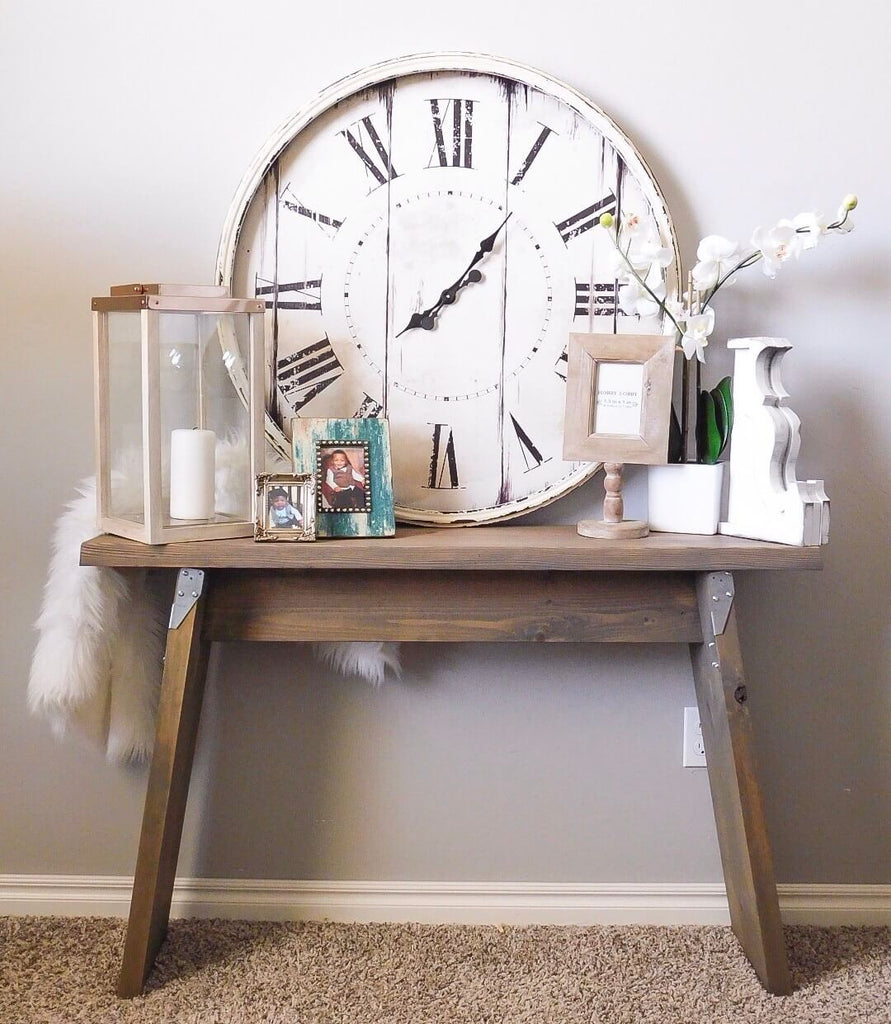
Industrial Console Table
This was a totally unexpected build, but I just love how it turned out! I had some left over boards from a project and saw a similar console on Pinterest and just had to re-enact it. Luckily it only took me about 30 min. to build. Doesn't get any better than that! Perfect for the beginner DIYer.
(There are some affiliate links in this post, meaning I get a small commission if you purchase through these links, at no cost to you. Click Here to read my full disclosure)
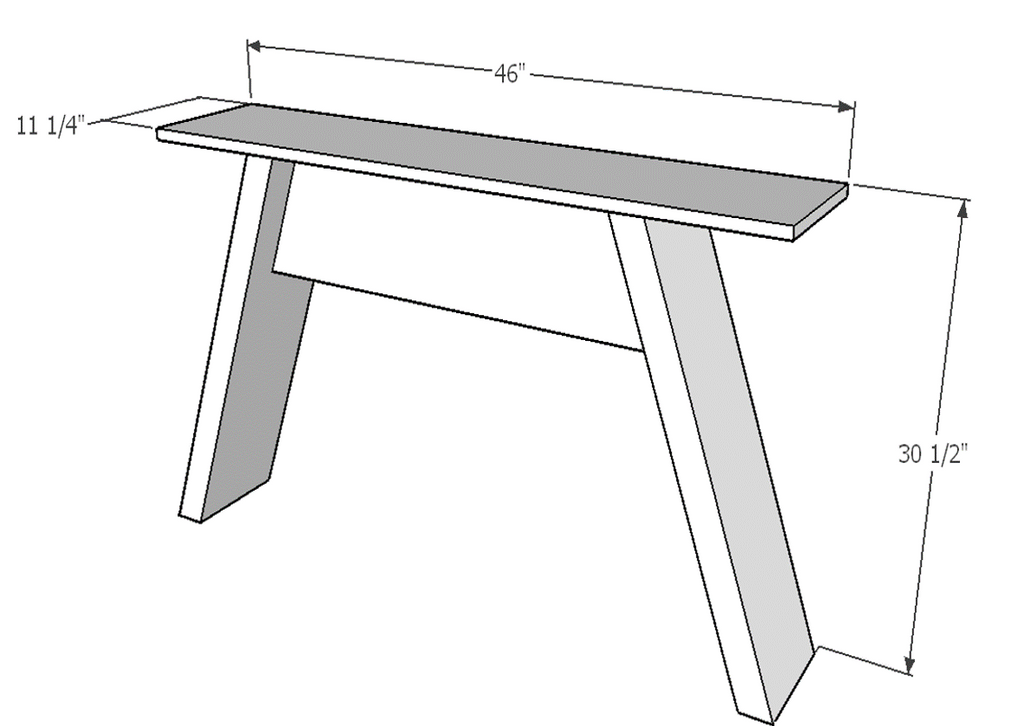
Dimensions
Materials List
1 - 2x10 @ 8ft
1- 2x6 @ 8ft
1- 2x12 @ 10ft
Cut List
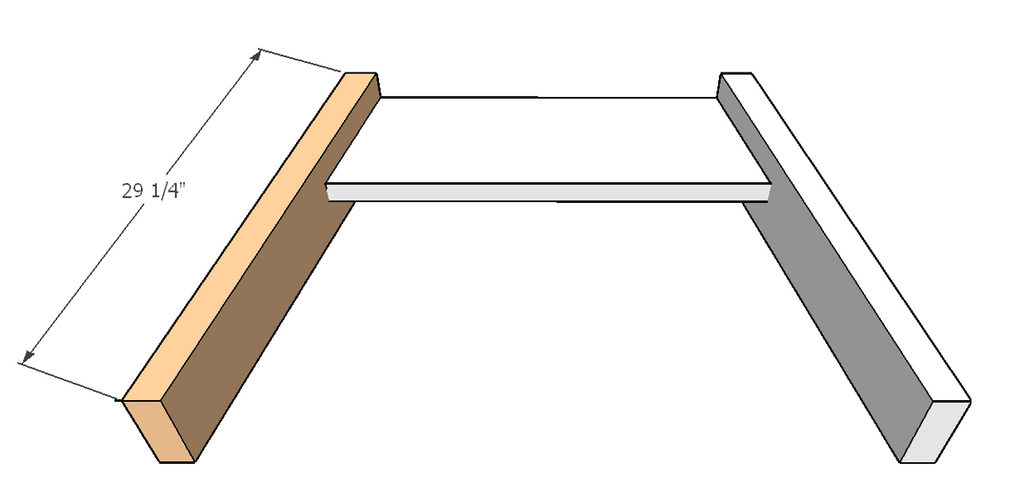
2 - 2x10 @ 29 1/4" (10" angle on both sides) cut like a rhombus
1 - 2x6 @ 32 1/2" (10" angle on both sides) cut like a trapezoid
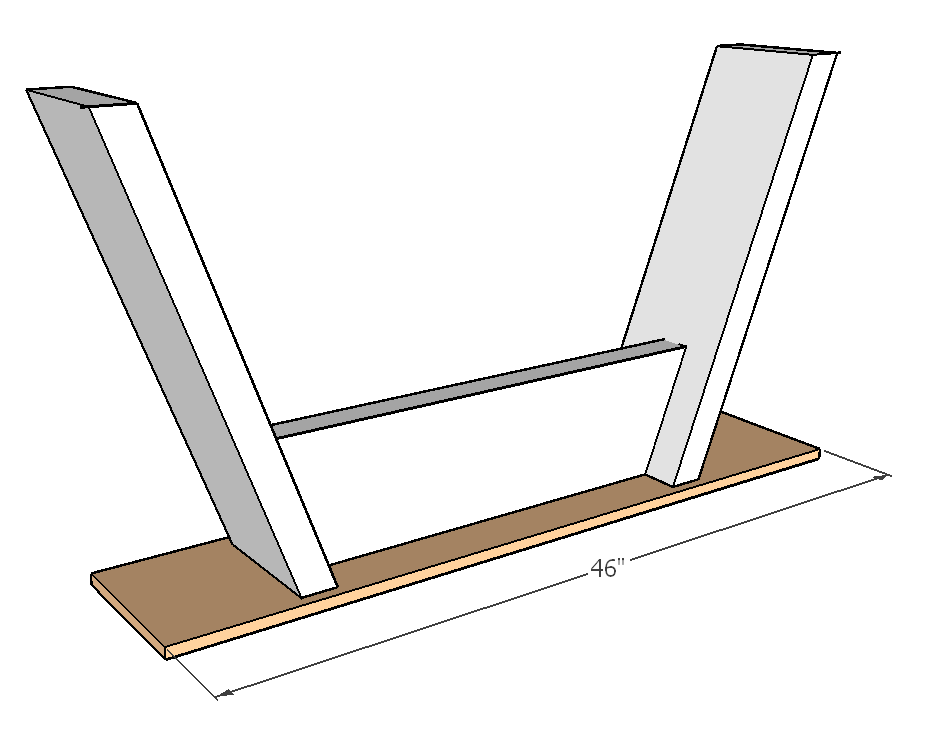
1 - 2x12 @ 46" (10" angle on both sides) cut like a trapezoid
Tools Used:
Kreg Jig K4 Pocket Hole System
Ryobi 18V Brushless Hammer Drill
Ryobi 15-Amp 10 in. Sliding Miter Saw
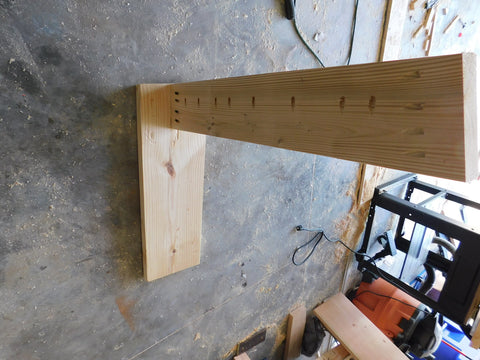
Step 1: Attach the middle 2x6 brace (32 1/2") to the side 2x10 (29 1/4") leg using a Kreg Jig K4 Pocket Hole System on a 1 1/2" setting, with 2 1/2" pocket hole screws to attach along with wood glue. The 2x6 should be flush with the top of the side leg and inset 3 3/4" from the front.
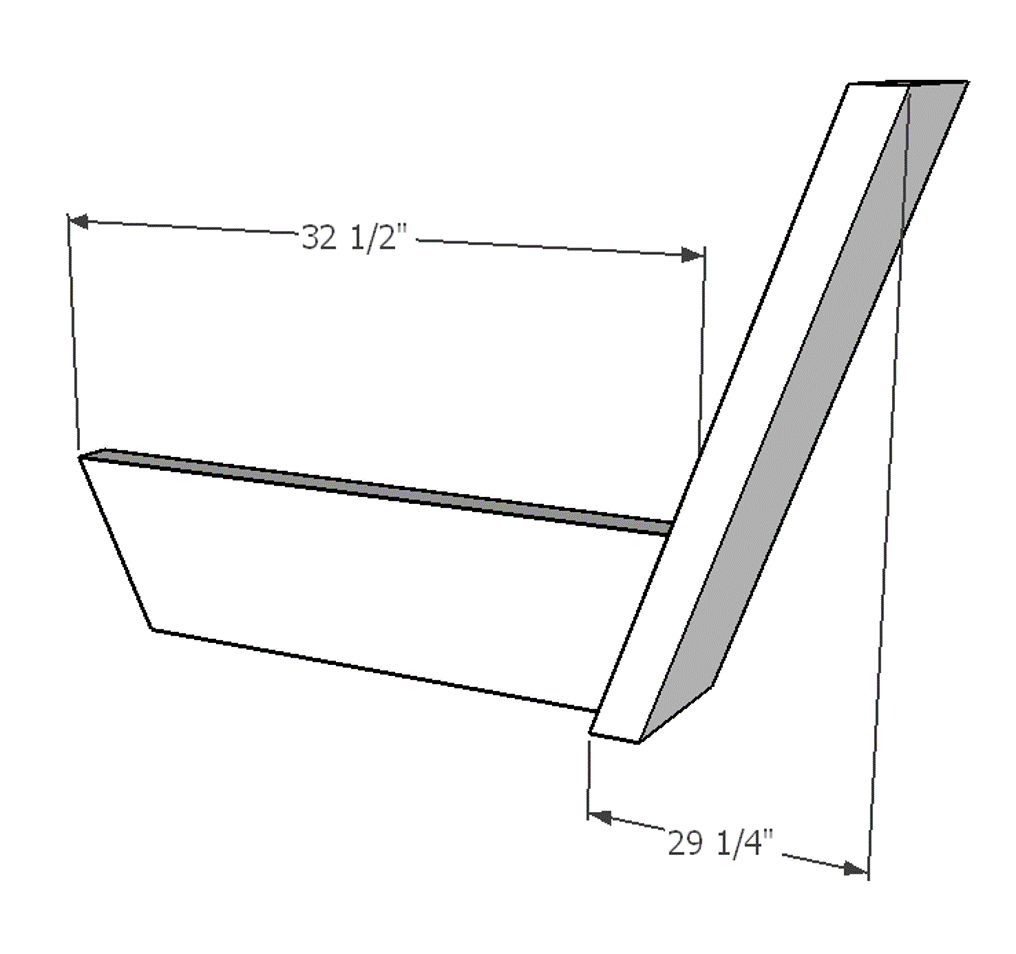
I used my Ryobi 15 Amp 12 in. Sliding Miter Saw with Laser to cut the middle 2x6 brace which will be cut at an angle of 10 degrees using the bottom miter scale. The side 2x10 leg will be cut at an angle of 10 degrees by tilting the blade to the desired angle.

 After cutting the wood I used my Kreg 3/4 HP Electric Foreman Pocket Hole Machine to make Kreg Holes in my 2x6 and 2x10 board. I put the fence setting in between 3/4" and 1 1/2". I'm not sure how that translates using a regular K4 machine, but I would think that using a 1 1/2" setting would be fine, but again I'm not sure.
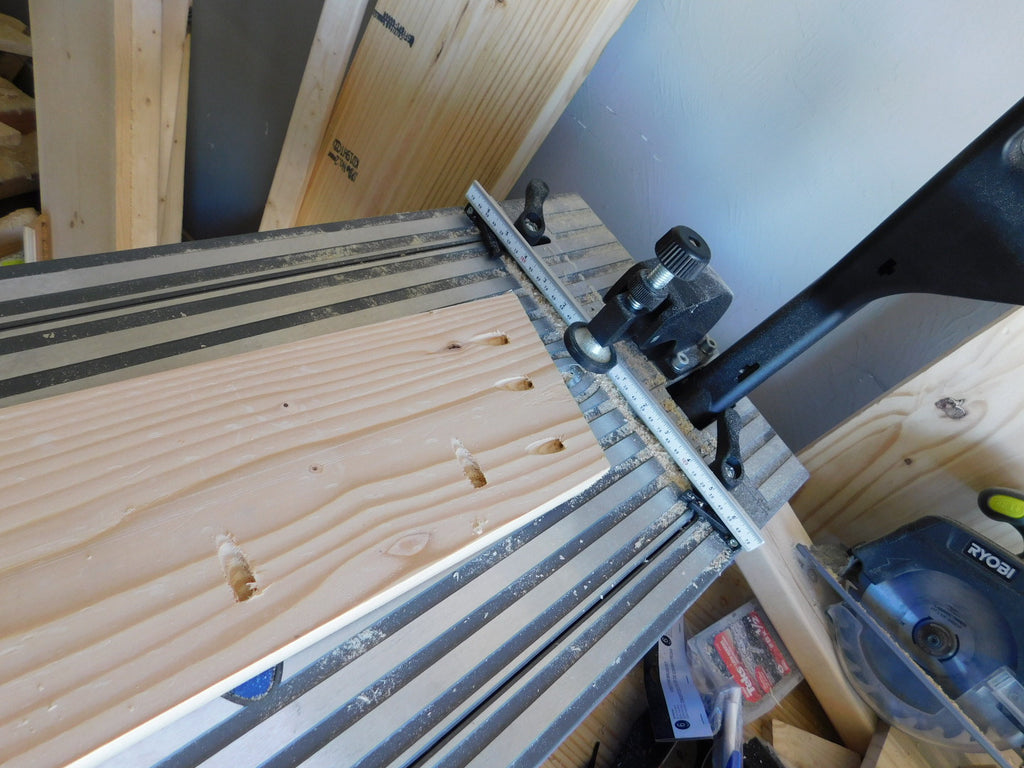
I screwed 4 holes on the sides and 8 on the top for attaching the top later. I also put one pocket hole on the two side legs in the back for securing the top. (Picture Below)
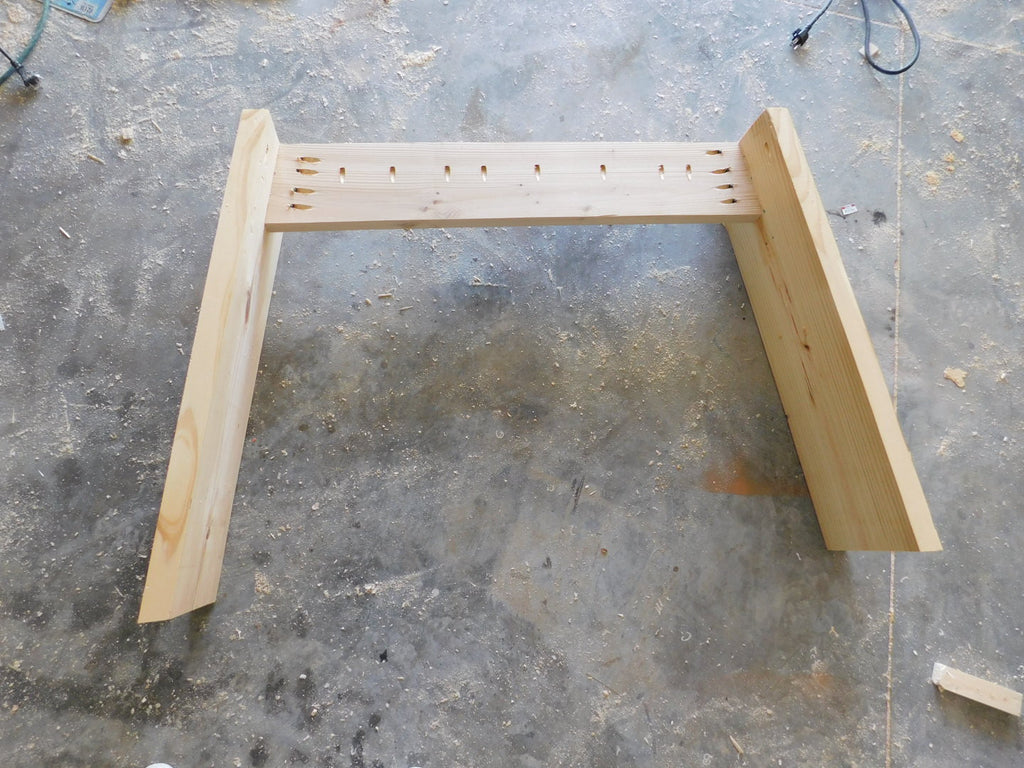
Step 2: Attach the other side 2x10 (29 1/4") leg using a Kreg Jig K4 Pocket Hole System on a 1 1/2" setting, with 2 1/2" pocket hole screws to attach along with wood glue. The 2x6 should be flush with the top of the side leg and inset 3 3/4" from the front.
Step 3: Attach the console table top 2x12 (46") using the pre-drilled pocket holes and 2 1/2" pocket hole screws to attach along with wood glue. I placed my top so that it hangs 1 1/2" from the base. Table top angles will be cut by the tilting the blade.

and ladies and gentlemen! Your done! Time for a finish and some hardware.
I have been seeing a couple people use Rust-Oleum's Varathane 1 qt. 3X Briarsmoke Premium Wood Stain and I have been dying to get my hands on it! I really love this color.
Once I finished staining the console I added these industrial pieces I had laying around, I believe I got them from Lowes. Be creative!
Lets check it out again!

Outdoor Convertible Coffee Table and Bench
A convertible coffee table that doubles as a bench? I can't believe what I'm seeing.
A outdoor convertible table isn't something you see often, so this DIY convertible coffee table caught my attention right away. For all who haven't heard there is an Instagram Builders Challenge hosted on Instagram every so often called the IG Builders challenge.
I participated in it last year and it was super fun. Check out my post here to read about my IG entry in last years challenge.
So what exactly is the IG Builders challenge? There is one plan that is released on a particular date and whoever wants to participate has 3 weeks to complete the build. Modifications and creativity is highly encouraged so long as you can tell that the build was created from the original plan. This year the plan was created by Ana White and she was one of the main judges as well. Here is the plan for the IGBC3 challenge.
There were some amazing builds that were presented and today I will be sharing the building plans for one of my favorite builds by Shawn (@industrial_vibe). It was no surprise that his build received 2nd runner up in the challenge. That's pretty good being that there were over 130 other builds!

Shawn made his outdoor convertible coffee table bench so that it could be converted into a coffee table!. Now isn't that neat? Thanks to his cool design and my 3D plan magic. You can now build it too.

(There are some affiliate links in this post, meaning I get a small commission if you purchase through these links, at no cost to you. Click Here to read my full disclosure)
Dimensions:

Materials List:
8 - 2x4s @ 8ft
1 - 2x2s @ 8ft
2 - 1x8s @ 8ft
Tools Used:
Kreg Jig K4 Pocket Hole System
Ryobi 18V Brushless Hammer Drill
Step 1: Attach the top middle 2x4 brace (41") and the bottom middle 2x2 (41") brace to the side 2x4s (16 1/2") using a Kreg Jig K4 Pocket Hole System on a 1 1/2" setting, with 2 1/2" Pocket Hole Screws to attach along with wood glue. There should be a 3/4" spacing at the top of the seat back.

Step 2: Assemble the side arms by attaching the top side 2x4 brace (16 1/2") and the front side 2x4 (5 1/2") brace together using a Kreg Jig K4 Pocket Hole System on a 1 1/2" setting, with 2 1/2" Pocket Hole Screws to attach along with wood glue. Repeat this step to create two side arms.

Step 3: Attach the bottom side 2x4 brace (15") to finish the side arm using a Kreg Jig K4 Pocket Hole System on a 1 1/2" setting, with 2 1/2" Pocket Hole Screws to attach along with wood glue. Repeat this step for both side arms.

Step 4: Attach the two side arms to the top bench back support using a Kreg Jig K4 Pocket Hole System on a 1 1/2" setting, with 2 1/2" Pocket Hole Screws to attach along with wood glue.

Step 5: Attach the two 1x8 (48") bench seat supports to the top bench using wood screws/brad nails and wood glue. The 1x6 boards will be flush with the outside of the bench.

Step 6: Attach the middle 1x3 (48") bench seat support to the top bench using wood screws/brad nails and wood glue. There should be a spacing of 1/4 of an inch in between boards.

Step 7: Assemble bottom half of the bench by attaching the top middle 2x4 brace (41") and the bottom middle 2x4 (41") brace to the side 2x4s (16 1/2") using a Kreg Jig K4 Pocket Hole System on a 1 1/2" setting, with 2 1/2" Pocket Hole Screws to attach along with wood glue.The bottom 2x4 should be placed faced down instead of right side up for the bottom bench half. The top should be inset by 3/4" like the top bench.

Step 8 : Assemble the side arms for the bottom half of the bench by attaching the top side 2x4 brace (15") and the front side 2x4 (15") brace to the (17 1/4") 2x4 using a Kreg Jig K4 Pocket Hole System on a 1 1/2" setting, with 2 1/2" Pocket Hole Screws to attach along with wood glue. Repeat this step to create two side arms.

Step 9: Attach the two side arms to the bottom bench back support using a Kreg Jig K4 Pocket Hole System on a 1 1/2" setting, with 2 1/2" Pocket Hole Screws to attach along with wood glue.

Step 10: Attach the (41") 2x4 to the existing bottom bench using a Kreg Jig K4 Pocket Hole System on a 1 1/2" setting, with 2 1/2" Pocket Hole Screws to attach along with wood glue.The 41" 2x4 should be inset 1 1/2" from the outside of the bench.

Step 11: Attach the (9 1/2") 2x4 braces to the existing bottom bench using a Kreg Jig K4 Pocket Hole System on a 1 1/2" setting, with 2 1/2" Pocket Hole Screws to attach along with wood glue.

Step 12: Attach the (48") 1x8 boards to the bottom bench using wood screws and wood glue.

Step 13: Attach the (48") 1x3 board2 to the bottom bench using wood screws and wood glue. There should be a 1/4" spacing in between boards.

Step 14: HERE IS MY SPECIAL CHALLENGE!
Use your creativity to create your own design for the backs of your convertible bench! You've got this!
Step 15: Add hardware to combine top and bottom bench together


Lets check out Shawn's Convertible Coffee Table and Bench one last time!


Entry Way Bench
So excited to share the plans for my entry way bench today! Such a fun piece to put in your Entry Way. The best part is you can build this fun piece for only $30 in lumber. You may be able to build it for less if you have some scraps lying around.

I have a SUPER small entry way in my house, but I couldn't deal with it being empty. This little bench fits perfectly in my little entry way space.
(There are some affiliate links in this post, meaning I get a small commission if you purchase through these links, at no cost to you. Click Here to read my full disclosure)
Dimensions

Materials List
2 - 1x6 @ 8ft
1 - 1x4 @ 6ft
2 - 2x4 @ 8ft
2 ½ Pocket Hole Screws
2" Screws
Cut List
2 – 2x4s @ 3ft
2 – 2x4s @ 17 5/8
4 – 2x4s @ 12 3/8"
2 – 1x4 @ 16 ¼"
1- 1x4 @ 26 5/8"
6 – 1x6 @ 28"
Step 1: Attach the (17 5/8") 2x4 leg to the (36") 2x4 leg by screwing the (12 3/8) 2x4 leg to them both using a Kreg Jig K4 Pocket Hole System on a 1 1/2" setting, with 2 1/2" pocket hole screws to attach along with wood glue. Repeat this step so that you have two legs.

Step 2: Attach the (12 3/8") bottom 2x4 braces to the existing legs using a Kreg Jig K4 Pocket Hole System on a 1 1/2" setting, with 2 1/2" pocket hole screws to attach along with wood glue. Do this step for both legs.

Step 3: Add (28") 1x6 legs to the bottom of the chair legs using 2" wood screws and wood glue. The 1x6 should hang off the edge of the legs by a 1/2". The 1st 1x6 should be flush with the back. Leave a 1/8" spacing between boards.

Step 4: Add (28") 1x6 legs to the top of the chair legs using 2" wood screws and wood glue. The 1x6 should hang off the edge of the legs by a 1/2". Leave a 1/8" spacing between boards.

Step 5: Add (16 1/4") 1x4 side braces under the 1x6 boards into the 2x4 legs on both sides using 2" wood screws and wood glue

Step 6: Add (26 5/8") 1x4 front brace under the 1x6 boards into the 2x4 legs using 2" wood screws and wood glue.

and there it goes. Easy entry bench for any spall space in your home.

YOU ALSO MAY LIKE


Handmade Corbel using Ryobi Bandsaw
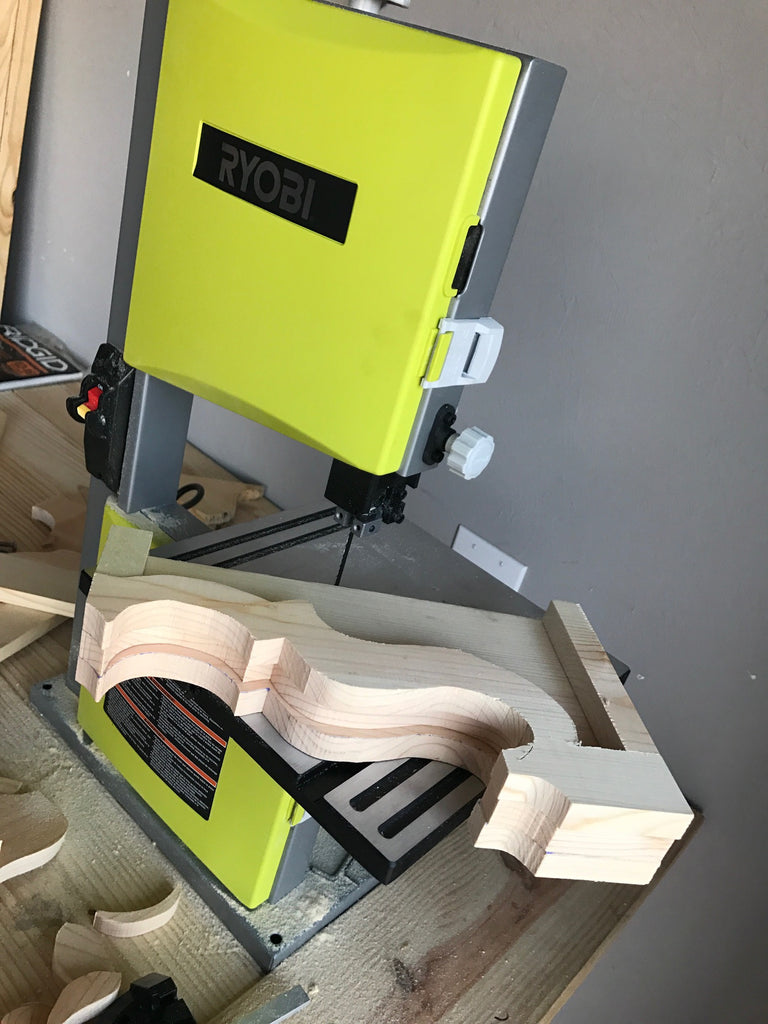
I have seen a lot of talk and posts about corbels and thought it would be the perfect starter project for my new band saw.
I have a 14" Rikon bandsaw and I know what you're thinking; "What do you need with a little 9" inch bandsaw when you have a massive Rikon?" (I have been asked) Well although the Rikon 14" is an awesome bandsaw, I am finding that it is actually easier to do smaller projects on the Ryobi bandsaw; mainly because its easier to maneuver smaller wood because of the size. So if you are a DIYer who loves to make smaller projects such as this one. This Ryobi 2.5 Amp 9 in. Band Saw is definitely the way to go!
(There are some affiliate links in this post, meaning I get a small commission if you purchase through these links, at no cost to you. Click Here to read my full disclosure)
Now lets get to it!
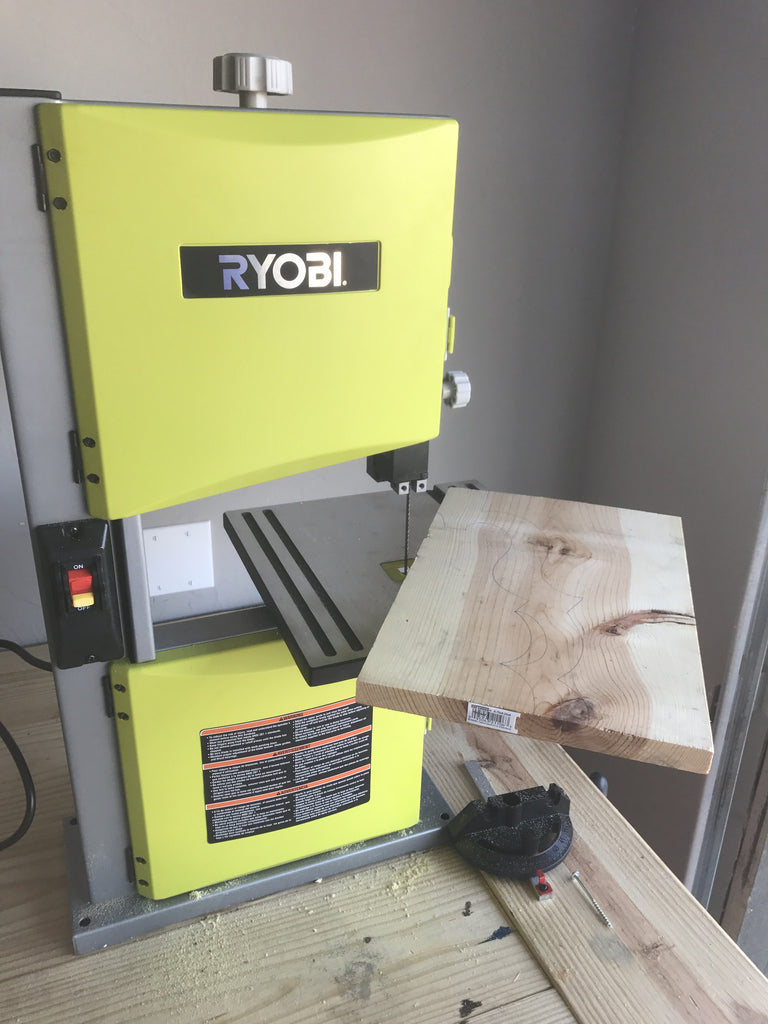
First I started of with a cut down 1 x 12 board.
I made this template for anyone who isn't confident in their scribble skills.
After tracing the template on the 1x12 board, I began cutting the outside pieces for the corbel.
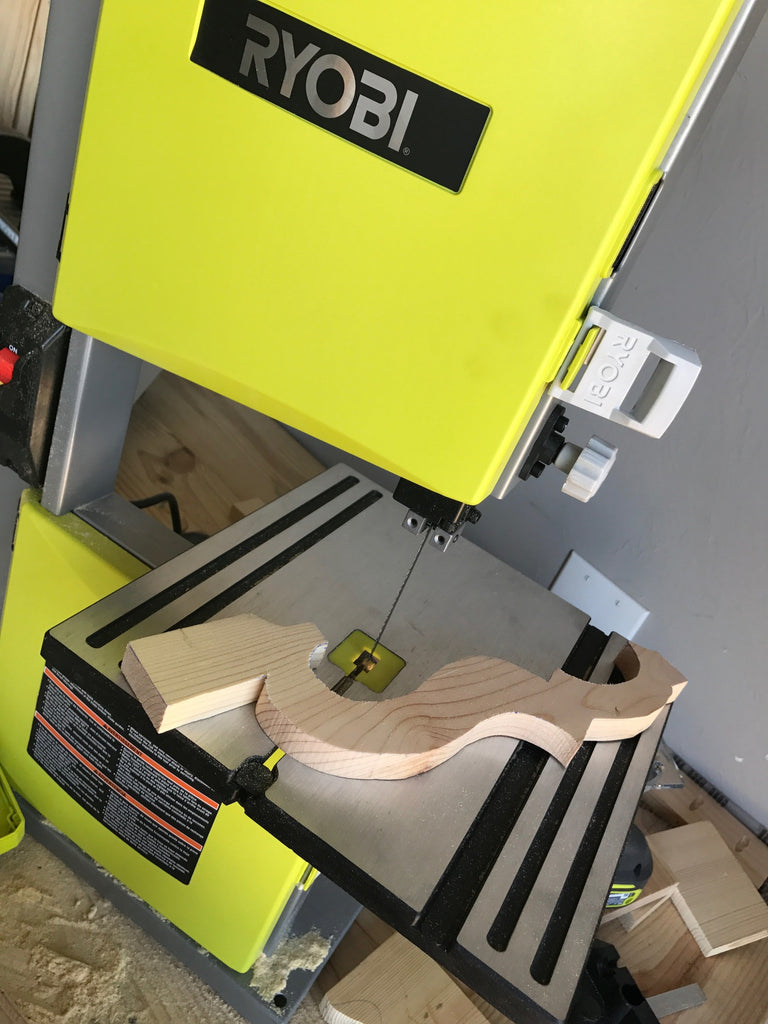
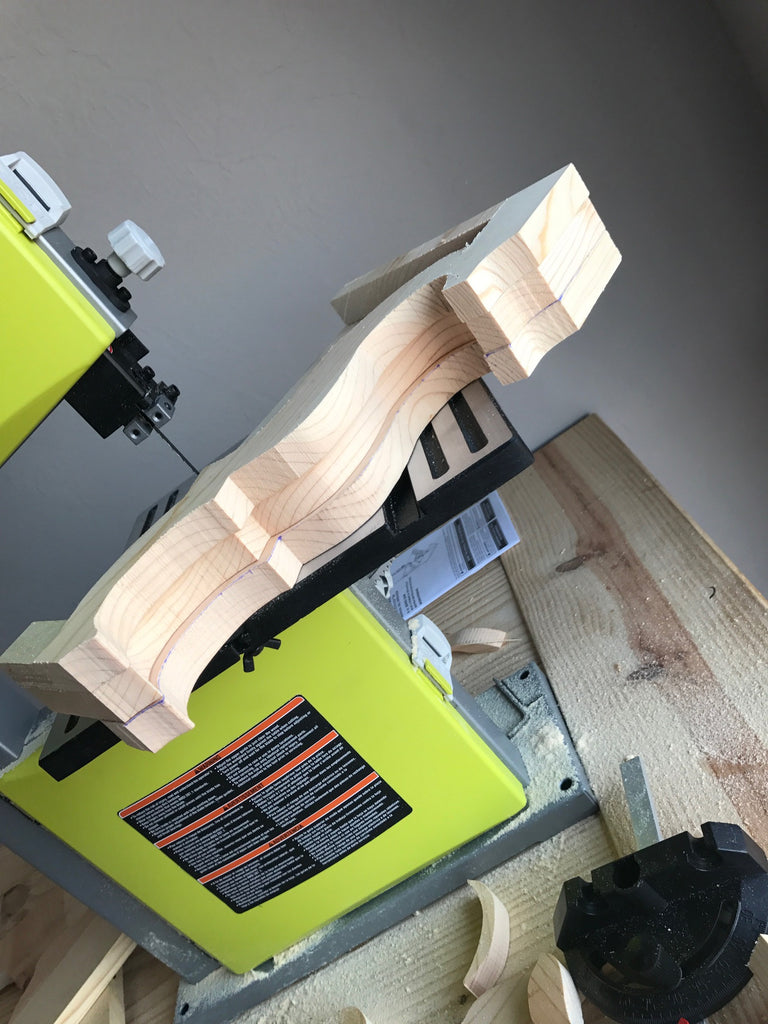
Don't feel like you have to try and cut on the template line in one straight pass, you don't want to bend the blade too much;make sure you make relief cuts. Here's a picture of how I made my cuts.
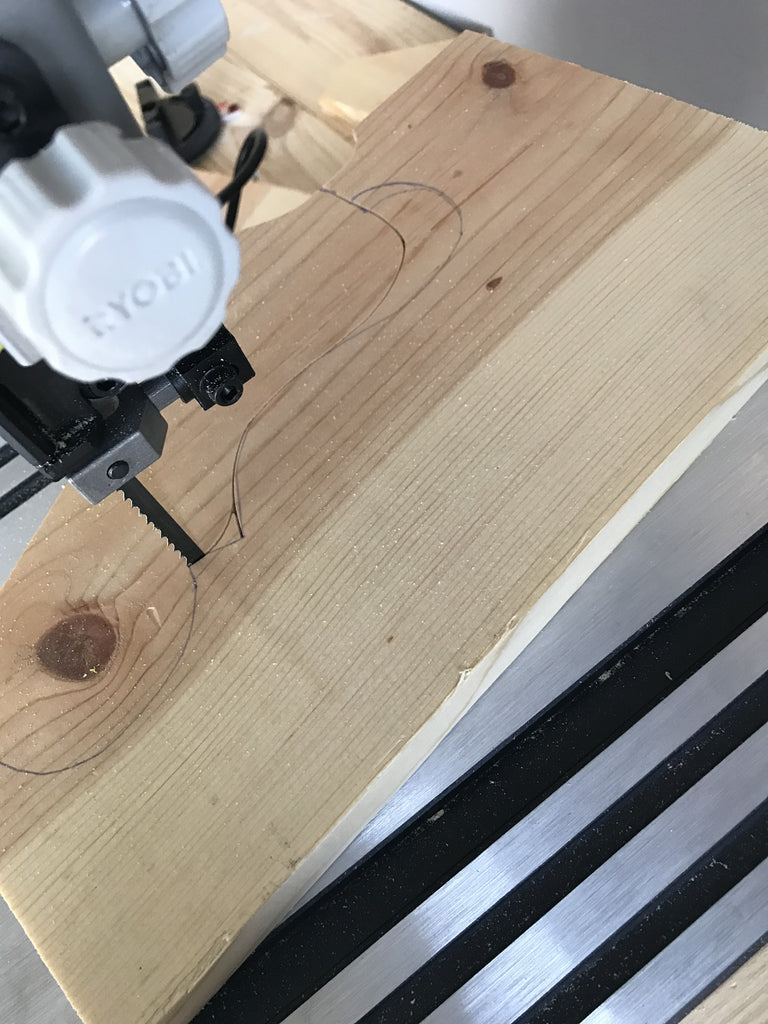
I made sure not to force the bandsaw when making my cuts, I curved around the sharp corners. Then I went back and cut the sharp corners. It makes life much easier and you don't risk the blade popping off. (Speaking from experience)
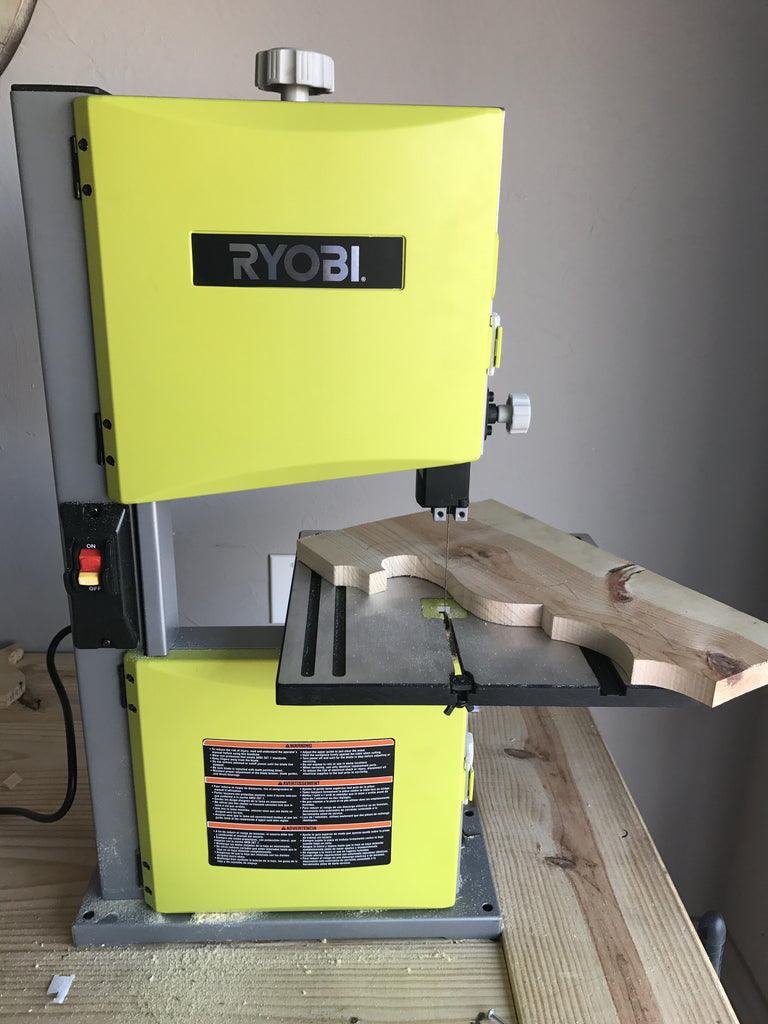
Once I finished cutting the two outer pieces I cut the inside piece. Trace your pattern or use the template pattern provided and cut away.
The middle piece should be about an inch shorter than the two outer pieces to give it a nice decorative look.
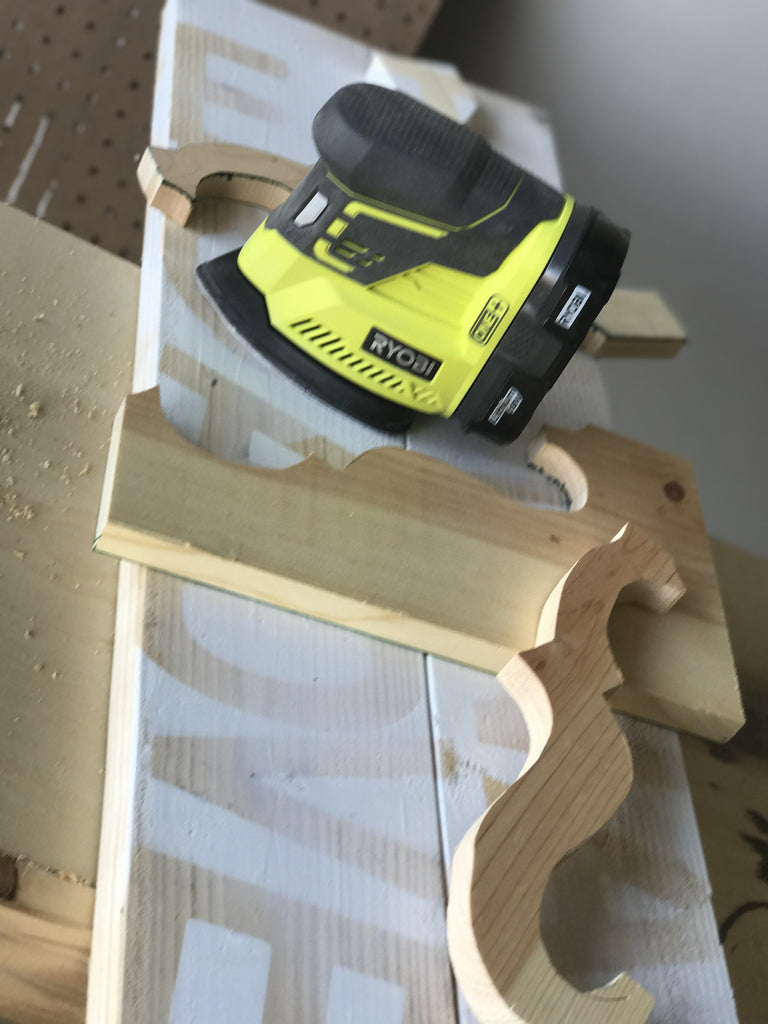
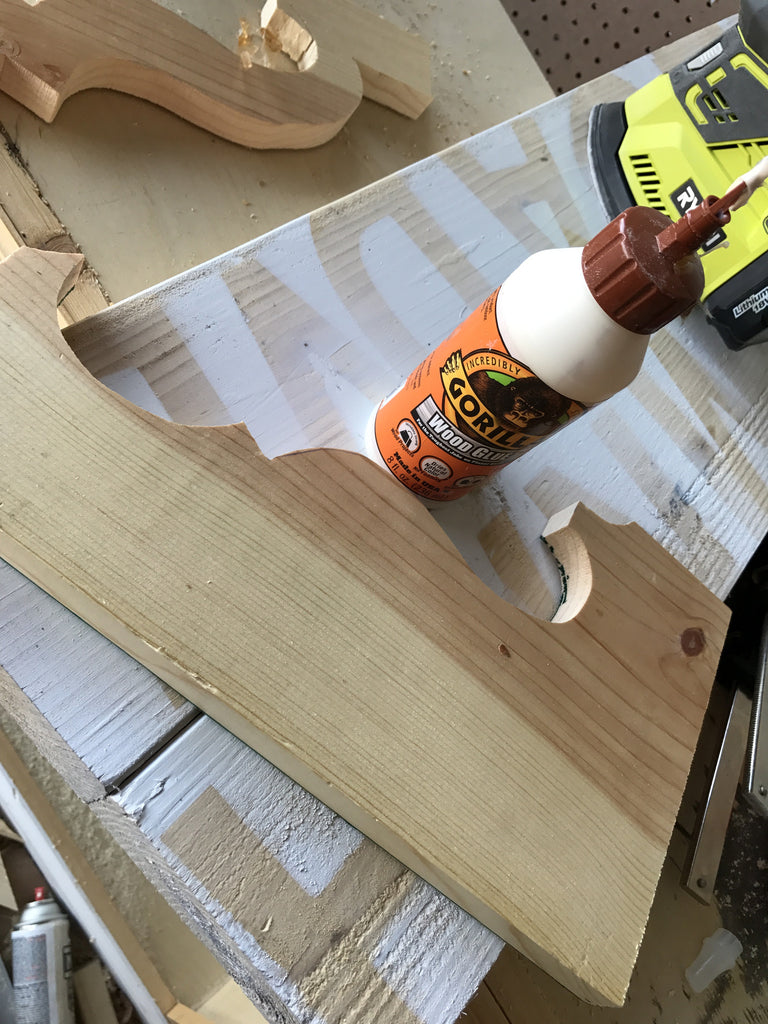 After cutting out the pieces I used my Corner Cat Sander RYOBI sent me to sand this baby down. And then glued the 3 pieces together with some good ole Gorilla Glue and secured using my Ryobi Brad nailer with some finish nails.

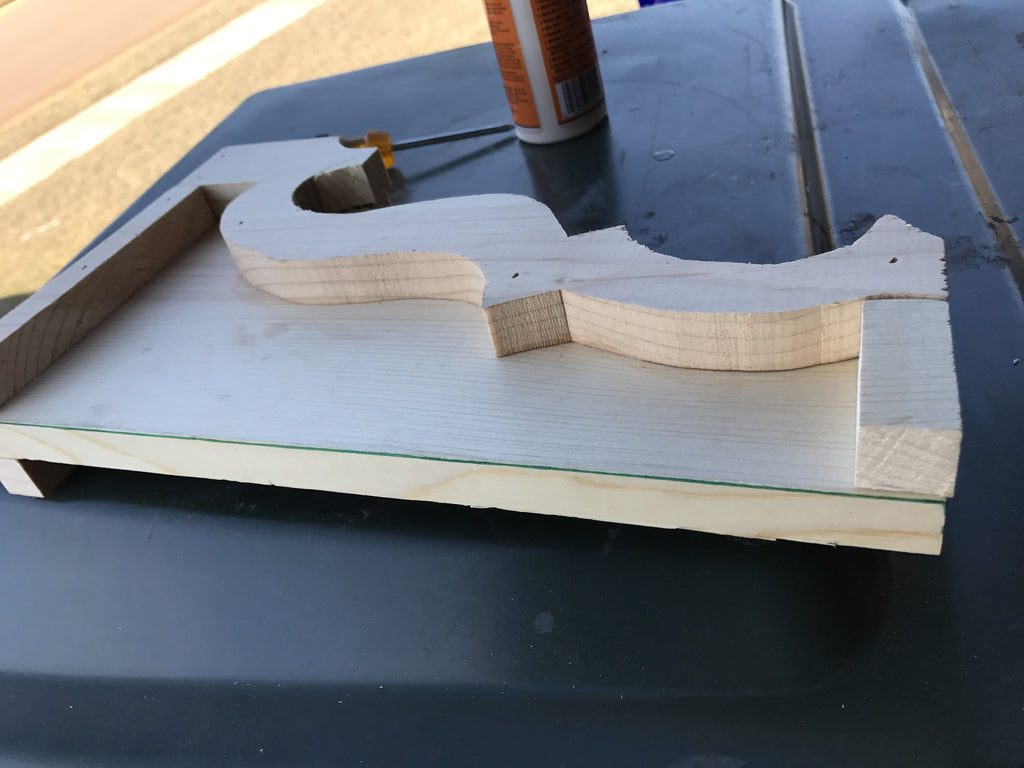
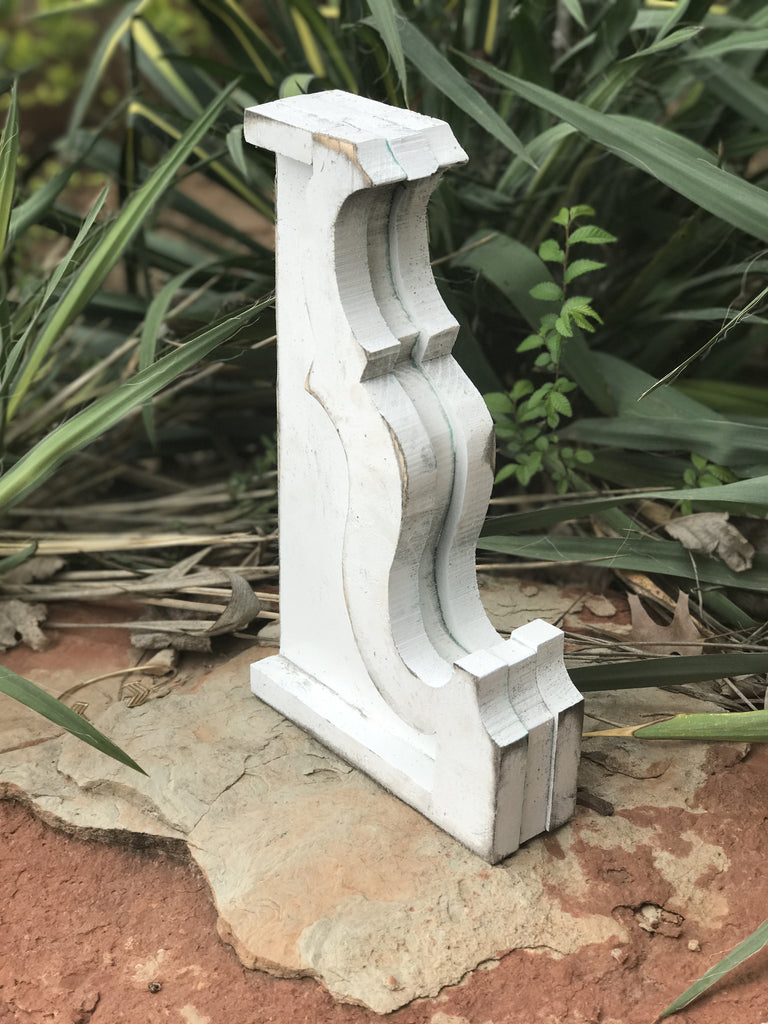
After gluing and nailing the 3 pieces together I added 1 inch pieces to both the top and bottom on both sides of the corbel to finish the look, securing them with both glue and finish nails.
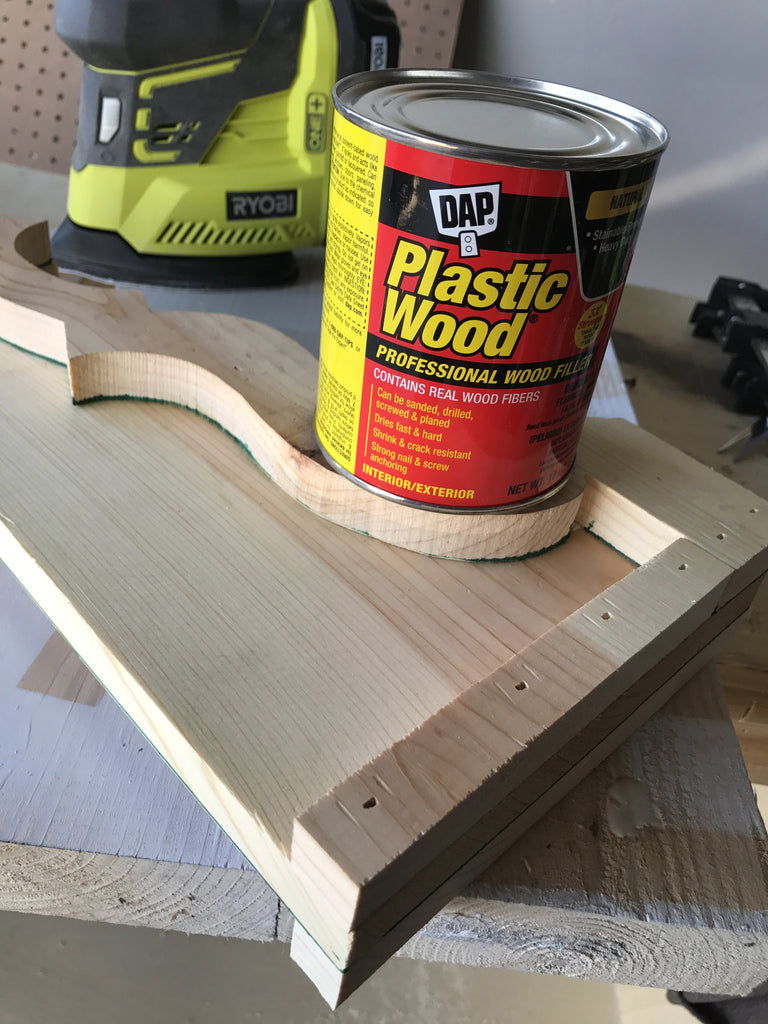 I used dap wood filler to fill in the holes. It is my go to! Definitely check it out! P.S don't use a dark green sharpie to make your lines haha luckily I'm painting over it!
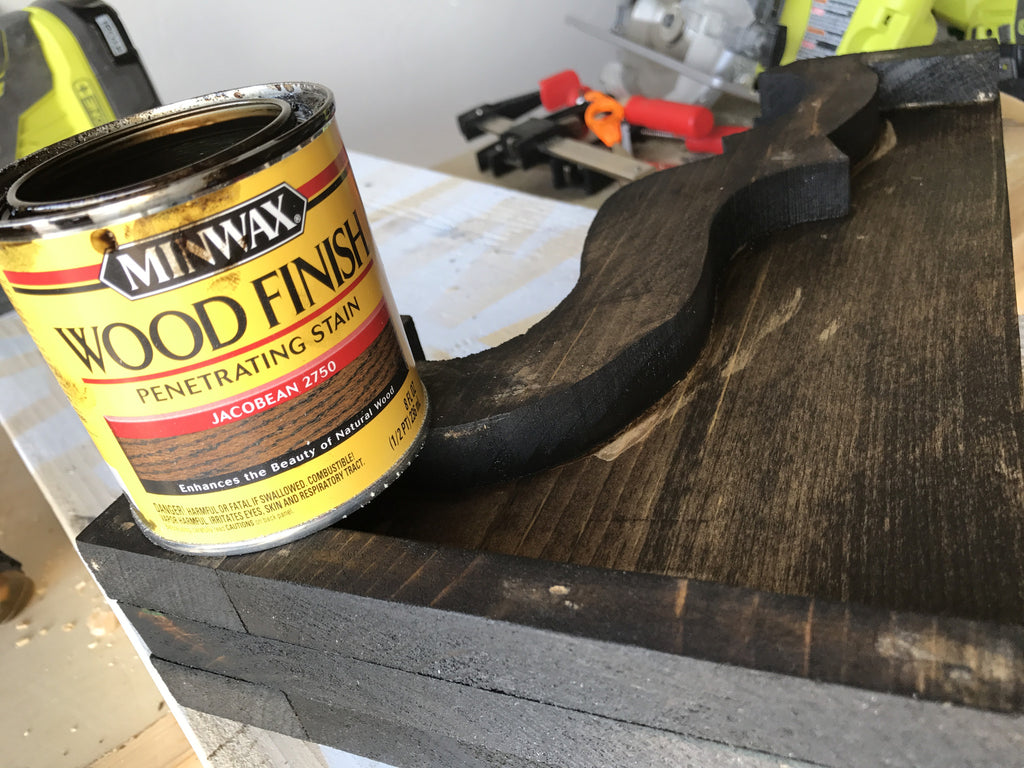
Now for the finish. First I stained the corbel with Minwax Jacobean. When your gluing your corbel make sure you wipe off the glue well or else you will be able to tell when you stain. haha OOPs. I let that dry for the day..
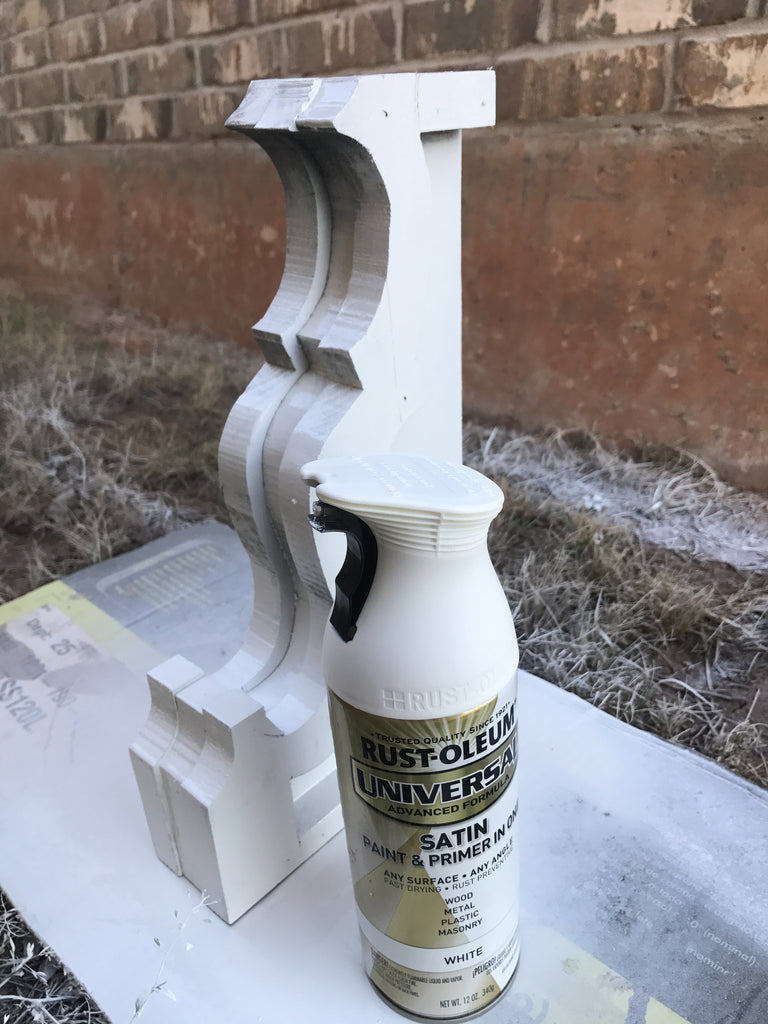
Once the stain was dry I sprayed over it with RUST-OLEUM Satin Paint and Primer, this stuff dries pretty quickly. Once dry I hand sanded the corbel with 220-grit sand paper to give it a antique look and that completes it! This was a super quick and easy project!
Don't forget to enter your projects on RYOBI Nation in Ryobi's contests for a chance to win $500 in power tools!
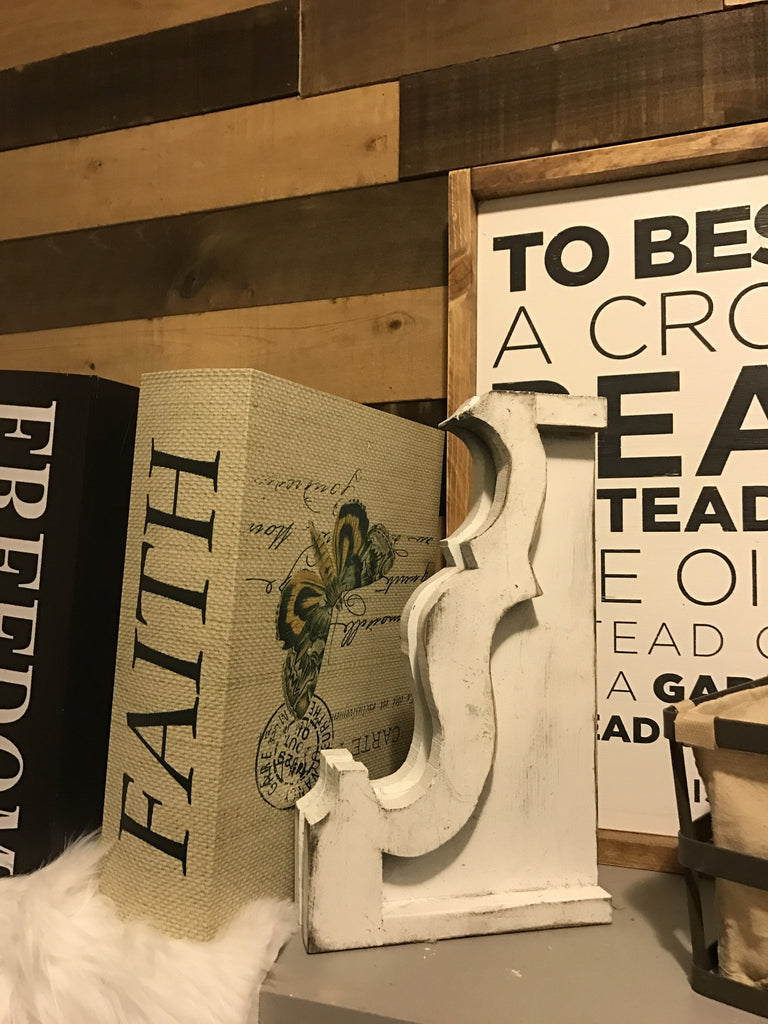
Be sure to tag me @smashingdiy on Insta in your own corbel creations.
Happy DIYing

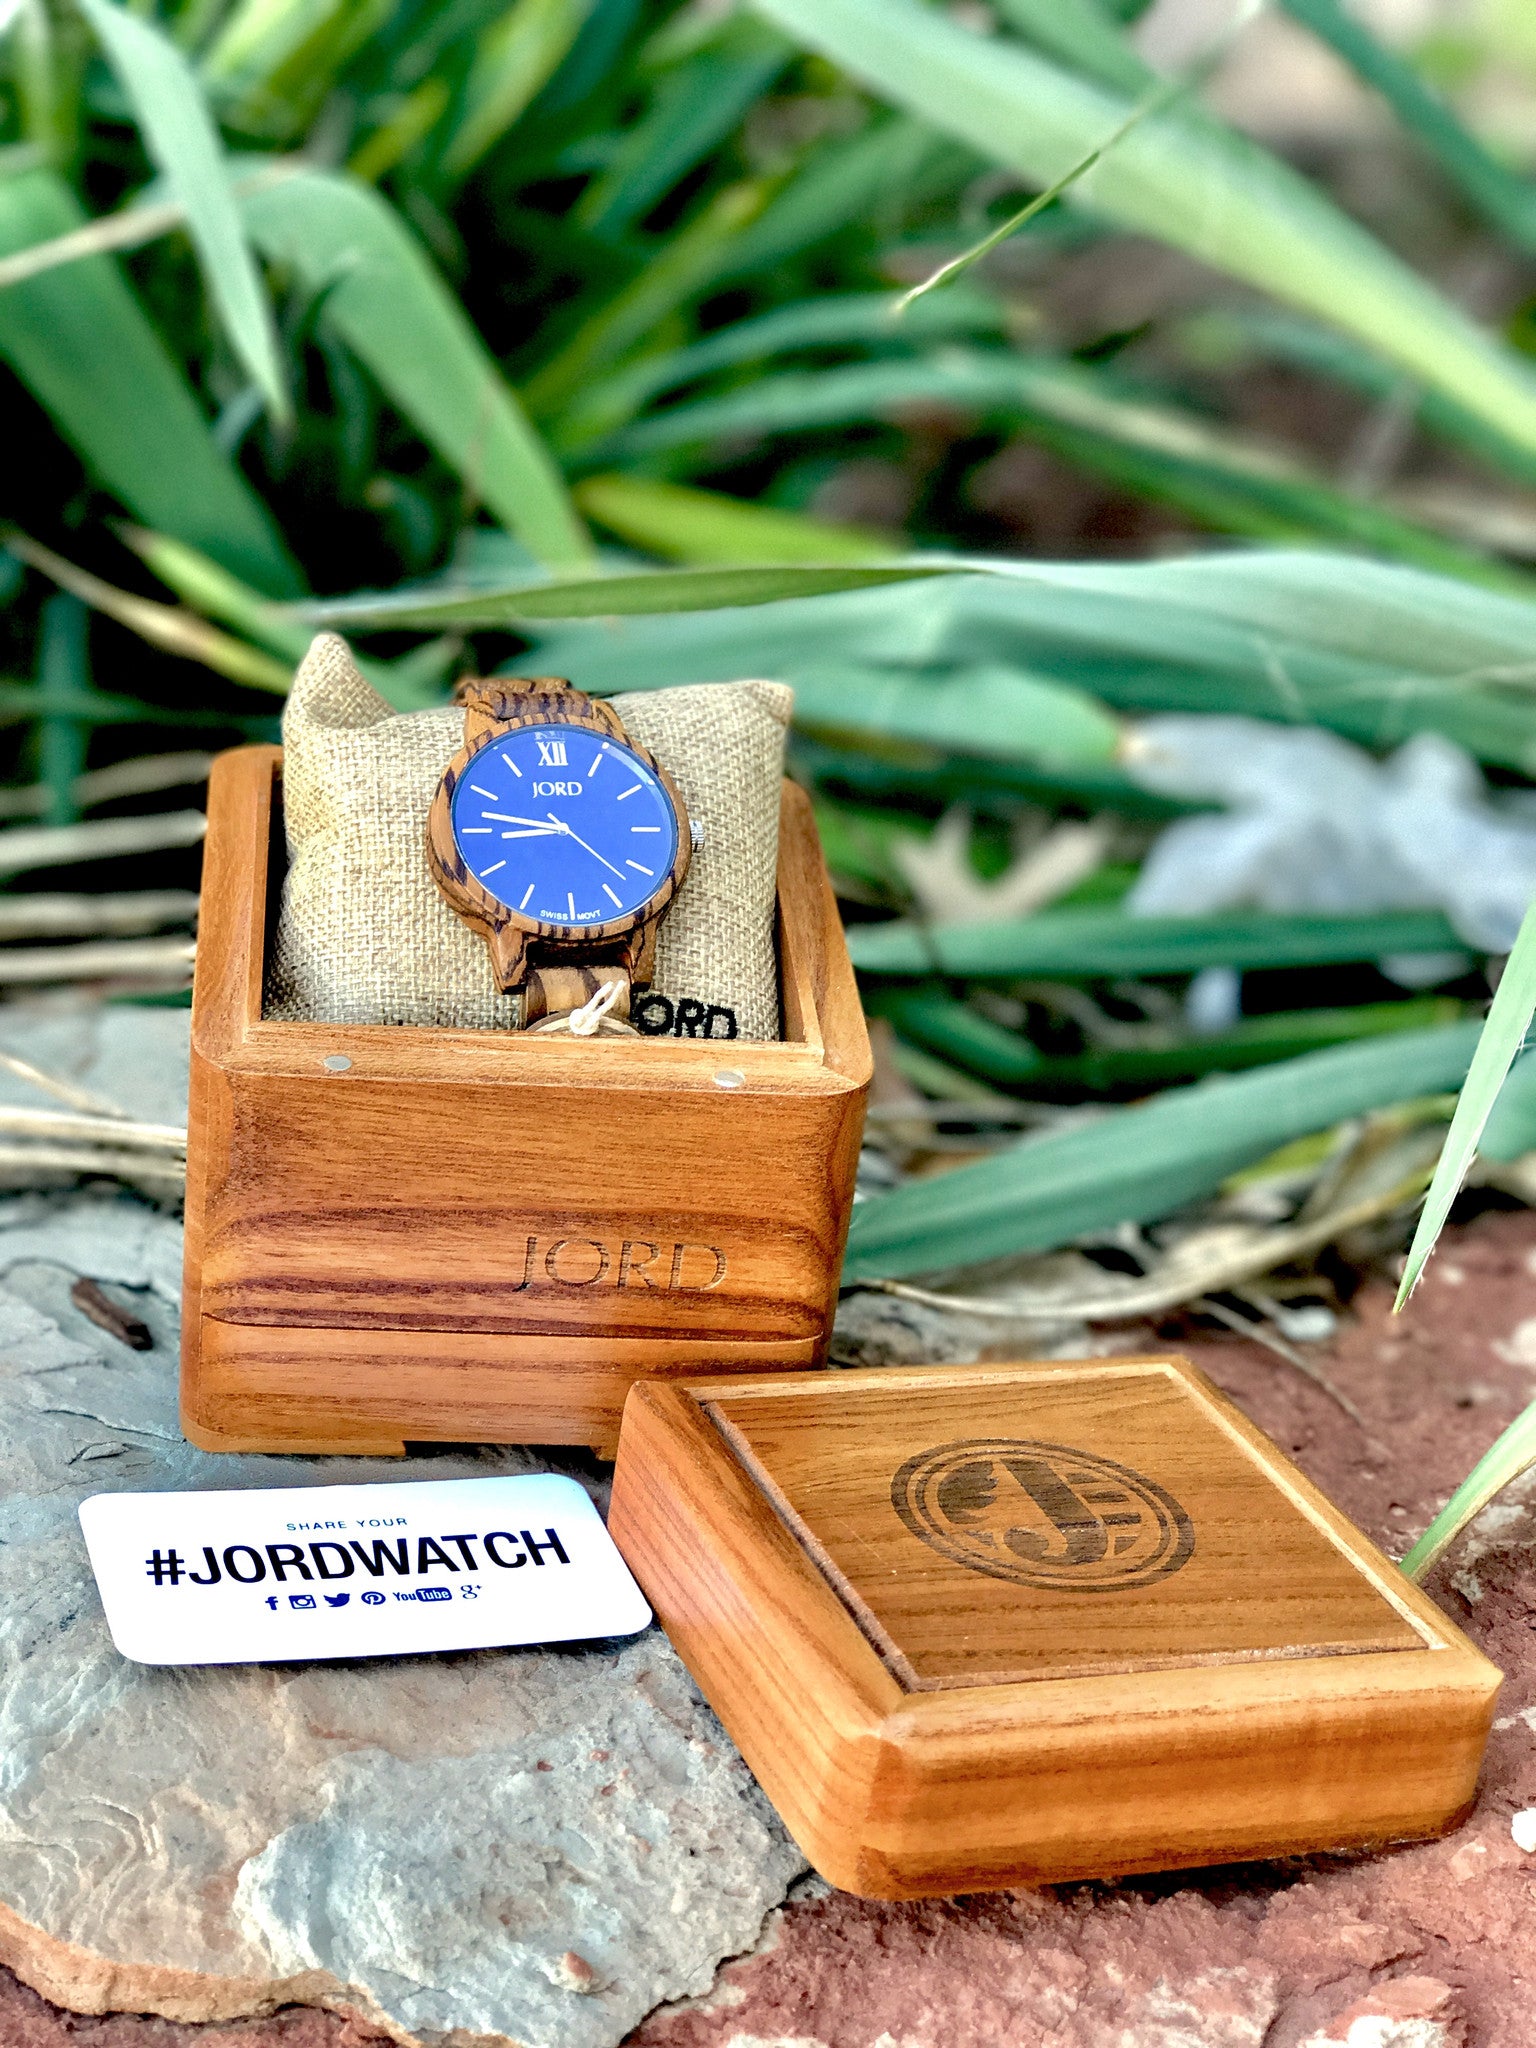
Spring is Blooming with JORD

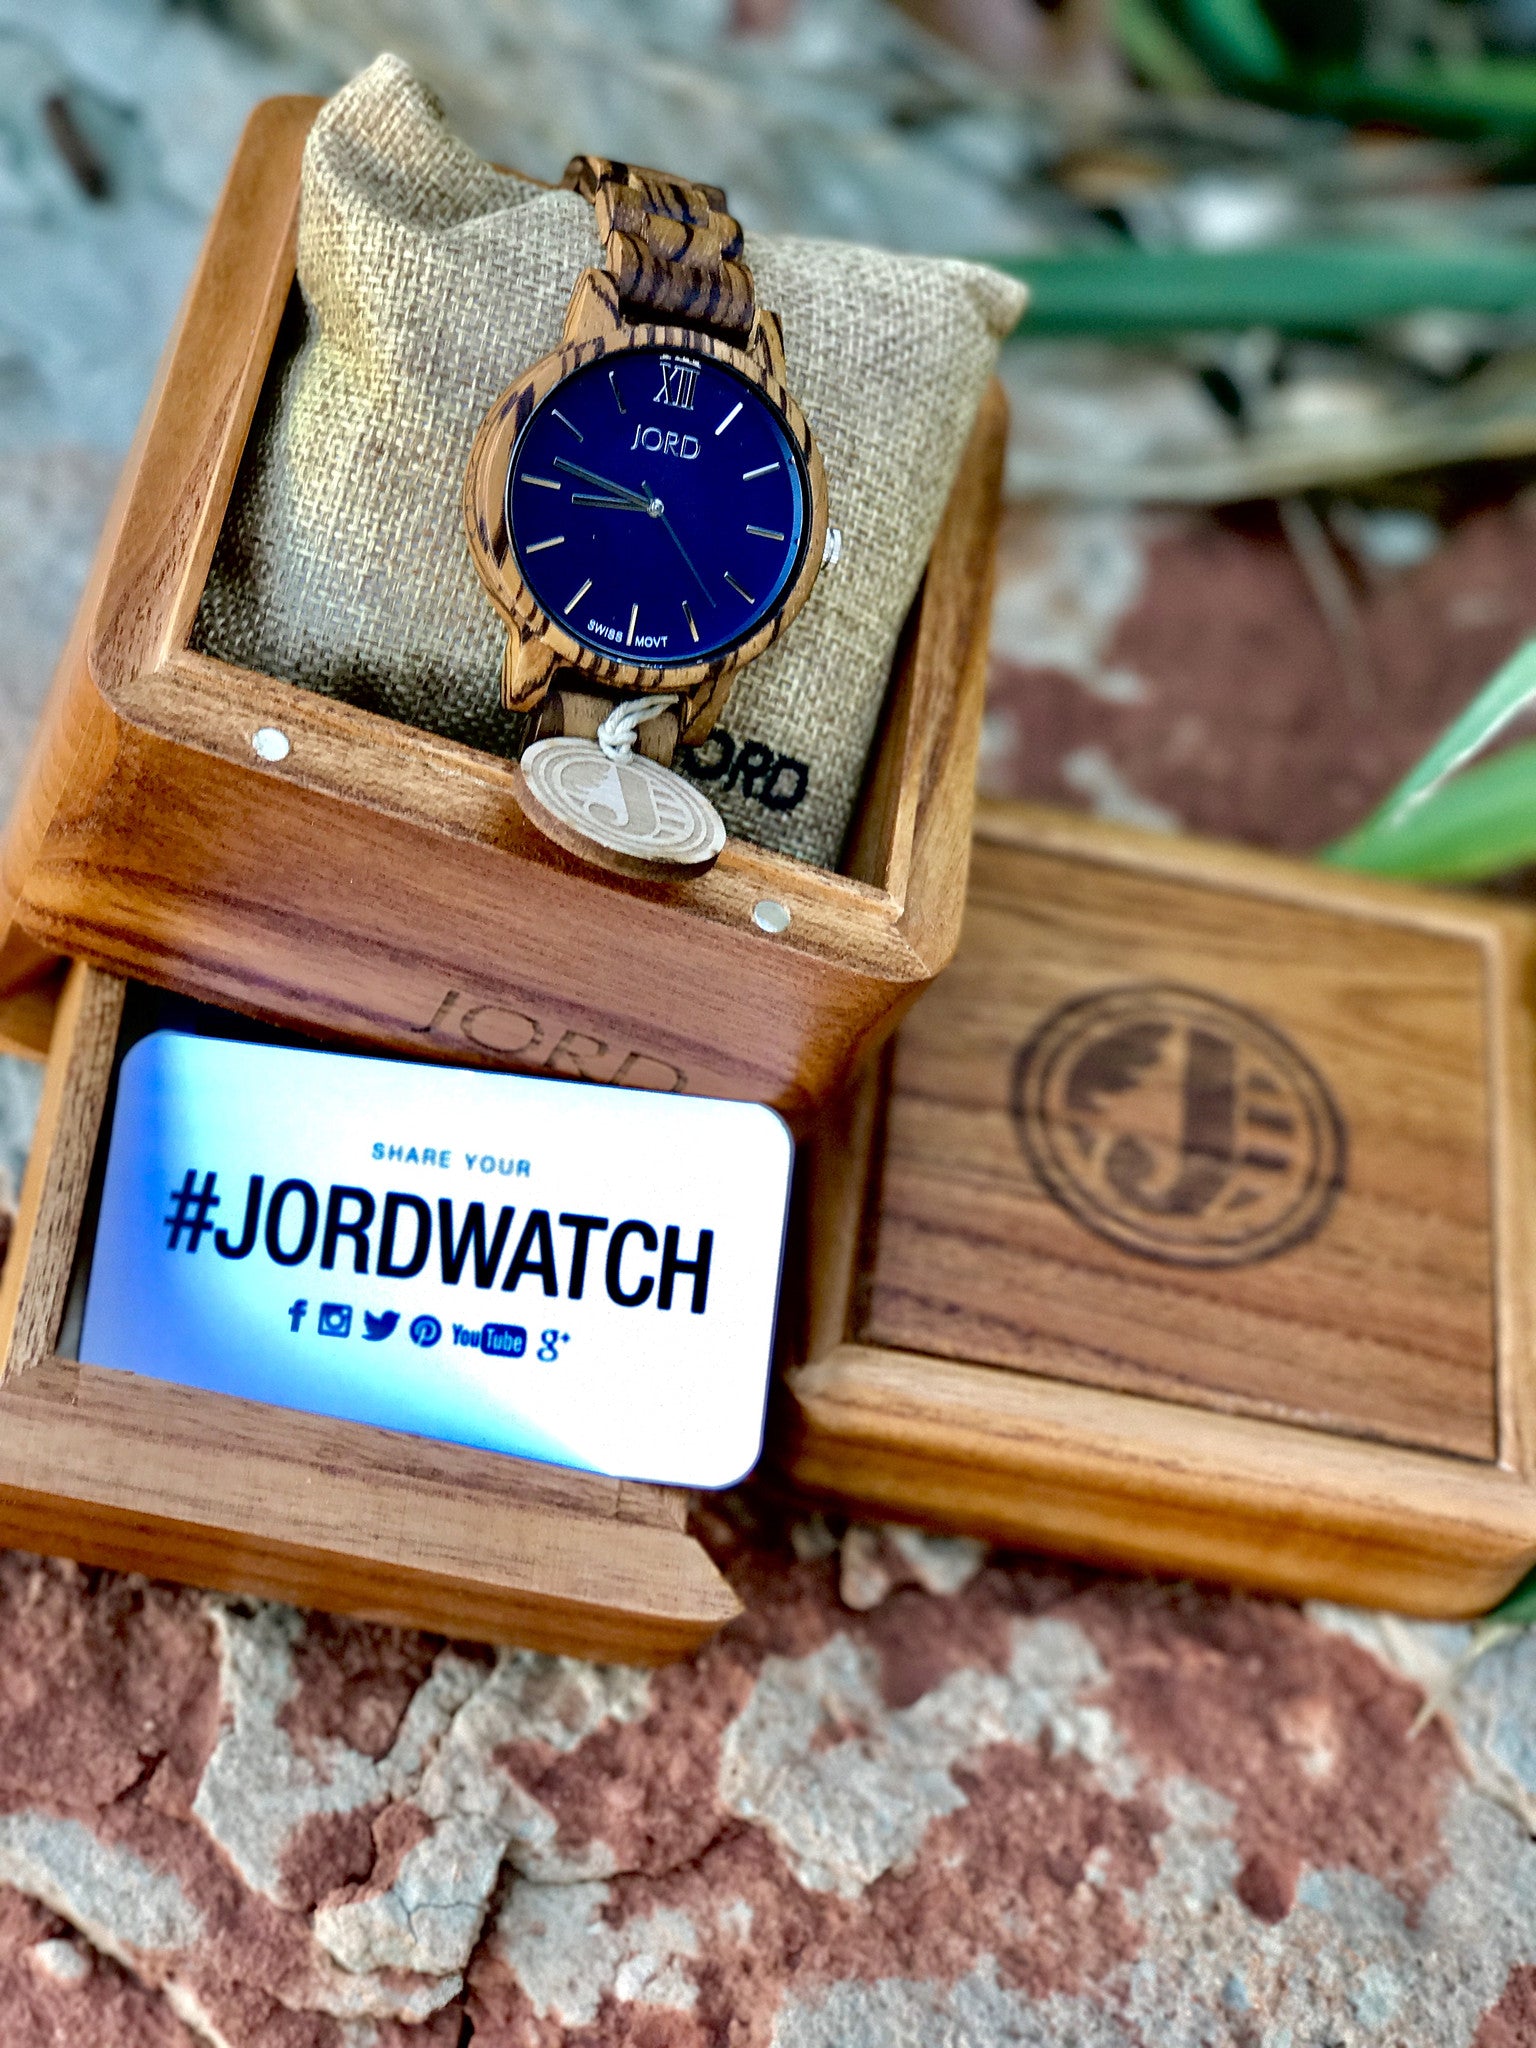

ENTER GIVEAWAY HERE

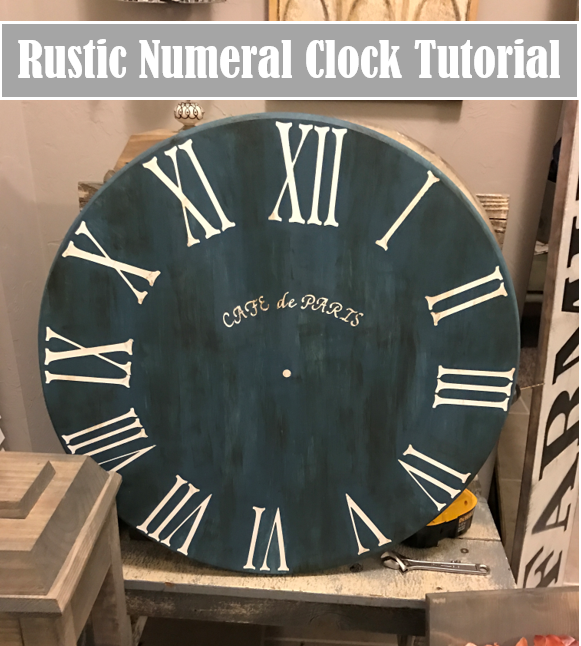
Roman Numeral Clock Tutorial
This Roman numeral clock will make your walls pop!
I just LOVE Roman Numeral clocks, so I wanted to come up with this How-To for anyone to be able create one easily! Here goes..
(There are some affiliate links in this post, meaning I get a small commission if you purchase through these links, at no cost to you. Click Here to read my full disclosure)
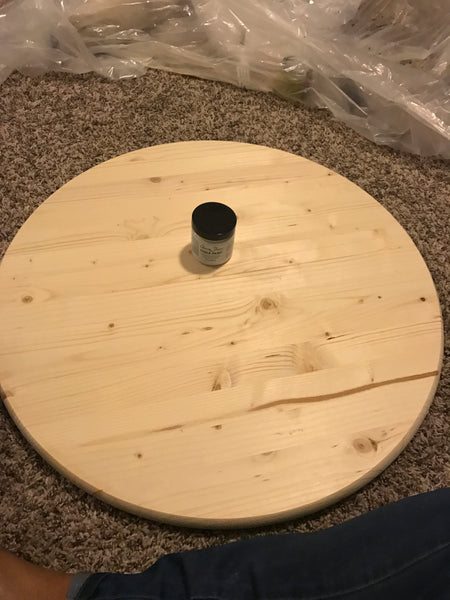
Clock Materials Needed
- 24" Wooden Round
- Clock Face Wall Decal
- Rustoleum Linen White
- Annie Sloan Aubbuson Blue
- Credit Card
- Brush
- One small nail
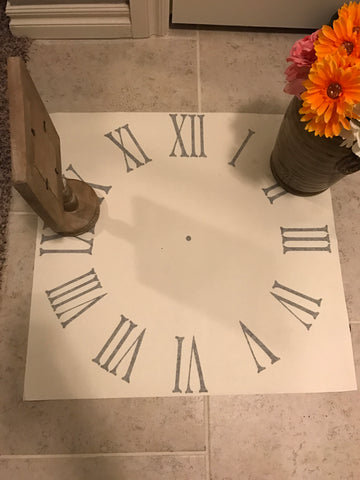
I love how simple and easy this Roman numeral clock was to make! I started off with this 24" round. For all you Non-woodworkers, Home Depot and Lowes has pre-made wooden rounds in all different sizes. "Home Depot's round isn't quit 24" so I'm not sure how it will work with this decal. I purchased mine from Lowes."
After the paint was dry, I applied the Roman Numeral Sticker Decal; my favorite part.
Amazon sells this Roman Numeral Clock Decal in 24" (it comes in other sizes too) that is perfect for a clock stencil. Wallpressions sells it for $9.99. WallSlicks sells it in other sizes but their 24" is higher.
It comes rolled up so I used a picture frame and pot to flatten it out.
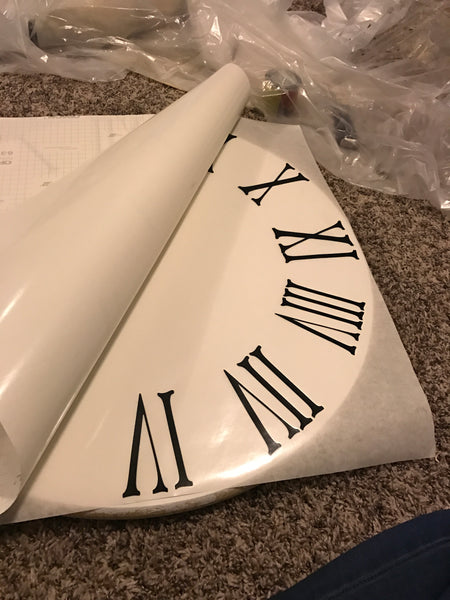
The sticker comes with instructions, but you peel the back side off. Flip it and press the letters into the round. Make sure you place the stickers where you want them before pressing down on the decal.
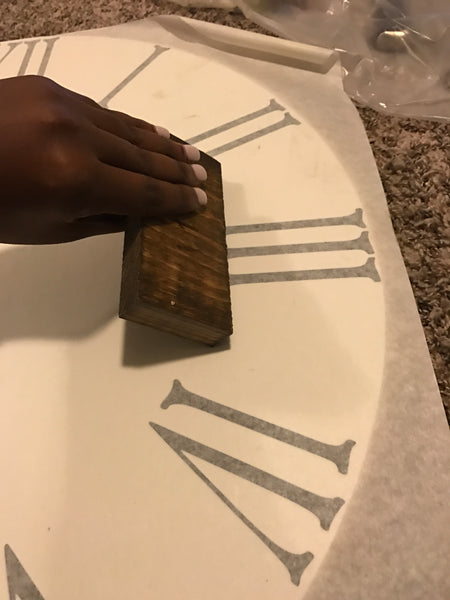
I used a scrap wooden block to make sure the letters would stick to the wood. A credit card would work GREAT for this too.
After pressing the decal down, I removed the top layer of the decal. Make sure to lift slowly to ensure the stickers stay placed on the wood.
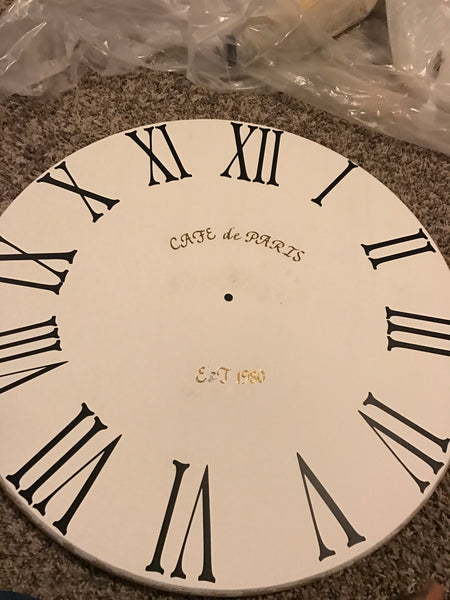
I added some small letter stickers to give the clock some extra PIZAZZ!! I pressed those down as well.
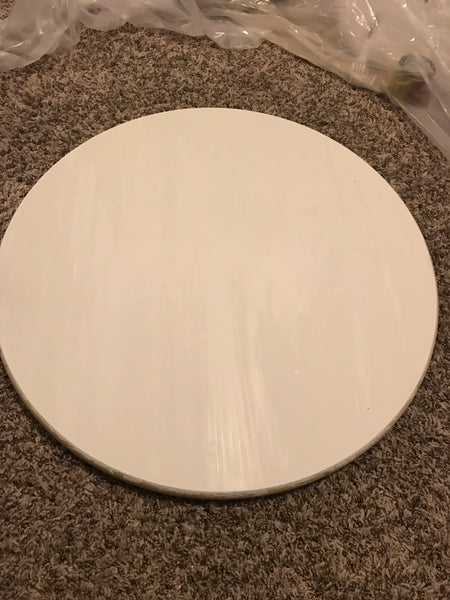
Once the Stickers and decal was placed I started painting over it! I used Annie Sloans Chalk Paint in Aubbuson Blue.
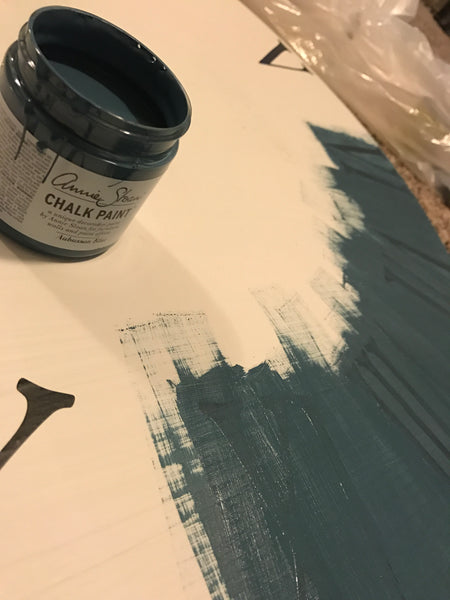
I painted over the whole round and then let it sit to dry!
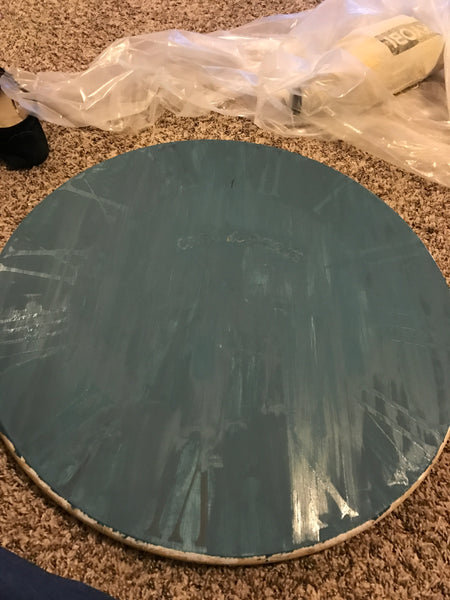
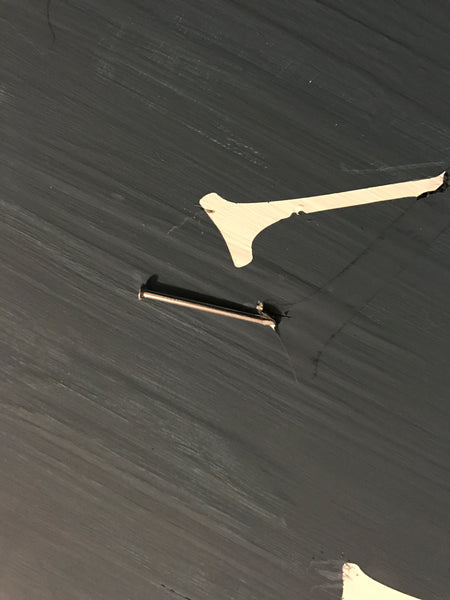
Once it was dry I started peeling the stickers! Another FUN part! I used a small nail to help lift the edges of the sticker, but be careful not to scratch the wood! After peeling I sealed it with Annie Sloan's Clear and Dark Wax.
WAAAAA-LAAAAAAHHHH!!! My Roman Numeral Clock was DONE!!
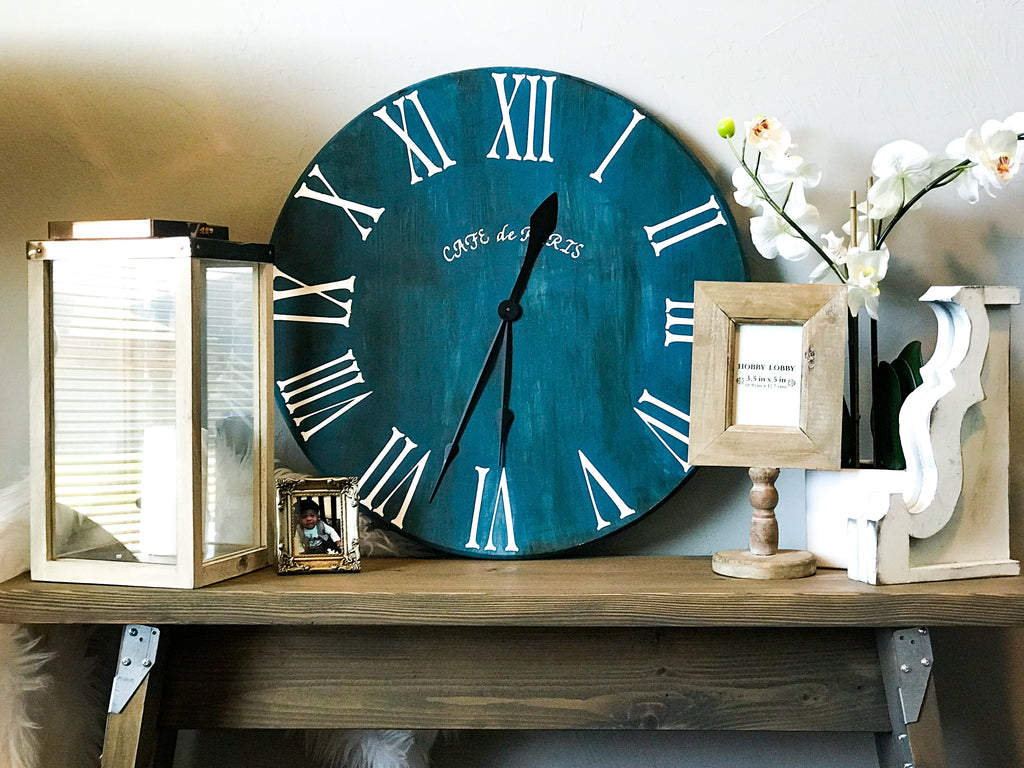
Feel free to add clock hands or put your own flavor on it! I would love to see your go at this project.
HAPPY CLOCKING!!

IG Builders Challenge


I think I just might be building one for myself!!! Thanks for reading!!!!